環境
この記事は以下の環境で動いています。
| 項目 | 値 |
|---|---|
| CPU | Core i5-8250U |
| Ubuntu | 20.04 |
| ROS | Noetic |
| Gazebo | 11.9.0 |
インストールについてはROS講座02 インストールを参照してください。
またこの記事のプログラムはgithubにアップロードされています。ROS講座11 gitリポジトリを参照してください。
概要
今まで単純な立体で模様の無いgazebo modelを作ってきました。今回はメッシュの使い方、テクスチャの適用の仕方を説明します。
ソースコード
メッシュの使い方(stlファイルを使う)
stl形式のメッシュの形を持ったmodelを製作します。
「mesh_room」という名前のモデルの形をroom_mesh.stlというメッシュで指定します。stlファイルは以下のようにmesh_roomモデルのディレクトリの直下に置きます。
gazebo1_lecture/
├── models/
│   └── mesh_room/
│       ├── model.config
│       ├── model.sdf
│       └── room_mesh.stl
└── worlds/
<?xml version='1.0'?>
<sdf version="1.4">
<model name="mesh_room">
  <pose>0 0 0.5 0 0 0</pose>
    <link name="link">
      <inertial>
        <mass>1.0</mass>
        <inertia>
          <ixx>0.083</ixx>
          <ixy>0.0</ixy>
          <ixz>0.0</ixz>
          <iyy>0.083</iyy>
          <iyz>0.0</iyz>
          <izz>0.083</izz>
        </inertia>
      </inertial>
      <collision name="collision">
        <geometry>
          <mesh>
            <uri>model://mesh_room/room_mesh.stl</uri>
          </mesh>
        </geometry>
      </collision>
      <visual name="visual">
        <geometry>
          <mesh>
            <uri>model://mesh_room/room_mesh.stl</uri>
          </mesh>
        </geometry>
      </visual>
    </link>
  </model>
</sdf>
このように<geometry>要素の中の<mesh>要素の中の<uri>要素でファイルを指定します。model://(モデル名)/(ファイル名)のように指定します。
collisionとvisualの両方で指定します。
テクスチャを張る
ここまで模様のない単色のモデルのみでしたが、表面に模様のあるテクスチャー付きのモデルを作ります。
以下のようにモデルの中のmaterialstディレクトリの下に画像とテクスチャ用のORGEスクリプトを入れます。
gazebo1_lecture/
├── models/
│   ├── texture_box/
│   │   ├── materials/
│   │   │   ├── test_texture.material
│   │   │   └── texture1.png
│   │   ├── model.config
│   │   └── model.sdf
└── worlds/
    └── world_test3.world
以下のようなOGREスクリプトを記述します(OGREはRvizの描画エンジンの名前です)。TestTextureという名前のテクスチャを定義してテクスチャのファイルとscaleを選択しています。
material TestTexture
{
  technique
  {
    pass
    {
      texture_unit
      {
        // Relative to the location of the material script
        texture texture1.png
        // Repeat the texture over the surface (4 per face)
        scale 0.5 0.5
      }
    }
  }
}
-
TestTextureがこのテクスチャの名前です(modelのsdfファイル中で使います。) -
scaleは1面あたりに何枚分貼るかという指定です。以下の様に記述すると1つの面に2x2で張られます。分割数で指定するので、大きい面には大きくテクスチャが張られます。
以下が本体のsdfファイルです。
<?xml version='1.0'?>
<sdf version="1.4">
<model name="texture_box">
  <pose>0 0 0.5 0 0 0</pose>
    <link name="link">
      <inertial>
        <mass>1.0</mass>
        <inertia>
          <ixx>0.083</ixx>
          <ixy>0.0</ixy>
          <ixz>0.0</ixz>
          <iyy>0.083</iyy>
          <iyz>0.0</iyz>
          <izz>0.083</izz>
        </inertia>
      </inertial>
      <collision name="collision">
        <geometry>
          <box>
            <size>1 1 1</size>
          </box>
        </geometry>
      </collision>
      <visual name="visual">
        <geometry>
          <box>
            <size>1 1 1</size>
          </box>
        </geometry>
        <material>
          <script>
            <uri>model://texture_box/materials/test_texture.material</uri>
            <name>TestTexture</name>
          </script>
        </material>
      </visual>
    </link>
  </model>
</sdf>
<material>要素の中の<script>要素の中で<uri>でOGREスクリプトのファイル名を指定して<name>でテクスチャの名前を指定します。
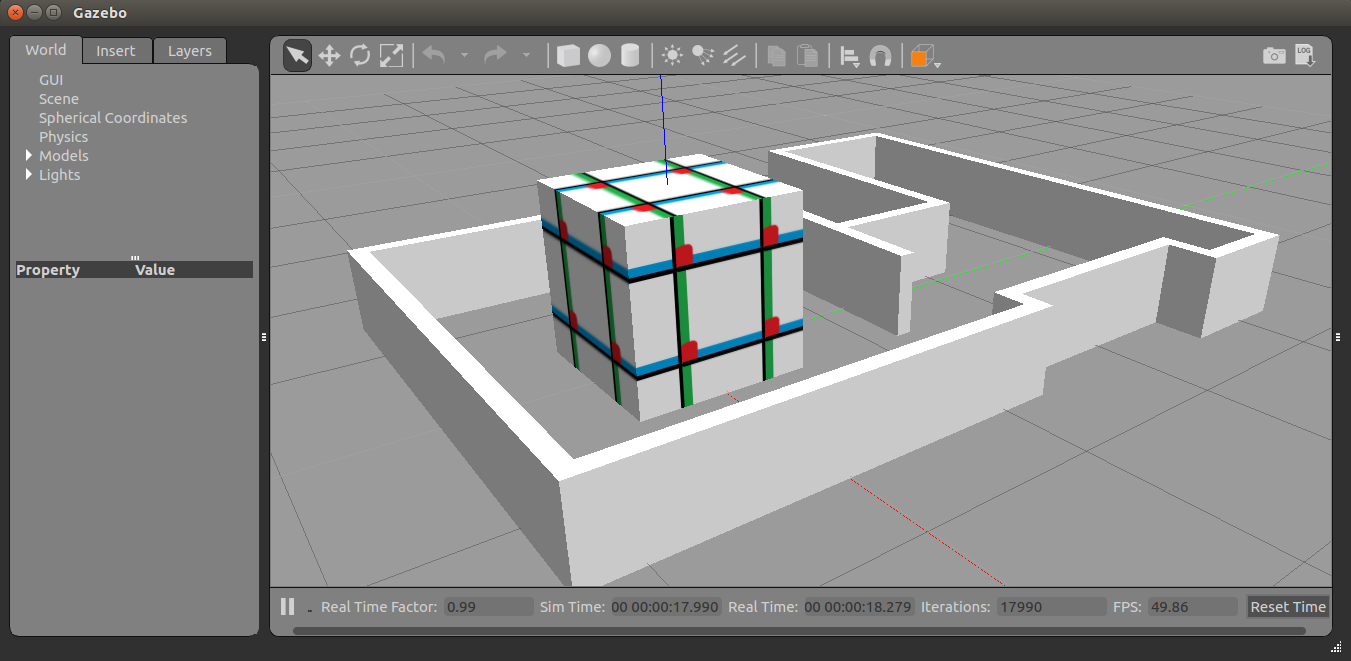
実行
以下のように表示されます。各ターミナルごとに実行前にsource ~/catkin_ws/devel/setup.bashを実行する必要があります。
roslaunch gazebo_ros empty_world.launch world_name:=texture_mesh_test.world verbose:=true
コメント
stlファイルで指定した形状にテクスチャを適用しようと記述しても、適用できません。このようなことをしたい場合はdaeファイルを作ってその中でテクスチャを適用する必要があります。
参考
Gazebo: Color And Texture Models
textureの使い方

