この記事は以下の環境で動いています。
| 項目 | 値 |
|---|---|
| CPU | Core i5-8250U |
| Ubuntu | 20.04 |
| ROS | Noetic |
| Gazebo | 11.9.0 |
インストールについてはROS講座02 インストールを参照してください。
またこの記事のプログラムはgithubにアップロードされています。ROS講座11 gitリポジトリを参照してください。
概要
Gazeboを使ってWebカメラなどのカメラのシミュレーションを行います。カメラのシミュレーションを導入することで画像処理をシミュレーションと融合できます。ここでは通常のカラーカメラをシミュレーションするcamera_pluginと、realsenseなどの深度もとれるカメラのシミュレーションをするdepth_camera_pluginの2種類を紹介します。
カラーカメラのシミュレーション
ソースコード
カメラのシミュレーションの部分のみを示します。
sim2_lecture/xacro/camera_macro.xacroの一部
<link name="head_camera_link">
  <!-- 省略 -->
  <sensor type="camera" name="head_camera">    <always_on>true</always_on>
    <update_rate>20</update_rate>
    <visualize>true</visualize>
    <camera name="head_camera">
      <horizontal_fov>1.2</horizontal_fov>
      <image>
        <format>R8G8B8</format>
        <width>800</width>
        <height>600</height>
      </image>
      <clip>
        <near>0.02</near>
        <far>300</far>
      </clip>
      <noise>
        <type>gaussian</type>
        <mean>0.0</mean>
        <stddev>0.007</stddev>
      </noise>
      <distortion>
        <k1>-0.25</k1>
        <k2>0.12</k2>
        <k3>0.0</k3>
        <p1>0.0</p1>
        <p2>0.0</p2>
        <center>0.5 0.5</center>
      </distortion>
    </camera>
    <plugin name="camera_controller" filename="libgazebo_ros_camera.so">
      <imageTopicName>/head_camera/image_raw</imageTopicName>
      <cameraInfoTopicName>/head_camera/camera_info</cameraInfoTopicName>
      <cameraName>camera1</cameraName>
      <frameName>head_camera_link</frameName>
      <updateRate>10.0</updateRate>
      <CxPrime>0.0</CxPrime>
      <Cx>0.0</Cx>
      <Cy>0.0</Cy>
      <focalLength>0.0</focalLength> <!-- use computed_focal_length -->
      <hackBaseline>0.12</hackBaseline> <!-- use for P[3] -->
      <distortionK1>0.05</distortionK1>
      <distortionK2>-0.05</distortionK2>
      <distortionK3>0.0</distortionK3>
      <distortionT1>0.0</distortionT1>
      <distortionT2>0.0</distortionT2>
    </plugin>
  </sensor>
</link>
-
<sensor>タグの中ではカメラの素性を設定できます。-
<horizontal_fov>タグではカメラの画角を設定します。rad単位で1.2なら左右で80deg程度の少し広角のカメラになります。 -
<image>タグでは画素数を決定できます。 -
<clip>タグでは近すぎるもの、遠すぎるものを除くクリップの設定が出来ます。 -
<distortion>タグではシミュレーションで出てくる画像の歪みの設定が出来ます。- これに対して
<plugin>/<distortionK1>等はrostopicのCameraInfoの情報に入る値を設定できます。
- これに対して
-
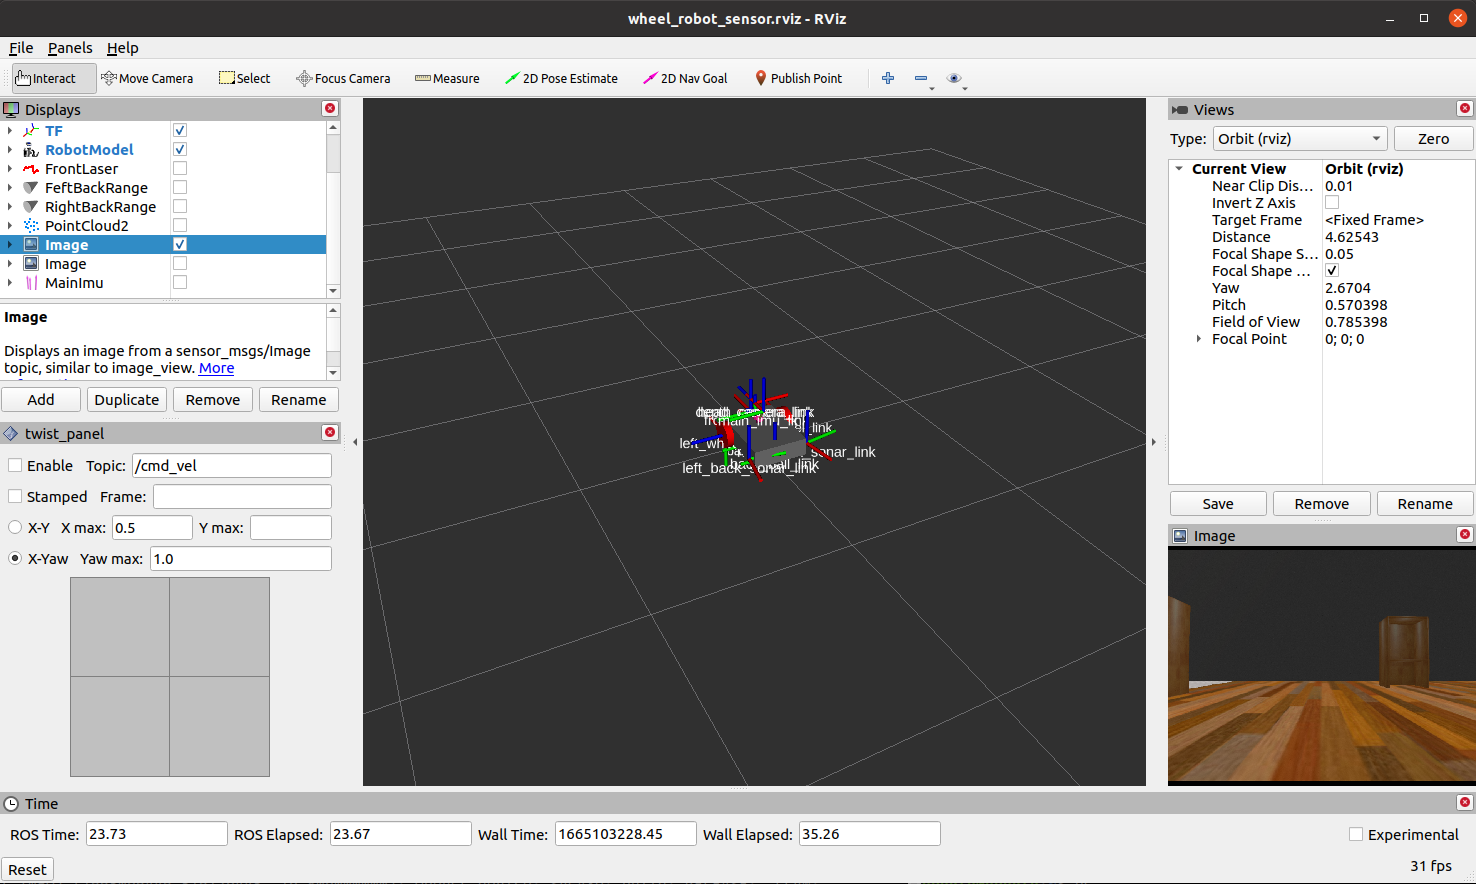
Rvizでの表示
Rvizで画像をImageトピックを表示するためには「Add」ボタン->「By topic」タブでImageトピックを選択します。
深度カメラのシミュレーション
SDF
sim2_lecture/xacro/camera_macro.xacroの一部
  <sensor name="depth_camera" type="depth">
    <always_on>true</always_on>
    <update_rate>20</update_rate>
    <visualize>false</visualize>
    <camera>
      <horizontal_fov>1.2</horizontal_fov>
      <image>
        <format>R8G8B8</format>
        <width>80</width>
        <height>60</height>
      </image>
      <clip>
        <near>0.02</near>
        <far>300</far>
      </clip>
    </camera>
    <plugin filename="libgazebo_ros_depth_camera.so" name="depth_camera_controller">
      <imageTopicName>/depth_camera/color/image_raw</imageTopicName>
      <cameraInfoTopicName>/depth_camera/color/camera_info</cameraInfoTopicName>
      <pointCloudTopicName>/depth_camera/point</pointCloudTopicName>
      <depthImageTopicName>/depth_camera/depth/image_raw</depthImageTopicName>
      <depthImageCameraInfoTopicName>/depth_camera/depth/camera_info</depthImageCameraInfoTopicName>
      <pointCloudCutoff>0.4</pointCloudCutoff>
      <cameraName>camera2</cameraName>
      <frameName>depth_camera_link</frameName>
      <updateRate>10.0</updateRate>
      <CxPrime>0.0</CxPrime>
      <Cx>0.0</Cx>
      <Cy>0.0</Cy>
      <focalLength>0.0</focalLength> <!-- use computed_focal_length -->
      <hackBaseline>0.12</hackBaseline> <!-- use for P[3] -->
      <distortionK1>0.05</distortionK1>
      <distortionK2>-0.05</distortionK2>
      <distortionK3>0.0</distortionK3>
      <distortionT1>0.0</distortionT1>
      <distortionT2>0.0</distortionT2>
    </plugin>
  </sensor>
-
<sensor>のタイプはdepthにします。 - その他はほとんど同じです。
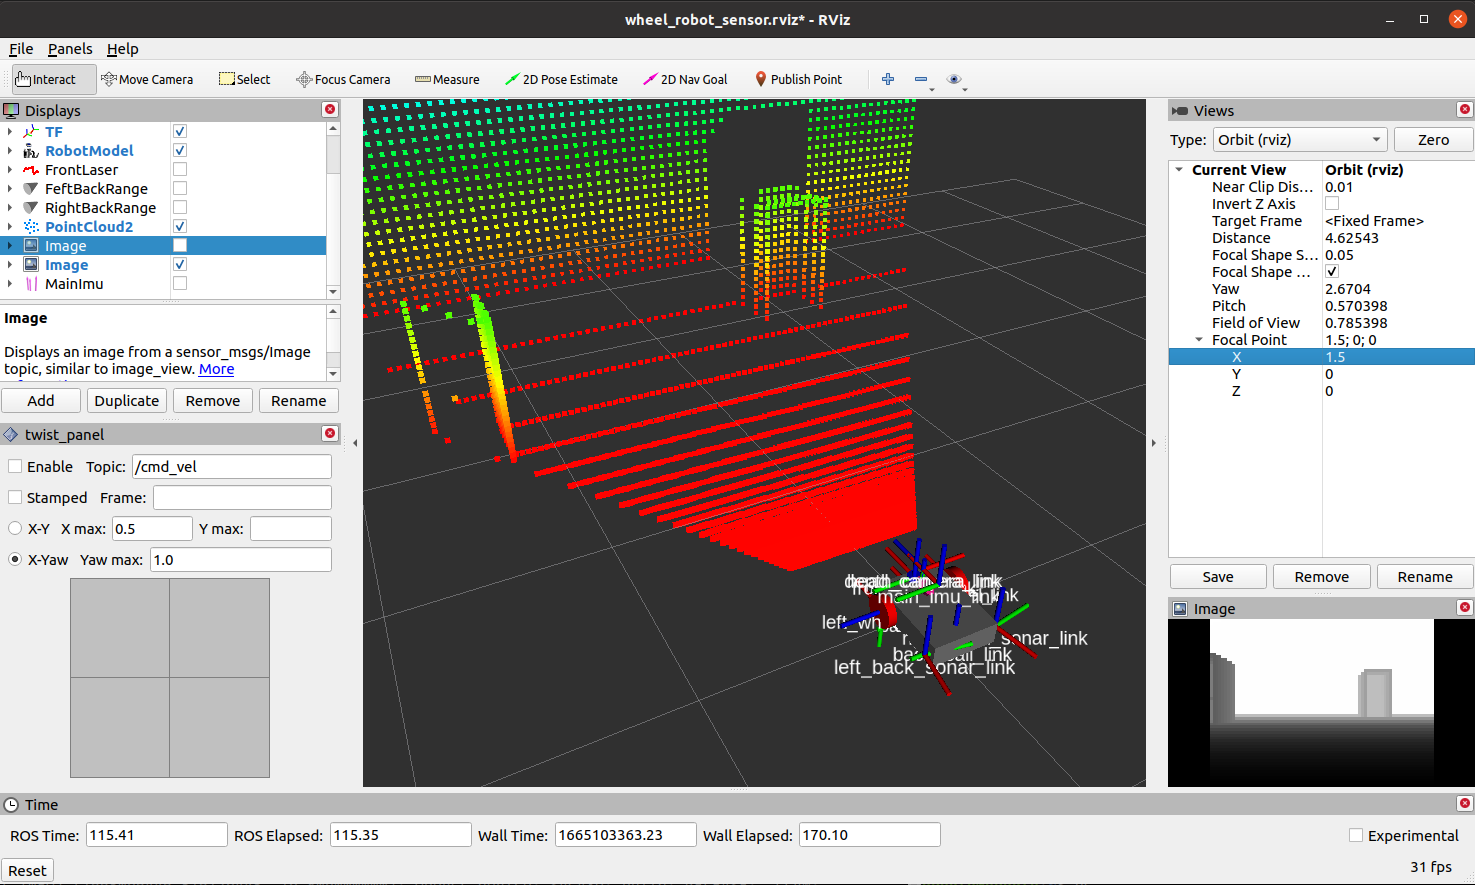
Rvizでの表示
Depthのセンサー出力は2種類あります。
- DepthImage: 通常のimageと同じように画像で各画素には距離情報が入っている
- PointCloud: XYZの位置情報を持った認識点のリスト
実行
各ターミナルごとに実行前にsource ~/catkin_ws/devel/setup.bashを実行する必要があります。
roslaunch gazebo2_lecture wheel_robot_sensor.launch
座標系について
カメラの座標を示すtfでは正面がZ軸、右がX軸、下がY軸になるようにするのが慣例です。しかしgazeboプラグインではX軸がカメラの正面になります。必要に応じて<pose>タグでカメラの正面の向きを回転させれます。
メモ
Kinetic標準で入るgazeboのバージョン(7.0.0)は問題があってカメラプラグインが動きません。gazeboのバージョンアップが必要です。
参考
gazeboのバージョンアップ方法
カメラのgazeboのplugin