はじめに
コミケの鉄道関係のエリアを見て回るとLED Matrixを使用した展示を多く見かけるようになったような気がします。
興味を持ったので、自分でも作成してみました。
できたもの

発車標風の時計ができました。
図のように行き先と時刻を表示します。(行き先の切り替えは未実装)
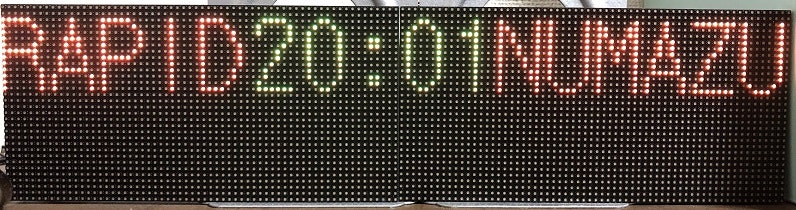
英語も、交互に切り替えて表示します。
表示のしくみ
Raspberry PiでLEDMatrixの制御を行うためのモジュールを作成している方がいらっしゃいます。
大体の方はこれを使われているようで、例に漏れずこれを使わせていただきます。
https://github.com/hzeller/rpi-rgb-led-matrix
★表示のしくみ
画像の1ドットをLED Matrixの1ドットとして扱います。
すなわち、128 x 32ドットの画像を用意すれば、その画像をそのまま128 x 32ドットのLED Matrixに表示することができます。
作成者さまさまですね。
必要なもの
-
Linux(Raspberry Pi)の簡単な知識
-
Raspberry Pi3
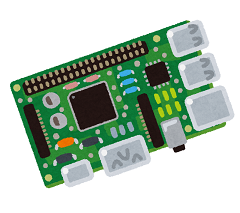
LED Matrixの制御及びPythonの実行に使用します。 -
LED Matrix(64ドット×32ドット) 2個
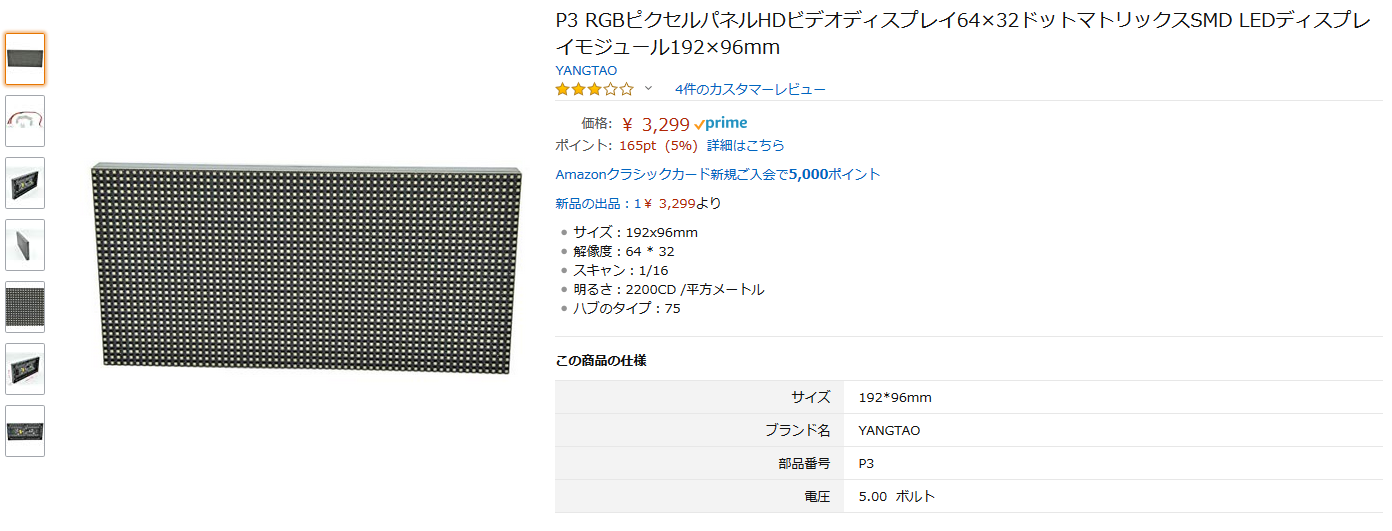
Amazonで購入できます。ドットマトリックスSMD LEDディスプレイモジュール といった名前で販売されています。
ケーブルでつなげる事により上下左右に延長することができます。今回は横に2個つなげました。
価格は1個3,300円ほどです。 -
ACアダプタ (5V)
今回使用するLED Matrixの定格電圧は5Vです。
必要な電流が確保できればUSBから取ってもOK。 -
passive-3
https://github.com/hzeller/rpi-rgb-led-matrix/tree/master/adapter/passive-3
Raspberry PiとLEDMatrixの接続に使用します。部品購入やハンダ付けが必要となりますが、安価にフラットケーブルで接続することができます。
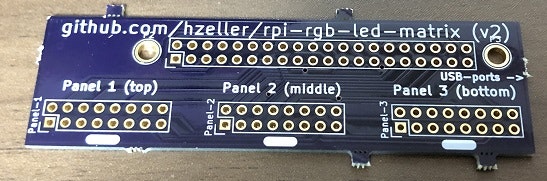
OSH Park(上記よりリンクあり)で3枚入り約15ドルほどで購入できます。
使用しない場合は、両メスのジャンパーワイヤーなどで接続すると良いでしょう。
接続方法はWiring diagramに従います。
https://github.com/hzeller/rpi-rgb-led-matrix/blob/master/wiring.md
準備
- ハードウェアの接続
-
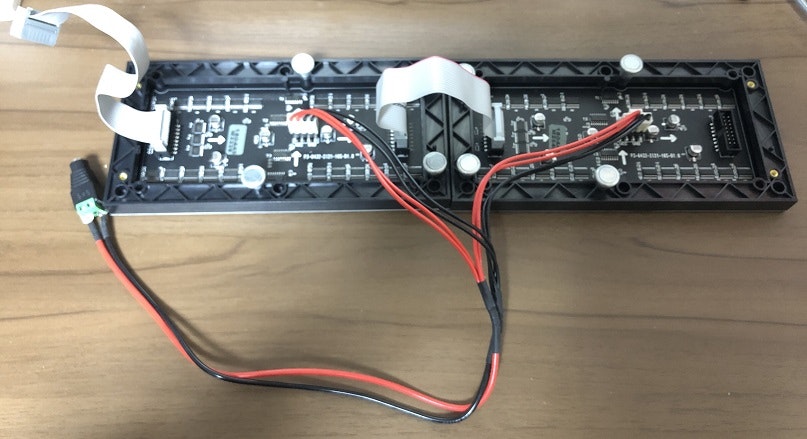
LED Matrixの接続
2台のLED Matrixを付属のケーブルで接続します。電源ケーブルも接続します。
-
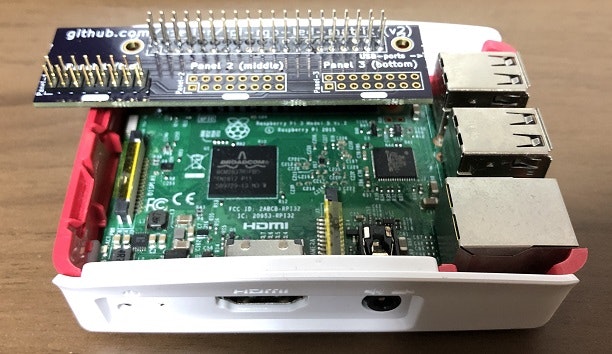
passive-3の接続
Raspberry Piにpassive-3を取り付けます。
-
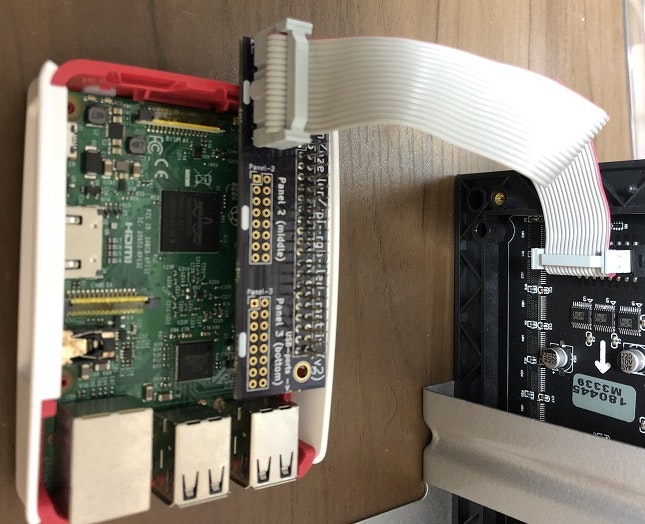
passive-3とLED Matrixの接続
こちらも付属のケーブルで接続します。passive-3側のコネクタの向きは、シルクと出っ張りが合う向きに取り付けてください。
- rpi-led-matrixのインストール
Python2で使用できるようにします。今回はPython2ですがPython3でも実行できます。
# rpi-rgb-led-matrixのダウンロード
git clone https://github.com/hzeller/rpi-rgb-led-matrix.git
# ダウンロードしたディレクトリへ移動
cd rpi-rgb-led-matrix
# Python2向けにビルド
sudo apt-get update && sudo apt-get install python2.7-dev python-pillow -y
make build-python
sudo make install-python
ソース
いろいろなところからプログラムを拝借しております。
自前で実装した部分はかなり適当なプログラムです。
# !/usr/bin/env python
# -*- encoding:utf8 -*-

import time
import sys
import os
import numpy as np
from datetime import datetime
from PIL import Image, ImageFont, ImageDraw
from rgbmatrix import RGBMatrix, RGBMatrixOptions


def imaged_text(text, fontfile, fontsize, color, scale_bias=4):
    font = ImageFont.truetype(fontfile, fontsize * scale_bias)
    image = Image.new('RGBA', (1, 1))
    draw = ImageDraw.Draw(image)
    w,h = draw.textsize(text, font=font)
    del draw
    image = Image.new('RGBA', (w, h))
    draw = ImageDraw.Draw(image)
    draw.text((0, 0), text, font=font, fill=color)
    del draw
    return image.resize((w // scale_bias, h // scale_bias), Image.ANTIALIAS)

def draw_text_to(target, position, text, fontfile, fontsize, color):
    image = imaged_text(text, fontfile, fontsize, color)
    target.paste(image , position, image)

def select_color(threshold, color, destcolor = '#FFFFFF'):
    mean = np.array(color).mean()
    if mean > threshold:
        #return (255, 255, 255)
        return (int(destcolor[1:3],16),int(destcolor[3:5],16),int(destcolor[5:7],16))
    else:
        return (0, 0, 0)

# 文字画像二値化
def to_bin(img, w, h, color = '#FFFFFF'):
    #各画素値のr,g,bの平均を求める
    means = np.array([[img.getpixel((x,y)) for x in range(w)] for y in range(h)]).mean(axis=2).reshape(w * h,)

    # ヒストグラムを作る
    hist = np.array([np.sum(means == i) for i in range(256)])

    max_v = 0
    threshold = 0
    # 0から255まで順に計算し、適切な閾値を求める
    # 閾値より大きい画素値をクラス1、小さい画素値をクラス2とする
    for th in range(256):
        n1 = sum(hist[:th])                                 # クラス1の個数
        m1 = np.dot(hist[:th], np.array(range(256))[:th])   # クラス1の値の平均
        n2 = sum(hist[th:])                                 # クラス2の個数
        m2 = np.dot(hist[th:], np.array(range(256))[th:])   # クラス2の値の平均
        if n1 == 0 or n2 == 0:
            v = 0
        else:
            # クラス間分散の分子を求める
            v = n1 * n2 * (m1 / n1 - m2 / n2) ** 2
        # クラス間分散の分子が最大となる閾値を更新していく
        if max_v < v:
            max_v = v
            threshold = th

    bin_img = Image.new('RGB', (w, h))
    np.array([[bin_img.putpixel((x, y), select_color(threshold, img.getpixel((x,y)), color)) for x in range(w)] for y in range(h)])
    return bin_img

def get_concat_h(im1, im2):
    dst = Image.new('RGB', (im1.width + im2.width, im1.height))
    dst.paste(im1, (0, 0))
    dst.paste(im2, (im1.width, 0))
    return dst

def get_clock(width = 64, separator = ""):
    hour = datetime.now().strftime("%H")
    min = datetime.now().strftime("%M")
    now =  separator + hour + ":" + min
    image = Image.new("RGB", (width, 16))
    draw_text_to(image, (0, 0), now, 'KH-Dot-Kodenmachou-16.ttf', 16, '#B5E61D')
    bin = to_bin(image, image.width, image.height, '#B5E61D')
    return bin

def get_text(str, width, separator = u"", col = '#B5E61D'):
    image = Image.new("RGB", (width, 16))
    draw_text_to(image, (0, 0), separator + str, 'KH-Dot-Kodenmachou-16.ttf', 16, col)
    bin = to_bin(image, image.width, image.height, col)
    return bin


# Configuration for the matrix
options = RGBMatrixOptions()
options.rows = 32
options.chain_length = 4
options.parallel = 1
options.hardware_mapping = 'regular'
options.brightness = 30
options.pwm_lsb_nanoseconds = 500

matrix = RGBMatrix(options = options)


if __name__ in '__main__':
    dest_text_jp = u"沼  津"
    dest_text_en = u"NUMAZU"
    dest_text_width = 48
    type_text_jp = u"快速 "
    type_text_en = u"RAPID"
    type_text_width = 40
    type = Image.new("RGB", (type_text_width, 16))
    dest = Image.new("RGB", (dest_text_width, 16))
    while 1:
        clock = get_clock(40, u"")
        sec = datetime.now().second
        if (0 <= sec <= 9) or (15 <= sec <= 24) or (30 <= sec <= 39) or (45 <= sec <= 54):
            type = get_text(type_text_jp, type_text_width, u"", '#FF7F27')
            dest = get_text(dest_text_jp, dest_text_width, u"", '#FF7F27')
        else:
            type = get_text(type_text_en, type_text_width, u"", '#FF7F27')
            dest = get_text(dest_text_en, dest_text_width, u"", '#FF7F27')

        up = get_concat_h(type, clock)
        up = get_concat_h(up, dest)
        matrix.SetImage(up)
        time.sleep(1)
実行
sudo python clock.py
苦労した点
キレイに文字を表示させる事が大変でした。当初はそのまま文字を出力すれば良いやん?と思っていたのですが、やってみたらジャギーが目立ちすぎてとても汚くなってしまいました。
試行錯誤した結果、作成した文字のイメージを二値化することにより、ジャギーを消す処理を行うことにしました。
また、使用しているフォントを再現したかったのですが、それも難度が高そうです。
やりたかったこと
ブラウザから種別や行先を変更するなどの仕組みを入れたかったのですが、時間との勝負に負けました。
もうちょっと実用性をもたせられないかな・・・。
おことわり
本内容は筆者が実際に作成しておりますが、自己満足のためのホビーユースレベルのものです。
内容の正確性や有用性などに関しては、一切責任を追うものではありません。
また、以下のサイト等より内容を引用し、使用させて頂いております。
https://github.com/hzeller/rpi-rgb-led-matrix
http://a-tak.com/blog/2017/03/05/raspberry-pi-led-clock-4/
http://tanakahisateru.hatenablog.jp/entry/20081008/1223450159
https://www.uosansatox.biz/entry/2017/09/04/150909
https://qiita.com/eucalyhome/items/e871e297bfd527ccaf2c
https://qiita.com/wasnot/items/be649f289073fb96513b