2005年〜2009年頃に更新していて、その後はたまにMovable Typeのバージョンアップだけしていてコンテンツは放置状態のMovable TypeのブログをWordPressに移行したログ。
動機
使っていないので放置でもよいのだが、Movable Typeのライセンスがわかりにくい(現在は個人無償版)のと、WordPressにすれば勝手にモバイル対応してくれそうなのと、単純にWordPressの方がシェアが多そうと思ったので移行することにした。
移行の検討
現状
現在の環境は以下のような状態。
- VPSで稼働
- HTTPSにはしておらず、HTTP
各コンポーネントのバージョンは以下。
| コンポーネント | バージョン |
|---|---|
| OS | CentOS 7.6 |
| Apache | 2.4.6 |
| PHP | 5.4.16 |
| MariaDB | 5.5.60 |
| Movable Type | r.4207 |
このブログ以外にも複数のサイトをホストしているため、ApacheはVirtualHostでいろいろ対応している。
移行に関する懸念点
- 画像ファイルが移行できるか
- MTからアップロードした画像ファイルはMTがコンテンツを書き出すディレクトリーの
imagesまたはassets_cディレクトリーにある - 記事内では相対リンクではなく、
http://blog.sotoiwa.com/images/090602_ma720.jpgのように絶対リンクで参照している - なので、
imagesとassets_cをそのまま残せば大丈夫そう
- MTからアップロードした画像ファイルはMTがコンテンツを書き出すディレクトリーの
- 記事のURLを維持できるか
- アーカイブテンプレートの設定を確認すると、ブログ記事のアーカイプパスは
%y/%m/%d%h%n.htmlを指定してあり、http://blog.sotoiwa.com/archives/2009/06/032327.htmlのようなパスとなっている - WordPressでも同じルールで記事のパスを設定すれば大丈夫そう
- アーカイブテンプレートの設定を確認すると、ブログ記事のアーカイプパスは
Movable Typeからのデータのエクスポート
MTの管理画面からデータをエクスポートする。
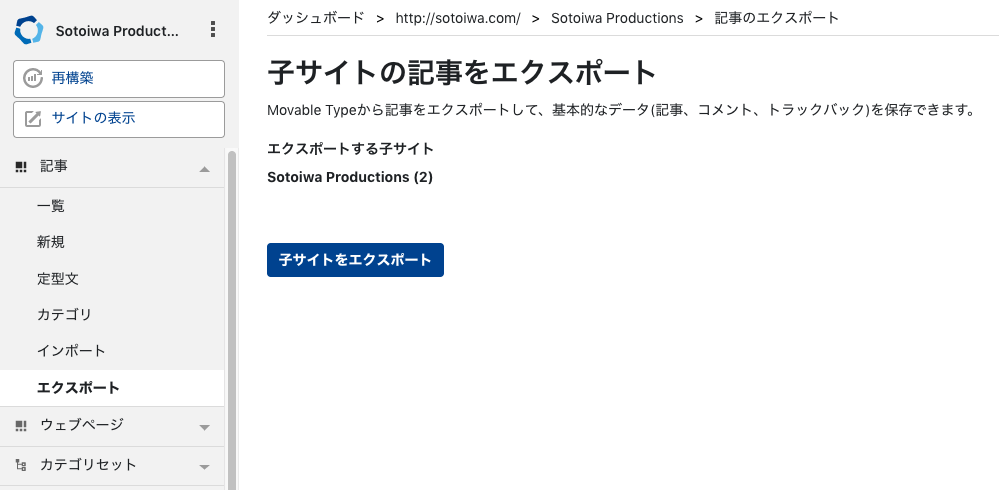
書き出したファイルは各記事あたり以下のような内容をつなげたテキストなので、記事の中のURLを変えたいとか何かしたい場合は場合はこの段階で一括置換をかけるのがよさそう。
AUTHOR: sotoiwa
TITLE: Movable Type
BASENAME: movable_type
STATUS: Publish
ALLOW COMMENTS: 1
CONVERT BREAKS: __default__
ALLOW PINGS: 1
PRIMARY CATEGORY: computer
CATEGORY: computer
DATE: 08/09/2005 05:05:07 PM
-----
BODY:
Movable Typeのテスト。
-----
EXTENDED BODY:

-----
EXCERPT:

-----
KEYWORDS:

-----


-----
--------
WordPressのインストール
移行先となるWordPressを稼働させるため、要件を確認する。
-
要件
- PHP バージョン 7.3 以上。
- MySQL バージョン 5.6 以上、または MariaDB バージョン 10.1 以上。
- HTTPS 対応
すると、現行環境は要件に対応していないので、対応させる。
HTTPS対応
HTTPS対応については別記事にまとめて記載した。
HTTPS対応後、MTの機能でサイトのURLを記事の中もURLをhttps://に変更し、整合性がとれた状態で動作をしていることを確認してから、データをエクスポートしなおした。HTTPS対応前にエクスポートしたテキストで一括置換をするのでもどちらでもよいと思われる。
PHPのバージョンアップ
CentOS標準のPHPは5.4なので、EPELとRemiリポジトリを追加して導入する。
リポジトリを追加する。
# EPELのリポジトリを追加
# rpm -Uvh https://dl.fedoraproject.org/pub/epel/epel-release-latest-7.noarch.rpm
yum install epel-release
# Remiのレポジトリを追加
rpm -Uvh http://rpms.famillecollet.com/enterprise/remi-release-7.rpm
既存のphpパッケージを削除する。
yum remove php-*
RemiからPHP 7.3をインストールする。このとき依存関係でEPELリポジトリも必要。
yum install --enablerepo=epel,remi,remi-php73 php
yum install --enablerepo=epel,remi,remi-php73 php-mbstring
yum install --enablerepo=epel,remi,remi-php73 php-mysqlnd
バージョン確認。
# php -v
PHP 7.3.5 (cli) (built: Apr 30 2019 08:37:17) ( NTS )
Copyright (c) 1997-2018 The PHP Group
Zend Engine v3.3.5, Copyright (c) 1998-2018 Zend Technologies
#
MariaDBのバージョンアップ
アンインストールしてもデータは消えないけれども、念のためバックアップする。
# mtテーブルだけ
mysqldump -u root -p mt > mt.dump
# 全テーブル
mysqldump -u root -p -x --all-databases > hogehoge.dump
# ユーザー情報
mysqldump -u root -p -x --allow-keywords mysql > hogehogeuser.dump
もしリストアする場合は以下のように実行する。
mysql -u root -p < mt.dump
mysql -u root -p < hogehoge.dump
mysql -u root -p mysql < hogehogeuser.dump
既存のMariaDBを削除する。依存関係で削除されてしまうパッケージがあるので再導入する。Postfixの設定をカスタマイズしている場合は事前に設定ファイルをバックアップすること。
# MariaDBを削除
yum remove mariadb-*
# Postfixを再インストール
systemctl status postfix
systemctl start postfix
# 以下もMTが使うので再導入
yum install perl-DBD-mysql
MariaDBのリポジトリを追加する。
curl -sS https://downloads.mariadb.com/MariaDB/mariadb_repo_setup | sudo bash
MariaDBをインストールして起動する。
yum install MariaDB-server
systemctl start mariadb
バージョンを確認する。
# mysql --version
mysql  Ver 15.1 Distrib 10.3.14-MariaDB, for Linux (x86_64) using readline 5.1
[root@v157-7-141-80 ~]# mysql -u root -p
Enter password:
Welcome to the MariaDB monitor.  Commands end with ; or \g.
Your MariaDB connection id is 248
Server version: 10.3.14-MariaDB MariaDB Server

Copyright (c) 2000, 2018, Oracle, MariaDB Corporation Ab and others.

Type 'help;' or '\h' for help. Type '\c' to clear the current input statement.

MariaDB [(none)]> select version();
+-----------------+
| version()       |
+-----------------+
| 10.3.14-MariaDB |
+-----------------+
1 row in set (0.001 sec)

MariaDB [(none)]> quit;
Bye
#
セキュリティー設定とテーブルのアップグレードを実行する。
mysql_secure_installation
mysql_upgrade -u root -p
WordPressのインストール
WP用にデータベースを追加する。
mysql -u root -p
create database wp;
grant all on wp.* to wpuser@localhost identified by 'hogehoge';
show databases;
select user,host from mysql.user;
quit;
WordPressのアーカイブをダウンロードし、ドキュメントルートとなるディレクトリーのひとつ上のディレクトリーにて展開する。
mkdir -p /var/www/wp.sotoiwa.com
cd /var/www/wp.sotoiwa.com
wget https://ja.wordpress.org/wordpress-5.2-ja.tar.gz
tar xzvf wordpress-5.2-ja.tar.gz
chown -R apache:apache wordpress
cd wordpress
インストールガイドに従ってwp-config.phpファイルを作成する。
cp wp-config-sample.php wp-config.php
vi wp-config.php
以上で準備はOKなはず。
向き先の切り替え
httpd.confを編集し、DocumentRootをMTのコンテンツの書き出し先ディレクトリーからwordpressディレクトリーに変更する。
<VirtualHost *:443>
    ServerName blog.sotoiwa.com:80
-   DocumentRoot "/var/www/blog.sotoiwa.com/blog"
+   DocumentRoot "/var/www/wp.sotoiwa.com/wordpress"
-   Alias /mt7 "/var/www/blog.sotoiwa.com/mt7"
-   Alias /mt-static7 "/var/www/blog.sotoiwa.com/mt-static7"
+   Alias /images "/var/www/blog.sotoiwa.com/blog/images"
+   Alias /assets_c "/var/www/blog.sotoiwa.com/blog/assets_c"
    ErrorLog logs/error_log_blog.sotoiwa.com
    CustomLog logs/access_log_blog.sotoiwa.com combined
+   <Directory "/var/www/wp.sotoiwa.com/wordpress">
+       Options Indexes FollowSymLinks
+       AllowOverride FileInfo AuthConfig Limit
+       Require all granted
+   </Directory>
    <Directory "/var/www/blog.sotoiwa.com/blog">
        Options Indexes FollowSymLinks
        AllowOverride FileInfo AuthConfig Limit
        Require all granted
    </Directory>
-   <Directory "/var/www/blog.sotoiwa.com/mt7">
-       Options Indexes FollowSymLinks ExecCGI
-       AllowOverride FileInfo AuthConfig Limit
-       Require all granted
-   </Directory>
-   <Directory "/var/www/blog.sotoiwa.com/mt-static7">
-       Options Indexes FollowSymLinks
-       AllowOverride FileInfo AuthConfig Limit
-       Require all granted
-   </Directory>
    ServerAlias blog.sotoiwa.com
    Include /etc/letsencrypt/options-ssl-apache.conf
    SSLCertificateFile /etc/letsencrypt/live/sotoiwa.com/cert.pem
    SSLCertificateKeyFile /etc/letsencrypt/live/sotoiwa.com/privkey.pem
    SSLCertificateChainFile /etc/letsencrypt/live/sotoiwa.com/chain.pem
</VirtualHost>
</IfModule>
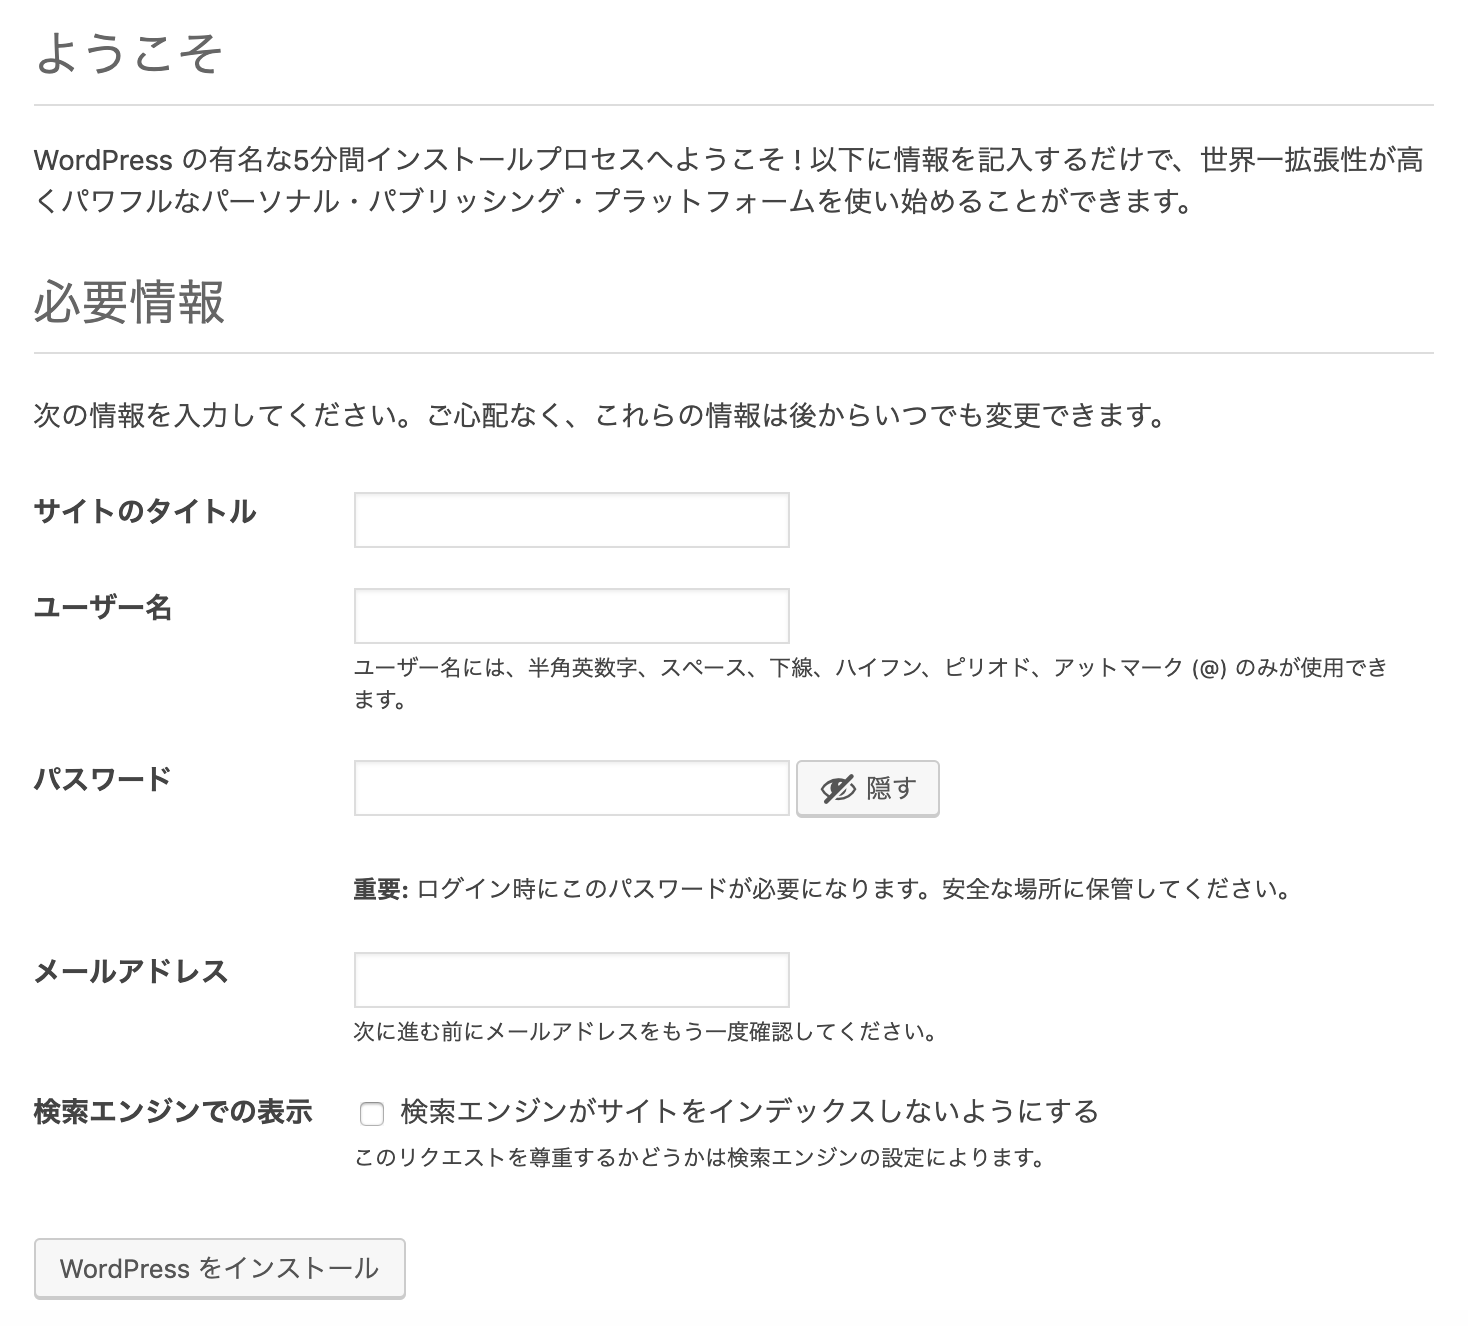
初期設定
サイトのトップページにアクセスすると、インストール画面にリダレクトされるので、情報を入力してインストールする。
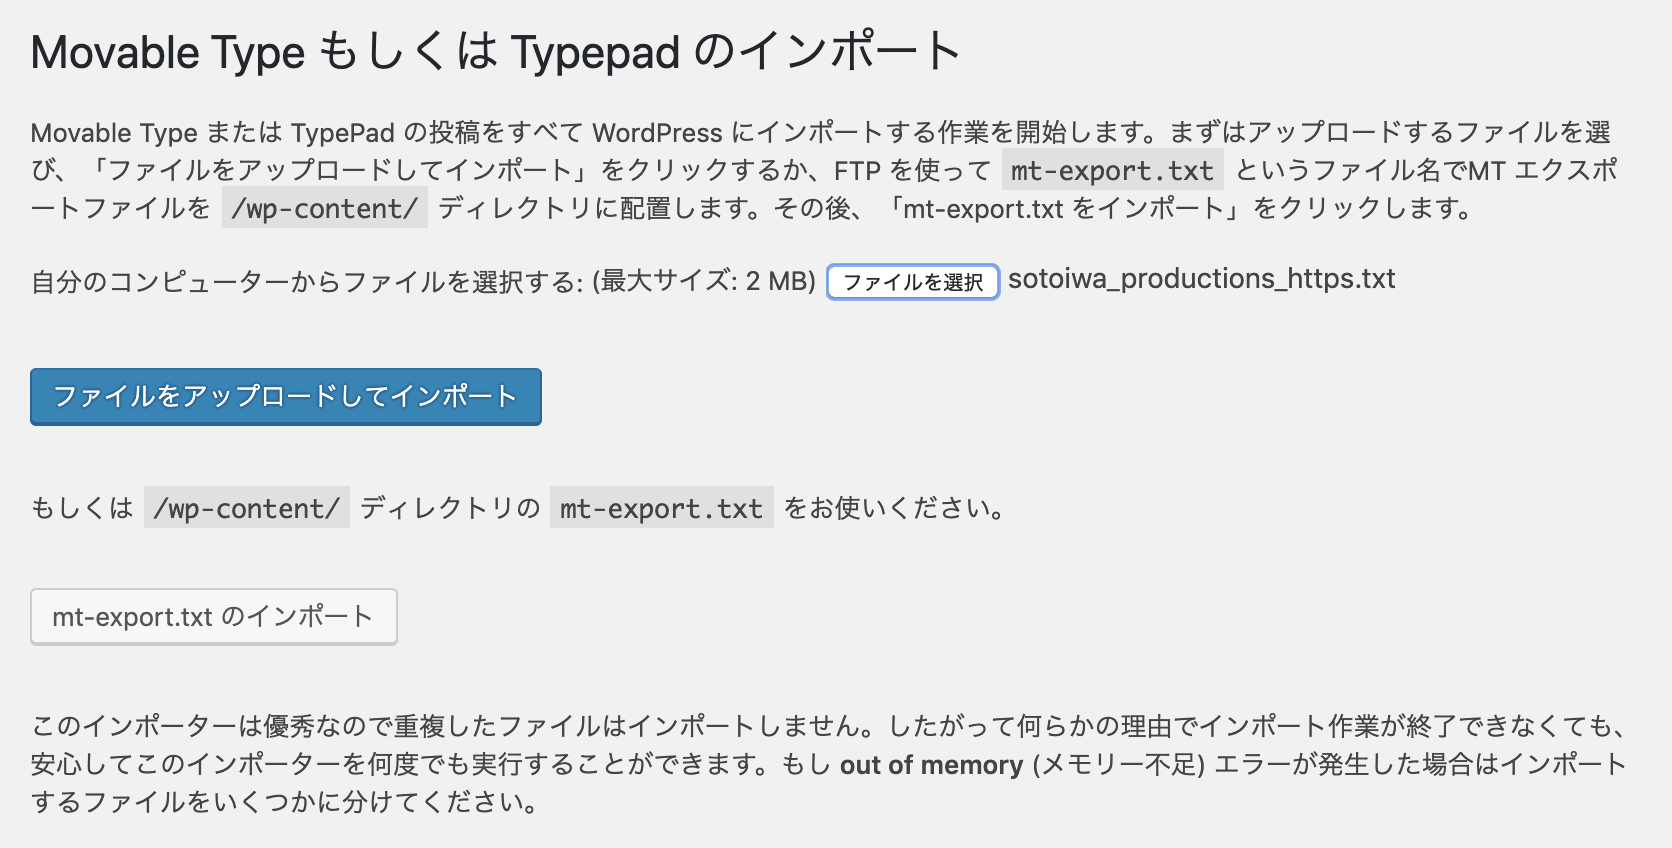
インポートプラグインの導入とカスタマイズ
ダッシュボードのツール > インポートから「Movable Typeと TypePad」を「今すぐインストール」する。このままインポートを実行すると、タグがインポートできなかったので、以下を参考にインポートプログラムを修正する。
-        function save_post(&$post, &$comments, &$pings) {
+        function save_post(&$post, &$comments, &$pings, &$tags) {
(省略)
		if ( $post_id = post_exists($post->post_title, '', $post->post_date) ) {
(省略)
			// Add categories.
			if ( 0 != count($post->categories) ) {
				wp_create_categories($post->categories, $post_id);
			}

			 // Add tags or keywords
-			if ( 1 < strlen($post->post_keywords) ) {
+			if ( 1 < strlen($tags) ) {
			 	// Keywords exist.
-				printf('<br />'.__('Adding tags <em>%s</em>...', 'movabletype-importer'), stripslashes($post->post_keywords));
-				wp_add_post_tags($post_id, $post->post_keywords);
+				printf('<br />'.__('Adding tags <em>%s</em>...', 'movabletype-importer'), stripslashes($tags));
+				wp_add_post_tags($post_id, $tags);
			}
		}
(省略)
	}

	function process_posts() {
(省略)
		$context = '';
		$post = new StdClass();
		$comment = new StdClass();
		$comments = array();
		$ping = new StdClass();
		$pings = array();
+		$tags = '';

		echo "<div class='wrap'><ol>";

		while ( $line = $this->fgets($handle) ) {
			$line = trim($line);

			if ( '-----' == $line ) {
				// Finishing a multi-line field
				if ( 'comment' == $context ) {
					$comments[] = $comment;
					$comment = new StdClass();
				} else if ( 'ping' == $context ) {
					$pings[] = $ping;
					$ping = new StdClass();
				}
				$context = '';
			} else if ( '--------' == $line ) {
				// Finishing a post.
				$context = '';
-				$result = $this->save_post($post, $comments, $pings);
+				$result = $this->save_post($post, $comments, $pings, $tags);
				if ( is_wp_error( $result ) )
					return $result;
				$post = new StdClass;
				$comment = new StdClass();
				$ping = new StdClass();
				$comments = array();
				$pings = array();
+				$tags = '';
			} else if ( 'BODY:' == $line ) {
				$context = 'body';
			} else if ( 'EXTENDED BODY:' == $line ) {
				$context = 'extended';
			} else if ( 'EXCERPT:' == $line ) {
				$context = 'excerpt';
			} else if ( 'KEYWORDS:' == $line ) {
				$context = 'keywords';
			} else if ( 'COMMENT:' == $line ) {
				$context = 'comment';
			} else if ( 'PING:' == $line ) {
				$context = 'ping';
			} else if ( 0 === strpos($line, 'AUTHOR:') ) {
				$author = trim( substr($line, strlen('AUTHOR:')) );
				if ( '' == $context )
					$post->post_author = $author;
				else if ( 'comment' == $context )
					 $comment->comment_author = $author;
			} else if ( 0 === strpos($line, 'TITLE:') ) {
				$title = trim( substr($line, strlen('TITLE:')) );
				if ( '' == $context )
					$post->post_title = $title;
				else if ( 'ping' == $context )
					$ping->title = $title;
			} else if ( 0 === strpos($line, 'BASENAME:') ) {
				$slug = trim( substr($line, strlen('BASENAME:')) );
				if ( !empty( $slug ) )
					$post->post_name = $slug;
			} else if ( 0 === strpos($line, 'STATUS:') ) {
				$status = trim( strtolower( substr($line, strlen('STATUS:')) ) );
				if ( empty($status) )
					$status = 'publish';
				$post->post_status = $status;
			} else if ( 0 === strpos($line, 'ALLOW COMMENTS:') ) {
				$allow = trim( substr($line, strlen('ALLOW COMMENTS:')) );
				if ( $allow == 1 )
					$post->comment_status = 'open';
				else
					$post->comment_status = 'closed';
			} else if ( 0 === strpos($line, 'ALLOW PINGS:') ) {
				$allow = trim( substr($line, strlen('ALLOW PINGS:')) );
				if ( $allow == 1 )
					$post->ping_status = 'open';
				else
					$post->ping_status = 'closed';
			} else if ( 0 === strpos($line, 'CATEGORY:') ) {
				$category = trim( substr($line, strlen('CATEGORY:')) );
				if ( '' != $category )
					$post->categories[] = $category;
+			} else if ( 0 === strpos($line, "TAGS:") ) {
+				$tags = trim( substr($line, strlen("TAGS:")) );
			} else if ( 0 === strpos($line, 'PRIMARY CATEGORY:') ) {
				$category = trim( substr($line, strlen('PRIMARY CATEGORY:')) );
				if ( '' != $category )
					$post->categories[] = $category;
			} else if ( 0 === strpos($line, 'DATE:') ) {
(省略)
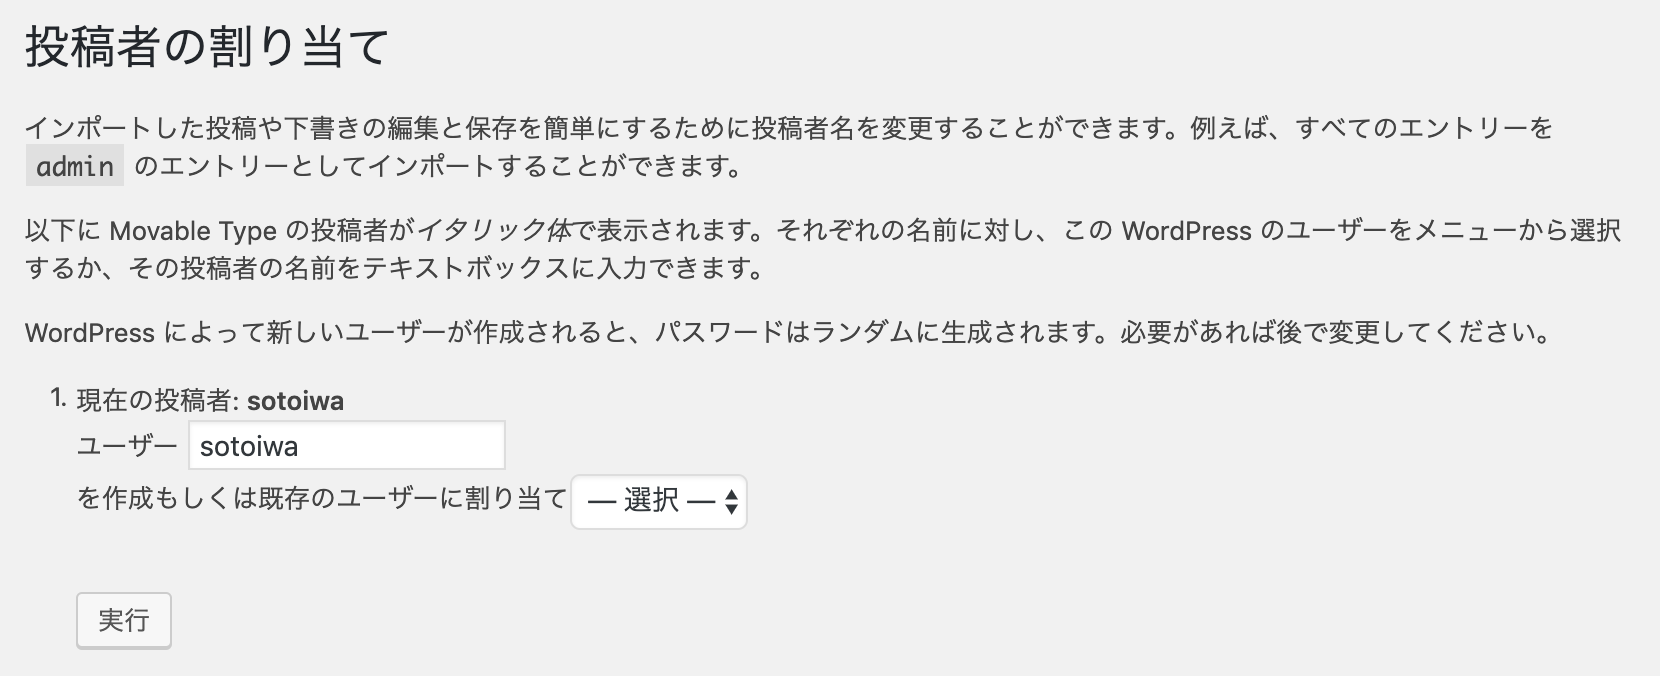
インポートの実行
ダッシュボードのツール > インポートから、インポートを実行する。
投稿者はここで変更することも可能。
パーマリンク設定
設定 > パーマリンク設定から「カスタム構造」を選択し、/%year%/%monthnum%/%day%%hour%%minute%を設定する。

以上でURLとタグを維持して移行できたはず。