はじめに
Chainerで実装・学習したモデルをONNX形式で出力するための環境を構築した。
サンプルのモデルを出力してNetronというビューワーで確認した。
検証環境
- Windows 10 Pro (Version: 1709, OS build: 16299.431)
- NVIDIA GeForce GTX 1070Ti
- Visual Studio 2017 (Version 15.7.2)
インストールするもの
- Anaconda3 5.2.0 (Python 3.6.5)
- CUDA Toolkit 9.2
- CuPy 5.0.0b2 (For CUDA 9.2)
- Chainer 4.2.0
- ONNX 1.1.2
- ONNX-Chainer 1.1.1a2
- Netron 1.8.9
各種ツールのインストール
Anaconda
公式サイトからインストーラーをダウンロードして実行する。インストール先のフォルダ以外は特に変更なし。
スタートメニューから「Anaconda Prompt」を起動してPythonのバージョンを確認。
(base) C:\>python --version
Python 3.6.5 :: Anaconda, Inc.
CUDA
公式サイトからインストーラーをダウンロードして実行する。
- Base Installer -> cuda_9.2.88_win10_network.exe
- Patch 1 (Released May 16, 2018) -> cuda_9.2.88.1_windows.exe
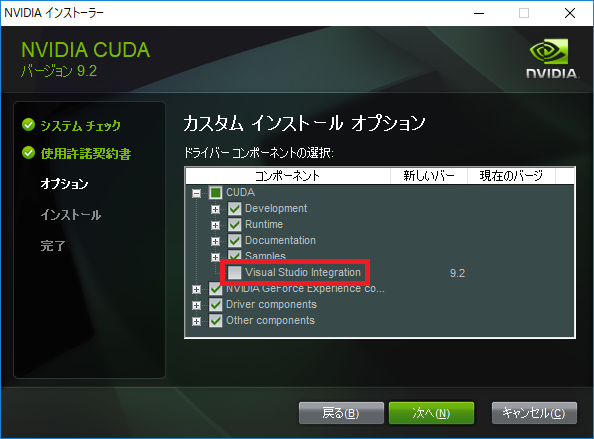
インストールオプションは「高速(推奨)」を選択する。
※ Visual Studio Integrationのインストール失敗が原因で、その他のコンポーネントも全てインストールできないことがある。
そのような場合には、インストールオプションで「カスタム」を選択して、Visual Studio Integrationのチェックを外す。
インストール完了後、コマンドプロンプトで「nvcc --version」を実行してバージョンの確認。
C:\>nvcc --version
nvcc: NVIDIA (R) Cuda compiler driver
Copyright (c) 2005-2018 NVIDIA Corporation
Built on Wed_Apr_11_23:16:30_Central_Daylight_Time_2018
Cuda compilation tools, release 9.2, V9.2.88
CuPy
Anaconda Promptを起動して「pip install cupy-cuda92」を実行する。
インストール完了後、Anaconda Promptから以下のコマンドを実行して、CuPyのバージョンを確認。
(base) C:>python -c "import cupy; print(cupy.__version__)"
5.0.0b2
Chainer
Anaconda Promptを起動して「pip install chainer==4.2.0」を実行する。
インストール完了後、chainerがimportできるか確認する。importの直後に、h5pyのWarningが発生している。
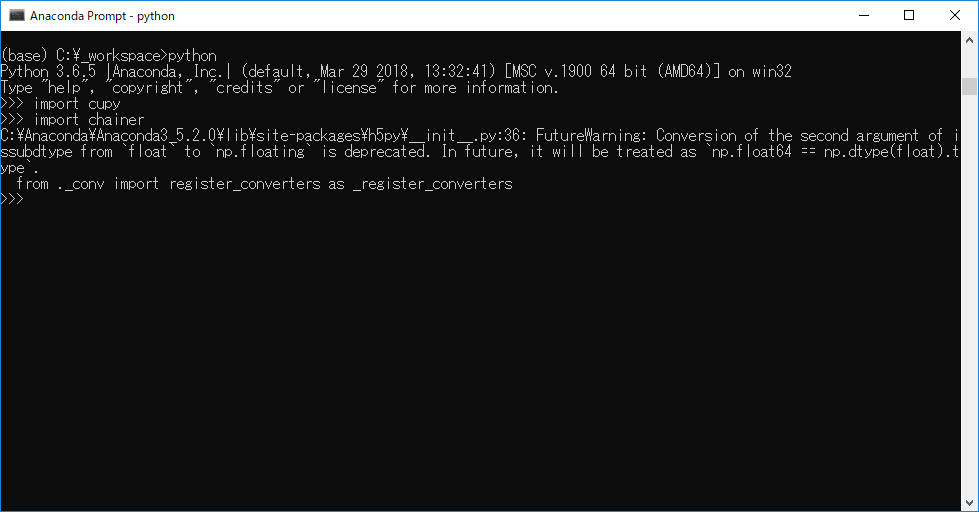
インストールされているh5pyのバージョンが2.7.1だった。
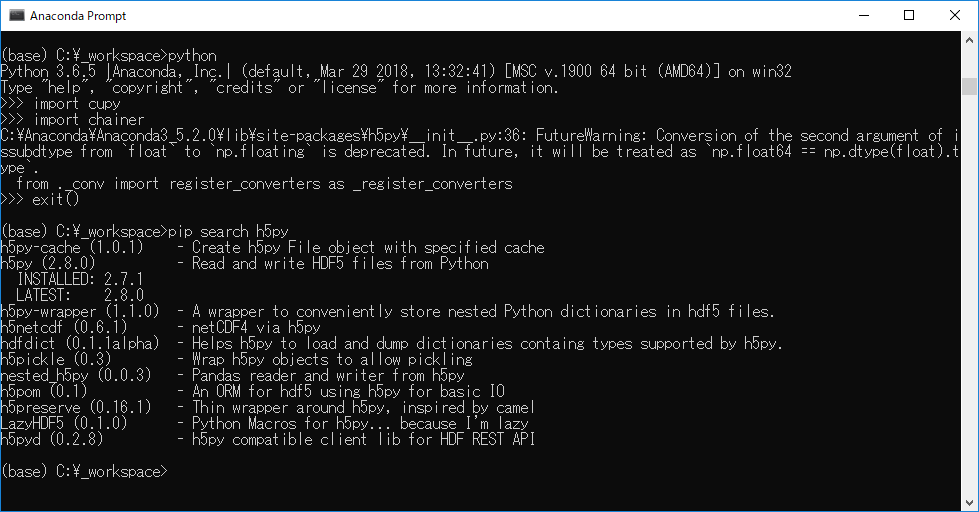
h5pyを2.8.0にアップデートする。
pip install -U h5py
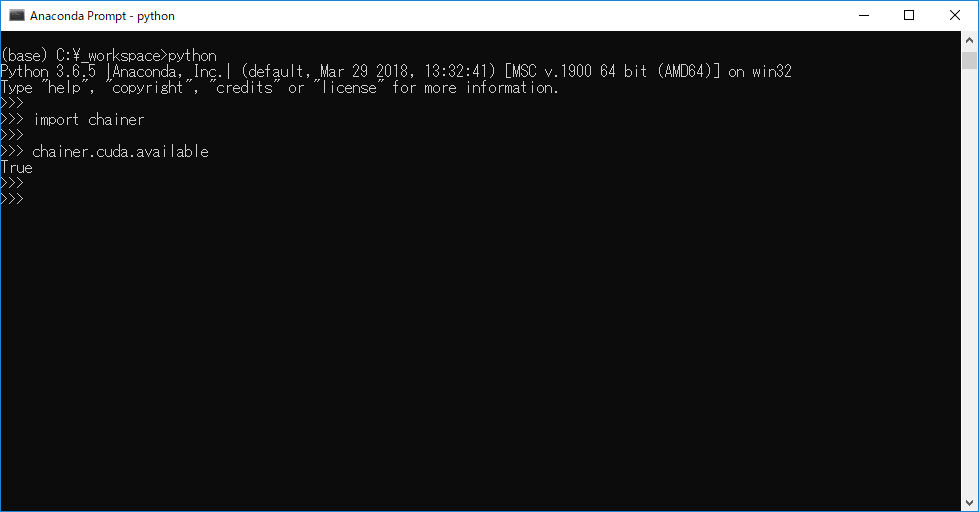
アップデート完了後、chainerがimportできるか、CUDAが使えるかを確認する。Warningもなくなったので特に問題なし。
ONNX
Anaconda Promptを起動して「pip install onnx==1.1.2」を実行する。
インストール完了後、Anaconda Promptから以下のコマンドを実行して、ONNXのバージョンを確認。
(base) C:\>python -c "import onnx; print(onnx.__version__)"
1.1.2
Windows環境だけかもしれないが、v1.0.1とかv1.1.1はビルドに失敗してインストールできなかった。
ONNX-Chainer
Anaconda Promptを起動して「pip install onnx-chainer==1.1.1a2」を実行する。
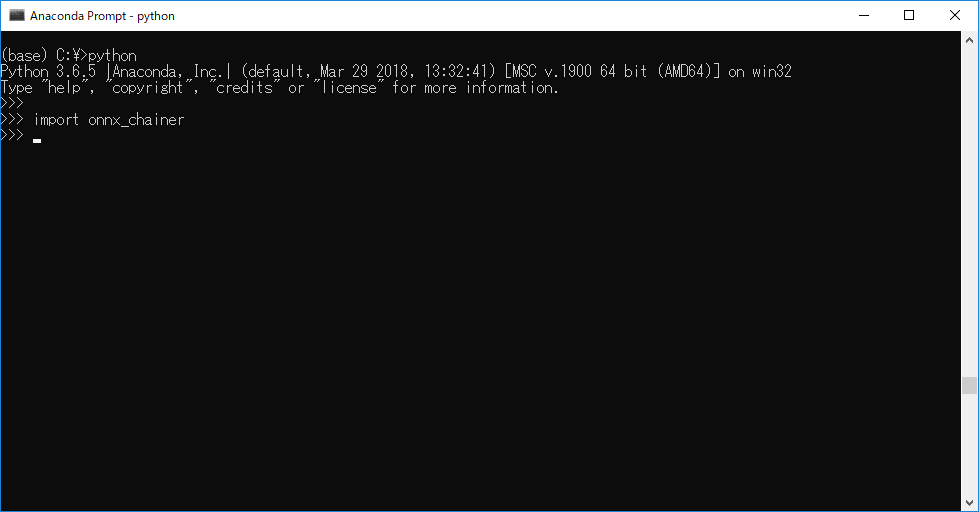
インストール完了後、onnx-chainerがimportできるかを確認する。importの直後にWarningなどが表示されなければ問題ない。
Netron
GitHubのページからインストーラーをダウンロードして実行する。
モデルをONNX形式で出力する
Anaconda Promptを起動して、以下のコード(train_mnist_export_onnx.py)を実行する。
python train_mnist_export_onnx.py –-gpu 0(GPU使用時)
# !/usr/bin/env python
import argparse

import chainer
import chainer.functions as F
import chainer.links as L
from chainer import training
from chainer.training import extensions

import numpy as np
import onnx
import onnx_chainer

# Network definition
class MLP(chainer.Chain):

    def __init__(self, n_units, n_out):
        super(MLP, self).__init__()
        with self.init_scope():
            # the size of the inputs to each layer will be inferred
            self.l1 = L.Linear(None, n_units)  # n_in -> n_units
            self.l2 = L.Linear(None, n_units)  # n_units -> n_units
            self.l3 = L.Linear(None, n_out)  # n_units -> n_out

    def __call__(self, x):
        h1 = F.relu(self.l1(x))
        h2 = F.relu(self.l2(h1))
        return self.l3(h2)


def main():
    parser = argparse.ArgumentParser(description='Chainer example: MNIST')
    parser.add_argument('--batchsize', '-b', type=int, default=100,
                        help='Number of images in each mini-batch')
    parser.add_argument('--epoch', '-e', type=int, default=20,
                        help='Number of sweeps over the dataset to train')
    parser.add_argument('--frequency', '-f', type=int, default=-1,
                        help='Frequency of taking a snapshot')
    parser.add_argument('--gpu', '-g', type=int, default=-1,
                        help='GPU ID (negative value indicates CPU)')
    parser.add_argument('--out', '-o', default='result',
                        help='Directory to output the result')
    parser.add_argument('--resume', '-r', default='',
                        help='Resume the training from snapshot')
    parser.add_argument('--unit', '-u', type=int, default=1000,
                        help='Number of units')
    parser.add_argument('--noplot', dest='plot', action='store_false',
                        help='Disable PlotReport extension')
    args = parser.parse_args()

    print('GPU: {}'.format(args.gpu))
    print('# unit: {}'.format(args.unit))
    print('# Minibatch-size: {}'.format(args.batchsize))
    print('# epoch: {}'.format(args.epoch))
    print('')

    # Set up a neural network to train
    # Classifier reports softmax cross entropy loss and accuracy at every
    # iteration, which will be used by the PrintReport extension below.
    model = L.Classifier(MLP(args.unit, 10))
    if args.gpu >= 0:
        # Make a specified GPU current
        chainer.backends.cuda.get_device_from_id(args.gpu).use()
        model.to_gpu()  # Copy the model to the GPU

    # Setup an optimizer
    optimizer = chainer.optimizers.Adam()
    optimizer.setup(model)

    # Load the MNIST dataset
    train, test = chainer.datasets.get_mnist(ndim=3)

    train_iter = chainer.iterators.SerialIterator(train, args.batchsize)
    test_iter = chainer.iterators.SerialIterator(test, args.batchsize,
                                                 repeat=False, shuffle=False)

    # Set up a trainer
    updater = training.updaters.StandardUpdater(
        train_iter, optimizer, device=args.gpu)
    trainer = training.Trainer(updater, (args.epoch, 'epoch'), out=args.out)

    # Evaluate the model with the test dataset for each epoch
    trainer.extend(extensions.Evaluator(test_iter, model, device=args.gpu))

    # Dump a computational graph from 'loss' variable at the first iteration
    # The "main" refers to the target link of the "main" optimizer.
    trainer.extend(extensions.dump_graph('main/loss'))

    # Take a snapshot for each specified epoch
    frequency = args.epoch if args.frequency == -1 else max(1, args.frequency)
    trainer.extend(extensions.snapshot(), trigger=(frequency, 'epoch'))

    # Write a log of evaluation statistics for each epoch
    trainer.extend(extensions.LogReport())

    # Save two plot images to the result dir
    if args.plot and extensions.PlotReport.available():
        trainer.extend(
            extensions.PlotReport(['main/loss', 'validation/main/loss'],
                                  'epoch', file_name='loss.png'))
        trainer.extend(
            extensions.PlotReport(
                ['main/accuracy', 'validation/main/accuracy'],
                'epoch', file_name='accuracy.png'))

    # Print selected entries of the log to stdout
    # Here "main" refers to the target link of the "main" optimizer again, and
    # "validation" refers to the default name of the Evaluator extension.
    # Entries other than 'epoch' are reported by the Classifier link, called by
    # either the updater or the evaluator.
    trainer.extend(extensions.PrintReport(
        ['epoch', 'main/loss', 'validation/main/loss',
         'main/accuracy', 'validation/main/accuracy', 'elapsed_time']))

    # Print a progress bar to stdout
    trainer.extend(extensions.ProgressBar())

    if args.resume:
        # Resume from a snapshot
        chainer.serializers.load_npz(args.resume, trainer)

    # Run the training
    trainer.run()

    # Export the trained model as onnx format
    # Don't forget to set train flag off!
    chainer.config.train = False
    pseudo_input = np.zeros((1, 1, 28, 28), dtype=np.float32)
    onnx_chainer.export(model.predictor, pseudo_input, filename='mnist.onnx')

if __name__ == '__main__':
    main()
上記のコードは、ChainerのリポジトリにあるExampleのtrain_mnist.pyを修正したもの。修正箇所は以下の通り。
10~12行目。importを追加。
import numpy as np
import onnx
import onnx_chainer
70~71行目。ndim=3を指定するように修正。
# Load the MNIST dataset
train, test = chainer.datasets.get_mnist(ndim=3)
125~129行目。学習したモデルをONNX形式で出力
# Export the trained model as onnx format
# Don't forget to set train flag off!
chainer.config.train = False
pseudo_input = np.zeros((1, 1, 28, 28), dtype=np.float32)
onnx_chainer.export(model.predictor, pseudo_input, filename='mnist.onnx')
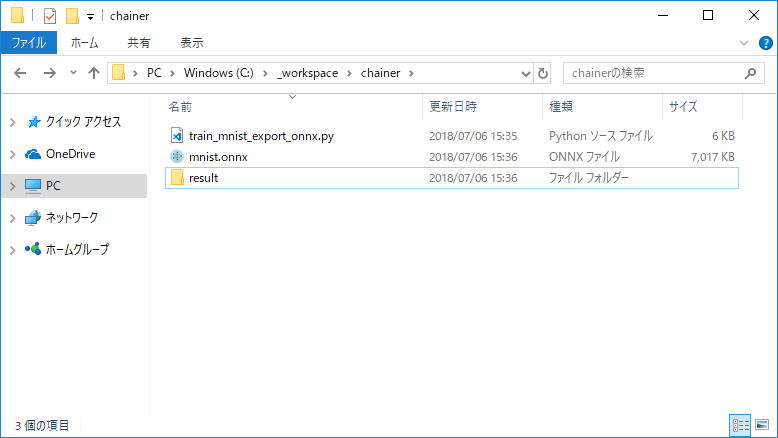
実行結果
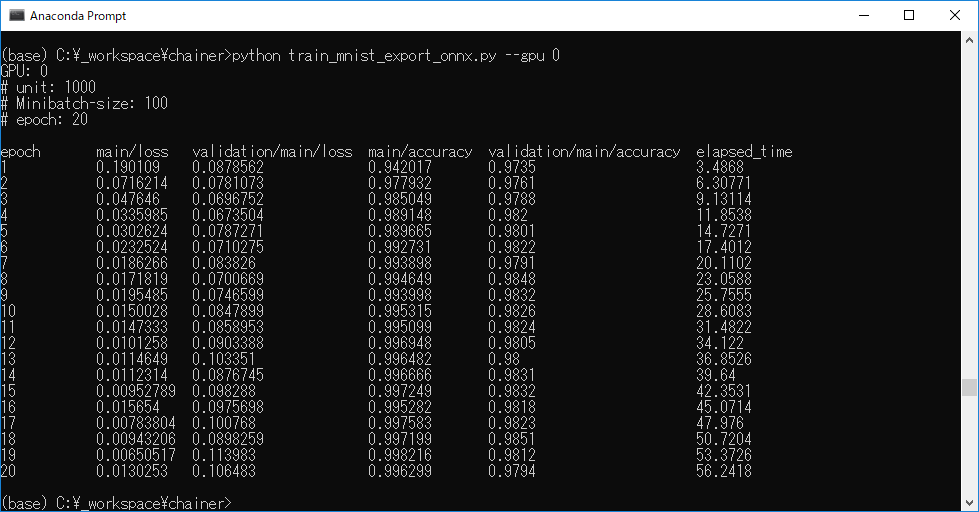
ONNXファイルが出力されている。
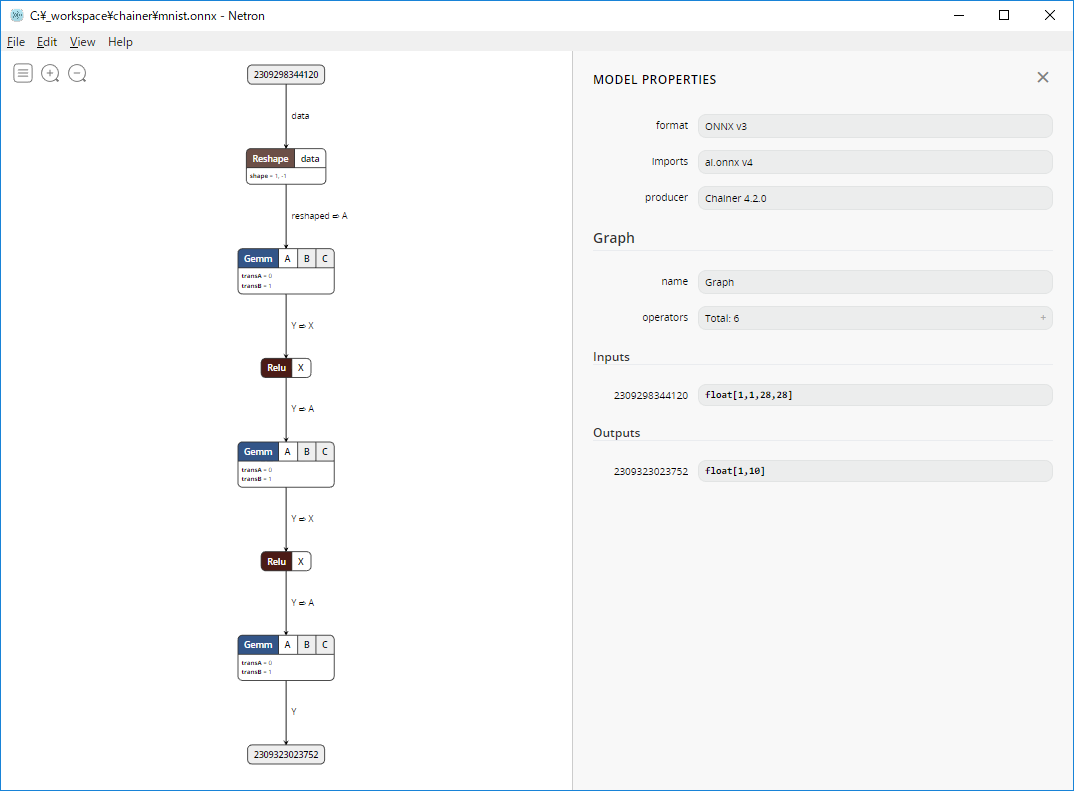
ONNXで出力したモデルの確認
Netronでmnist.onnxを開いて確認する。
まとめ
- Chainerで実装・学習したモデルをONNX形式で出力するためにWindows環境に各種ツールをインストールした。
- サンプルのモデルをONNX形式で出力してNetronというビューワーで確認した。