
Claude(実際にはデスクトップアプリのClaude Desktop)でMCP(Model Context Protocol)という仕組みを利用すると、チャット中に外部関数を呼び出すことができます。この外部関数を提供するプログラムをMCPサーバーと呼びます。MCPサーバーとリモートのRaspberry Piで通信して、Raspberry PiにつながったLEDを制御します。すると、Claudeのチャット画面で「ライトを付けて」「ライトを消して」の様に指示すると、リモートのLEDの点灯消灯を行うことができます。
環境構築
Windows環境を想定しています。
以下のものをインストールします。
とりあえずClaude Desktopを使ってみる

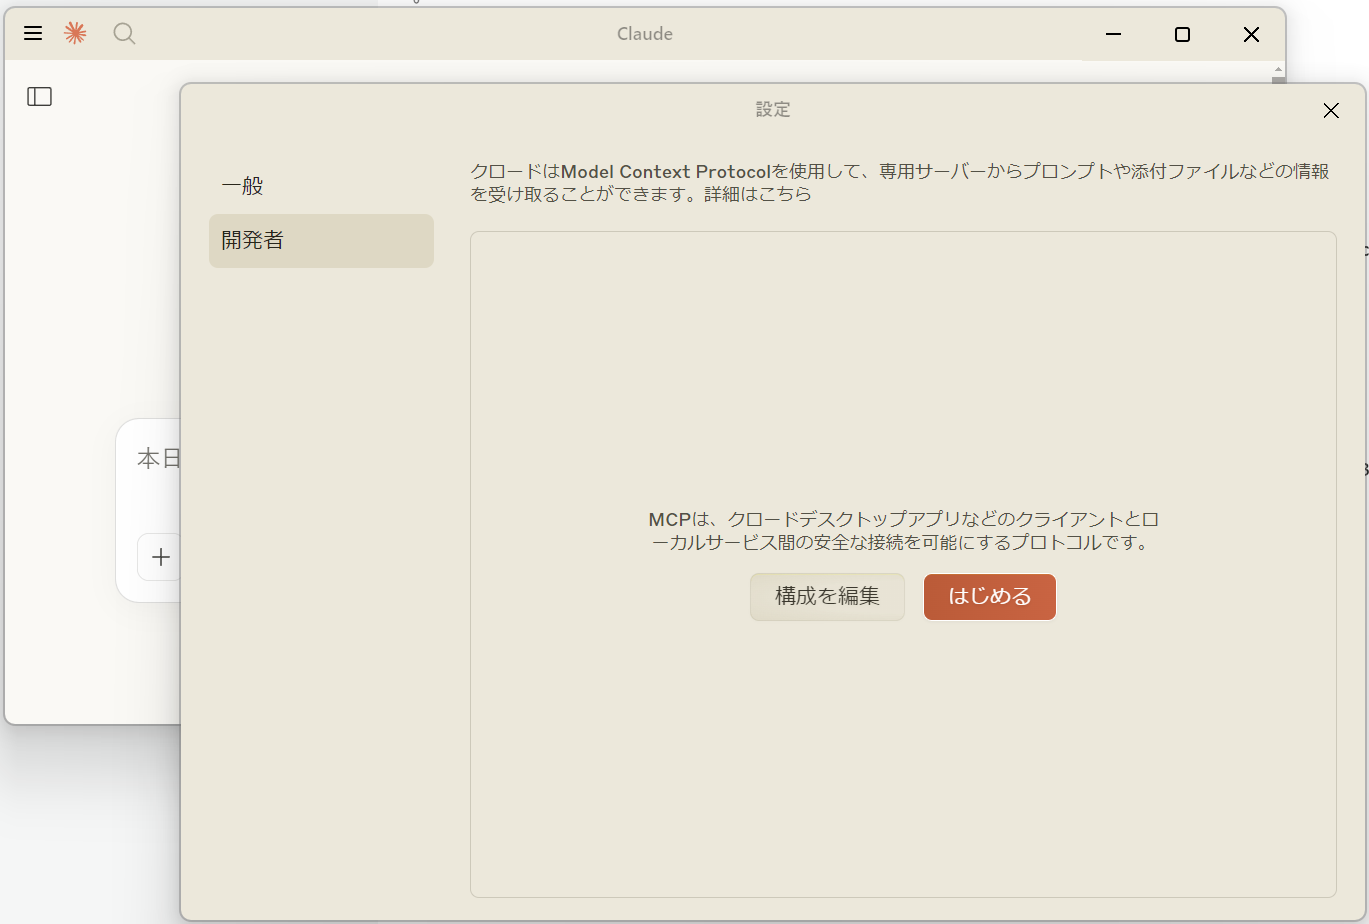
メニューから次の項目を選択:ファイル → 設定...

開発者カテゴリを選択して構成を編集ボタンを押します。
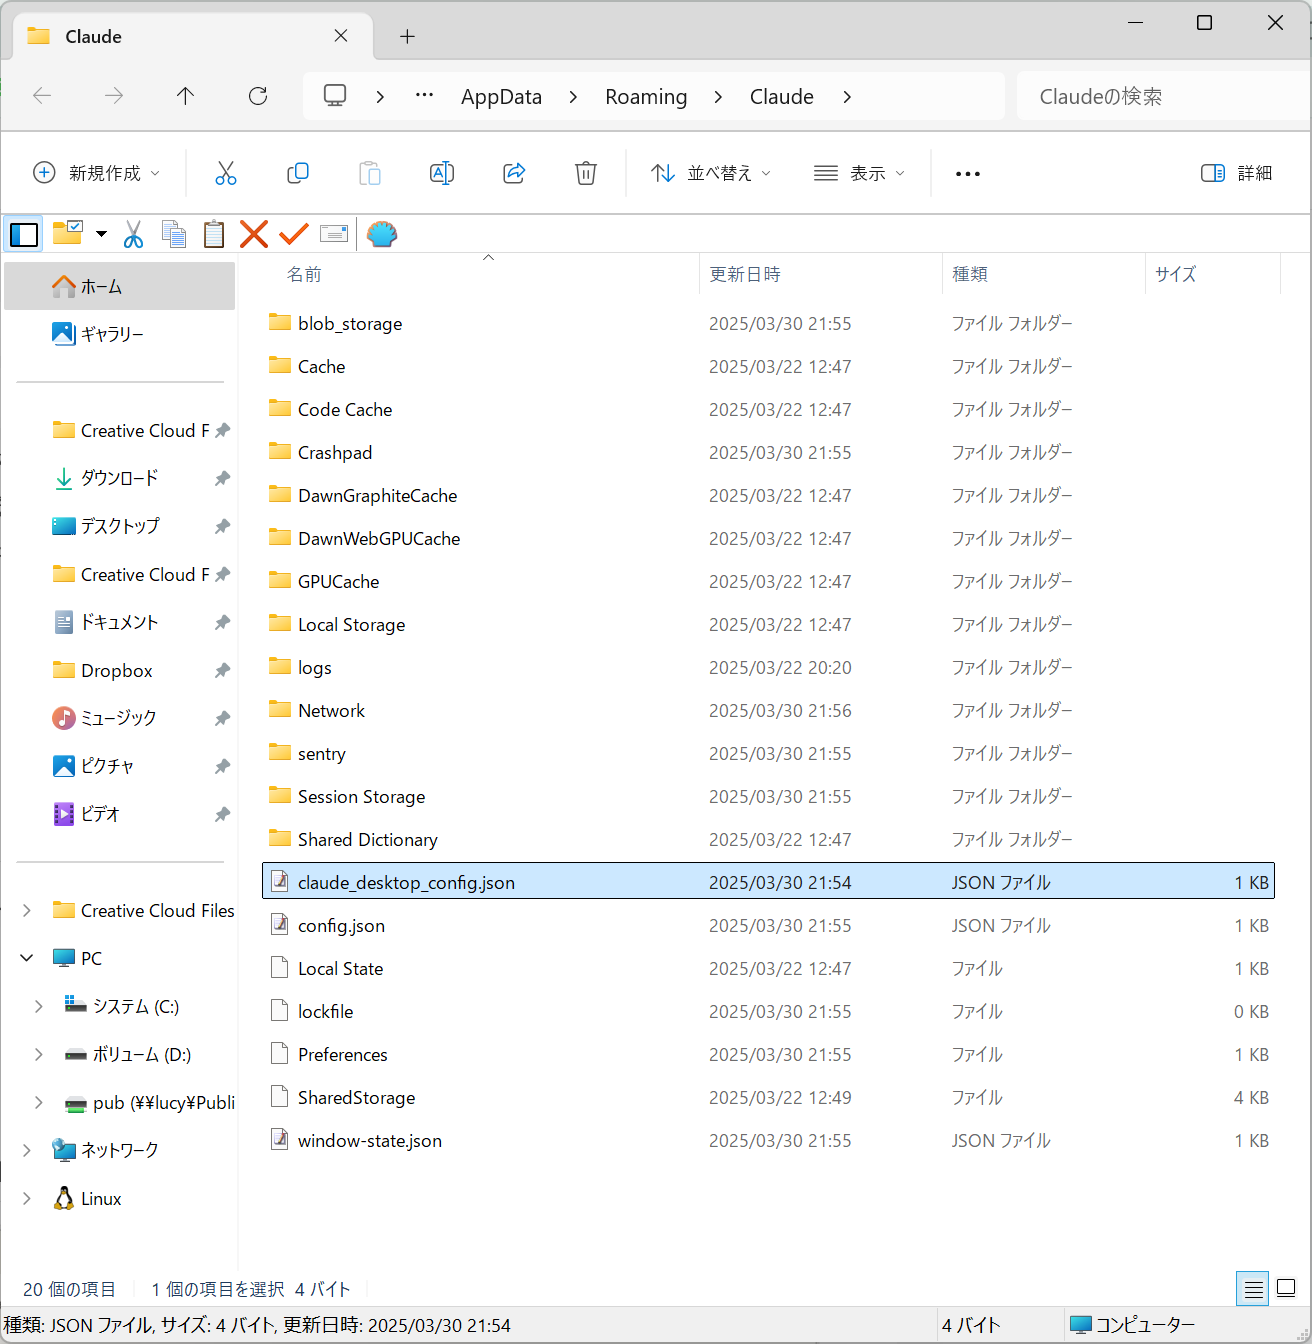
claude_desktop_config.jsonというファイルのあるフォルダが開かれます。MCPサーバーをインストールすると、このファイルが更新されます。後述しますが、本記事ではuvコマンドによって自動的に更新されます。(MCPサーバーによっては、手作業でインストールする場合に、このファイルを自分で編集しなければならないことがあります)
MCPサーバーを追加した後、Claude Desktopを終了して起動し直す必要があります。ここで注意ですが、Claude Desktopの閉じ方には2種類あります。メニューからCloseを選ぶと常駐状態でウィンドウが閉じるだけで終了はしません。Alt+F4で閉じた時もこの挙動です。claude_desktop_config.jsonを再読込するには、メニューの終了を選択して完全に終了する必要がありますので注意してください。
チュートリアル
まず、Claude DesktopとMCPサーバー間でやりとりする基本的な手順を確認しておきます。最初に必要なことは公式サイトに書いてありますので、そのとおりに進めてみます。
必要なパッケージをインストールします。
pip install uv
uv add "mcp[cli]"
(pythonとpipコマンドにPATHを通しておく必要があるかもしれません)
適当な作業ディレクトリを作って、その中でmcp_server.pyを作成します。
# mcp_server.py
from mcp.server.fastmcp import FastMCP

# Create an MCP server
mcp = FastMCP("Demo")

# Add an addition tool
@mcp.tool()
def add(a: int, b: int) -> int:
    """Add two numbers"""
    return a + b

# Add a dynamic greeting resource
@mcp.resource("greeting://{name}")
def get_greeting(name: str) -> str:
    """Get a personalized greeting"""
    return f"Hello, {name}!"
Claude Desktopにインストール(登録)します。
mcp install mcp_server.py
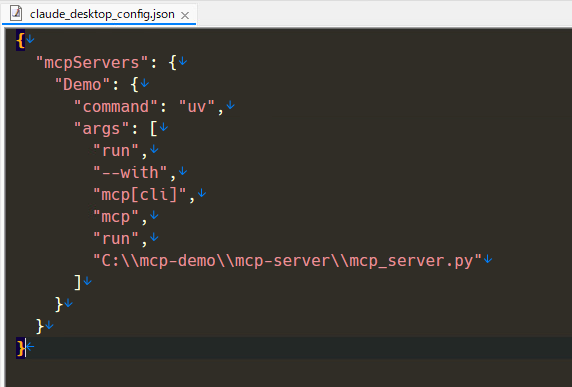
claude_desktop_config.jsonが更新されたことを確認します。
Claude Desktopを起動します。
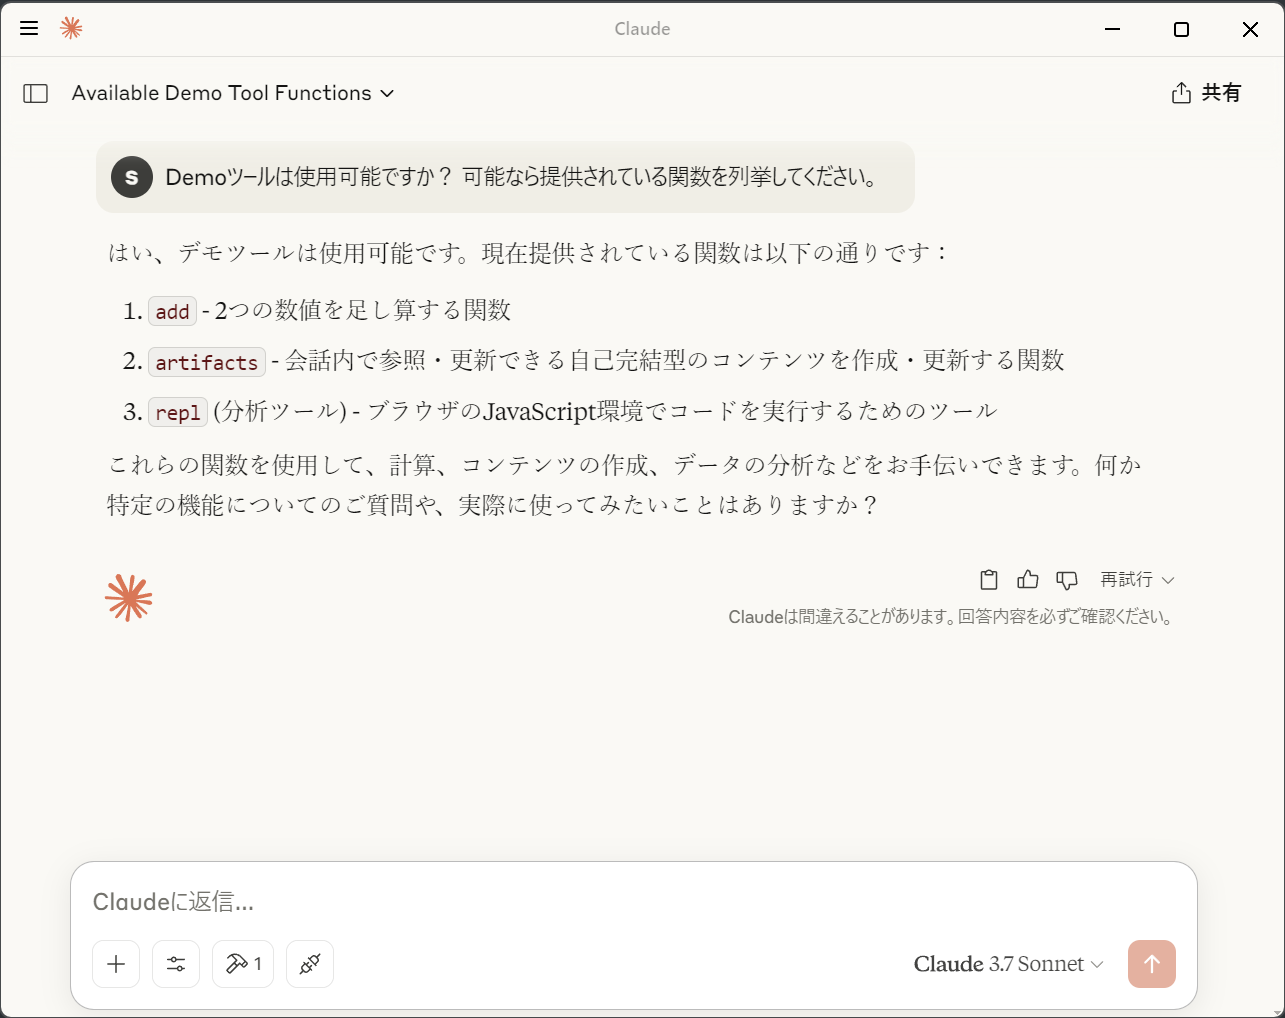
ClaudeはMCPサーバーを「ツール」として認識します。この例では「Demoツール」です。利用可能な関数をみてみましょう。mcp_server.pyで実装されているadd関数が見えていれば正常です。無い場合はclaude_desktop_config.jsonが正しく読み込まれていないかもしれませんので、Claude Desktopを完全に終了してから起動し直し、再度確認してみましょう。
add関数を実行するような指示をすると、ツールを実行して良いか聞かれますので、許可します。すると、計算結果が表示されます。

リモートの Raspberry Pi を構築
次のような回路を用意します。

まずは試しにシェルから点灯確認します。
GPIO3を出力用として設定
sudo echo "3" > /sys/class/gpio/export
sudo echo "out" > /sys/class/gpio/gpio3/direction
点灯
sudo echo 1 > /sys/class/gpio/gpio3/value
消灯
sudo echo 0 > /sys/class/gpio/gpio3/value
Raspberry Pi 用 API サーバーを用意します。
from flask import Flask, request, jsonify
import RPi.GPIO as GPIO
import atexit

app = Flask(__name__)

LED_PIN = 3
GPIO.setmode(GPIO.BCM)
GPIO.setup(LED_PIN, GPIO.OUT)

def cleanup_gpio():
    GPIO.cleanup()

atexit.register(cleanup_gpio)

@app.route('/led/on', methods=['GET'])
def turn_on_led():
    GPIO.output(LED_PIN, GPIO.HIGH)
    return jsonify({'status': 'on'}), 200

@app.route('/led/off', methods=['GET'])
def turn_off_led():
    GPIO.output(LED_PIN, GPIO.LOW)
    return jsonify({'status': 'off'}), 200

@app.route('/cpu/temperature', methods=['GET'])
def get_cpu_temperature():
    try:
        with open("/sys/class/thermal/thermal_zone0/temp", "r") as f:
            temp_str = f.readline()
            temp_c = int(temp_str) / 1000.0
            return jsonify({'status': 'success', 'unit': 'degree celsius', 'value': temp_c}), 200
    except:
        return jsonify({'status': 'error', 'message': 'thermal sensor is not available'}), 200

if __name__ == '__main__':
    app.run(host='0.0.0.0', port=5000)
Raspberry Piでip aを実行して、IPアドレスを確認します。

API サーバーを実行します。
python api_server.py
このAPIに接続してみましょう。(IPアドレスは上で確認した値に適宜書き換えてください)
http://192.168.1.7:5000/led/on
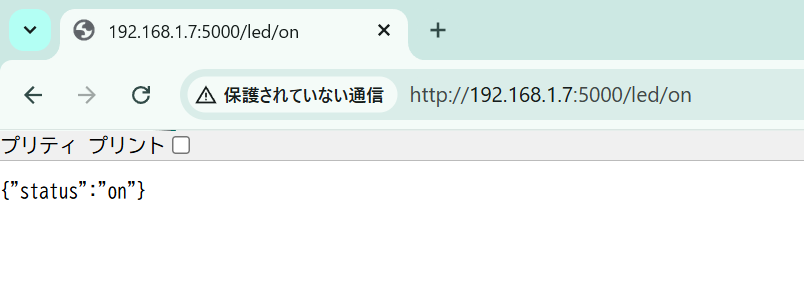
LEDが点灯すれば成功です。onをoffに変えて、消灯することも確認しておきます。
MCPサーバーに関数を実装
remote_serverの値は実際のアドレスに書き換えてください。
# mcp_server.py
from mcp.server.fastmcp import FastMCP
import urllib.request

remote_server = "192.168.1.7:5000"

# Create an MCP server
mcp = FastMCP("Demo")

# Add an addition tool
@mcp.tool()
def add(a: int, b: int) -> int:
    """Add two numbers"""
    return a + b

@mcp.tool()
def light_switch(on: bool):
    """Turn on or turn off the light"""
    try:
        if on:
            urllib.request.urlopen("http://" + remote_server + "/led/on")
            return {"status": "The light is turned on"}
        else:
            urllib.request.urlopen("http://" + remote_server + "/led/off")
            return {"status": "The light is turned off"}
    except Exception as e:
        return {"status": "error", "message": str(e)}

@mcp.tool()
def query_cpu_temperature():
    """Query temperature of the CPU in degree celsius"""
    try:
        with urllib.request.urlopen("http://" + remote_server + "/cpu/temperature") as res:
            return res.read()
    except Exception as e:
        return {"status": "error", "message": str(e)}

# Add a dynamic greeting resource
@mcp.resource("greeting://{name}")
def get_greeting(name: str) -> str:
    """Get a personalized greeting"""
    return f"Hello, {name}!"
MCPクライアント(Claude Desktop)から関数を使用できるようにするには、関数定義の前の行に@mcp.tool()と書きます。次の行に"""関数の説明"""を書きます。
引数のonの値に応じて、リモートの LED API のアドレスを呼び分けています。/led/onにアクセスすると点灯、/led/offにアクセスすると消灯となります。
Claude Desktopを起動して、もしエラーがあった場合は、通知が表示され、設定の開発者の画面に三角の!マークが表示されます。
Claude Desktop で動作確認
問題なければ、設定の開発者の画面で、Demo Runningの様に表示されます。チャット欄に「Demoツールは使用可能ですか? 可能なら提供されている関数を列挙してください。」と指示をしてみます。light_switch関数が認識されていれば、「ライトを付けてください」「ライトを消してください」の様な指示が実行されるはずです。

query_cpu_temperatureという関数も用意しておきました。「CPUの温度を取得して」の様に訊くと答えてくれます。
デバッグの参考になる情報として、「Demoツールで使用可能な関数に関する情報をJSONSchemaで出力してください」という指示をすると、関数の詳細を見ることができます。