
はじめに
ハッキング・ラボのつくりかたを参考にしてVirtualBoxにParrotOSを導入しました。
動作環境
- host os: windows 11
- virtualbox: version 7.1.12
- guest os: parrot security os 7.2 (導入したエディション)
導入手順
1. parrot osのisoイメージをダウンロード
parrot osの公式サイトから、必要なエディションのisoファイルをダウンロードします。

2. virtualboxで仮想マシンの作成
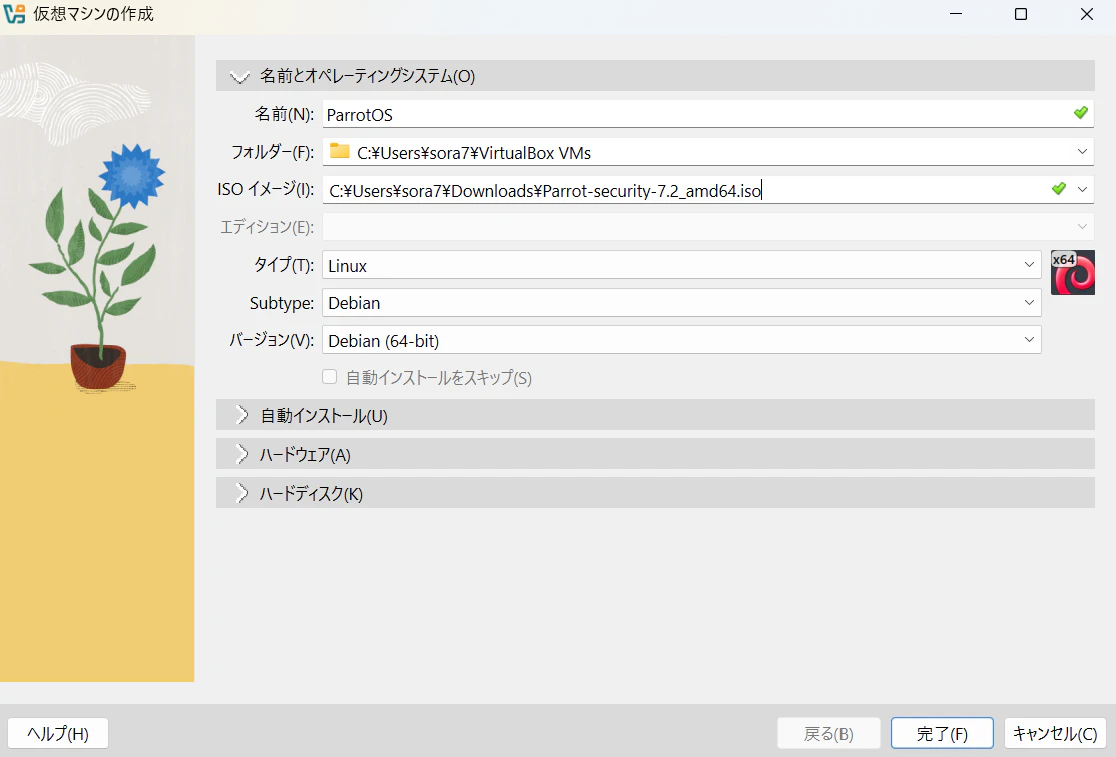
virtualboxを起動し、「新規」から以下の設定で仮想マシンを作成します。
- 名前: ParrotOS
- タイプ: linux
- バージョン: debian (64-bit)
- メモリー: 4gb以上推奨
- プロセッサー: 2cpu以上推奨
3. ストレージの設定と起動
- 作成した仮想マシンの「設定」>「ストレージ」を開きます。
- コントローラー: ideの光学ドライブに、手順1でダウンロードしたisoファイルを選択します。
- 設定を保存し、仮想マシンを「起動」します。
4. parrot osのインストール
- liveモードで起動後、デスクトップにある「install parrot」のアイコンをダブルクリックします。
- インストーラーの指示に従い、言語、タイムゾーン、キーボードレイアウト(日本語など)を設定します。
- パーティション設定は「ディスクの消去」を選択します。
- ユーザー名とパスワードを設定し、インストールを開始します。
- 完了後、再起動します(再起動時にisoファイルを外します)。

おわりに
これでvirtualbox上でparrot osを動かす環境が整いました。次はParrotOSの探索に進んでいきます。