-
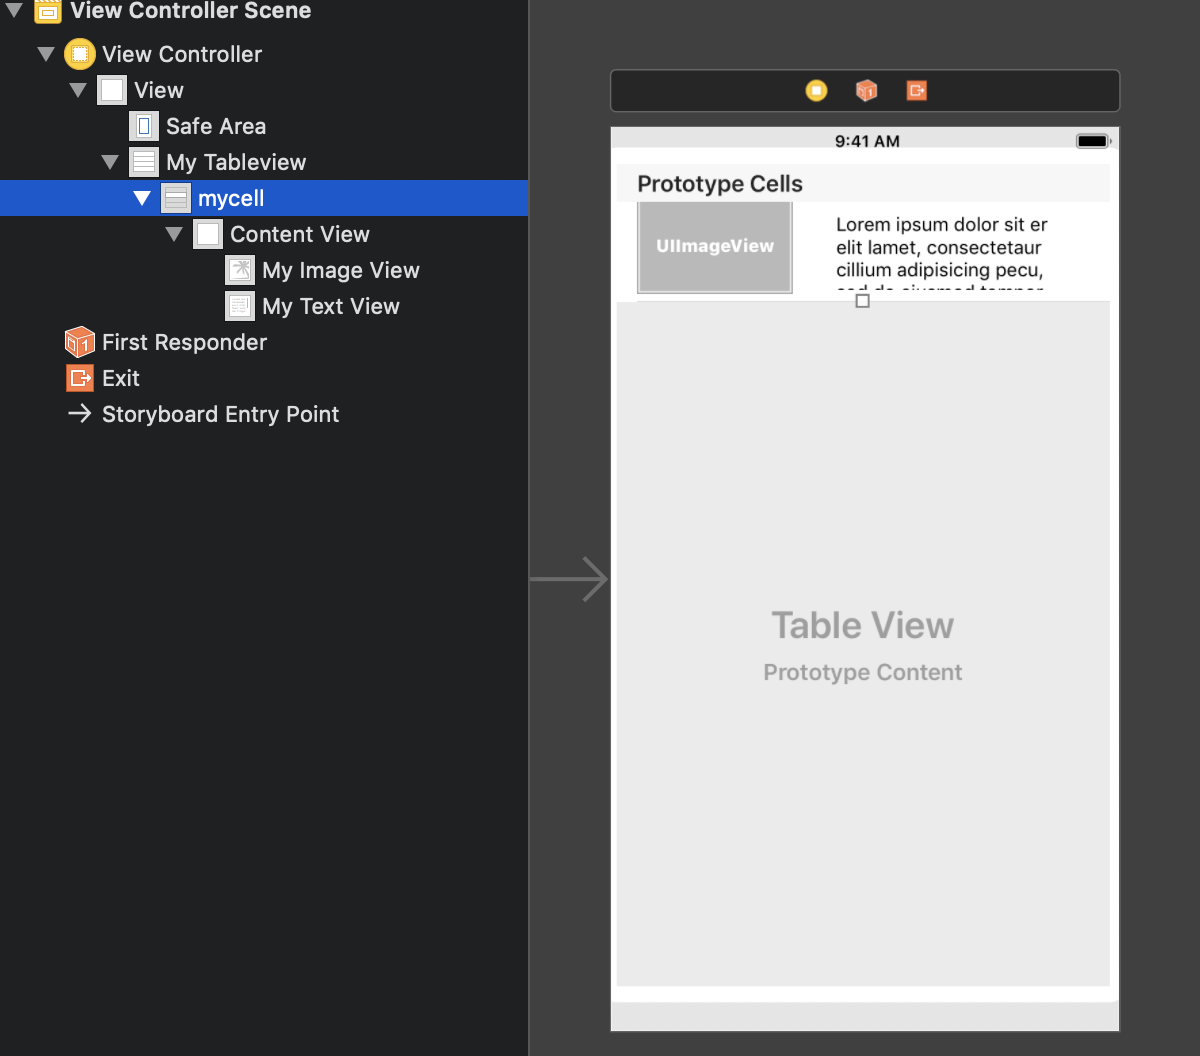
StoryBoardに UITableView UITableViewCell を入れる
-
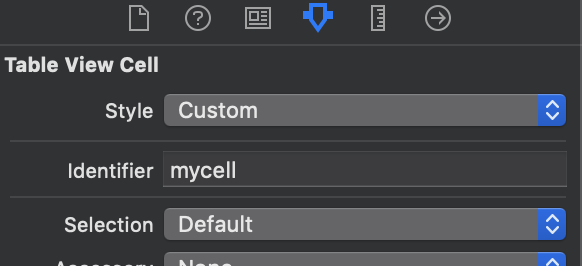
UITableViewCellのIdentifierをmycell設定
-
UITableViewCellにUIImageView、UITextViewを入れる
-
Drag&DropでUITableViewCellのmyTableviewリレーションを作成(ViewController.swift参照)
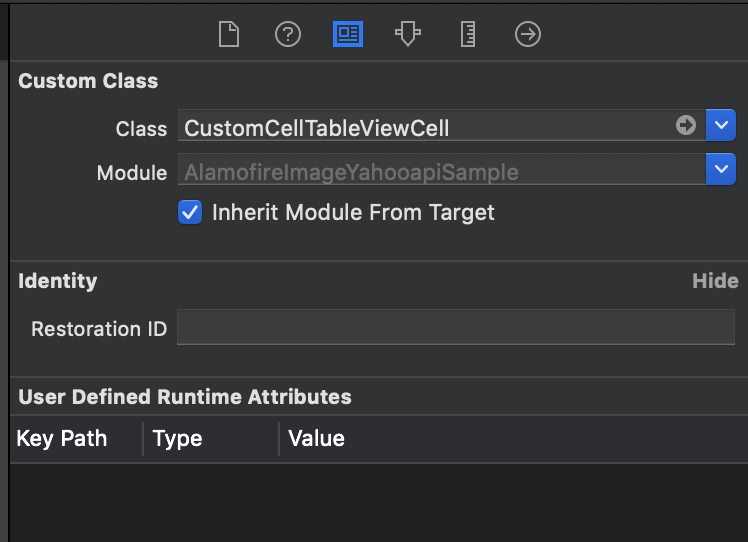
- CustomCellTableViewCellクラスを作成
CustomCellTableViewCell.swift
import UIKit

class CustomCellTableViewCell: UITableViewCell {


    @IBOutlet weak var myImageView: UIImageView!

    @IBOutlet weak var myTextView: UITextView!

    override func awakeFromNib() {
        super.awakeFromNib()
        // Initialization code
    }

    override func setSelected(_ selected: Bool, animated: Bool) {
        super.setSelected(selected, animated: animated)

        // Configure the view for the selected state
    }

}
- UITableViewCell のclass をCustomCellTableViewCell 設定
-
Drag&DropでリレーションmyImageView myTextView を連結
-
Assets.xcassetsにImage1を追加
ViewController.swift
import UIKit
import AlamofireImage
class ViewController: UIViewController, UITableViewDelegate, UITableViewDataSource {
@IBOutlet weak var myTableview: UITableView!
override func viewDidLoad() {
super.viewDidLoad()
// Do any additional setup after loading the view, typically from a nib.
myTableview.dataSource = self
myTableview.delegate = self
}
func tableView(_ tableView: UITableView, numberOfRowsInSection section: Int) -> Int {
return 10
}
func numberOfSections(in tableView: UITableView) -> Int { // sectionの数を決める
return 1
}
func tableView(_ tableView: UITableView, heightForRowAt indexPath: IndexPath) -> CGFloat {
// Cellの高さを決める
return 50
}
func tableView(_ tableView: UITableView, cellForRowAt indexPath: IndexPath) -> UITableViewCell {
// セルを取得する
let cell: CustomCellTableViewCell = tableView.dequeueReusableCell(withIdentifier: "mycell", for: indexPath) as! CustomCellTableViewCell
// セルに表示する値を設定する
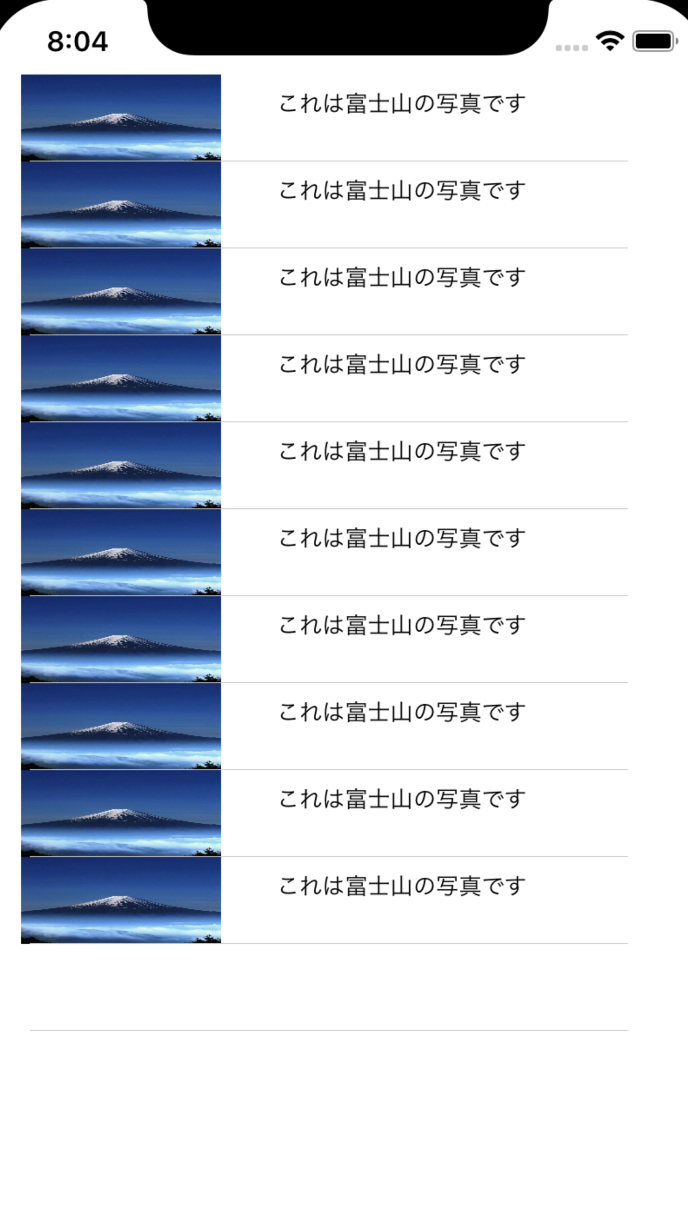
cell.myTextView?.text = "これは富士山の写真です"
cell.myImageView?.image = UIImage(named:"Image1")!
return cell
}
}
- 実行