はじめに
本稿は下記流れに沿って、axios+SAM+API Gatewayを利用して、GET及びPOSTメソッドのAPIを叩けるところまでを目標としています。
- SAMを利用して、API Gateway及びlambdaを構築
- ローカルから先程作成したAPI GatewayのGETメソッドを叩く
- ローカルから先程作成したAPI GatewayのPOSTメソッドを叩く
前回「ローカルから先程作成したAPI GatewayのGETメソッドを叩く」ということを試しました。その際に、「ドメインが異なる場合はCORSを意識する必要がある」ということを学びました。具体的には、API側でドメイン間でのリソースを共有を許可するような内容をheaderに含んで返却する必要がある、ということでした。
今回は、「ローカルから先程作成したAPI GatewayのPOSTメソッドを叩く」ということを試していきたいと思います。
3. ローカルから先程作成したAPI GatewayのPOSTメソッドを叩く
ではPOSTメソッドを叩けるようにしていきたいと思います。まずはAPI側の実装をしていきます。
POSTのAPIとして以下のlambdaを作成します。
// post_item.py
import json

# import requests


def lambda_handler(event, context):
    print(event)
    msg = json.loads(event['body'])['message']
    return {
        "statusCode": 200,
        'headers': {
            'Access-Control-Allow-Headers': 'Content-Type',
            'Access-Control-Allow-Origin': '*',
            'Access-Control-Allow-Methods': 'OPTIONS,POST,GET'
        },
        "body": json.dumps({
            "message": "you posted this message: " + msg
        }),
    }
またこのlambdaをSAMで管理できるよう、template.yamlを修正します。
Resources:
  PostItemFunction:
    Type: AWS::Serverless::Function # More info about Function Resource: https://github.com/awslabs/serverless-application-model/blob/master/versions/2016-10-31.md#awsserverlessfunction
    Properties:
      CodeUri: post_item/
      Handler: post_item.lambda_handler
      Runtime: python3.7
      Events:
        HelloWorld:
          Type: Api # More info about API Event Source: https://github.com/awslabs/serverless-application-model/blob/master/versions/2016-10-31.md#api
          Properties:
            Path: /post_items
            Method: post
そしてこれらをビルド・デプロイしてAPI側の準備は完了です。
続いてアプリ側の修正を行います。今回はPOSTメソッドに対応した処理を追加します。
// App.js
import React, {Component} from 'react';
import axios from 'axios';

class App extends Component {
    constructor(props){
        super(props);
        this.state = {
            'appMessage': 'hello,app',
            postApiMessage: 'before post'
        };
        this.doChange = this.doChange.bind(this);
        this.getApi = this.getApi.bind(this);
        this.postApiMessage = this.postApiMessage.bind(this);
    }

    instance = axios.create({
        baseURL: 'https://flz1roclul.execute-api.ap-northeast-1.amazonaws.com/Prod'
    });

    doChange(e){
        this.setState({
            message: e.target.value
        })
    }

    getApi(){
        this.instance.get('/hello')
            .then((response) => {
                this.setState({
                    'appMessage': response.data['message']
                })
            })
            .catch(() => {
                this.setState({
                    'appMessage': 'faild get message from button'
                })
            })
    }

    postApiMessage(){
        this.instance.post('/post_items', {'message': this.state.message})
          .then((results)=>{
            //console.log(results.json())
            console.log(results)
            this.setState({
              'postApiMessage': 'postApiSuccess! ' + results.data['message']
            })
          })
          .catch((results) => {
            console.log(results)
            this.setState({
              'postApiMessage': 'postApiFailed' + results
            })
          })
      }

    render(){
        return(
            <div>
                <p>{this.state.postApiMessage}</p>
                <form>
                    <input type="text" value={this.state.message} onChange={this.doChange}/>
                    <input type="button" value="post api" onClick={this.postApiMessage} />
                </form>
                <div>{this.state.appMessage}</div>
                <input type='button' onClick={this.getApi} value="button" />
            </div>
        )
    }
}

export default App;
今回の処理は、アプリ側でポストした内容をAPI側でくっつけて返却するという単純なものです。
前回の反省を活かし、今回はAPI側に必要なheaderを予め追加しておいたので、大丈夫だと思います!
何がだめったのか?
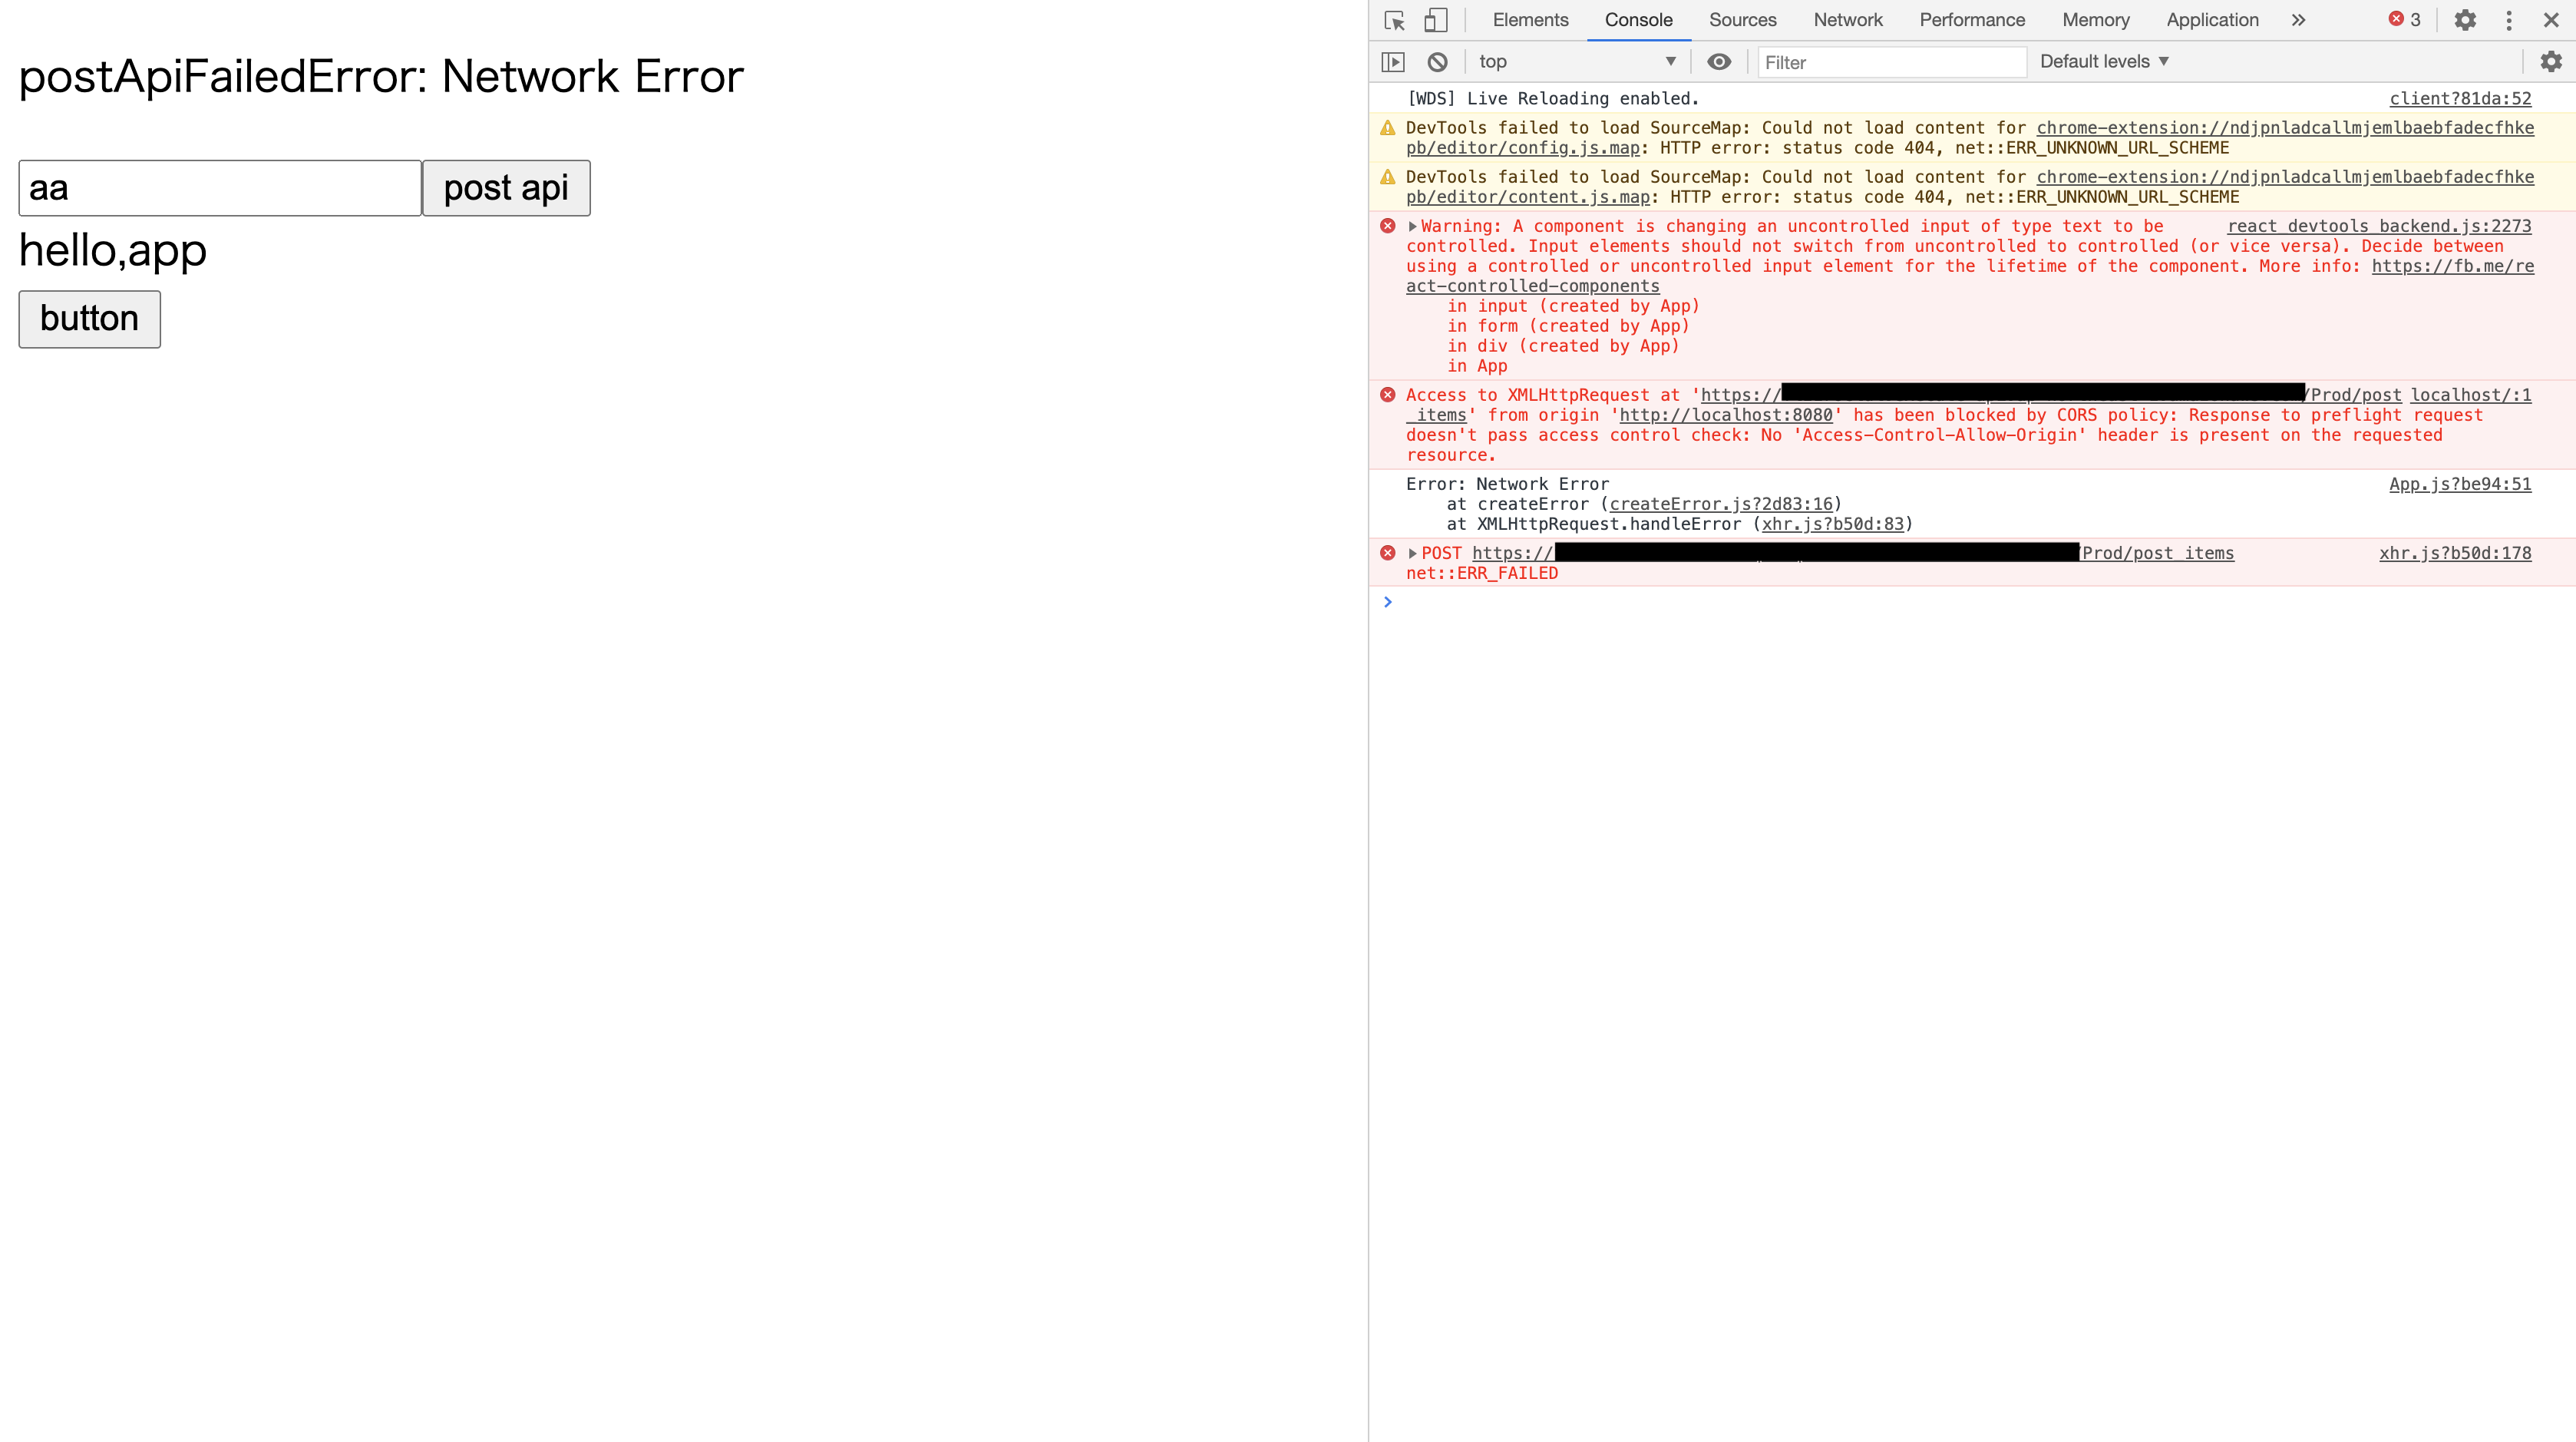
今回のエラーメッセージは以下のとおりです。
Access to XMLHttpRequest at 'https://{APIのURL}/Prod/post_items' from origin 'http://localhost:8080' has been blocked by CORS policy: Response to preflight request doesn't pass access control check: No 'Access-Control-Allow-Origin' header is present on the requested resource.
'Access-Control-Allow-Origin'はつけたはずなのになんで?と思っていたのですが、今回重要なのは次の箇所でした
Response to preflight request doesn't pass access control check
調べてみると、特定の条件を満たすと、実際のメソッドが実行される前にOPTIONSメソッドが実行される(だからpreflight)ようです。で今回はそれに対応するメソッドが用意されてなかったので、エラーとなったと。
というわけで対策をしようと思います。メソッド部分は必要なheaderを返すだけでよいので以下のようにしました。
// post_item_options.py
import json

# import requests


def lambda_handler(event, context):
    return {
        "statusCode": 200,
        'headers': {
            'Access-Control-Allow-Headers': 'Content-Type',
            'Access-Control-Allow-Origin': '*',
            'Access-Control-Allow-Methods': 'OPTIONS,POST,GET'
        },
        "body": json.dumps({
            "message": "this is the method to avoid cors for post method"
            # "location": ip.text.replace("\n", "")
        }),
    }
そしてこれをtemplate.yamlに追加します。
Resources:
  PostItemOptionsFunction:
    Type: AWS::Serverless::Function # More info about Function Resource: https://github.com/awslabs/serverless-application-model/blob/master/versions/2016-10-31.md#awsserverlessfunction
    Properties:
      CodeUri: post_item_options/
      Handler: post_item_options.lambda_handler
      Runtime: python3.7
      Events:
        HelloWorld:
          Type: Api # More info about API Event Source: https://github.com/awslabs/serverless-application-model/blob/master/versions/2016-10-31.md#api
          Properties:
            Path: /post_items
            Method: options
大事なのは、POSTメソッドとPathは同じにすることです。これは、preflightメソッドは送信しようとしたメソッドに対して飛ぶためです。
もう一度やってみた
API側の修正を行ったので、もう一度チャレンジしてみました。

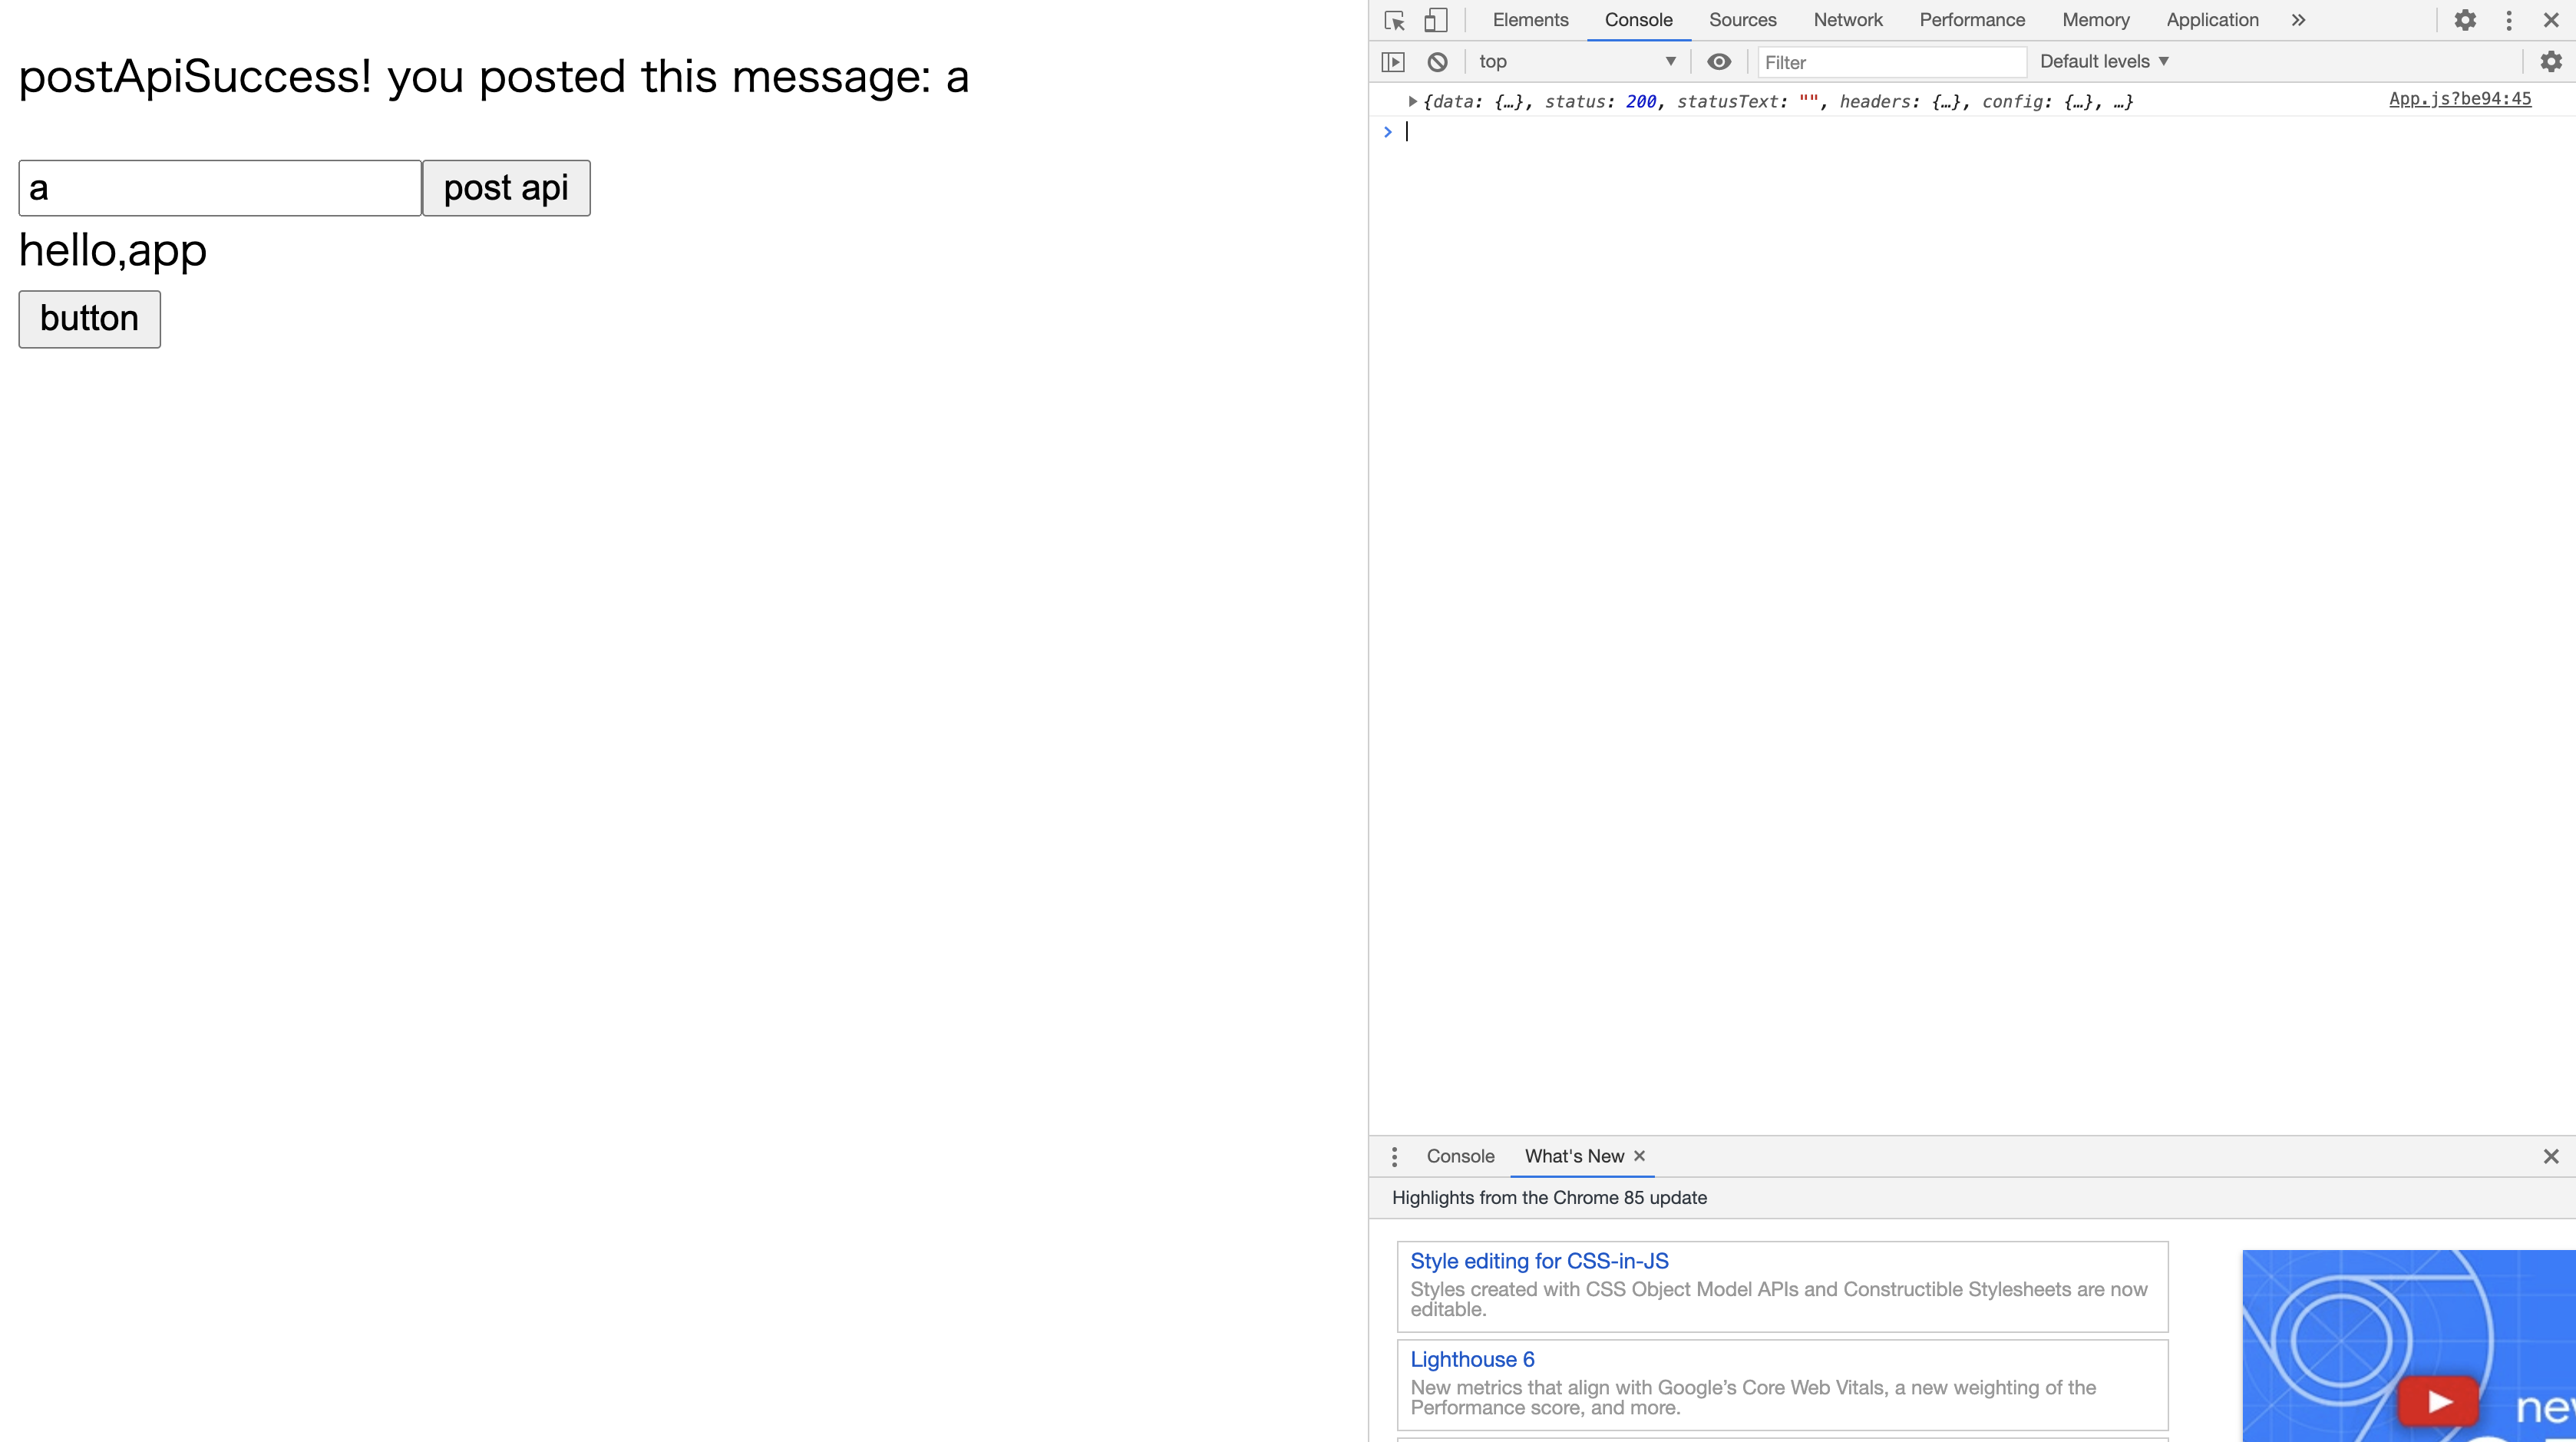
無事postが成功して、メッセージが返却されました!
終わりに
無事API環境を構築し、アプリからGET及びPOSTAPIを叩けるようになりました。「ただURLとメソッドを指定して叩けばいい」と思っていたので、まさかheader云々でこんなにハマるとは思わなかったです。もし本稿が同じような悩みに直面している人の助けになれば幸いです。
