はじめに
先日、手持ちのWindowsPCでFlutterを使ってアプリ開発をしてみようと試したが、サンプルアプリですらエミュレータ上の起動で時間がかかり、開発不可能だった。。。
AWSのMACインスタンスを考えたが、専有ホストが必要らしく料金的にきつかったので、メモリを多めに積んだLinux系のVMインスタンスで構築することが可能か試してみた。
実行環境
【ローカルPC-OS】
Windows 10 Pro
UltraVNC_1_3_2_X64(Viewerのみ)
本記事の流れ
1.GCP上のVMインスタンスをセットアップ
2.Flutter SDK のインストールとPATH設定
3.デスクトップ環境のセットアップ
4.Android Studioのセットアップ
5.VScodeおよびプラグインのインストール
6.Flutterプロジェクトの作成
1.GCP上のVMインスタンスをセットアップ
デフォルトのVMインスタンスでは "ネストされた仮想化のサポートが有効" になっていないため、エミュレータを起動できない。
※簡単に言うと、VM(仮想環境)の上でエミュレータ(仮想環境)を動かせない状態だということ。
そのため、VMインスタンスを作成する元のイメージから、少しと特別な手を加える方法がある。
※基本的にはこれを参考に ⇒ https://cloud.google.com/compute/docs/instances/enable-nested-virtualization-vm-instances?hl=ja
GCP上の cloud shell で以下を実行
イメージの元となるブートディスクを作成
ブート作成に使うimage名の確認
# debianの場合
$ gcloud compute images list --project debian-cloud --no-standard-images

# ubuntuの場合
$ gcloud compute images list --project ubuntu-os-cloud --no-standard-images

# windows
$ gcloud compute images list --project gce-uefi-images --no-standard-images
ブートディスクの作成
$ gcloud compute disks create disk-ubuntu18-tokyo-100 \
--image-project ubuntu-os-cloud \
--image-family ubuntu-1804-lts \
--size 100 \
--zone asia-northeast1-b
※ここで作成されたディスクはGCPナビゲーションメニューのComputer Engine > ディスク より確認ができる。ブラウザからGCPメニューでVMインスタンスを作成した場合も、ここのディスクができる。
ブートディスクからイメージを作成
※このタイミングで、"ネストされた仮想化のサポートを有効" にしている。
$ gcloud compute images create img-ubuntu18-tokyo-100 \
--source-disk disk-ubuntu18-tokyo-100 \
--source-disk-zone asia-northeast1-b \
--licenses "https://compute.googleapis.com/compute/v1/projects/vm-options/global/licenses/enable-vmx"
※ここで作成されたイメージはGCPナビゲーションメニューのComputer Engine > イメージ より確認ができる。
イメージからVMインスタンスを作成
$ gcloud compute instances create vm-ubuntu18-tokyo-ssd100 \
--zone asia-northeast1-b \
--min-cpu-platform "Intel Haswell" \
--image img-ubuntu18-tokyo-100 \
--custom-cpu 8 \
--custom-memory 48 \
--boot-disk-type=pd-ssd
ここから先はVMインスタンスに入りシェルで実行
必要Toolの確認(なければインストール)
$ sudo apt update
$ sudo apt -y upgrade
$ sudo apt install -y bash curl file git unzip xz-utils zip
Flutterのテストコマンドで必要らしいパッケージ
$ sudo apt install -y libglu1-mesa
Android Studioのエミュレータを起動させる時に必要
$ sudo apt install -y qemu-kvm libvirt-bin ubuntu-vm-builder bridge-utils
$ sudo gpasswd -a 【アカウント名】 libvirt
$ sudo gpasswd -a 【アカウント名】 kvm

# 確認
$ grep libvirt /etc/group
$ grep kvm /etc/group
VScodeのインストール
$ curl -L https://go.microsoft.com/fwlink/?LinkID=760868 -o vscode.deb
$ sudo apt install ./vscode.deb
$ code --version
1.53.0
8490d3dde47c57ba65ec40dd192d014fd2113496
x64
ここで一旦再起動
2.Flutter SDK のインストールとPATH設定
公式ページを参考に最新版のリンクからダウンロード。(公式ページ)
# Flutter SDK のダウンロード
$ wget https://storage.googleapis.com/flutter_infra/releases/stable/linux/flutter_linux_1.22.6-stable.tar.xz

# 任意の解凍先を作り、移動して解凍
$ mkdir ~/development
$ cd ~/development
$ sudo tar xf ~/flutter_linux_1.22.6-stable.tar.xz

# PATHの設定(現在のターミナルのみで一時的に有効)
$ export PATH="$PATH:`pwd`/flutter/bin"

# PATHの設定を確認
$ echo $PATH
*****************:/home/******/development/flutter/bin

# PATHの設定の反映
$ source ~/.bashrc
※PATHの設定を永続化したい場合は、~/.profileの最下行にPATH="$PATH:/home/【アカウント名】development/flutter/bin"を追記。
Flutter doctor を実行
$ flutter doctor
Doctor summary (to see all details, run flutter doctor -v):
[✓] Flutter (Channel stable, 1.22.6, on Linux, locale ja_JP.UTF-8)
[✗] Android toolchain - develop for Android devices
    ✗ Unable to locate Android SDK.
      Install Android Studio from: https://developer.android.com/studio/index.html
      On first launch it will assist you in installing the Android SDK components.
      (or visit https://flutter.dev/docs/get-started/install/linux#android-setup for detailed instructions).
      If the Android SDK has been installed to a custom location, set ANDROID_SDK_ROOT to that location.
      You may also want to add it to your PATH environment variable.
[!] Android Studio (not installed)
[!] VS Code (version 1.53.0)
    ✗ Flutter extension not installed; install from
      https://marketplace.visualstudio.com/items?itemName=Dart-Code.flutter
[!] Connected device
    ! No devices available
! Doctor found issues in 3 categories.
※もし以下の様なエラーが出る場合は、権限の有効化を!
mkdir: cannot create directory ‘/home/*******/development/flutter/bin/cache’: Permission denied
$ sudo chmod 777 -R ~/development/flutter
3.デスクトップ環境のセットアップ
Android Studio を入れる際にグラフィックが必要になるので、このタイミングでリモート接続のためのセッティングをしておく。 ※手順的には2番目でも問題ないかも?
デスクトップ環境のインストールとRDP接続準備
$ sudo apt install -y ubuntu-desktop xrdp
$ sudo systemctl enable xrdp
$ sudo systemctl start xrdp
日本語キーボードの設定(コンソール)
$ sudo dpkg-reconfigure keyboard-configuration
色々聞かれるが以下の順番で設定。
⇒ Generic 105-key PC (intl.)
⇒ Japanese
⇒ Japanese
⇒ The default for the keyboard layout
⇒ No compose key
RDP接続する際のパスワードを設定 (デフォルトのGCPアカウントではパスワード設定していないはずなので)
$ sudo passwd 【アカウント名】
※VNCサーバーを使う場合は以下!
$ sudo apt install vnc4server
パスワード設定
$ vncpasswd
Password:
Verify:
軽量なデスクトップlxdeをいれる (エミュレータの表示が正常かどうかは不明)
$ sudo apt install lubuntu-desktop
初回起動をして設定ファイルを作成
$ vncserver :1

# 起動確認ができたら一旦停止
$ vncserver -kill :1
設定ファイル~/.vnc/xstartupを編集
# 一番下の行をコメントアウトして1行追加。
・
・
# x-window-manager &
/usr/bin/startlxde &
画面の解像度を決めてVNCサーバーを起動
$ vncserver -geometry 1920x1200 :1
UltraVNC Viewer で以下に接続できればOK
※GCP上でファイアウォールの開放を忘れない!
【外部IP】:5901
4.Android Studioのセットアップ
基本的には公式サイトの手順を参照
https://developer.android.com/studio/install?hl=ja
Android Studioのダウンロードと解凍
$ cd ~/
$ wget https://redirector.gvt1.com/edgedl/android/studio/ide-zips/4.1.2.0/android-studio-ide-201.7042882-linux.tar.gz

$ cd /opt/
$ sudo tar xf ~/android-studio-ide-201.7042882-linux.tar.gz
Android Studioのコンポーネントインストール
RDP接続してデスクトップ環境上からターミナルを開き、以下を実行する。
$ /opt/android-studio/bin/studio.sh
Android Studioが立ち上がるので初期設定して、必要なコンポーネントをインストール
※特に難しいことはないが、【Windows10上にFlutterの開発環境を構築する。】の手順2を参考に。
試しにエミュレータがちゃんと立ち上がるか確認
この段階で一旦チェック
$ flutter doctor
Doctor summary (to see all details, run flutter doctor -v):
[✓] Flutter (Channel stable, 1.22.6, on Linux, locale en_US.UTF-8)

[!] Android toolchain - develop for Android devices (Android SDK version 30.0.3)
    ✗ Android licenses not accepted.  To resolve this, run: flutter doctor --android-licenses
[!] Android Studio
    ✗ Flutter plugin not installed; this adds Flutter specific functionality.
    ✗ Dart plugin not installed; this adds Dart specific functionality.
[!] VS Code (version 1.53.0)
    ✗ Flutter extension not installed; install from
      https://marketplace.visualstudio.com/items?itemName=Dart-Code.flutter
[!] Connected device
    ! No devices available
大きく2つの問題が発生!
① Androidライセンス契約に同意していない。
② Android StudioにFlutterやDartのプラグインがインストールされていないとのこと。
⇒ 今回はVScodeをつかうため、このエラーは問題なし。
③ VScodeにFlutterの拡張機能がインストールされていない。
⇒ 手順5で解決。
$ flutter doctor --android-licenses
# 全て『y』でOK
・・・
・・・
All SDK package licenses accepted
$ flutter doctor
Doctor summary (to see all details, run flutter doctor -v):
[✓] Flutter (Channel stable, 1.22.6, on Linux, locale C.UTF-8)

[✓] Android toolchain - develop for Android devices (Android SDK version 30.0.3)
[!] Android Studio
    ✗ Flutter plugin not installed; this adds Flutter specific functionality.
    ✗ Dart plugin not installed; this adds Dart specific functionality.
[!] Connected device
    ! No devices available
5.VScodeにプラグインのインストール
以下の作業は、RDP接続してデスクトップ環境上から行う
TerminalからVScodeを起動
$ code
Flutterをインストール(※Dartも一緒にインストールされる。)
Flutter Widget Shippets もインストール
※必須ではないが、開発する際に便利らしいのでインストールしておく。
6.Flutterプロジェクトの作成
プロジェクト作成
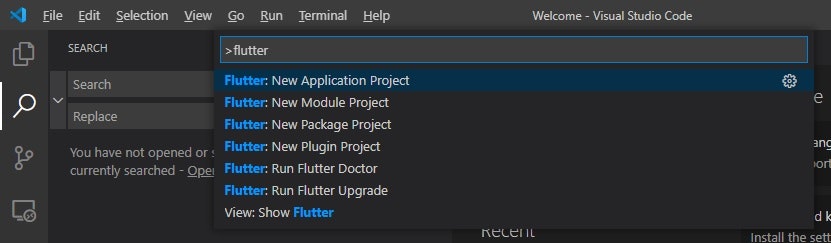
VScodeを立ち上げ、F1で入力欄を表示させたら、そこで>flutterと入力。
出てきた候補の中からNew Application Projectをクリック。
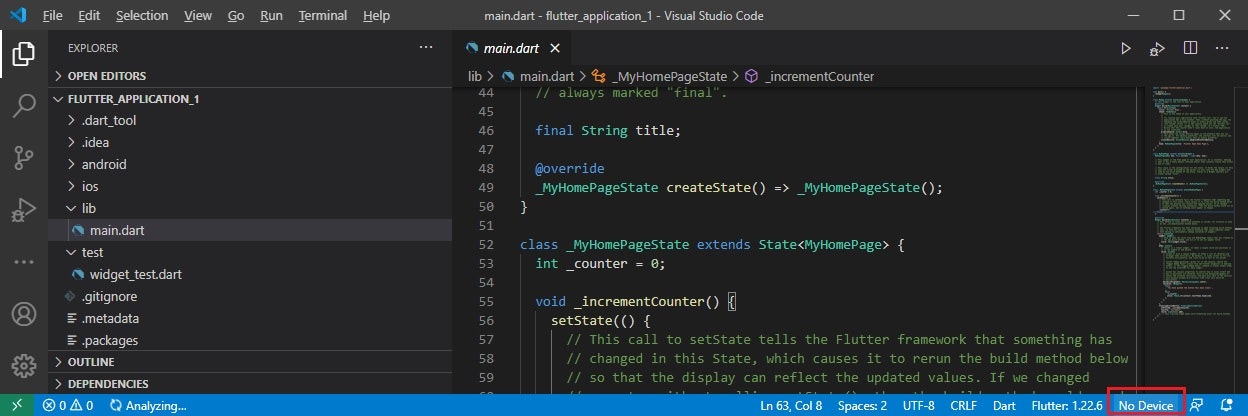
プロジェクトを作成するフォルダを指定して、『Select a folder...』をクリック。
エミュレータ上での起動確認
プロジェクト作成後、main.dartが開かれているので、右下の【No Devices】をクリックして、作成済みのエミュレータをどれか選択する。そうするとエミュレータが起動する。
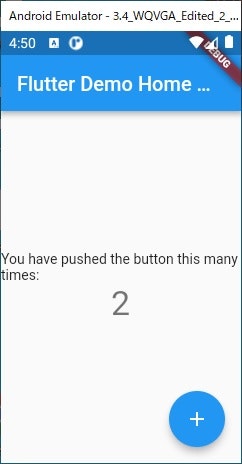
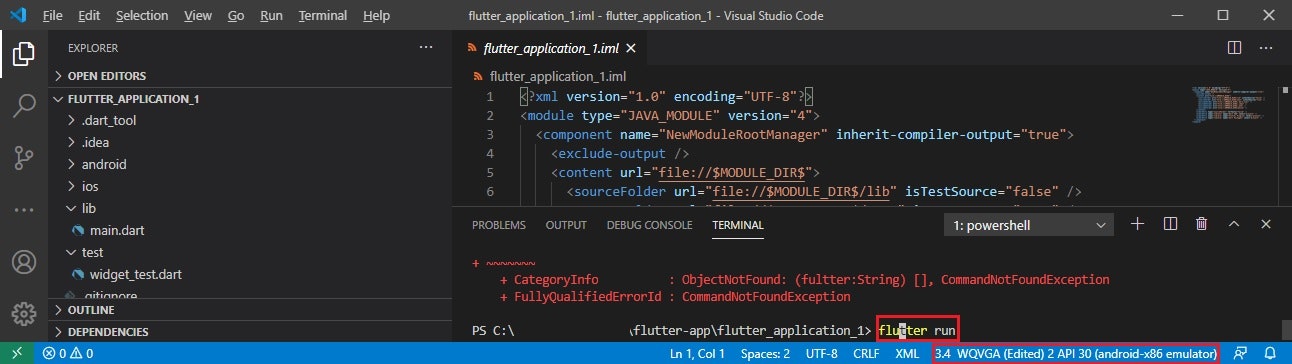
エミュレータが起動した状態で、TERMINALからflutter runを実行すると、動くはず。(結構待つ)
下図の様に、サンプルのアプリが開けばOK!