はじめに
初心者対応構成
- Windowsからの導入手順
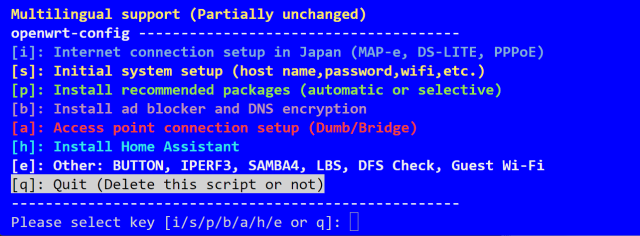
- スクリプトでの自動設定
-
UCI (ttyd)、Webコンソール (LuCi)、ファイラー (SFTP)にて比較作業がおススメ

デバイスアクセス
PowerShellの開始
- キー入力:
Win+x>a>はい
UCI(SSH)アクセス
ssh -o StrictHostKeyChecking=no root@192.168.1.1
- root@192.168.1.1's password:
初期値:パスワード無し
OpenSSHのインストールが無い場合
- 機能の確認
※Windows 10 Fall Creators Update(1709)以降標準搭載
Get-WindowsCapability -Online | Where-Object Name -like 'OpenSSH*'
- 機能のインストール
Add-WindowsCapability -Online -Name OpenSSH.Server~~~~0.0.1.0
既知の問題
- 非公式ファームウェア
-
Buffalo WSR-6000AX8 のサポートを追加 #13107
公式とバージョンは同じでも非公式ファームウェアなので本家には無い不具合が発生するかもしれません - MT7981及びMT7986ではCPU周波数スケーリングはサポートされていません
- WiFiアップロードで通信途絶
ファームウェアについて
デバイスについて
OpenWrt化手順:Flash instruction using initramfs image:
事前準備
- スクリプト: buffalo
- ディレクトリ:
C:\openwrt
警告 > 強制的に貼り付け
Set-ExecutionPolicy Unrestricted
New-Item C:\openwrt -ItemType Directory -Force
Invoke-WebRequest -Uri "https://raw.githubusercontent.com/site-u2023/buffalo/main/wsr-6000ax8.ps1" -OutFile "C:\openwrt\wsr-6000ax8.ps1"
C:\openwrt\wsr-6000ax8.ps1
デバイスをインターネット回線から物理的切断(ONU・HGWからLAN線を外す)
3. AOSSボタンを押しながらルーターの電源を接続し、TFTPダウンロードが開始されるまで押したままにする
デバイス(WSR-6000AX8)のAOSSボタンを押しながら電源に接続
TFTPダウンロードが開始されるまで押したままにする
※10数秒程度でログが出る
- 以下2行のログを確認しServaを閉じる
[**/** **:**:**.***] TFTP Inf: Read file <linux.ubi-recovery>. Mode octet[**/** **:**:**.***] TFTP Inf: <linux.ubi-recovery>: sent blks=5393 blkSz=1468, Total 7916412 bytes in 2s, err recovery=0
- ルーターが自動で再起動
※うまくいかない場合、以下からServaを起動させ再度実行
& "C:\openwrt\Serva\Serva64.exe"
-
I am"Community" userを選択 -
左上アイコンをダブルクリック -
TFTPタブを選択- Service Up/Down
-
TFTP Serverにチェック
-
- THTP Server IP address
-
192.168.11.10になっている事を確認
-
- THTP Server root directory
-
Browseをクリック
C:\openwrt\tftpdroot\linux.ubi-recoveryを指定-
Selectをクリック
-
-
-
OKをクリック
- Service Up/Down
4. TFTPダウンロードが終了するとカーネルが起動するので 192.168.1.x/24 のマシンからSCPで ??-squashfs-sysupgrade.bin をターゲット(root@192.168.1.1:/tmp)にコピーする
C:\openwrt\ip\192-168-1-2.ps1
scp -r C:\openwrt\buffalo\openwrt-mediatek-filogic-buffalo_wsr-6000ax8-squashfs-sysupgrade.bin root@192.168.1.1:/tmp/openwrt-mediatek-filogic-buffalo_wsr-6000ax8-squashfs-sysupgrade.bin
公開されているメーカーファームウェアを使用して元のファームウェアに戻すことが可能になったのでバックアップは必須ではなくなった
6. 後でメーカーファームウェアに戻したい場合はここで ubi パーティション(/dev/mtd5) のバックアップを取る (取得後ルーター外に転送するのを忘れずに)
- tmpフォルダで作業
cat /proc/mtd # 確認
dd if=/dev/mtd5 of=/tmp/mtd5.firmware
Windowsのダウンロードフォルダにファイルを保存
- TeraTerm
- ファイル
- CCH SCP
- 点線の下段
From:/tmp/mtd5.firmware
To:C:\Users\%username%\Downloads - Receive
※ ダウンロードフォルダに格納
- ファイル
絶対に電源は抜かない事
デバイスをインターネット回線に物理的接続(ONU・HGWからLAN線に繋ぐ)
新規設定用 オールインワンスクリプト 初心者対応
デバイス更新
メーカーファームウェアの復元方法
事前準備
以下をダウンロード
-
WSR-6000AX8シリーズ ファームウェア (Windows) Ver.1.02
※所定のダウンロードフォルダ(.\Downloads\wsr6000ax8-102.exe)に保存必須
メーカーファームウェアを buffalo-enc で復号し sysupgrade -F -n で書き込む
警告 > 強制的に貼り付け
& ".\Downloads\wsr6000ax8-102.exe"
New-Item C:\openwrt\ -ItemType Directory -Force
Invoke-WebRequest -Uri "https://github.com/musashino205/firmware-wintools/releases/download/0.6.5.2/firmware-wintools_0.6.5.2.zip" -OutFile "C:\openwrt\firmware-wintools.zip"
Expand-Archive -Path C:\openwrt\firmware-wintools.zip -DestinationPath C:\openwrt\ -Force
Remove-item C:\openwrt\firmware-wintools.zip
C:\openwrt\firmware-wintools\firmware-wintools.exe buffalo-enc -i C:\BUFFALO\wsr6000ax8-102\wsr_6000ax8_jp_102 -o C:\BUFFALO\wsr6000ax8-102\wsr_6000ax8_jp_102.bin \ -d -k Buffalo -O 0xc8 -l
scp -r C:\BUFFALO\wsr6000ax8-102\wsr_6000ax8_jp_102.bin root@192.168.1.1:/tmp/wsr_6000ax8_jp_102.bin
ssh root@192.168.1.1
yes
※SSHログイン出来ない場合、以下を削除(隠しファイル)
C:\Users\yourusername\.ssh\known_hosts
Clear-Content .ssh\known_hosts -Force
- 確認
hexdump -n 64 -v -C /tmp/wsr_6000ax8_jp_102.bin
- メーカーファームウェア復元
sysupgrade -F -n /tmp/wsr_6000ax8_jp_102.bin
- 自動再起動
絶対に電源は抜かない事
数分待つ
-
192.168.11.1でログイン
あとがき
令和5年7月現在、デバイスは中古市場ではまだまだ高い
安く手に入ったので検証してみました
WiFiでベンチマークするとアップロードでネットワークが落ちる、が自動復旧する
この辺がヒントか
IPV6(OCNバーチャルコネクトの為V4はmapでファイアーウォールを使う)は800超えてもCPU負荷無し
※ハードウェア フローオフロード要チェック
NIC接続はWXR-5950AX12より速い(WiFi接続は同等)
書き換えなくても、まんまsysupgradeだった
再起動したらストックファーム
チョー簡単でした
感謝です


