はじめに
https://qiita.com/sinnsa233048/items/7651deab6a5461a6b23e の続き
Raspberry Piをサーバとして使用するのにセットアップのためだけにディスプレイとキーボードをつなげるのは面倒!
こんな煩わしさを解消するためのTips
お品書き
今回は以下のパターンのセットアップについて見ていきます。
- Raspberry Pi OS(前回)
- SDカード使用
- USBメモリ使用
- Ubuntu Server(今回はここにフォーカスします)
- SDカード使用
- USBメモリ使用
Ubuntu Serverのセットアップ
ブードローダの設定変更
Raspberry Pi4でUbuntu ServerをUSBメモリから起動する場合、ブートローダーの設定変更をする必要があります
以下のドキュメントを参考にしてください
https://www.raspberrypi.org/documentation/hardware/raspberrypi/booteeprom.md
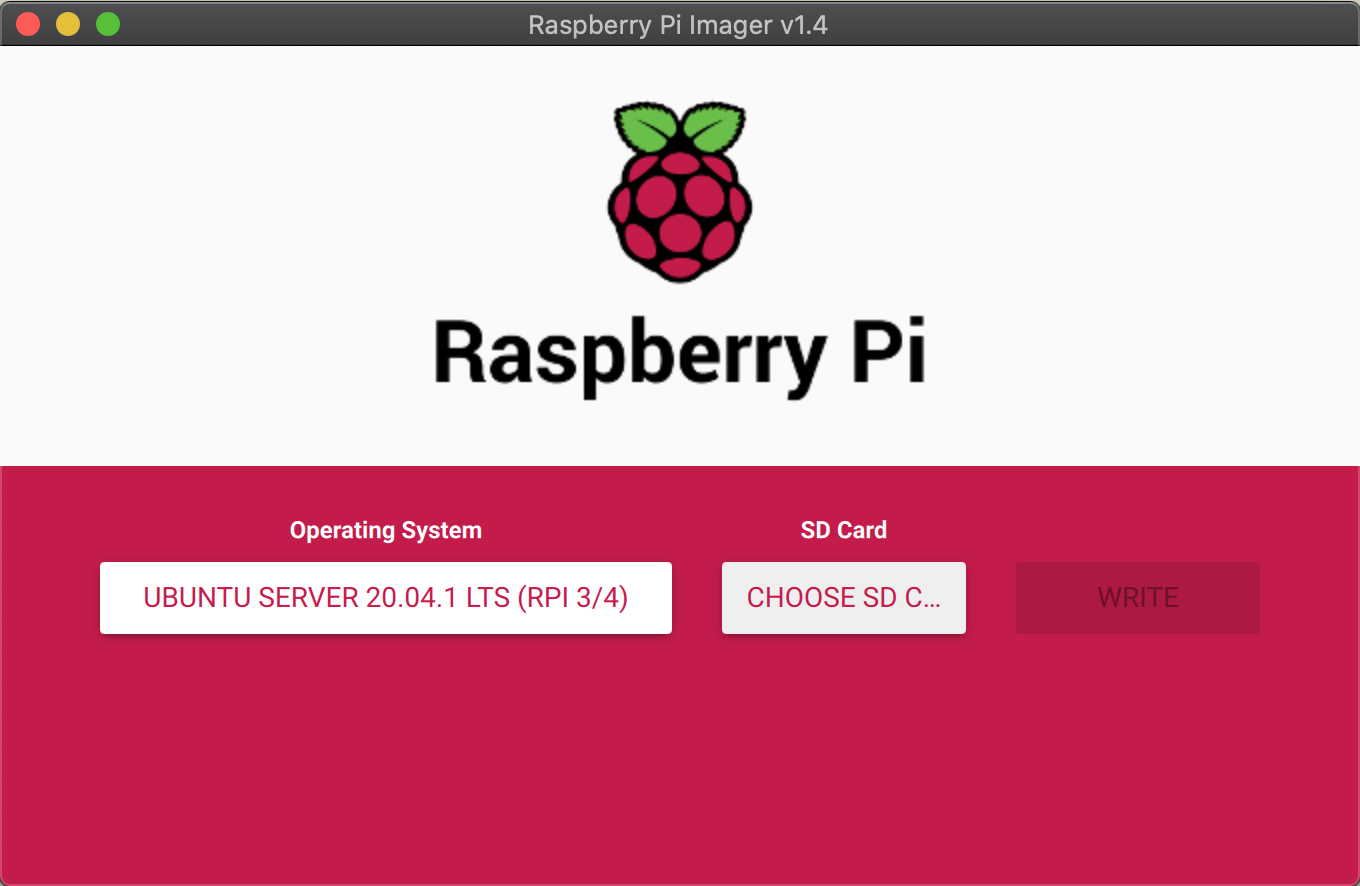
Raspberry Pi Imagerでのディスクの書き込み
SDカード、USBメモリ共通の手順です
OSの選択
Ubuntu Server 20.04.1 LTS(64bit)を選択します

ディスクの選択
書き込み
WRITEを押して書き込み。
書き込み完了後ディスクはアンマウントされてしまうので再度装入し直してください。
wifi接続設定ファイルの作成
接続設定ファイルについて
Ubuntu Server向けの接続設定ファイルはnetplanライクな記載になります。
以下のテンプレートの{SSID}と{WPAキー}を埋めたものを用意してください。
(networkというファイル名で保存しておきます)
Ubuntu Serverでは起動時にmDNSのサービスがデフォルトでは起動せず、[ホスト名].localでのアクセスができないです。そのため固定IPを振っておくことをおすすめします。
固定IPやデフォルトゲートウェイの設定変更は
- https://netplan.io/reference
-
https://www.komee.org/entry/2018/06/12/181400
を参照して設定してください。(そんなに難しくないはず)
# This file contains a netplan-compatible configuration which cloud-init
# will apply on first-boot. Please refer to the cloud-init documentation and
# the netplan reference for full details:
#
# https://cloudinit.readthedocs.io/
# https://netplan.io/reference
#
# Some additional examples are commented out below

version: 2
wifis:
  wlan0:
    dhcp4: true
    optional: true
    access-points:
      {SSID}:
        password: "{WPAキー}"
設定ファイルをSDカード/USBメモリに転送
先程作成したnetworkファイルをSDカード/USBメモリのルートディレクトリに配置してください。
macでの手順は以下です
$ ls network
network
$ cp network /Volumes/system-boot/
$ ls -1 /Volumes/system-boot/network
/Volumes/system-boot/network
SDカードから起動する人はsshでRaspberry Pi接続に飛んでください。
USBメモリから起動するための設定変更
ここからが本番です
ここで話す内容はhttps://www.raspberrypi.org/forums/viewtopic.php?t=278791 に沿っています。
以降はすべてmacから実施する際の手順となります。(手元にWin端末がないためご容赦ください。。)
カーネルの解凍
gzで圧縮されているカーネルの解凍をしていきます。
$ cd /Volumes/system-boot/
$ pwd
/Volumes/system-boot/
$ ls vmlinuz
vmlinuz
$ sudo dd if=vmlinuz bs=1 | zcat > vmlinux
$ ls vmlinux
vmlinux
zcat vmlinuz > vmlinuxでも回答できるようなのですが、手元のmac端末ではエラーとなってしまったので上記の手順で実施しています。
ブート設定の変更
/Volumes/system-boot/config.txt内の
[pi4]
kernel=uboot_rpi_4.bin
max_framebuffers=2
を
[pi4]
max_framebuffers=2
dtoverlay=vc4-fkms-v3d
boot_delay
kernel=vmlinux
initramfs initrd.img followkernel
に置き換えてください。
kernelの自動解凍設定ファイルの作成
aptでkernelアップデートし、再起動後に正常に起動するよう自動解凍設定スクリプトを配置します。
$ pwd
/Volumes/system-boot/
$ touch auto_decompress_kernel
$ vi auto_decompress_kernel
以下の内容を記載
# !/bin/bash -e

# Set Variables
BTPATH=/boot/firmware
CKPATH=$BTPATH/vmlinuz
DKPATH=$BTPATH/vmlinux

# Check if compression needs to be done.
if [ -e $BTPATH/check.md5 ]; then
	if md5sum --status --ignore-missing -c $BTPATH/check.md5; then
	echo -e "\e[32mFiles have not changed, Decompression not needed\e[0m"
	exit 0
	else echo -e "\e[31mHash failed, kernel will be compressed\e[0m"
	fi
fi

# Backup the old decompressed kernel
mv $DKPATH $DKPATH.bak

if [ ! $? == 0 ]; then
	echo -e "\e[31mDECOMPRESSED KERNEL BACKUP FAILED!\e[0m"
	exit 1
else 	echo -e "\e[32mDecompressed kernel backup was successful\e[0m"
fi

# Decompress the new kernel
echo "Decompressing kernel: "$CKPATH".............."

zcat $CKPATH > $DKPATH

if [ ! $? == 0 ]; then
	echo -e "\e[31mKERNEL FAILED TO DECOMPRESS!\e[0m"
	exit 1
else
	echo -e "\e[32mKernel Decompressed Succesfully\e[0m"
fi

# Hash the new kernel for checking
md5sum $CKPATH $DKPATH > $BTPATH/check.md5

if [ ! $? == 0 ]; then
	echo -e "\e[31mMD5 GENERATION FAILED!\e[0m"
	else echo -e "\e[32mMD5 generated Succesfully\e[0m"
fi

# Exit
exit 0
念の為実行権限を与えておきます
$ sudo chmod +x auto_decompress_kernel
sshでRaspberry Pi接続
USBメモリ/SDカードを挿入し電源を入れる。
原因不明のまま記事を書いて申し訳ないのですが、初回起動時はなぜかNICがIPを割り当てず、sshでアクセスできない事象が発生する場合があります。
その際は電源を入れて5分程度してから電源の抜去/再挿入をしてください。
(5分の根拠は初回起動時にcloud-initの処理が完了する時間+数分のマージンをとった値です。)
sshでアクセス
ssh ubuntu@[Raspberry PiのIP]でアクセスできます。(PWはubuntu。ログイン時に強制PW再設定が走るのでプロンプトに従って操作してください。)
SDカードで起動する人はここまで
aptを実行した際にkernel自動解凍スクリプトをキックするよう設定
USBメモリに作成した自動解凍スクリプトが起動するよう設定していきます。
$ sudo vi /etc/apt/apt.conf.d/999_decompress_rpi_kernel
以下の内容を記載
DPkg::Post-Invoke {"/bin/bash /boot/firmware/auto_decompress_kernel"; };
実行権限の付与
$ sudo chmod +x /etc/apt/apt.conf.d/999_decompress_rpi_kernel
ここまで設定したら、再起動を行いkernelが起動することを確認しておいてください。
設定がうまく行っていない場合には起動時に(initramfs)のプロンプトが表示されて止まっているはず。
最後に
長文になりましたが閲覧頂きありがとうございました。
Raspberry PiはSDカードのDISK I/Oがボトルネックになるシーンが多いと感じたためこの記事がお役に立てると幸いです。
内容の不整合/質問等ありましたらコメントいただけると幸いです。
