はじめに
チュートリアルによくありがちな、「特定のViewに対して吹き出しのような表示を行って使い方などを案内する」という,いわゆるtootip的な表現がしたかったので、これを実現できるライブラリを探してみました。
Androidでこのような要件に使えるライブラリといえばandroid-target-tooltipが定番かなと思っていましたが、調べてみると同種のものとしてBalloonと言うとてもいい感じのライブラリを発見することができました。使い勝手などを調査してみたかったので、本記事ではこれに触ってみます。
「Balloon」について
ライブラリのURL(https://github.com/skydoves/Balloon)
特徴
- full-kotlin
- Javaが混ざってるとぬるぽに怯えながらコードを書くことになるので個人的には嬉しいポイントです。
- 「kotlin dsl」で記述できる
- このライブラリでは「kotlin dsl」を活用して直感的に見た目を定義できます
- コードだけで見た目を定義できる
- 人によってこれをメリットと捉えるか否かは分かれそうですが、個人的にはいちいちXMLで見た目定義したりするのは面倒に感じるところがあるので、メリットにあげています。
触ってみる
まずはシンプルに触ってみる
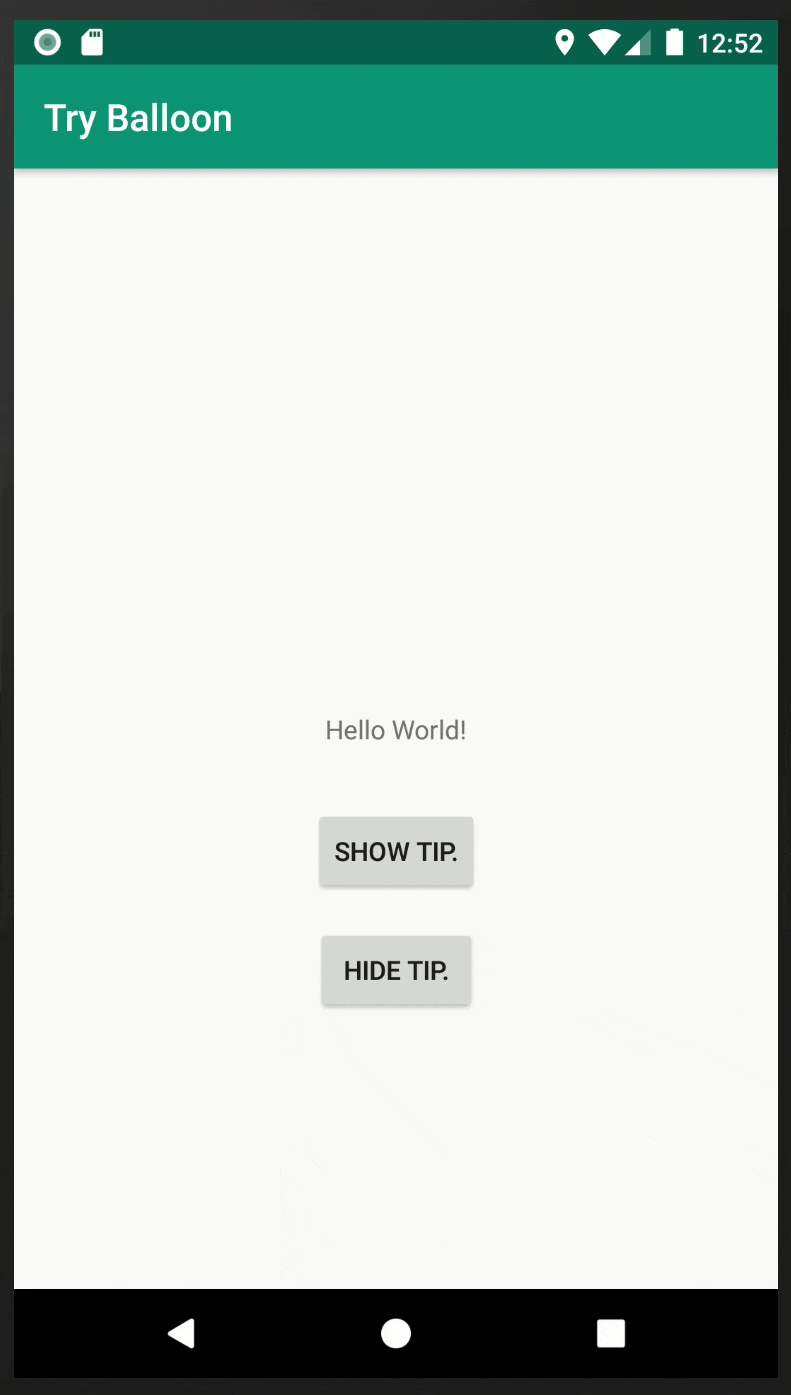
まずはシンプルに、「特定のViewに対してテキストを含んだtooltipを出す」というのを作ってみます。
以下のようにmain_activity.xmlを記述します。
<?xml version="1.0" encoding="utf-8"?>
<androidx.constraintlayout.widget.ConstraintLayout xmlns:android="http://schemas.android.com/apk/res/android"
    xmlns:app="http://schemas.android.com/apk/res-auto"
    xmlns:tools="http://schemas.android.com/tools"
    android:layout_width="match_parent"
    android:layout_height="match_parent"
    tools:context=".MainActivity">

    <TextView
        android:id="@+id/textView"
        android:layout_width="wrap_content"
        android:layout_height="wrap_content"
        android:text="Hello World!"
        app:layout_constraintBottom_toBottomOf="parent"
        app:layout_constraintLeft_toLeftOf="parent"
        app:layout_constraintRight_toRightOf="parent"
        app:layout_constraintTop_toTopOf="parent" />

    <Button
        android:id="@+id/button1"
        android:layout_width="wrap_content"
        android:layout_height="wrap_content"
        android:layout_marginTop="32dp"
        android:text="show tip."
        app:layout_constraintEnd_toEndOf="parent"
        app:layout_constraintStart_toStartOf="parent"
        app:layout_constraintTop_toBottomOf="@+id/textView" />

    <Button
        android:id="@+id/button2"
        android:layout_width="wrap_content"
        android:layout_height="wrap_content"
        android:layout_marginTop="16dp"
        android:text="hide tip."
        app:layout_constraintEnd_toEndOf="parent"
        app:layout_constraintStart_toStartOf="parent"
        app:layout_constraintTop_toBottomOf="@+id/button1" />
buttob1を押したらtextViewに対してtooltip表示、button2を押したら非表示、という感じで作ると以下のようになります。
class MainActivity : AppCompatActivity() {

    override fun onCreate(savedInstanceState: Bundle?) {
        super.onCreate(savedInstanceState)
        setContentView(R.layout.activity_main)

        val balloon = createBalloon(baseContext) {
            setArrowSize(10)
            setWidthRatio(0.5f)
            setHeight(65)
            setArrowPosition(0.5f)
            setCornerRadius(4f)
            setAlpha(0.9f)
            setText("Hello Balloon.")
            setBackgroundColorResource(R.color.colorPrimary)
            setBalloonAnimation(BalloonAnimation.FADE)
            setLifecycleOwner(this@MainActivity)
        }

        findViewById<Button>(R.id.button1).setOnClickListener {
            balloon.showAlignTop(findViewById(R.id.textView))
        }

        findViewById<Button>(R.id.button2).setOnClickListener {
            balloon.dismiss()
        }
    }
}
createBalloonの部分がkotlin dslになっています。書きやすく、読みやすいですね。
これは以下のように動作します。
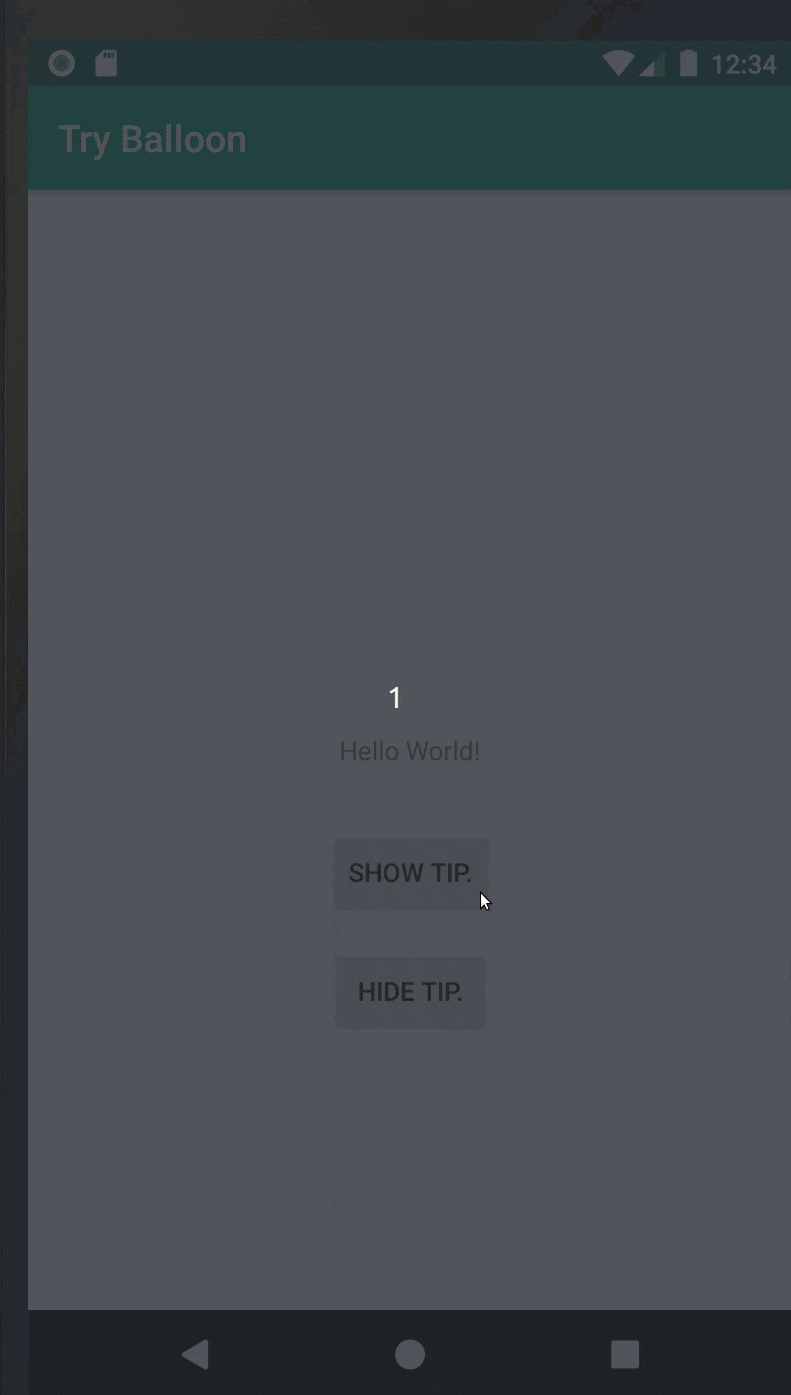
インターフェースが直感的なので、特に解説することはないかなーと思います。とても簡単にtooltipを表示することができました。
カスタムビューを表示してみる
次は独自に定義したViewを表示させてみましょう。これができると自由度が一気に広がるので捗ります。
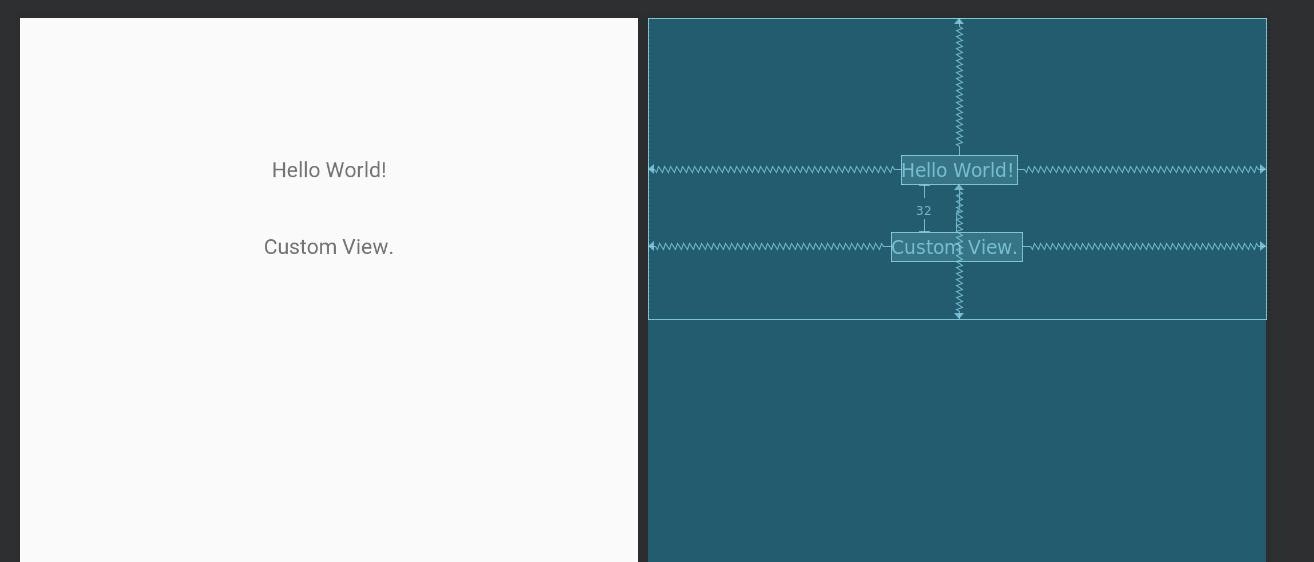
以下のようなViewを表示させてみます。
<?xml version="1.0" encoding="utf-8"?>
<androidx.constraintlayout.widget.ConstraintLayout xmlns:android="http://schemas.android.com/apk/res/android"
    xmlns:app="http://schemas.android.com/apk/res-auto"
    xmlns:tools="http://schemas.android.com/tools"
    android:layout_width="match_parent"
    android:layout_height="200dp">

    <TextView
        android:id="@+id/textView1"
        android:layout_width="wrap_content"
        android:layout_height="wrap_content"
        android:text="Hello World!"
        app:layout_constraintBottom_toBottomOf="parent"
        app:layout_constraintLeft_toLeftOf="parent"
        app:layout_constraintRight_toRightOf="parent"
        app:layout_constraintTop_toTopOf="parent" />

    <TextView
        android:id="@+id/textView2"
        android:layout_width="wrap_content"
        android:layout_height="wrap_content"
        android:layout_marginTop="32dp"
        android:text="Custom View."
        app:layout_constraintEnd_toEndOf="parent"
        app:layout_constraintStart_toStartOf="parent"
        app:layout_constraintTop_toBottomOf="@+id/textView1" />

</androidx.constraintlayout.widget.ConstraintLayout>
コードはこんな感じに書きます。
class MainActivity : AppCompatActivity() {

    override fun onCreate(savedInstanceState: Bundle?) {
        super.onCreate(savedInstanceState)
        setContentView(R.layout.activity_main)

        val balloon = createBalloon(baseContext) {
            setArrowSize(10)
            setWidthRatio(0.5f)
            setHeight(200)
            setArrowPosition(0.5f)
            setCornerRadius(4f)
            setAlpha(0.9f)
            setLayout(R.layout.custom_balloon)
            setBackgroundColorResource(R.color.colorPrimary)
            setBalloonAnimation(BalloonAnimation.FADE)
            setLifecycleOwner(this@MainActivity)
        }

        findViewById<Button>(R.id.button1).setOnClickListener {
            balloon.showAlignTop(findViewById(R.id.textView))
        }

        findViewById<Button>(R.id.button2).setOnClickListener {
            balloon.dismiss()
        }
    }
}
setLayoutを使うことで独自に定義したViewを表示できます。また、ここでは触れませんが、セットしたViewを取り出すgetContentView()というメソッドもあり、これを利用することで細かい見た目の変更を行ったり、各種リスナの登録を行ったりできます。
注意点として、setLayoutをしても、そのサイズに合わせてtooltipが伸縮したりはしないようなので、そこはsetHeightなどを活用してマニュアルでいい感じに設定してやる必要があります。
ここまで実装できると以下のように動作します。
無事独自に定義したViewを表示することができました!
おわりに
今回は「Balloon」について調べました。インターフェースが使いやすいですし、見た目もいい感じなので、今後色々活用していこうかなと考えています。
個人的に改良したいところもあるので、改良を施してコントリビュートもしていきたいところです。