はじめに
初めてgitを使う人のために、appを作成してからgit pushするまでの流れを書きました。
pushした後のブランチ作成については下記を参考にしてください。
gitの使い方(git init 〜git push)
1.新しいレポジトリを作成する
まず、保存するためのレポジトリを作成します。
今回はGithub上で作成します。(Bitbucketだと画面は異なりますが基本は同じです。)
右上にある+ボタンのNew repositoryを押します。

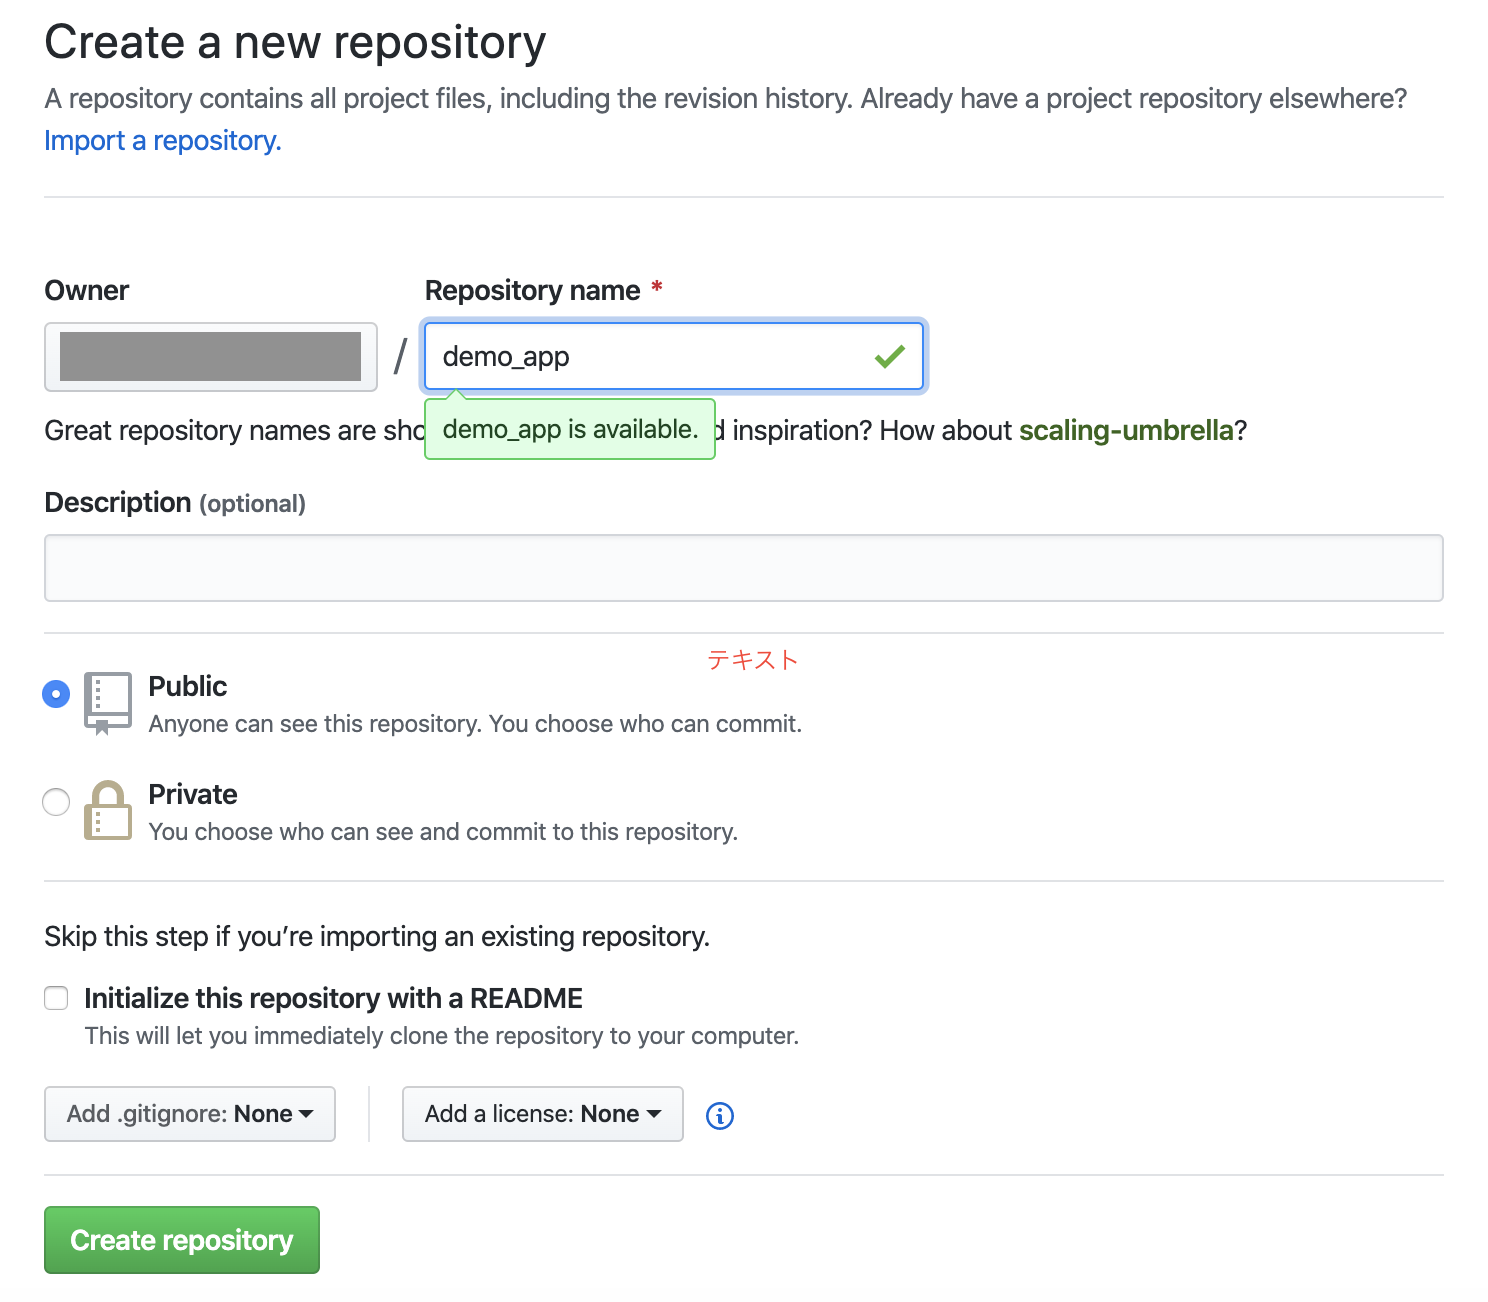
Create a new repositoryの画面が開きます。
Repository nameに作成するappの名前を入力し、Create repositoryを押します。今回はdemo_appと名付けます。

2.Git使い方
アプリを作成したいディレクトリで下記のコマンドを実行し、アプリを作成します。(例としてrailsアプリで作成しています。)
demo_appの部分はアプリの名前にします。
$rails new demo_app
作成したappに入ります。
$cd demo_app
ターミナル でgit init → git add → git commitの順に実行します。
$git init
$git add -A               # -Aとつけるとファイル全てを選択します。特定のファイルのみaddしたければファイル名を指定します。
$git commit -m "first commit"  # first commit の部分はコメントを残すことができます。日本語でもOKです。
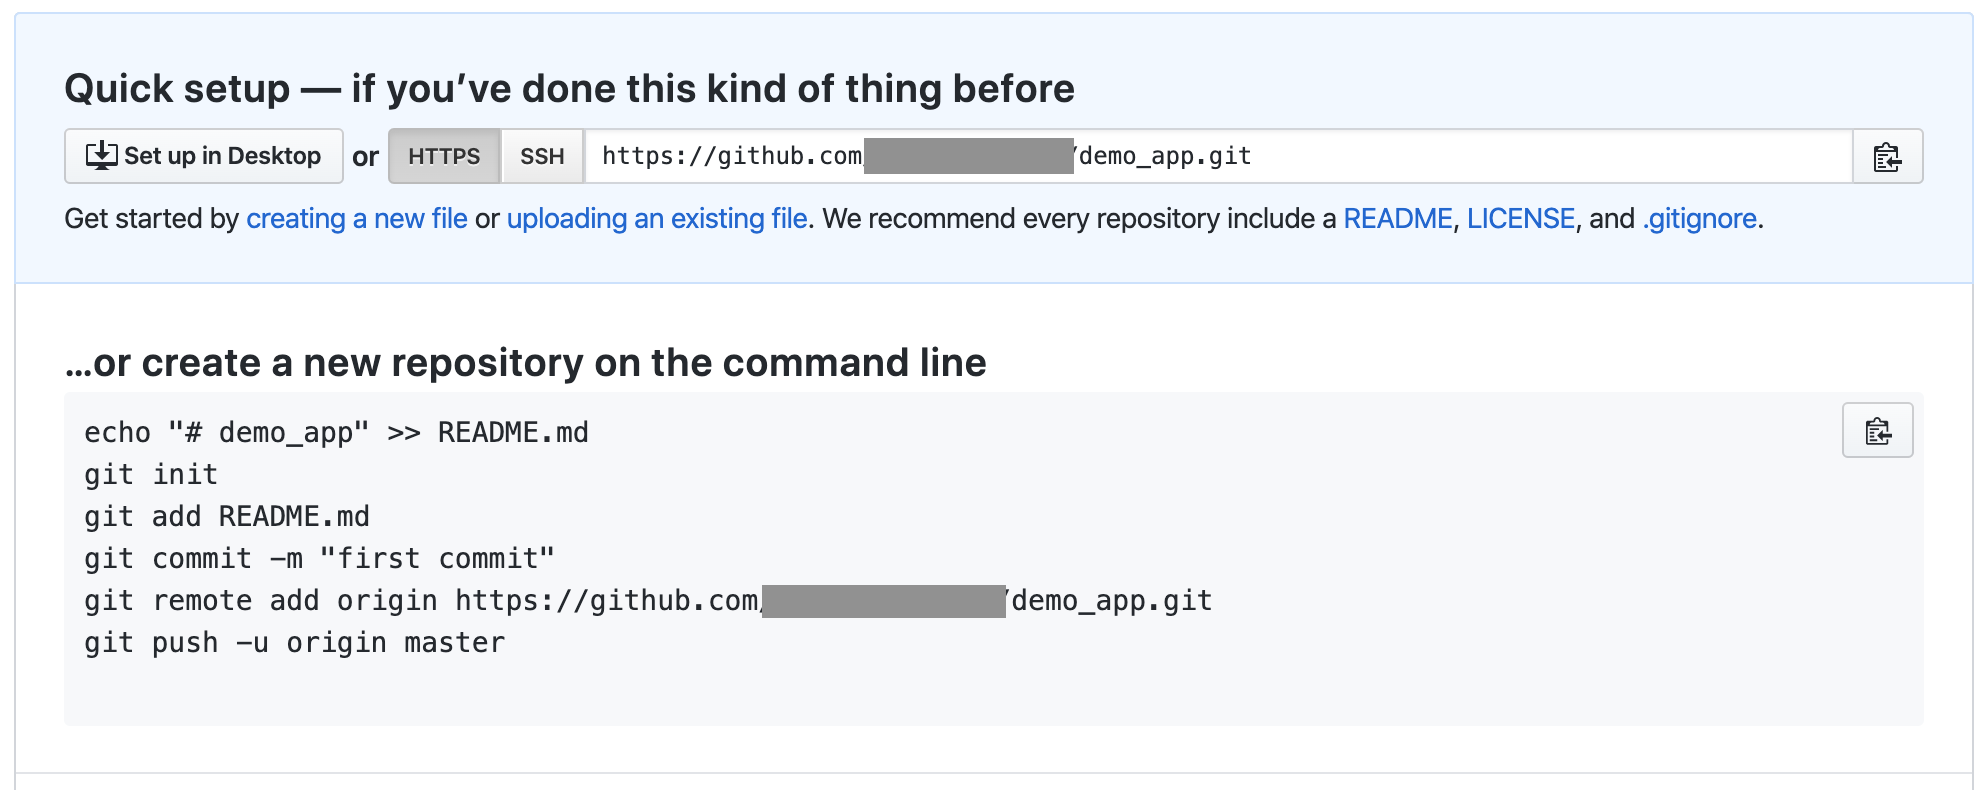
Githubで新規レポジトリを作成した際に'https://github.com/○○○○/demo_app.git' というリンクが作成されるのでコピーします。
ターミナル で下記のコマンドを実行します。
$git remote add origin https://github.com/○○○○/demo_app.git   #コピーしたリンクをoriginの後に書く
$git push -u origin master                                    #Githubにpush(反映)される
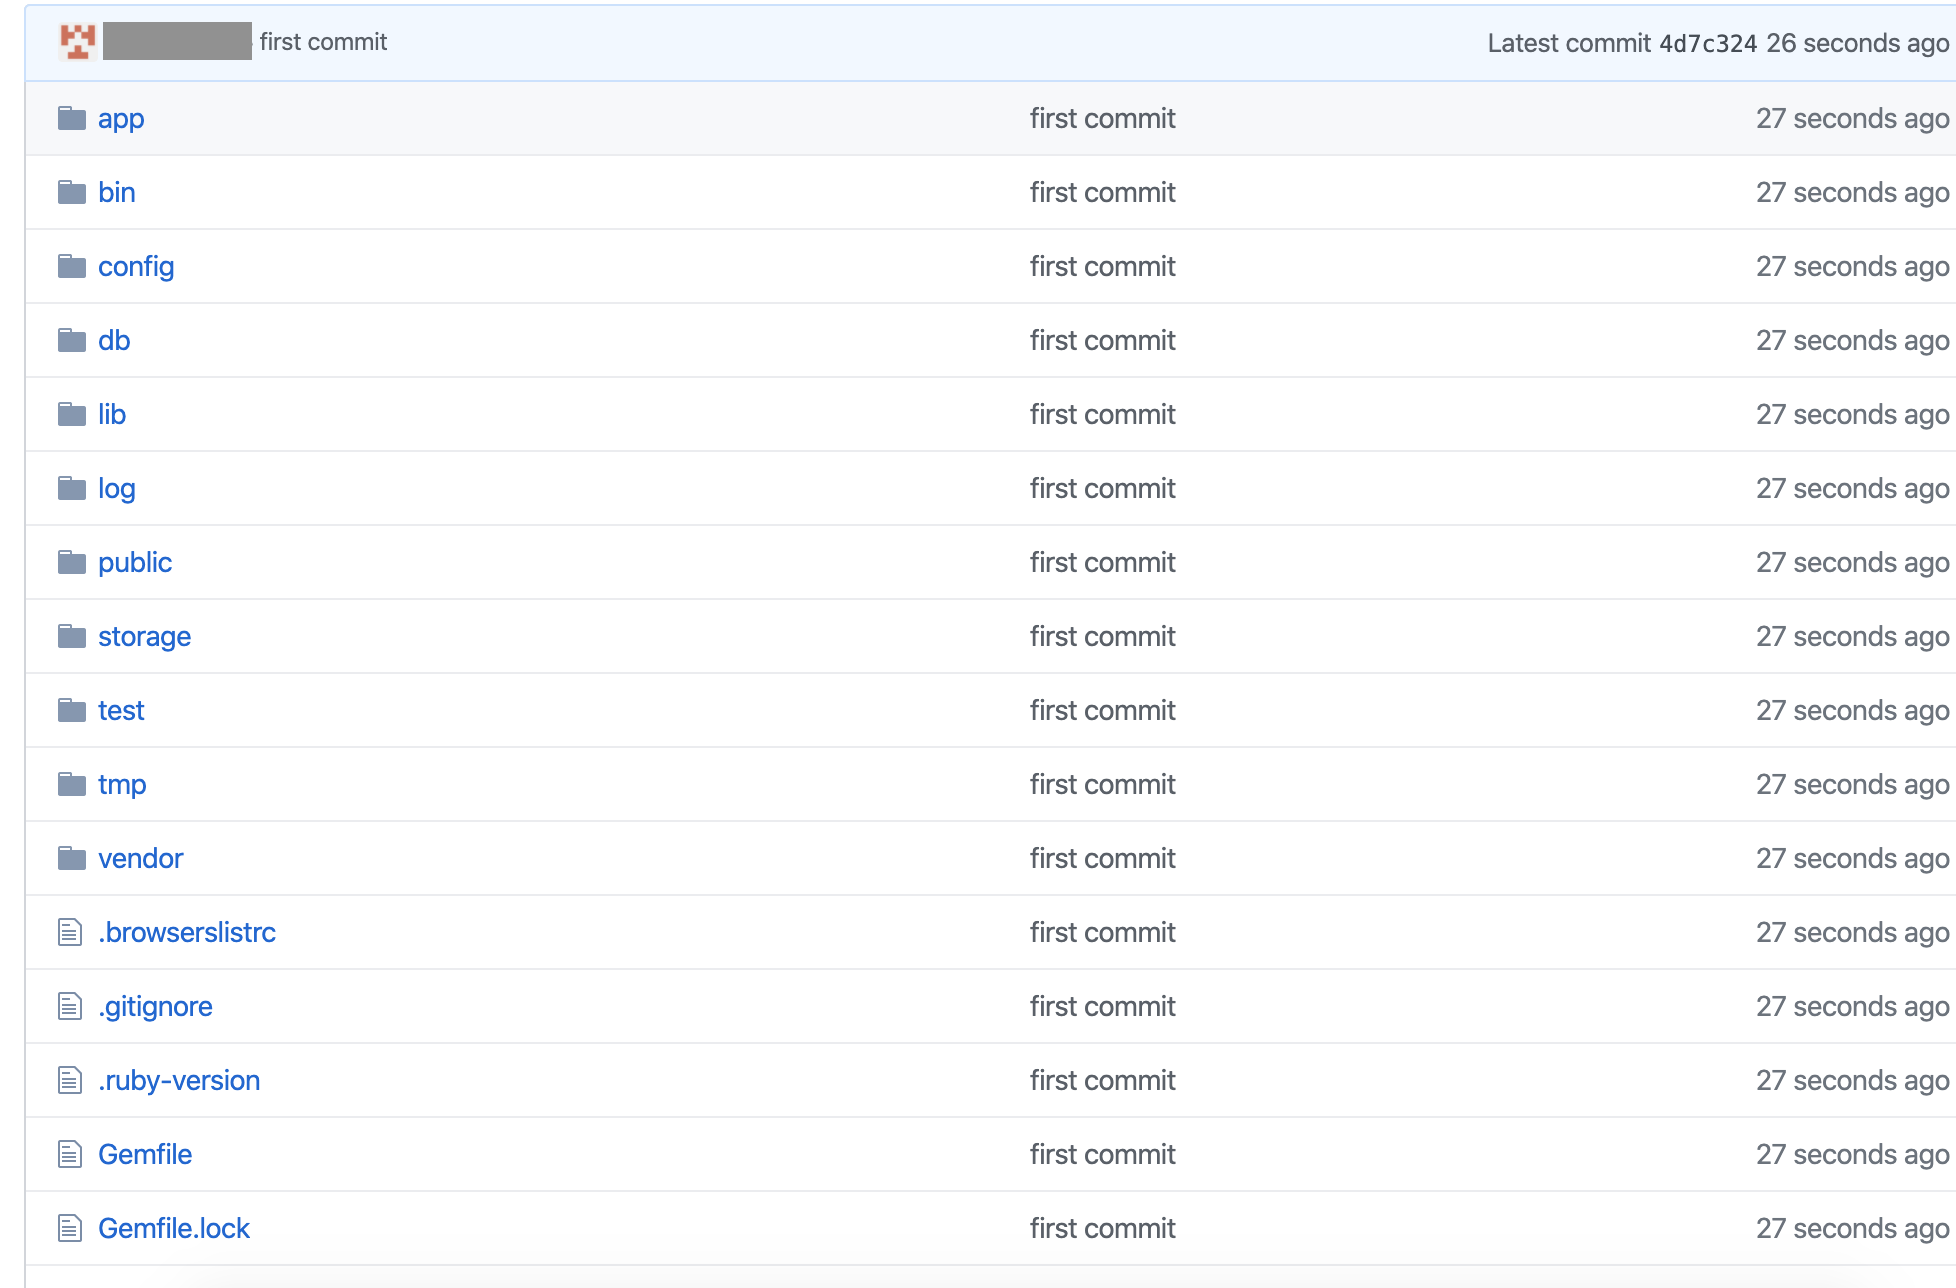
Gitgubでcodeを開くと反映されていることが確認できます。

終わりに
以上でリモートリポジトリに反映することができました。
次回は作業ブランチの作成・反映についても紹介したいと思います。
gitの使い方(git init 〜git push)
