本記事のゴール
AzureFunctionsをローカルで実行できるようになる

はじめに
皆さん、AzureFunctions使っていますか? 私は汎用性も高くシンプルでかなりお気に入りのリソースです。
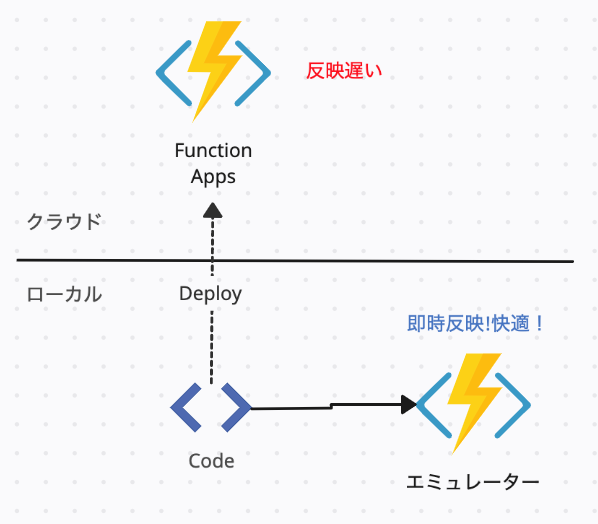
この便利なAzureFunctions、皆さんはどのようにデバッグしてますか?もしかして毎回クラウド上のFunctionAppにdeployして動作確認されたりしてませんか?
実はこのAzureFunctions,ローカル実行できるんです。
「パブリックエンドポイントのあるHttpTriggerだけじゃないの?」と思われたあなた!それ以外のタイプのFunctionsにも管理エンドポイントが用意され、開発者の任意のタイミングで実行できます。
クラウドでのデバッグに必要だったデプロイ処理(ファイルのアップロード、クラウド上のFunctionAppへの変更etc)の完了を待つ時間はもう必要ありません。
実際のところは、“実は”というほど隠された情報でもなく、普通にドキュメントに載ってる情報なのですが、「何となく構築面倒くさそう」「そんなにFunctions更新しないし後でいいだろう」という愚かな考えで大量の時間を無駄にしてしまったので、みなさんにはこの記事で「結構簡単だな、サクッとやっとこう」と思っていただければ何よりです!
Azure Functions をローカルで開発して実行する
本記事で紹介した関数についてはコードサンプル(TypeScript)を筆者のrepositoryにあげてあるので良ければ参考になさってください
https://github.com/shunexe/AzureFunctionsLocalDebugTemplates
準備
Functionsは作られている前提としていますが、記事末尾のこちらに作成方法を記載したので気になる方は参考にしてください。以下についても環境変数を使わない場合はやらなくて大丈夫です!
-
関数内の処理で利用する環境変数を
local.settings.jsonに記述する
環境変数MY_ENVを利用したい場合{ "IsEncrypted": false,//デフォルトで存在する値 "Values": { "FUNCTIONS_WORKER_RUNTIME": "node",//デフォルトで存在する値 "AzureWebJobsStorage": "",//デフォルトで存在する値 "MY_ENV":"hello,world"//独自の環境変数 } }func initでプロジェクトを作成した場合は自動で生成されますが、手動で作成する場合はプロジェクトディレクトリのルートに配置してください。. ├── YourFunction ├── host.json ├── local.settings.json ←ここ ├── package-lock.json ├── package.json └── tsconfig.json
関数の実行方法
大まかな流れは3ステップ!
大体次の3ステップです
- (必要であれば)azuriteを起動
- 関数を起動
- ローカルの関数エンドポイントにリクエストを投げる
以下で関数のタイプを2つに大別してやり方を紹介していきます!
HttpTrigger
-
パッケージのインストール
npm i -
関数の起動
npm start -
エンドポイントにGETまたはPOSTリクエストを投げる
エンドポイントが表示されるのでそこに対してGET/POSTリクエストを行う(portはデフォルトで7071)
http://localhost:7071/api/{function_name}
Azure Functions Core Tools の操作
HttpTrigger以外の場合
-
azuriteのセットアップ
-
azuriteとは
Azurite オープンソース エミュレーターには、Azure Blob、Queue Storage、Table Storage アプリケーションをテストするための無料のローカル環境が用意されています。
ローカルでの Azure Storage の開発に Azurite エミュレーターを使用する
上記にあるように、Azureが提供しているAzureStorageのエミュレーターです。基本的にはこちらを常時起動させておくことになります。
-
インストール
npm install -g azurite -
実行
—location、—debugオプションには任意のディレクトリを指定してください。指定しない場合カレントディレクトリに各種ファイルが生成されます。azurite --silent --location ./azurite --debug ./azurite/debug.log -
local.settings.jsonで環境変数を変更する
AzureWebJobsStorageに"UseDevelopmentStorage=true"を指定する{ "IsEncrypted": false, "Values": { "FUNCTIONS_WORKER_RUNTIME": "node", "AzureWebJobsStorage": "UseDevelopmentStorage=true" } }
※TimerTrigger,Azure Queue Storage trigger,BlobStorageTriggerの場合、BlobStorageを内部的に使うため必須となっていますが、他の関数タイプの場合必要ない可能性があります。現時点では全ての関数タイプのローカル実行を検証できておらず確認出来次第更新したいと思います。
-
-
パッケージのインストール
npm i -
関数の起動
npm start -
管理エンドポイントにPOSTリクエストを投げる
-
管理エンドポイントの形式(デフォルトportは7071)
http://localhost:7071/admin/functions/{function_name} -
Curlでリクエストを送る場合
curl --request POST -H "Content-Type:application/json" --data '{}' 'http://localhost:7071/admin/functions/MyTimerTrigger'
-
Azure Functions Core Tools の操作
バインドするサービスがある場合
AzureFunctionsを利用する方の中には、組み込みの機能であるBindingを利用してAzureの各種サービスと連携していることもあるかと思います。
その場合もリソースごとに以下のような手段でデバッグが可能です。
-
AzureStorageとのバインディング
azuriteの機能によりAzureStorageをエミュレートし、ローカルで動作確認することが可能
-
その他のリソース
ローカルエミュレートはできないため、クラウド上のリソースと接続し動作確認が可能
この場合はクラウド上のリソースの接続文字列を環境変数に設定する必要があります。
Azure Functions をローカルで開発して実行する
本記事では前者のAzureStorageのうちBlobStorageとのバインディングをローカルで行う際の方法について説明します。
追加の準備
※AzureStorageのエミュレート自体はazuriteが行ってくれるので追加の手順は必要ありません。逆に言えばazuriteは起動させ続けておく必要があります。
-
local.settings.json内の環境変数の設定を変更する
-
AzureWebJobsStorage
TimerTriggerの場合と同様に”UseDevelopmentStorage=true”をセット。 -
MyStorageConnectionString
AzureStorageエミュレーターへ接続する際の接続文字列はドキュメント上に公開されておりこれを指定します。Blob service にのみ接続する場合、接続文字列は次のようになります。
DefaultEndpointsProtocol=http;AccountName=devstoreaccount1;AccountKey=Eby8vdM02xNOcqFlqUwJPLlmEtlCDXJ1OUzFT50uSRZ6IFsuFq2UVErCz4I6tq/K1SZFPTOtr/KBHBeksoGMGw==;BlobEndpoint=http://127.0.0.1:10000/devstoreaccount1;
設定後のlocal.setttings.json
{
  "IsEncrypted": false,
  "Values": {
    "FUNCTIONS_WORKER_RUNTIME": "node",
    "AzureWebJobsStorage": "UseDevelopmentStorage=true",
    "MyStorageConnectionString":"DefaultEndpointsProtocol=http;AccountName=devstoreaccount1;AccountKey=Eby8vdM02xNOcqFlqUwJPLlmEtlCDXJ1OUzFT50uSRZ6IFsuFq2UVErCz4I6tq/K1SZFPTOtr/KBHBeksoGMGw==;BlobEndpoint=http://127.0.0.1:10000/devstoreaccount1;"
  }
}
また
”MyStorageConnectionString”は任意の文字列に置き換えていただいても構いません。ただし、function.jsonのconnectionに指定する文字列とだけは一致させてください。例:blobトリガーの場合のfunction.json
{ "bindings": [ { "name": "myBlob", "type": "blobTrigger", "direction": "in", "path": "test-container/samples-workitems/{name}", "connection": "MyStorageConnectionString"←ココにはlocal.settings.jsonで接続文字列のキーとなっている文字列と同じものを入れる } ], "scriptFile": "../dist/BlobTrigger/index.js" } -
-
AzureStorageExplorer(デスクトップアプリ)
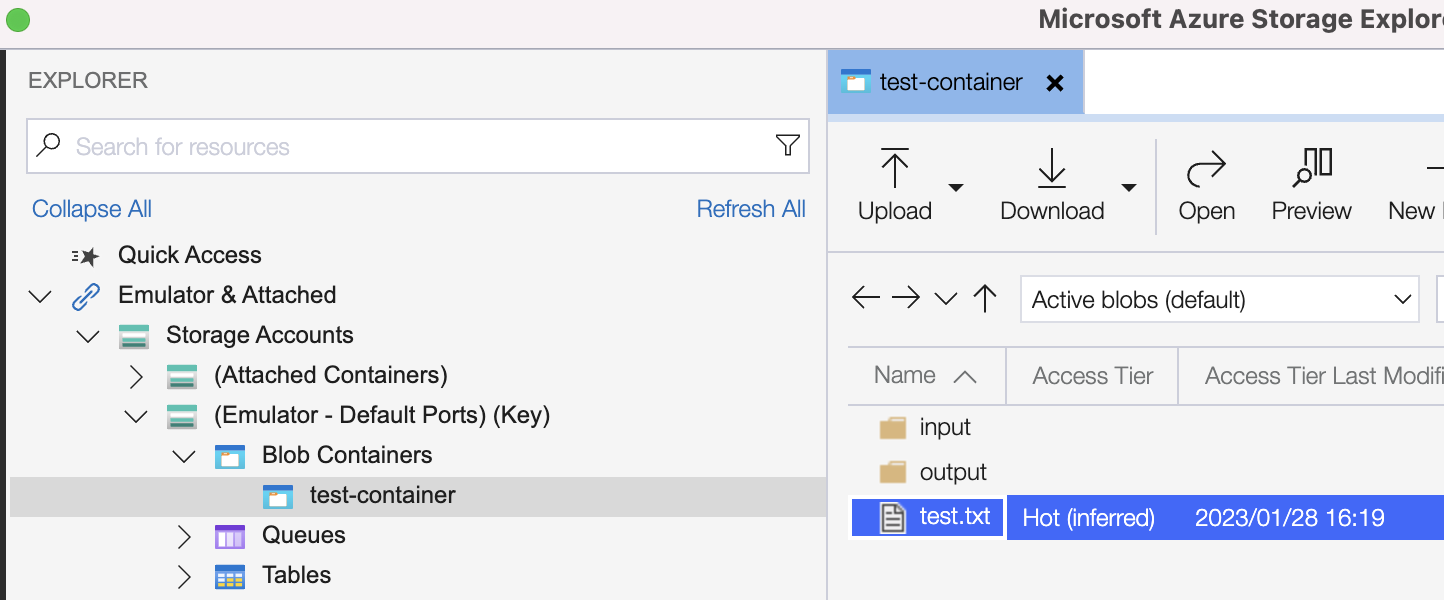
今回は、azuriteでエミュレートしたAzureStorage(Queue Storage、Blob Storage、Table Storage)にアクセスするのに使います。ローカルのストレージにファイルを追加したいとき、関数から出力したファイルを確認することができます。
例:BlobStorageの各種バインドごとの実行手順
BlobStorageトリガー
BlobStorageでのファイルの変更を実行のトリガーにできるバインディングです。
Azure Functions の Azure Blob Storage トリガー
-
azurite&関数を準備し、実行
-
local.settings.json
”追加の準備”セクションと同じ -
function.json
{ "bindings": [ { "name": "myBlob", "type": "blobTrigger", "direction": "in", "path": "test-container/samples-workitems/{name}", "connection": "MyStorageConnectionString" } ], "scriptFile": "../dist/BlobTrigger/index.js" } -
index.ts
import { AzureFunction, Context } from "@azure/functions"

const blobTrigger: AzureFunction = async function (context: Context, myBlob: any): Promise<void> {
    context.log("Blob trigger function processed blob \n Name:", context.bindingData.name, "\n Blob Size:", myBlob.length, "Bytes");
};

export default blobTrigger;
詳細はこちらを参照
AzureFunctionsLocalDebugTemplates/BlobTrigger at main · shunexe/AzureFunctionsLocalDebugTemplates
-
-
AzureStorageExplorer上で指定された場所にファイルを追加
-
関数が実行されば成功!
BlobStorage入力バインディング
関数実行時にBlobStorageのファイルを取り込むことができるバインディングです。
Azure Functions における Azure Blob Storage の入力バインド
-
azurite&関数を準備し、実行
-
local.settings.json
”追加の準備”セクションと同じ -
function.json
{ "bindings": [ { "authLevel": "function", "type": "httpTrigger", "direction": "in", "name": "req", "methods": [ "get", "post" ] }, { "type": "http", "direction": "out", "name": "res" }, { "name": "inputBlob", "type": "blob", "direction": "in", "path": "test-container/samples-workitems/input/input.txt", "connection": "MyStorageConnectionString" } ], "scriptFile": "../dist/BlobIuputBind/index.js" } -
index.ts
import { AzureFunction, Context, HttpRequest } from "@azure/functions"

const httpTrigger: AzureFunction = async function (context: Context, req: HttpRequest): Promise<void> {
    context.log(context.bindings.inputBlob);
    context.res = {
        // status: 200, /* Defaults to 200 */
        body: "done"
    };

};

export default httpTrigger;
詳細はこちらを参照
AzureFunctionsLocalDebugTemplates/BlobIuputBind at main · shunexe/AzureFunctionsLocalDebugTemplates
-
-
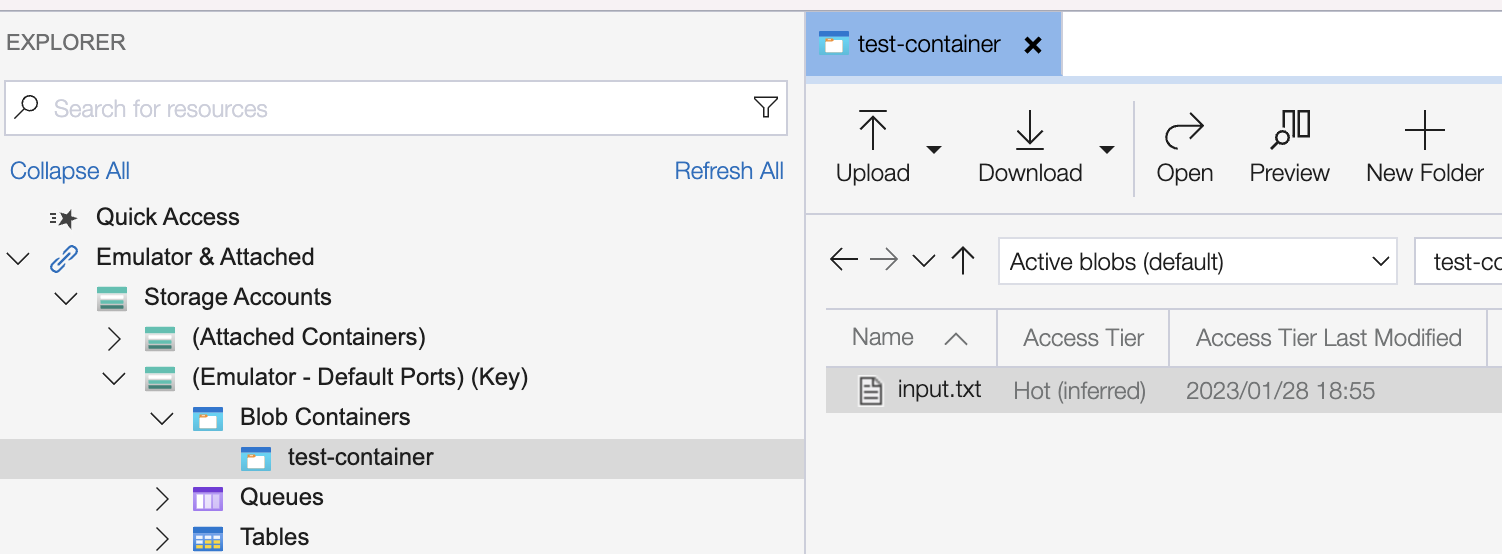
AzureStorageExplorer上で指定された場所にファイルを配置
今回は”Hello,world!!!”とだけ記述したinput.txtを配置 -
関数実行時に中身が参照されてれば成功!
BlobStorage出力バインディング
BlobStorageにファイルを出力することができるバインディングです。
Azure Functions における Azure Blob Storage の出力バインド
-
azurite&関数を準備し、実行
-
local.settings.json
”追加の準備”セクションと同じ -
function.json
{ "bindings": [ { "authLevel": "function", "type": "httpTrigger", "direction": "in", "name": "req", "methods": [ "get", "post" ] }, { "type": "http", "direction": "out", "name": "res" }, { "name": "outputBlob", "type": "blob", "direction": "out", "path": "test-container/samples-workitems/output/output.csv", "connection": "MyStorageConnectionString" } ], "scriptFile": "../dist/BlobOuputBind/index.js" } -
index.ts
import { AzureFunction, Context, HttpRequest } from "@azure/functions"

const httpTrigger: AzureFunction = async function (context: Context, req: HttpRequest): Promise<void> {
    const randomCsv = 'id,name\n1,John'

    context.bindings.outputBlob = randomCsv;

    context.res = {
        status: 200,
        headers: {
            "content-type": "text/csv"
        },
        body: "CSV created!"
    };

};

export default httpTrigger;
詳細はこちらを参照
AzureFunctionsLocalDebugTemplates/BlobOutputBind at main · shunexe/AzureFunctionsLocalDebugTemplates
-
-
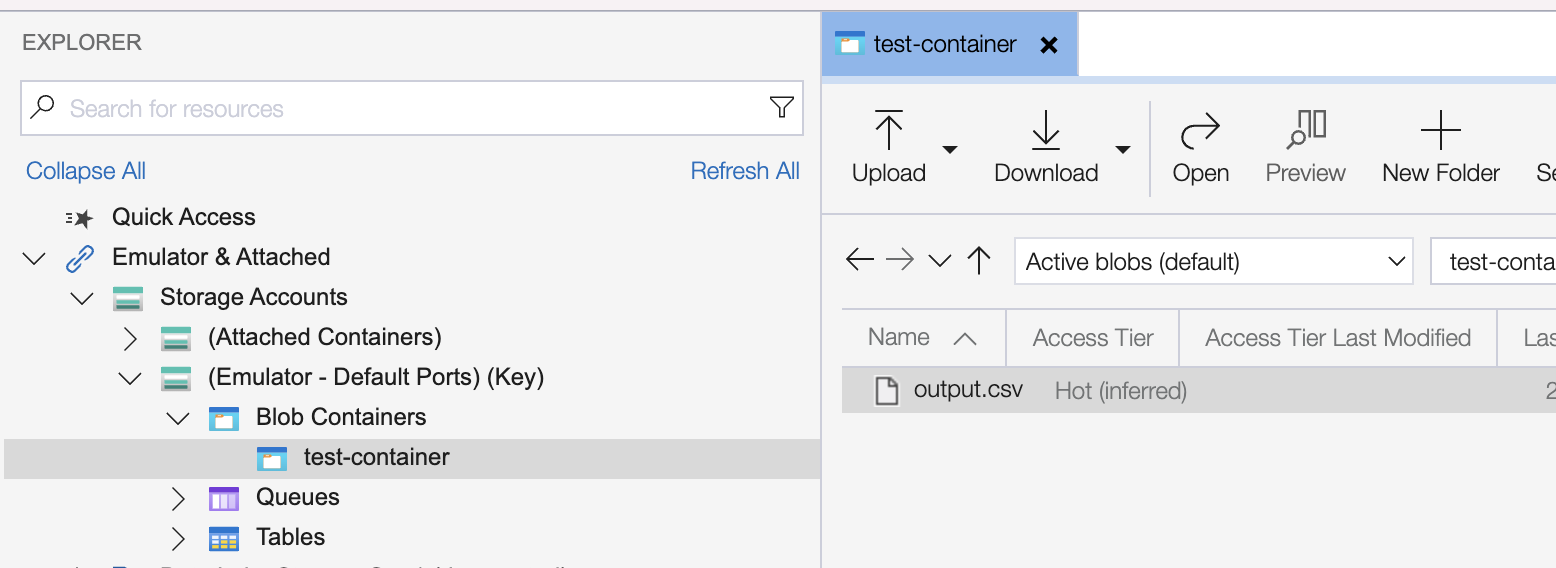
関数が実行後に指定したパスにファイルが出力されてれば成功!
SDKを利用する場合
バインドを使わない場合もSDKを使ってAzureのリソースに接続する場合もあるかと思います。その際は、基本的にはコネクションに必要な接続文字列を環境変数に設定しておくだけで大丈夫です。
例: BlobStorage用のSDK:@azure/storage-blobを使う場合
-
local.settings.json
エミュレートされたBlobStorageに繋ぐ場合はデフォルト接続文字列が用意されているのでそれを記載{ "IsEncrypted": false, "Values": { "FUNCTIONS_WORKER_RUNTIME": "node", "AzureWebJobsStorage": "", "MyStorageConnectionString":"DefaultEndpointsProtocol=http;AccountName=devstoreaccount1;AccountKey=Eby8vdM02xNOcqFlqUwJPLlmEtlCDXJ1OUzFT50uSRZ6IFsuFq2UVErCz4I6tq/K1SZFPTOtr/KBHBeksoGMGw==;BlobEndpoint=http://127.0.0.1:10000/devstoreaccount1;" } } -
index.ts
import { AzureFunction, Context, HttpRequest } from "@azure/functions"
import {BlobServiceClient} from "@azure/storage-blob"

const httpTrigger: AzureFunction = async function (context: Context, req: HttpRequest): Promise<void> {
    const blobClient = BlobServiceClient.fromConnectionString(process.env["MyStorageConnectionString"])

    // 何らかの処理

    context.res = {
        // status: 200, /* Defaults to 200 */
        body: 'ok'
    };

};
トラブルシュート
-
Could not create BlobContainerClient for ScheduleMonitor.
[2023-01-15T05:42:35.992Z] The listener for function 'Functions.MyTimerTrigger' was unable to start.
[2023-01-15T05:42:35.996Z] The listener for function 'Functions.MyTimerTrigger' was unable to start. Microsoft.Azure.WebJobs.Extensions.Timers.Storage: Could not create BlobContainerClient for ScheduleMonitor.
以下の設定し忘れが原因。下記を追記してfunctionを再起動
"AzureWebJobsStorage": "UseDevelopmentStorage=true"
Functions作成方法
-
まずプロジェクトを作る
func init プロジェクト名 --typescript -
プロジェクトに内包する関数をテンプレートから作る
1つのプロジェクトには複数の関数をデプロイすることができます。ここでは関数をテンプレートから作成する方法を紹介します。func new --name 関数名 --template テンプレートの種類テンプレートの種類は下記のコマンドで取得できます
func templates listテンプレート例
- "HTTP trigger"
- “Timer trigger”
- “IoT Hub (Event Hub)”
- "Azure Blob Storage trigger"
終わりに
いかがでしたでしょうか。あらゆる種類の関数タイプについては説明できませんでしたがローカル実行の大枠は把握できたのではないかと思います。私は1年以上AzureFunctions使っていて、ずっとクラウド上でデバッグして本当に無駄な時間を過ごしました。「このデバッグ時間無駄すぎるのでは?いい加減ローカル環境作ろう」と重い腰をあげたのが3,4週間前でした。何事もそうかもしれないですが、やってみると意外と簡単だったりするので、ぜひ構築してみてください。デプロイ待っていたのが本当にバカバカしくなります。この記事で皆さんのFunction開発が少しでも快適になれば幸いです。


