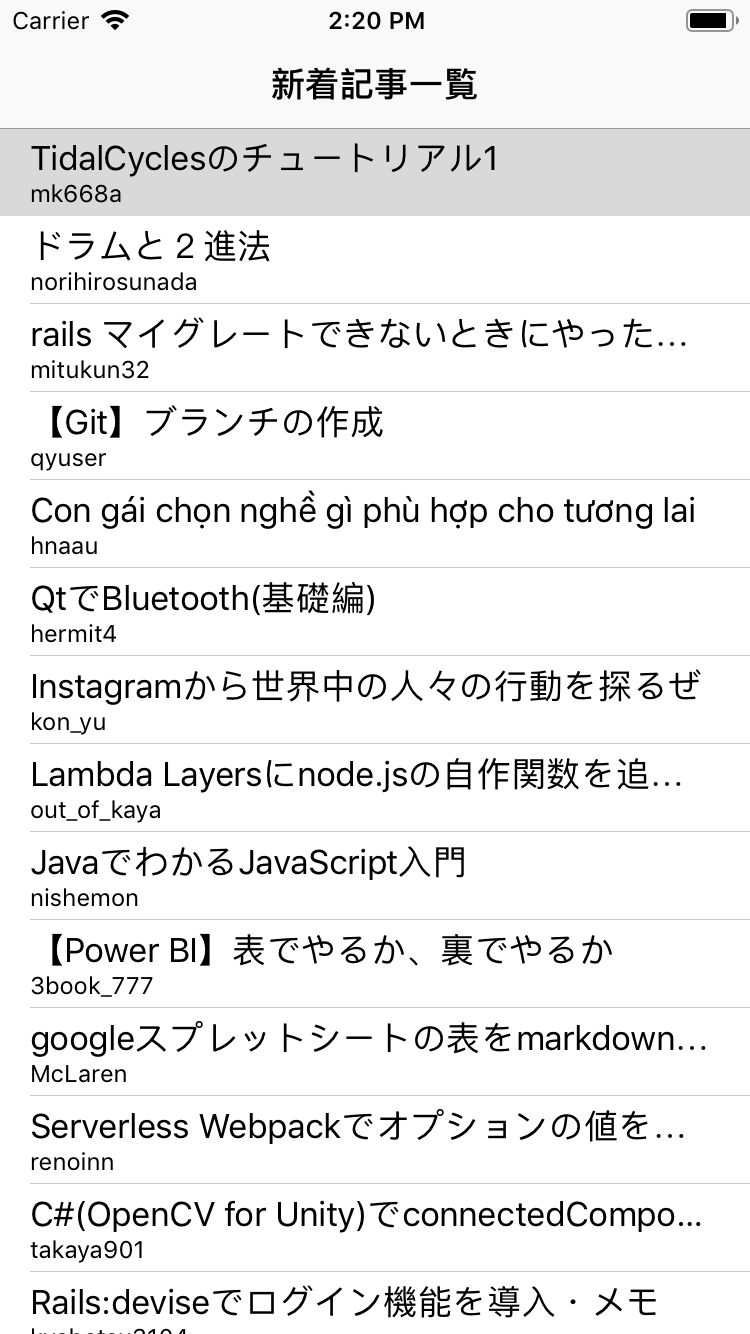
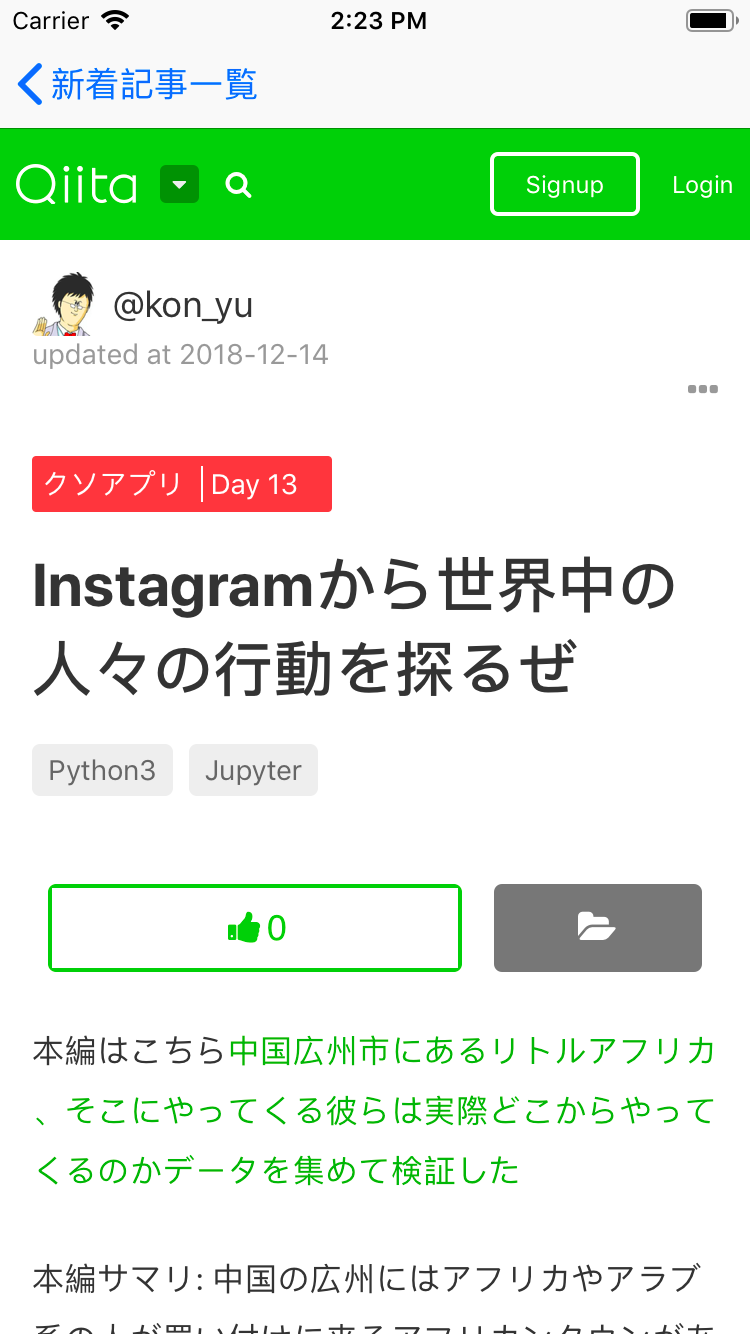
背景
iOSでAPIについて学ぶついでに、Qiitaの新着記事を表示させました。また、記事をタップした時に当サイトに飛ぶようにしました。このアプリで学んだことをいくつかに分けて説明します。
参考にしたもの
[AlamofireとSwiftyJSONでAPIを叩くチュートリアル]
(https://qiita.com/yutat93/items/1b6dfe34fa8537cf3329)
[[iPhone] Web ブラウザを作る]
(https://i-app-tec.com/ios/web-browser.html)
[APIって結局何なの?初心者向けに徹底解説します!]
(https://blog.codecamp.jp/api)
[Homebrew]
(https://brew.sh/index_ja.html)
[Carthageを使ってビルド時間を短縮しよう]
(https://qiita.com/yutat93/items/97fe9bc2bf2e97da7ec1)
準備
Xcode 9.2
Swift 3.2
完成図
APIについて
APIとは、、、
"Application Programming Interface"の略。
簡単に言うと、ソフトウェアとプログラムをつなぐもの。
APIを使うには
今回は、"SwiftyJSON"と"Alamofire"というライブラリを導入します。
プロジェクト作成と導入
プロジェクト作成
Xcodeを起動して、"Create a new Xcode project" -> "Single View App"を選択します。
プロジェクト名はQiitaViewerApp。(任意)
保存先はDeskTopへ(わかりやすいため)
ライブラリ導入
今回は、Carthageを使って導入します。
ターミナルを開いてください。
Carthageの導入
Homebrewを入れていない方は以下のコマンドを実行してください。
ruby -e "$(curl -fsSL https://raw.githubusercontent.com/Homebrew/install/master/install)"
以下のコマンドを実行してcarthageをインストール。
brew install carthage
ライブラリの導入
ライブラリをプロジェクト(先ほど作ったプロジェクト)に導入したいので、ターミナルで作業します。
cd ~/DeskTop/QiitaViewer
touch Cartfile
vi Cartfile
このコマンドを実行すると、"Cartfile"をターミナル上で編集できます。
このファイルに以下のように編集して保存します。
github "Alamofire/Alamofire"
github "SwiftyJSON/SwiftyJSON"
iで入力モードになります。
入力モードを終える時は、esc。
その状態で:wqを実行すると、保存して終了し、:q!を実行すると、保存せずに終了します。
編集できたら、以下のコマンドを実行してライブラリをビルドします。
carthage update --platform iOS
ビルドが終了したら、プロジェクトの方でライブラリを追加します。
プロジェクトファイルの"General"から"Linked Frameworks and Library"の+ボタンを押します。
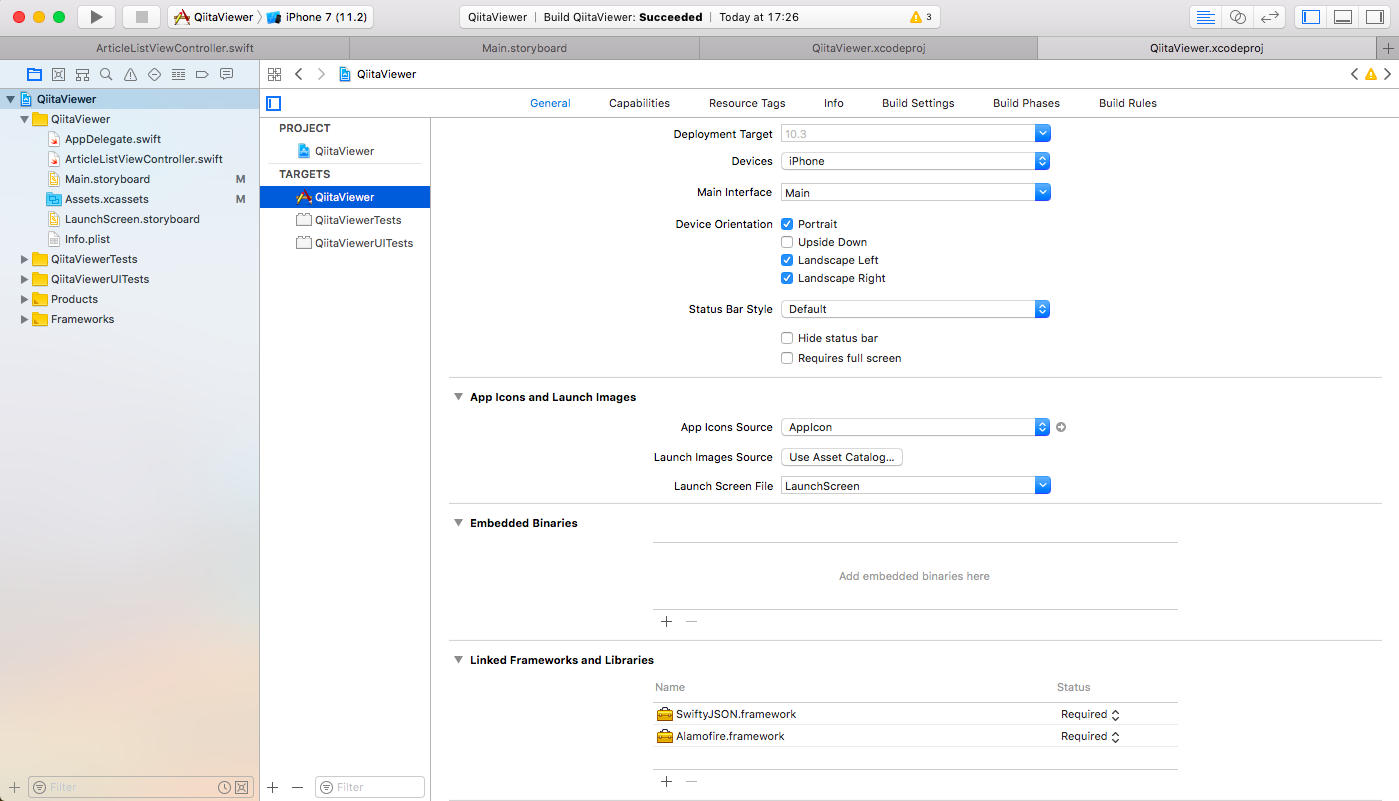
Frameworksを選択する画面になるので、"Add Other"を選択します。
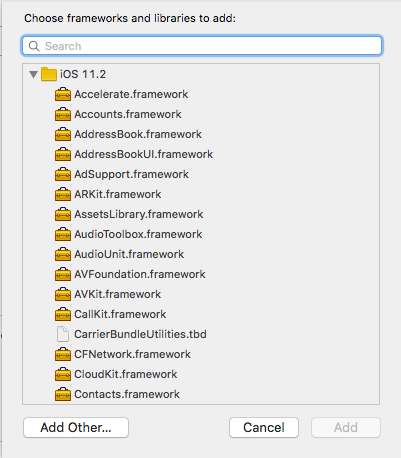
プロジェクトのディレクトリ内から、QiitaViewer/Carthage/Build/iOSのAlamofire.frameworkとSwiftyJSON.frameworkを選択します。
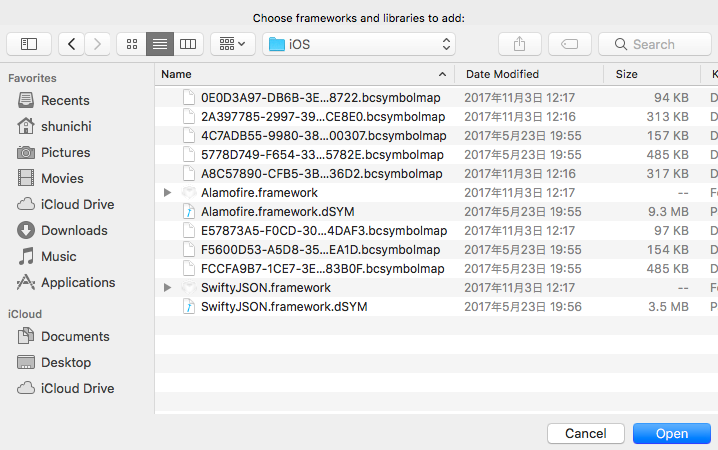
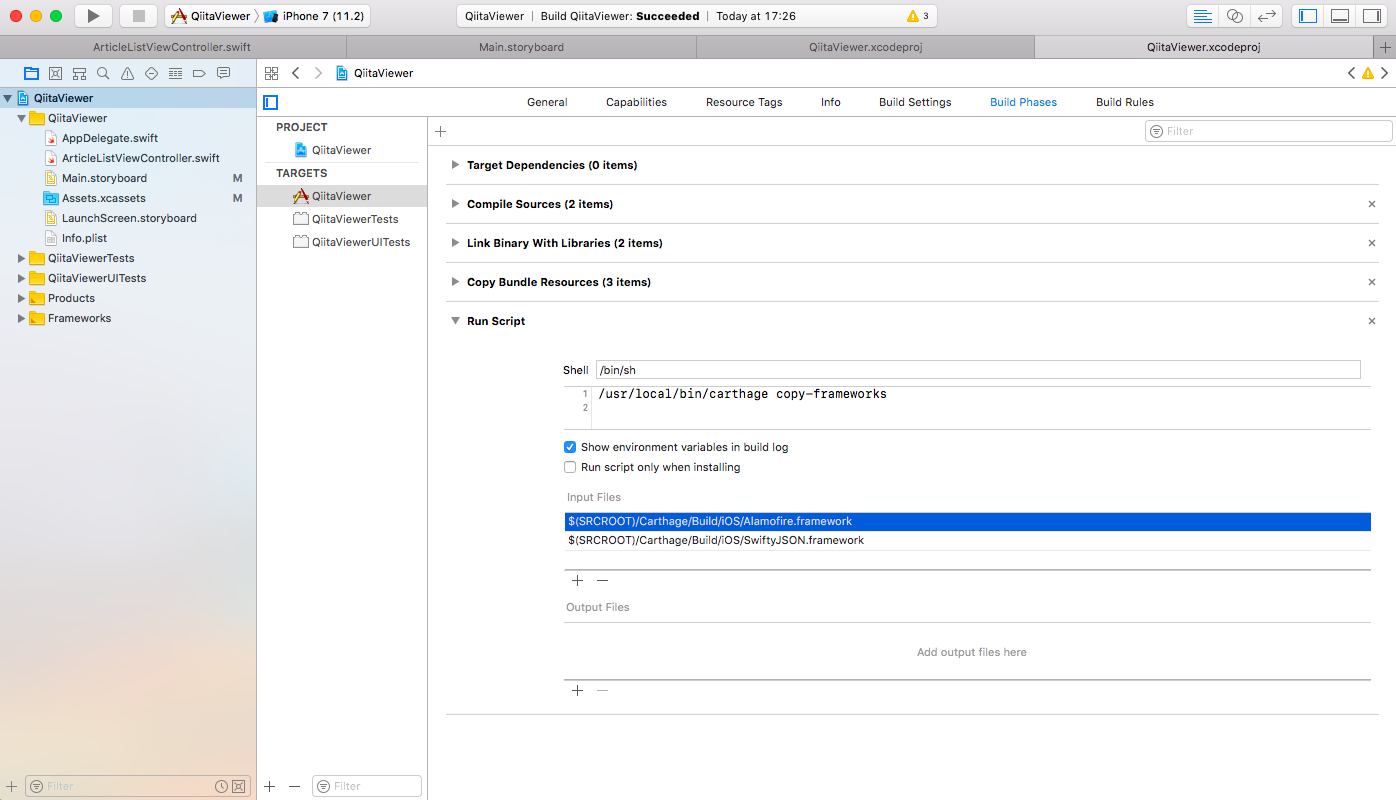
追加できたら、Build Phasesタブに移動し、+ボタンから"New Run Script Phase"を選択します。
"Run Script"が出てくるので、"Shell"に
/usr/local/bin/carthage copy-frameworks
"input Files"に
$(SRCROOT)/Carthage/Build/iOS/Alamofire.framework
$(SRCROOT)/Carthage/Build/iOS/SwiftyJSON.framework
これで、無事プロジェクトにライブラリが導入されました。
Part.2へ
次は、Main.storybordを使って画面を構成していきます。
[APIを使って、Qiitaの記事を表示させる。Part.2]
(https://qiita.com/shun6510/items/64d5d44ffa98b12858d4)
追記(2018/11/19)
以下、これらのコードを以下に公開しています。
