概要
今回はTerraformを使ってRDS(Postgres)へ接続する踏み台サーバ(EC2)を構築する方法について解説していきたいと思います
構成は下記の通りです
前提
- Terraformのmain.tfを作成済み
- VPC、プライベートサブネットをはじめとするネットワークを構築済み
- RDS(Postgres)を作成済み
- TerraformのWorkspaceをDEVに選択した状態で進めています
- EC2インスタンスへの接続はセッションマネージャーを使用します
main.tfをまだ作成していない方は下記の記事を参考にしてください
Terraformを使ってネットワークを構築する方法について知りたい方は以下の記事を参考にしてください
Terraformを使ってRDSを構築する方法について知りたい方は以下の記事を参考にしてください
また、コンテナ経由でTerraformを使用すると複数ブロジェクトで使用する際にバージョンによる違いを意識せずに済みます
コンテナを使用したい方はこちらの記事も参考にしてみてください
ディレクトリ構成
構成は以下の通りです
tree
.
├── bastion.tf
├── database.tf
├── iam.tf
├── main.tf
├── network.tf
├── templates
|   └── bastion
|       ├── instance-profile-policy.json
|       └── user-data.sh
└── variables.tf
- variables.tf
- bastion.tf
- user-data.sh
- database.tf
の順にEC2およびRDSの設定を記載していきます
variables
こちらに関しましては任意ですが踏み台サーバで使用する用の変数を定義します
今回はami_image_for_bastion(踏み台サーバのイメージ名)を定義します
上記の変数を踏み台サーバの設定を記載するbastion.tfにハードコーディングしてもいいですが、variables.tf内にまとめると変更箇所を探すのが容易になるので記載しています
# ------------------------------
# Variables
# ------------------------------

# プロジェクトを識別する一意の識別子
variable "prefix" {
  default = "tf-pg"
}

variable "project" {
  default = "terraform-playground"
}

variable "owner" {
  default = "shun198"
}

variable "db_username" {
  description = "Username for RDB MySQL Instance"
}

variable "db_password" {
  description = "Password for RDB MySQL Instance"
}

variable "ami_image_for_bastion" {
  default = "al2023-ami-2023.1.*-kernel-6.*-x86_64"
}
bastion.tf
踏み台サーバの設定を記載します
# ------------------------------
# Bastion Server Configuration
# ------------------------------

data "aws_ami" "amazon_linux" {
  # 最新のamiを取得
  most_recent = true
  filter {
    name   = "name"
    values = ["${var.ami_image_for_bastion}"]
  }
  # Amazon公式のamiを取得
  owners = ["amazon"]
}

resource "aws_instance" "bastion" {
  ami           = data.aws_ami.amazon_linux.id
  instance_type = "t2.micro"
  user_data     = file("./templates/bastion/user-data.sh")
  key_name  = var.bastion_key_name
  subnet_id = aws_subnet.public_a.id

  vpc_security_group_ids = [
    aws_security_group.bastion.id
  ]

  tags = merge(
    local.common_tags,
    tomap({ "Name" = "${local.prefix}-bastion" })
  )
}

resource "aws_security_group" "bastion" {
  description = "Control bastion inbound and outbound access"
  name        = "${local.prefix}-bastion"
  vpc_id      = aws_vpc.main.id

  # 踏み台サーバへのSSH接続を許可
  ingress {
    protocol    = "tcp"
    from_port   = 22
    to_port     = 22
    cidr_blocks = ["0.0.0.0/0"]
  }

  # 踏み台サーバから最新のパッケージのダウンロードができるようにするため
  egress {
    protocol    = "tcp"
    from_port   = 443
    to_port     = 443
    cidr_blocks = ["0.0.0.0/0"]
  }

  # 踏み台サーバから最新のパッケージのダウンロードができるようにするため
  egress {
    protocol    = "tcp"
    from_port   = 80
    to_port     = 80
    cidr_blocks = ["0.0.0.0/0"]
  }

  # DBへアクセスできるようにするため
  egress {
    from_port = 5432
    to_port   = 5432
    protocol  = "tcp"
    cidr_blocks = [
      aws_subnet.private_a.cidr_block,
      aws_subnet.private_c.cidr_block,
    ]
  }

  tags = merge(
    local.common_tags,
    tomap({ "Name" = "${local.prefix}-bastion-sg" })
  )
}
EC2インスタンスのイメージの設定
今回はAWS公式の最新のAmazon Linux Imageを取得したいため、以下のように記載します
data "aws_ami" "amazon_linux" {
  # 最新のamiを取得
  most_recent = true
  filter {
    name   = "name"
    values = ["${var.ami_image_for_bastion}"]
  }
  # Amazon公式のamiを取得
  owners = ["amazon"]
}
また、variables.tfで
variable "ami_image_for_bastion" {
  default = "al2023-ami-2023.1.*-kernel-6.*-x86_64"
}
という風にワイルドカードを使用しているので公式が出している2023.1以降のAmazon Linux Imageのバージョンを指定しています
EC2インスタンスの設定
今回はt2.microタイプのインスタンスを作成します
user_dataにはEC2インスタンスを作成した際にインスタンス内で使用するパッケージをあらかじめインストールするシェルスクリプトのパスを記載します
シェルスクリプトの内容に関しましてはこの後解説します
また、VPC内の踏み台サーバのセキュリティグループのIDを以下のように定義しています
  vpc_security_group_ids = [
    aws_security_group.bastion.id
  ]
セキュリティグループの作成方法はシェルスクリプトの後に解説します
resource "aws_instance" "bastion" {
  ami           = data.aws_ami.amazon_linux.id
  instance_type = "t2.micro"
  user_data     = file("./templates/bastion/user-data.sh")
  key_name  = var.bastion_key_name
  subnet_id = aws_subnet.public_a.id

  vpc_security_group_ids = [
    aws_security_group.bastion.id
  ]

  tags = merge(
    local.common_tags,
    tomap({ "Name" = "${local.prefix}-bastion" })
  )
}
user-data.sh
今回はPostgreSQLのクライアントを使ってRDSへアクセスしたいため、
PostgreSQLのクライアントを以下のシェルスクリプトを使ってインストールします
#!/bin/bash
sudo dnf install -y postgresql15
踏み台サーバのセキュリティグループ
踏み台サーバのセキュリティグループを作成します
踏み台サーバのため、セキュリティグループは以下の表のように定義します
今回はSSHのインバウンド設定のCIDRブロックを["0.0.0.0/0"]にしていますが
よりセキュアにしたい場合は特定の固定IPアドレスのみに設定するのも手かと思います
| プロトコル/サービス | in/out | ポート番号 | CIDR |
|---|---|---|---|
| SSH | inbound | 22 | 全てのアクセス |
| RDS(Postgres) | outbound | 5432 | プライベートサブネットAとCのCIDRブロック内 |
| HTTP | outbound | 80 | 全てのアクセス |
| HTTPS | outbound | 443 | 全てのアクセス |
resource "aws_security_group" "bastion" {
  description = "Control bastion inbound and outbound access"
  name        = "${local.prefix}-bastion"
  vpc_id      = aws_vpc.main.id

  # 踏み台サーバへSSH接続を許可
  ingress {
    protocol    = "tcp"
    from_port   = 22
    to_port     = 22
    cidr_blocks = ["0.0.0.0/0"]
  }

  # 最新のパッケージのダウンロードできるよう踏み台サーバからHTTP接続を許可
  egress {
    protocol    = "tcp"
    from_port   = 443
    to_port     = 443
    cidr_blocks = ["0.0.0.0/0"]
  }

  # 最新のパッケージのダウンロードできるよう踏み台サーバからHTTP接続を許可
  egress {
    protocol    = "tcp"
    from_port   = 80
    to_port     = 80
    cidr_blocks = ["0.0.0.0/0"]
  }

  # 踏み台サーバからRDSへアクセスできるようにするため
  egress {
    from_port = 5432
    to_port   = 5432
    protocol  = "tcp"
    cidr_blocks = [
      aws_subnet.private_a.cidr_block,
      aws_subnet.private_c.cidr_block,
    ]
  }

  tags = merge(
    local.common_tags,
    tomap({ "Name" = "${local.prefix}-bastion-sg" })
  )
}
database.tf
先ほど踏み台サーバのセキュリティグループで5432番ポートのアウトバウンドルールを設定しました
今後はRDSのインバウンドルールを設定します
security_groupsの中に踏み台サーバのセキュリティグループのIDを指定します
  ingress {
    protocol  = "tcp"
    from_port = 5432
    to_port   = 5432
    security_groups = [
      aws_security_group.bastion.id,
    ]
  }
RDSの設定に関しましては以下の通りです
# ------------------------------
# Database Configuration
# ------------------------------
resource "aws_db_subnet_group" "main" {
  name = "${local.prefix}-main"
  subnet_ids = [
    aws_subnet.private_a.id,
    aws_subnet.private_c.id,
  ]


  tags = merge(
    local.common_tags,
    tomap({ "Name" = "${local.prefix}-rds-subnet-group" })
  )
}

resource "aws_security_group" "rds" {
  description = "Allow access to RDS"
  name        = "${local.prefix}-rds-sg"
  vpc_id      = aws_vpc.main.id

  ingress {
    protocol  = "tcp"
    from_port = 5432
    to_port   = 5432
    security_groups = [
      aws_security_group.bastion.id,
    ]
  }

  egress {
    from_port   = 0
    to_port     = 0
    protocol    = "-1"
    cidr_blocks = ["0.0.0.0/0"]
  }

  tags = merge(
    local.common_tags,
    tomap({ "Name" = "${local.prefix}-rds-sg" })
  )
}

resource "aws_db_instance" "main" {
  identifier              = "${local.prefix}-db"
  db_name                 = "postgres"
  allocated_storage       = 20
  storage_type            = "gp2"
  engine                  = "postgres"
  engine_version          = "15.2"
  instance_class          = "db.t3.small"
  db_subnet_group_name    = aws_db_subnet_group.main.name
  password                = var.db_password
  username                = var.db_username
  backup_retention_period = 0
  multi_az                = false
  skip_final_snapshot     = true
  vpc_security_group_ids  = [aws_security_group.rds.id]

  tags = merge(
    local.common_tags,
    tomap({ "Name" = "${local.prefix}-rds-instance" })
  )
}
iam.tf
踏み台サーバへのアクセス権を読み取り専用にするために
- 踏み台サーバ専用のロールの作成
- 作成したロールにアタッチするReadOnlyのポリシーをアタッチ
します
# Bastion
# 踏み台サーバ用のIAMロールを作成
resource "aws_iam_role" "bastion" {
  name = "${local.prefix}-bastion"
  # sts:AssumeRole(別のIAMロールへの切り替えを許可)を割り当てる
  assume_role_policy = file("./templates/bastion/instance-profile-policy.json")

  tags = merge(
    local.common_tags,
    tomap({ "Name" = "${local.prefix}-bastion-role" })
  )
}

# IAMロールにポリシーを割り当てる
resource "aws_iam_role_policy_attachment" "bastion_attach_policy" {
  role = aws_iam_role.bastion.name
  # EC2インスタンスへセッションマネージャーを使って接続するポリシー(AmazonSSMManagedInstanceCore)をアタッチする
  # https://docs.aws.amazon.com/ja_jp/aws-managed-policy/latest/reference/AmazonSSMManagedInstanceCore.html
  policy_arn = "arn:aws:iam::aws:policy/AmazonSSMManagedInstanceCore"
}

# IAMインスタンスプロファイルを設定(IAMロールに相当するもの)
# インスタンスプロファイルにロールを割り当てる
resource "aws_iam_instance_profile" "bastion" {
  name = "${local.prefix}-bastion-instance-profile"
  role = aws_iam_role.bastion.name
}
IAM用のAssume Role
EC2へアクセスする用のAssume Roleを作成します
{
  "Version": "2012-10-17",
  "Statement": [
    {
      "Action": "sts:AssumeRole",
      "Principal": {
        "Service": "ec2.amazonaws.com"
      },
      "Effect": "Allow"
    }
  ]
}
tagの作成
こちらに関しては任意です
ハードコーディングしてもいいのですが今回はmain.tfで定義した変数を使用します
mergeを使ってmain.tfにあるlocal.common_tags変数に任意の変数を追加します
共通部分は繰り返し使用でき、なおかつ独自の変数を追加できるのでおすすめです
前述のvarialbes.tfから
- var.prefix
- var.project
- var.owner
を取得します
# ------------------------------
# Locals
# ------------------------------
locals {
  # variables.tfから変数を取得
  # terraformのworkspaceの一覧から該当するworkspace(dev,stg,prdなど)を取得
  prefix = "${var.prefix}-${terraform.workspace}"
  common_tags = {
    Environmnet = terraform.workspace
    Project     = var.project
    Owner       = var.owner
    ManagedBy   = "Terraform"
  }
}
実際に作成してみよう!
フォーマットの修正、validateやplanによる確認が終わったら以下のコマンドで適用します
terraform apply -auto-approve
variables内で定義したPostgresの
- ユーザ名
- パスワード
を設定します
今回はどちらもpostgresにします
var.db_password
  Password for RDB MySQL Instance

  Enter a value: postgres

var.db_username
  Username for RDB MySQL Instance

  Enter a value: postgres
作成されたか確認してみよう!
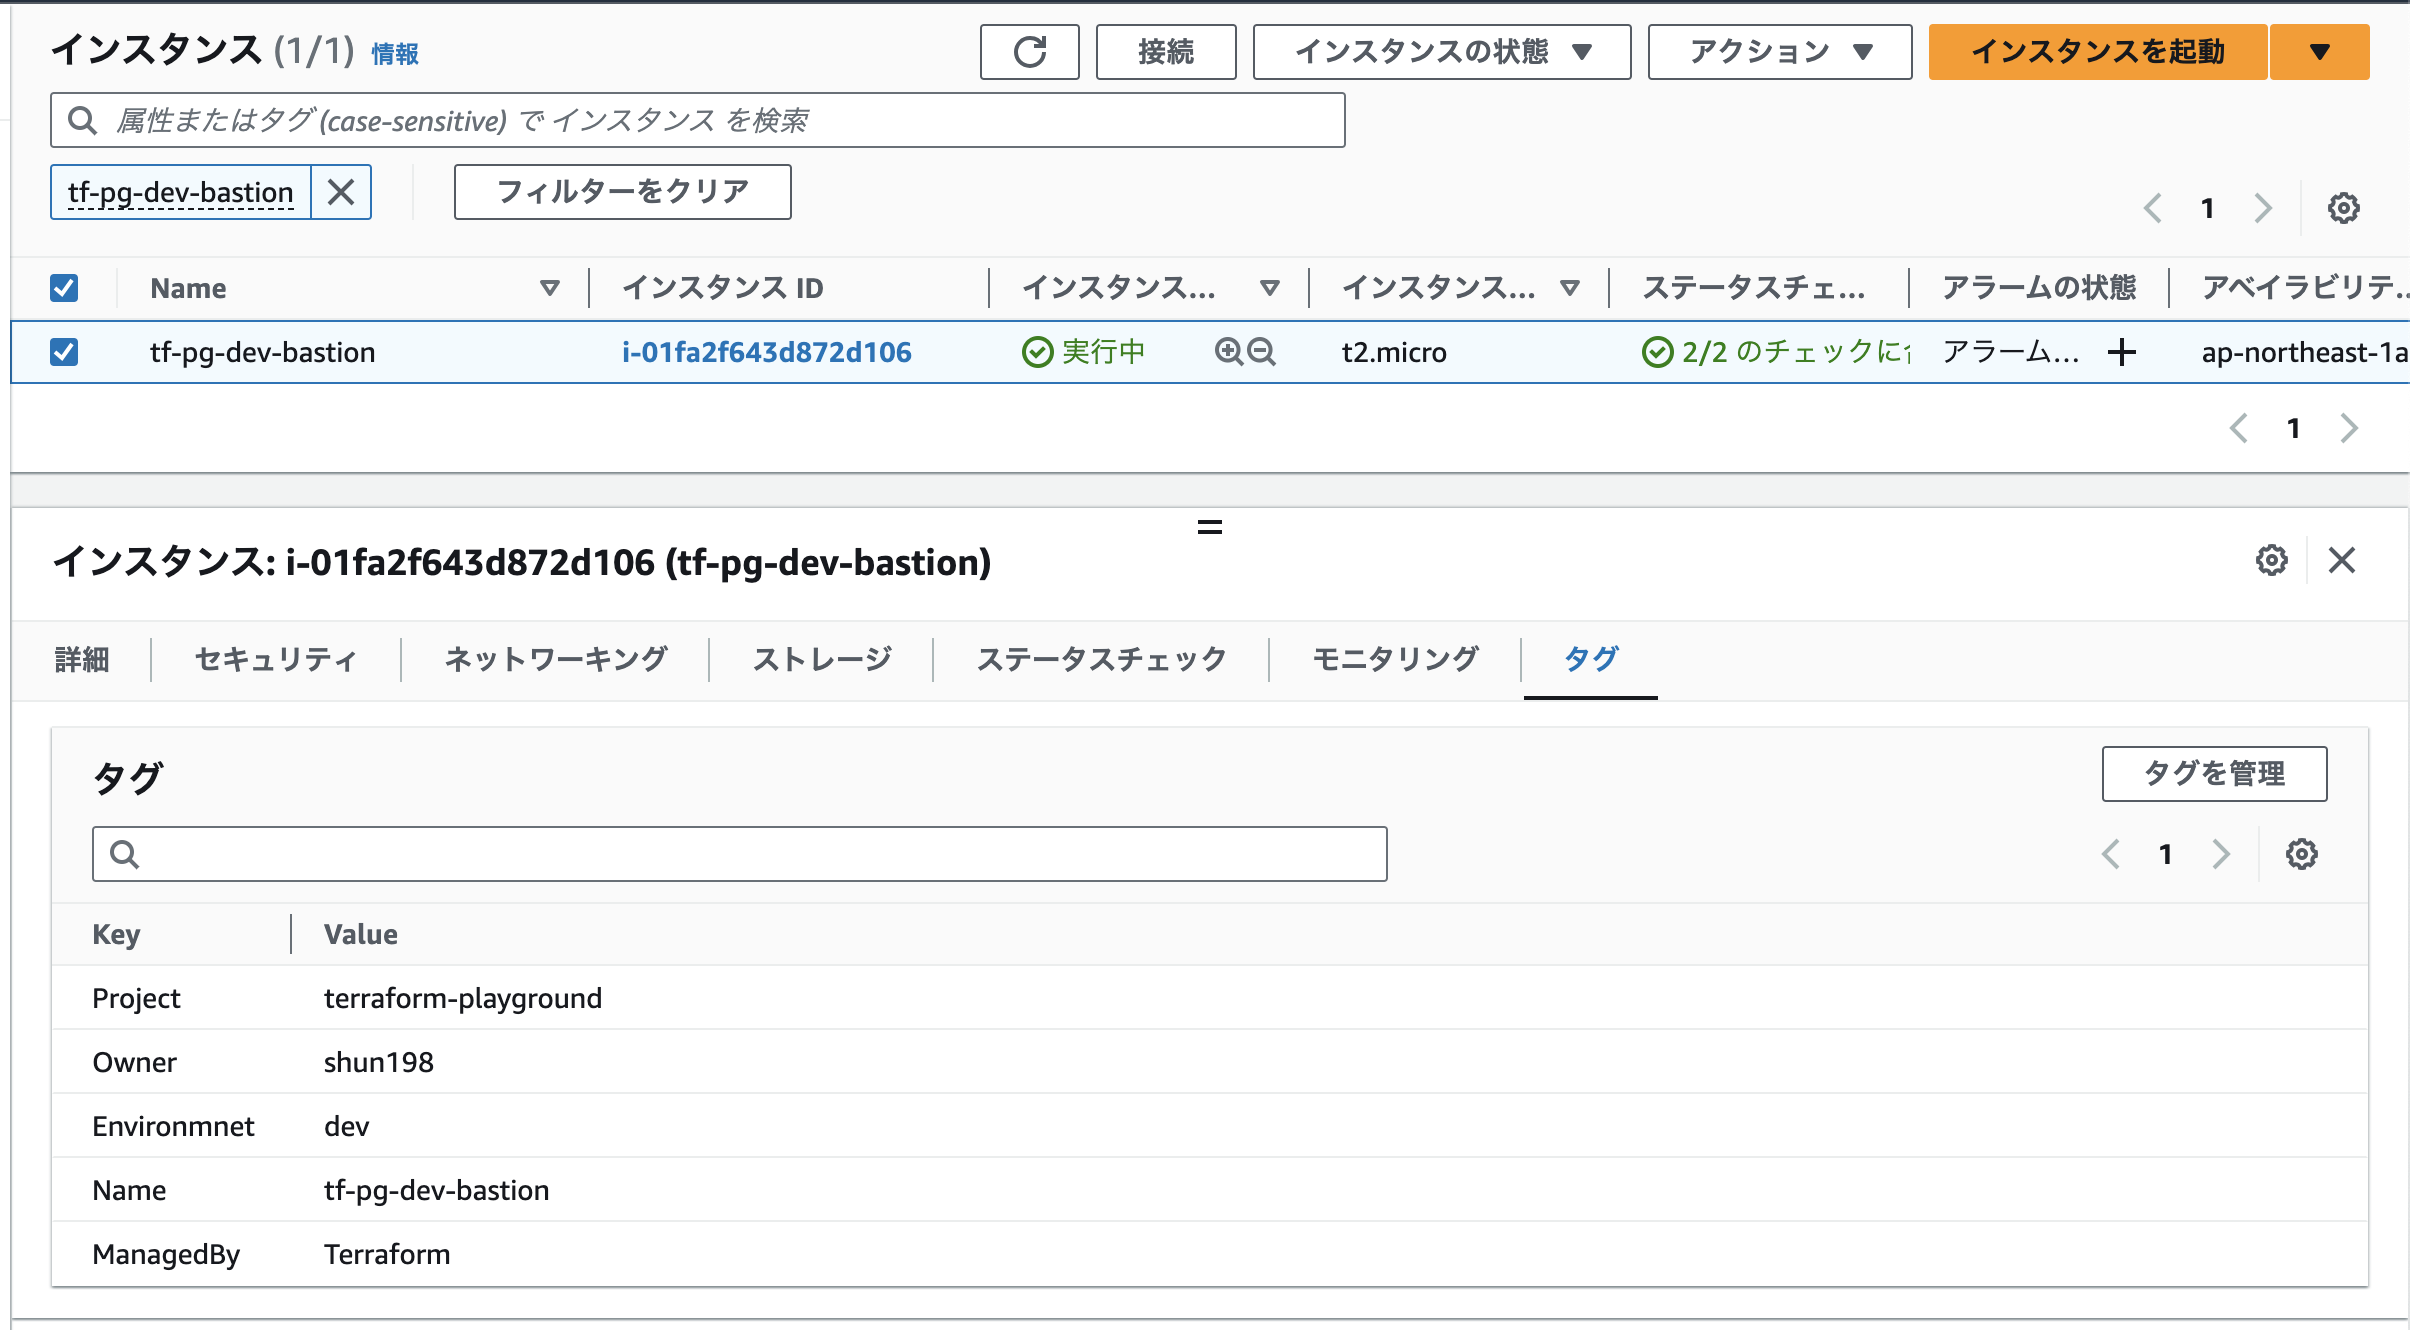
- EC2
が作成および該当するタグが付けられていることを確認します
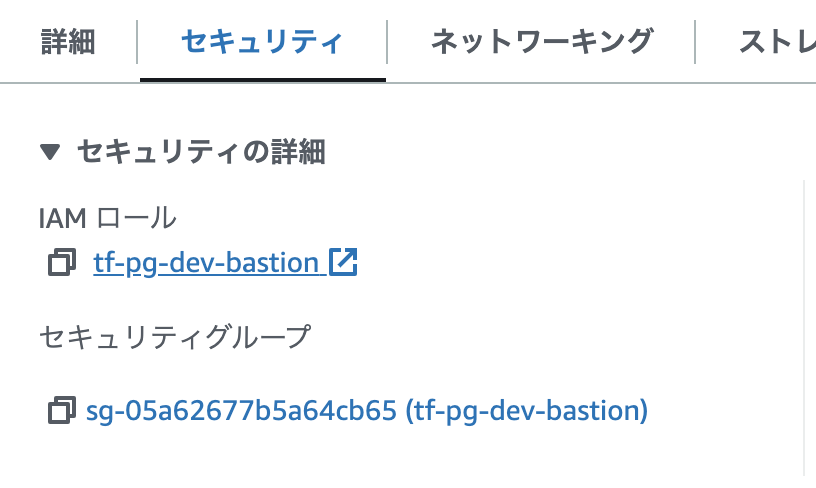
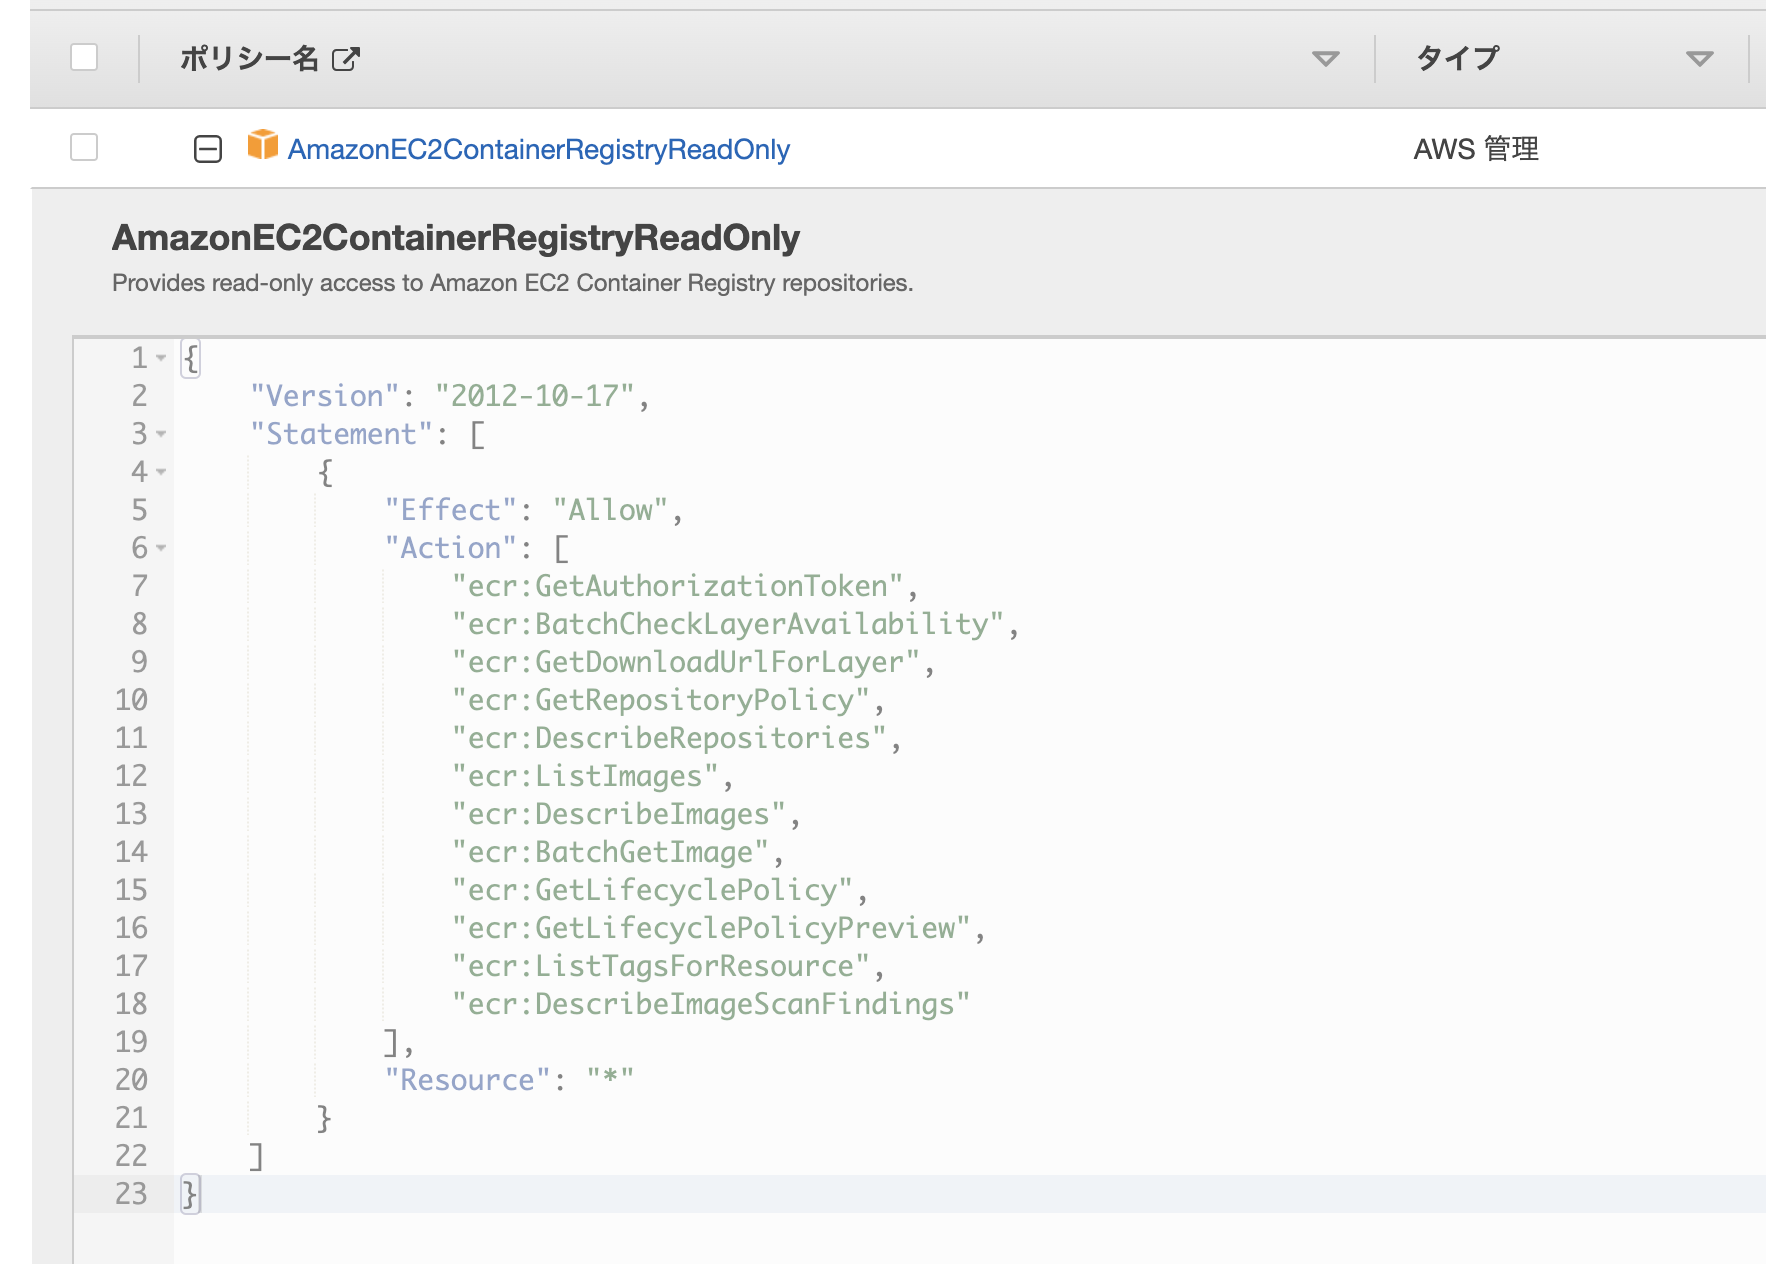
ロールが作成されており、ポリシーがAmazonEC2ContainerRegistryReadOnlyになっていることを確認します


RDSへ接続してみよう!
セッションマネージャーを使って踏み台サーバへ接続します
psqlを使用して作成したPostgresのインスタンスへ接続します
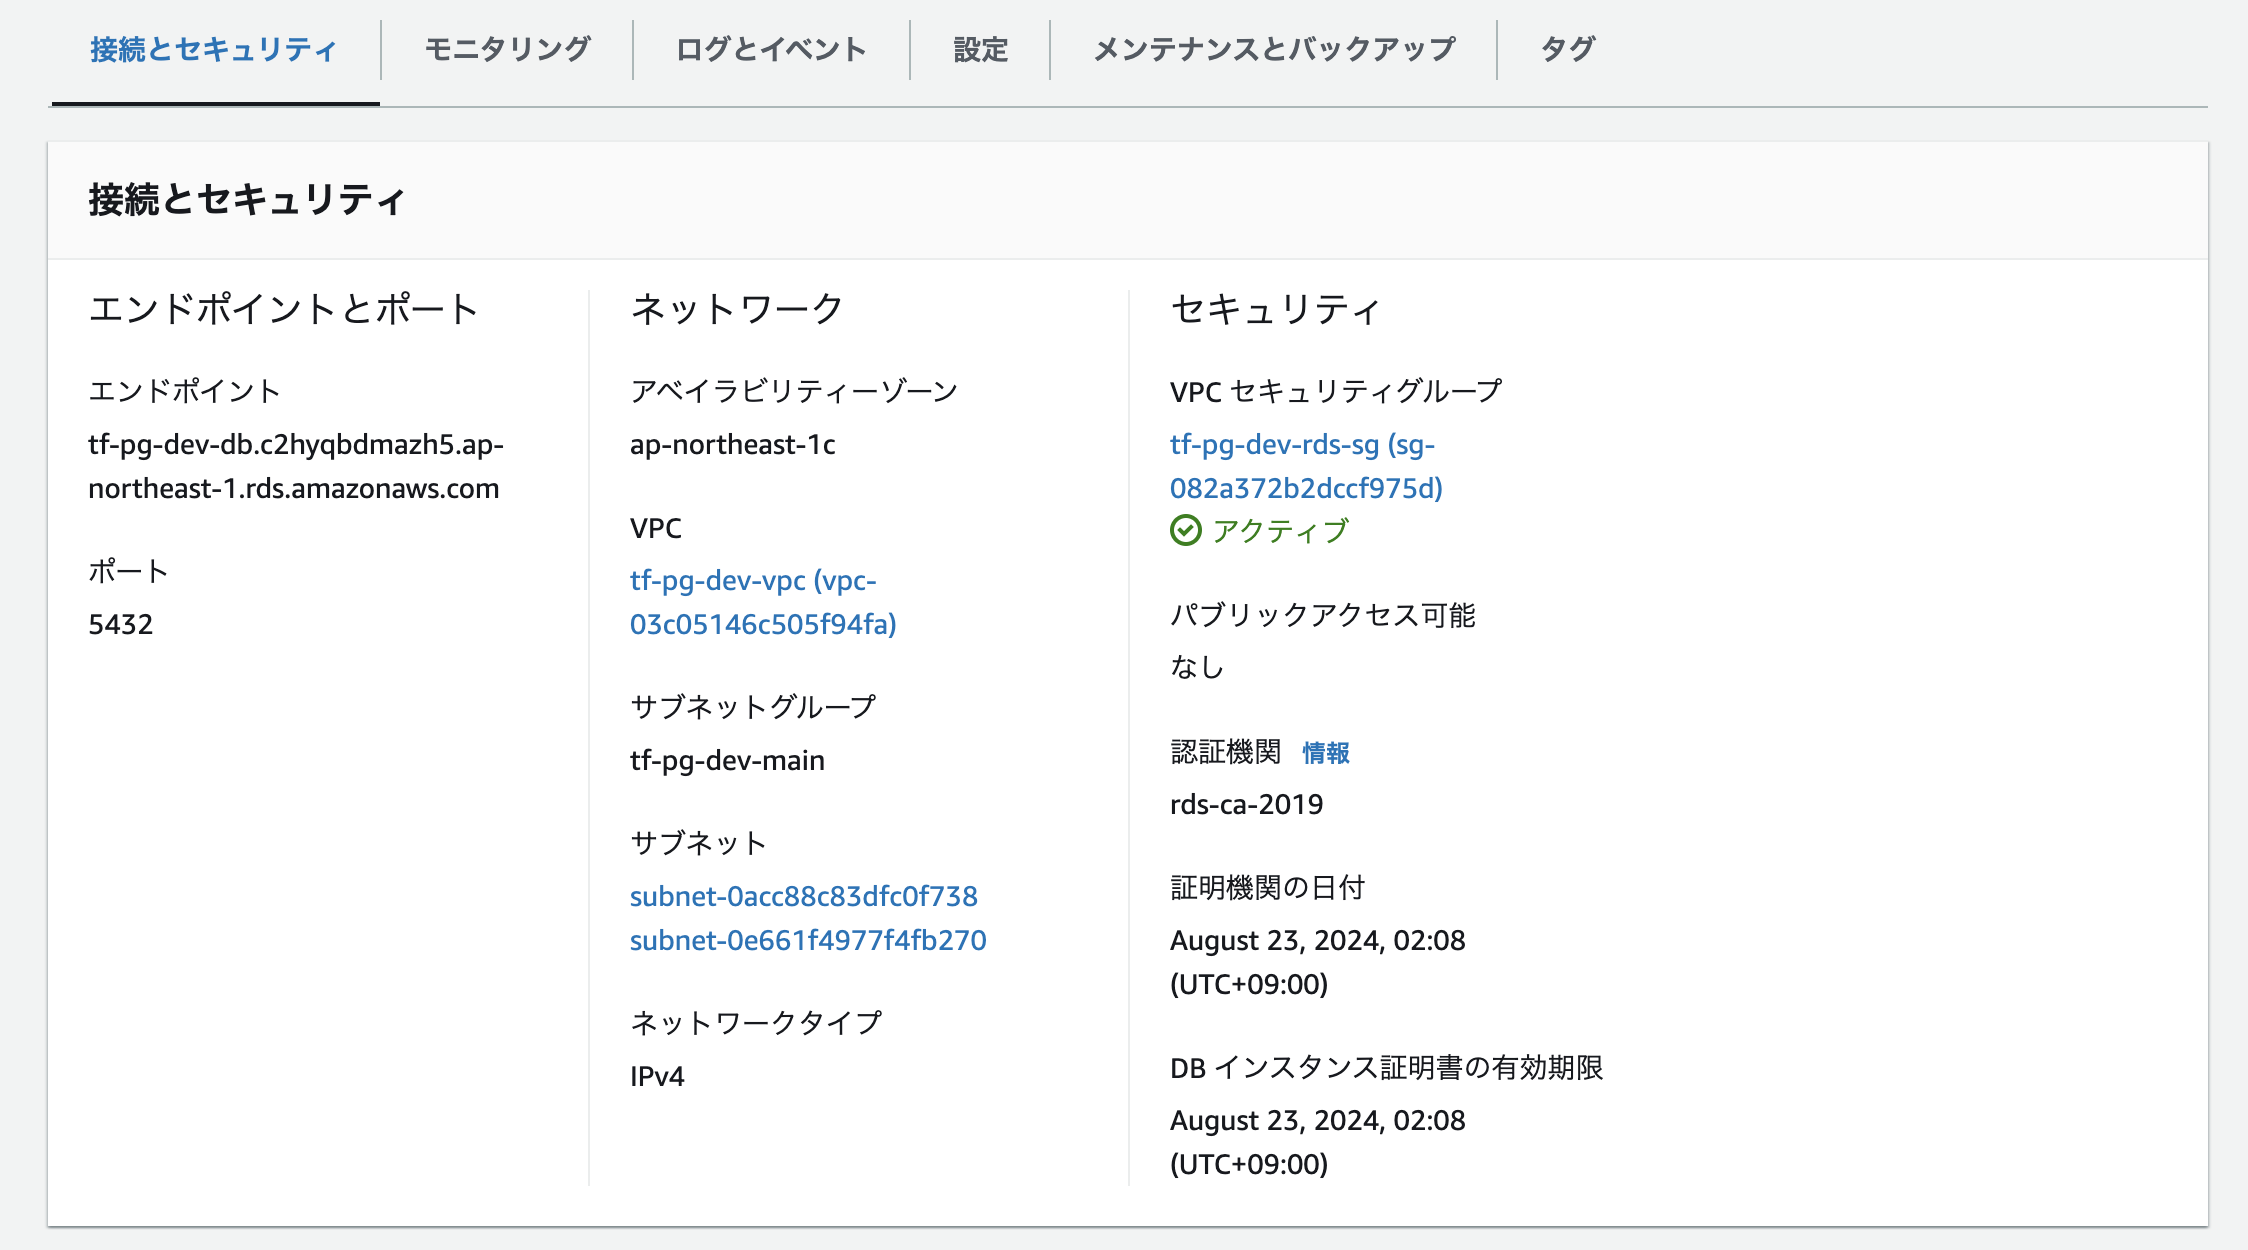
Postgresのホスト名はRDSの接続とセキュリティに記載されています

コマンドを実行します
先ほど設定したパスワード(postgres)を入力します
psql -h tf-pg-dev-db.c2hyqbdmazh5.ap-northeast-1.rds.amazonaws.com -p 5432 -U postgres -d postgres
以下のように接続できたら成功です
psql (15.0, server 15.2)
SSL connection (protocol: TLSv1.2, cipher: ECDHE-RSA-AES256-GCM-SHA384, compression: off)
Type "help" for help.

postgres=> \l
                                                 List of databases
   Name    |  Owner   | Encoding |   Collate   |    Ctype    | ICU Locale | Locale Provider |   Access privileges
-----------+----------+----------+-------------+-------------+------------+-----------------+-----------------------
 postgres  | postgres | UTF8     | en_US.UTF-8 | en_US.UTF-8 |            | libc            |
 rdsadmin  | rdsadmin | UTF8     | en_US.UTF-8 | en_US.UTF-8 |            | libc            | rdsadmin=CTc/rdsadmin+
           |          |          |             |             |            |                 | rdstopmgr=Tc/rdsadmin
 template0 | rdsadmin | UTF8     | en_US.UTF-8 | en_US.UTF-8 |            | libc            | =c/rdsadmin          +
           |          |          |             |             |            |                 | rdsadmin=CTc/rdsadmin
 template1 | postgres | UTF8     | en_US.UTF-8 | en_US.UTF-8 |            | libc            | =c/postgres          +
           |          |          |             |             |            |                 | postgres=CTc/postgres
(4 rows)
リソースの削除
使用しないリソースは以下のコマンドで削除しましょう
terraform destroy
まとめ
今後は
- ECS
- ALB
- DNS
などのリソースをTerraformで作成していきたいので後ほど記事の作成や修正をしていきたいと思います
参考


