はじめに
本記事ではGraphQLにおけるJWTを利用したユーザー認証についてテストを行った備忘録となります。
Prismaとは?
GraphQLサーバー(本記事ではGraphQLサーバーとしてApolloを利用)とデータベースを繋ぐORMの一つです。
ORMとは下記の機能のまとまりのことを指します。
① データベースからデータを取得する
② 取得したデータをオブジェクト化する
③ データの更新・変更などをデータベースに格納する
JWTとは?
JWT(ジョット)とはJSON Web Token の略で、JSONデータに署名や暗号化を施す方法のことを指します。
本記事ではログイン認証に利用します。
詳しくはこちら
Prismaの設定
早速Prismaの設定からスタートしていきます😊
$ mkdir jwt-Auth
$ cd jwt-Auth
$ npm init
$ npm install apollo-server graphql  prisma-client-lib
$ npm install -g prisma
npmによるインストールが完了したら、プロジェクト内でPrismaを利用出来るように設定をします。
$ prisma init
そのままDockerを使い、Prismaの設定を行なっていきます。
? Set up a new Prisma server or deploy to an existing server?
❯ Create new database                 Set up a local database using Docker
? What kind of database do you want to deploy to?
❯ PostgreSQL        PostgreSQL database
? Select the programming language for the generated Prisma client
❯ Prisma JavaScript Client
成功すると下記のような案内が表示されます。
Created 3 new files:

  prisma.yml           Prisma service definition
  datamodel.graphql    GraphQL SDL-based datamodel (foundation for database)
  docker-compose.yml   Docker configuration file

Next steps:

  1. Start your Prisma server: docker-compose up -d
  2. Deploy your Prisma service: prisma deploy
  3. Read more about Prisma server:
Dockerコンテナの起動
Dockerコンテナを起動する前に、生成されたファイルの設定変更をします。
①docker-compose.yml内の中ほどある、portに関する設定のコメントアウトを外す。
こちらがコメントアウトされたままだと、localhostで立ち上げることが出来ません。
# Uncomment the next two lines to connect to your your database from outside the Docker environment, e.g. using a database GUI like Postico
    ports:
      - "5432:5432"
②datamodel.graphqlの書き換えをします。こちらのファイルがORMとして機能するために必要なファイルの元になります。
type User {
  id: ID! @id
  name: String!
  email: String! @unique
  password: String!
}
③prisma.ymlは変更不要ですが、下記のようになります。
endpoint: http://localhost:4466
datamodel: datamodel.prisma

generate:
  - generator: javascript-client
    output: ./generated/prisma-client/
準備ができたら、先ほどの「Next steps」の案内に従い、コンテナを起動させます。
$ docker-compose up -d
$ prisma deploy
$ prisma generate
以上のコマンドを正常に実行すると、datamodel.prismaファイルから生成されたORMとして機能するために必要なファイルが作成されます。
下記のようにPrismaインスタンスをファイルにimportすると、QueryやMutationを実行する際に、データベースへアクセス出来るようになります。
const { prisma } = require('./generated/prisma-client')
Apolloサーバーに関するコードを書く
Prismaの設定が完了したら、GraphQLサーバーとして、Apolloを使用する準備をしていきます。bcryptとはパスワードのハッシュ化のために利用するライブラリです。
$ mkdir resolver
$ touch index.js schema.js  resolver/Mutation.js
$ npm install bcrypt jsonwebtoken
先ずはスキーマを定義します。
const {gql} = require('apollo-server');

const typeDefs = gql`
type Query {
  users(query: String): [User!]!
}

type Mutation {
  createUser(data: CreateUserInput!): AuthPayload!
  login(data: LoginUserInput!): AuthPayload!
}

type AuthPayload {
  token: String!
  user: User!
}

input CreateUserInput {
  name: String!
  email: String!
  password: String!
}

input LoginUserInput {
  email: String!
  password: String!
}

type User {
  id: ID!
  name: String!
  email: String
  password: String!
}
`
module.exports = typeDefs;
JWTとbcryptはこちらで利用しています。
Prismaはすべてのリゾルバー間で共有するので、第三引数のcontextとして使います。
const bcrypt = require('bcrypt');
const jwt = require('jsonwebtoken');

const Mutation = {
    async createUser(parent, args, { prisma }, info) {
        const { data: { email, name, password } } = args;
        const newUser = await prisma.createUser({
          email,
          name,
          // bcryptでパスワードをハッシュ化
          password: bcrypt.hashSync(password, 3)
        });
          // サーバーがJWTトークンを発行
        return {token : jwt.sign(newUser, "supersecret")};
    },
    async login(parent, args, { prisma }, info) {
        const { data: { email, password } } = args;
         // メールアドレスと照合
        const [ signInUser ] = await prisma.users({
          where: {
            email
          }
        })
       // console.log(signInUser) 該当ユーザーのid,name,email,passwordが格納されているオブジェクト
        if (!signInUser) throw new Error('Unable to Login');
         // 暗号化されたデータベース格納のパスワードと照合
        const isMatch = bcrypt.compareSync(password, signInUser.password);
        if (!isMatch) throw new Error('Unable to Login');
         // 一致した場合、新しいユーザ認証トークンを戻り値として返す
        return {token : jwt.sign(signInUser, "supersecret")};
    },
}

module.exports = Mutation
最後にApolloサーバー(GraphQLサーバー)を立ち上げする設定の処理を書きます。
const { ApolloServer } = require('apollo-server');
const Mutation = require('./resolver/Mutation')
const typeDefs = require('./schema')
// datamodel.prismaファイルから生成されたPrismaインスタンス
const { prisma } = require('./generated/prisma-client')


const server = new ApolloServer({
    typeDefs: typeDefs,
    resolvers: {
        Mutation
    },
    context: {
        prisma
    }
})

server.listen().then(({ url}) => {
    console.log(`🚀 Server ready at ${url}`);
});
GraphQL IDEにてテストをする
GraphQL IDEを使ってテストをします。
$ node index.js
🚀 Server ready at http://localhost:4000/
サインアップ
IDE上でname,email.passwordを含むクエリを書きます。
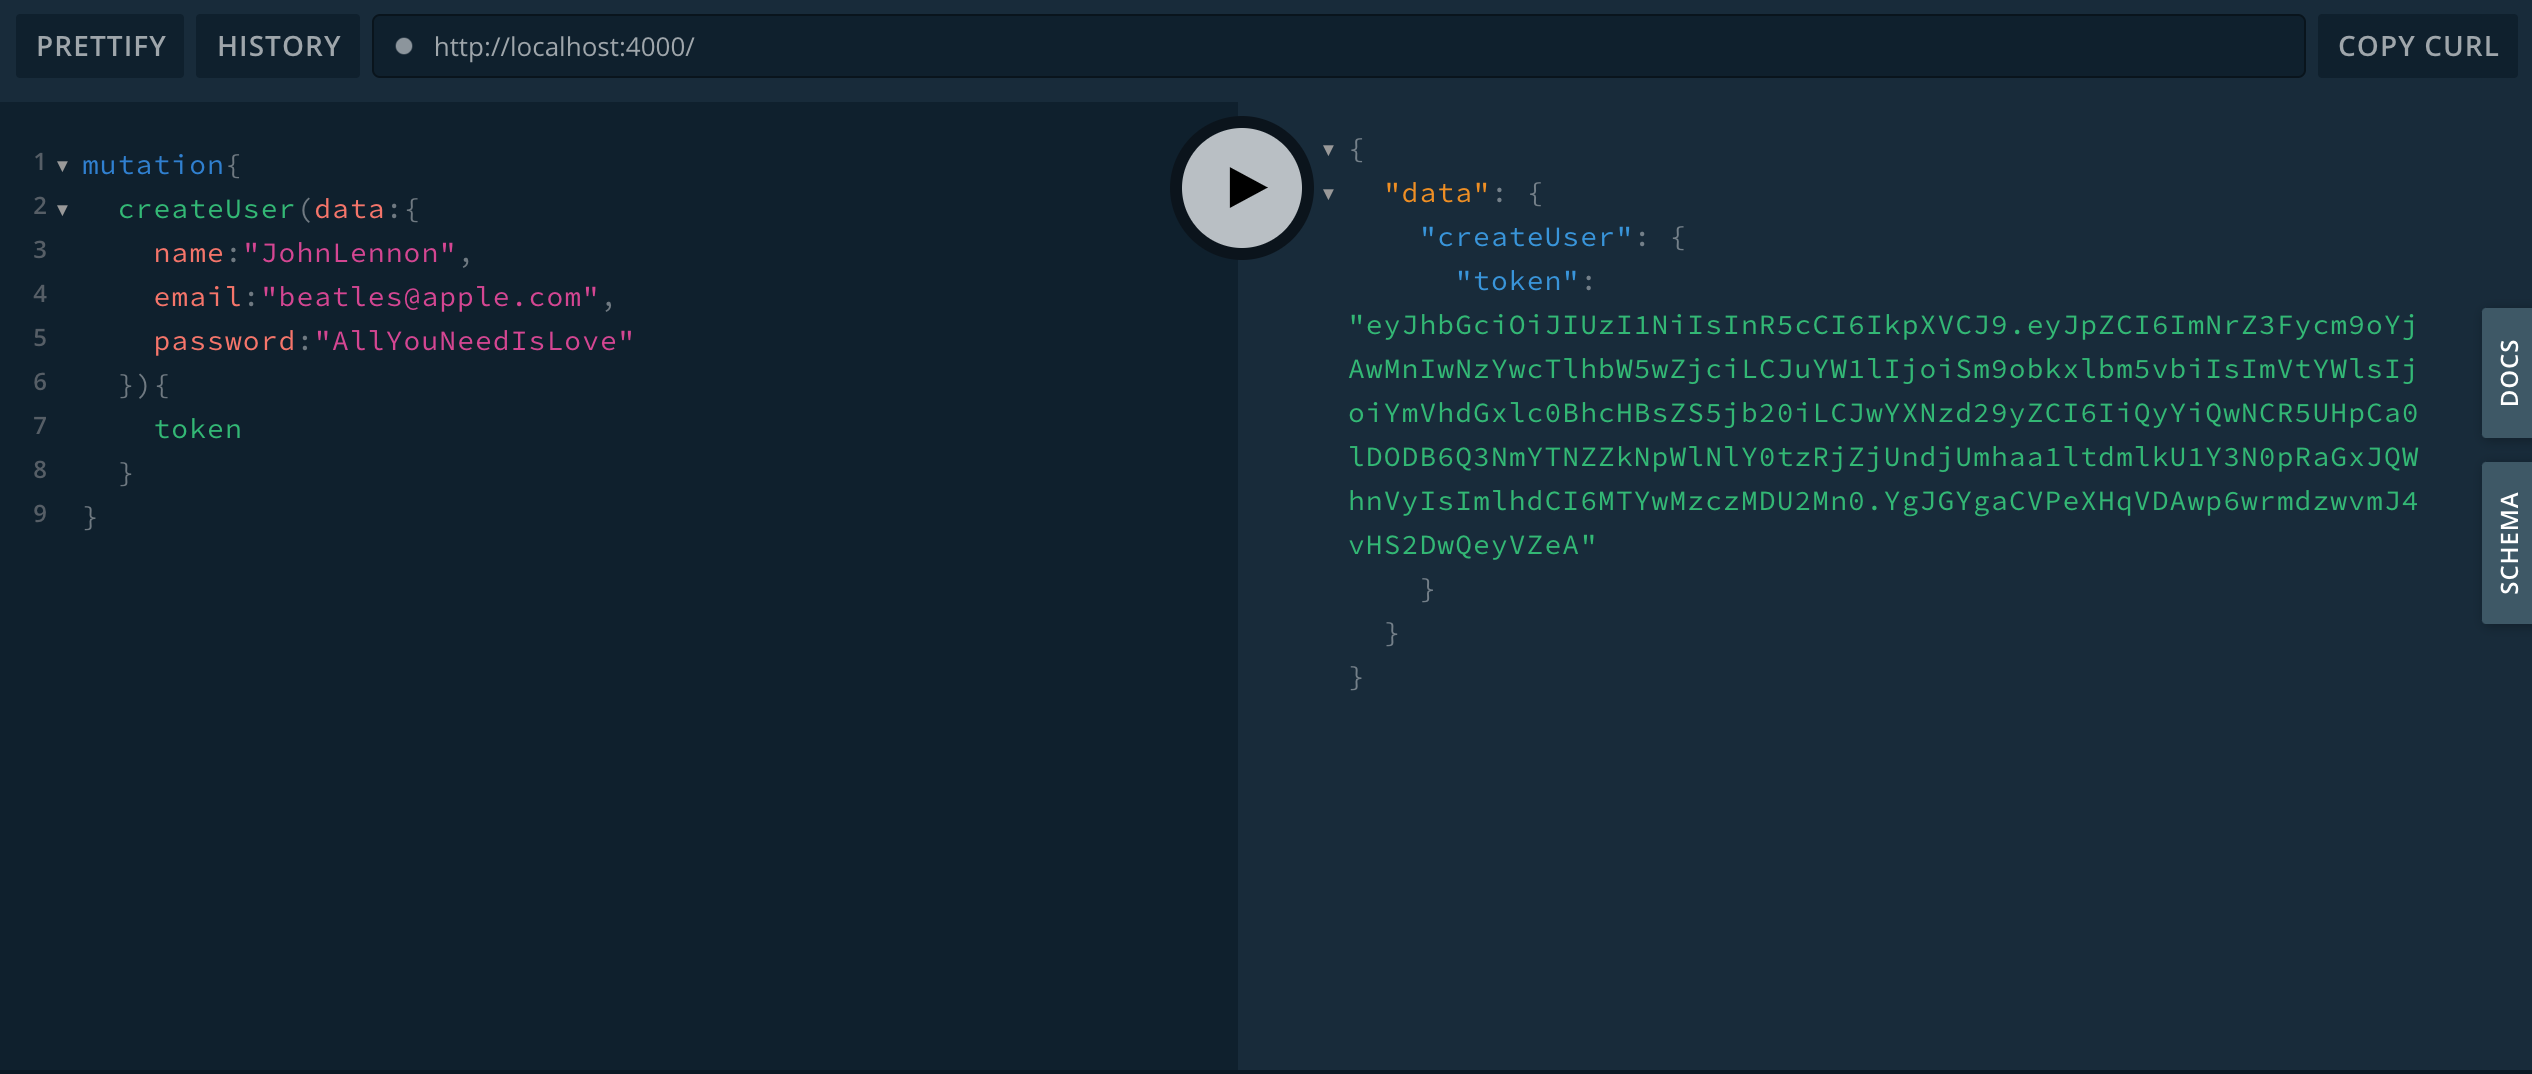
JWTトークンが返ってきました。
サインイン
続いてサインインの確認です。
サインアップと同じ、email,passwordをクエリで書きます。
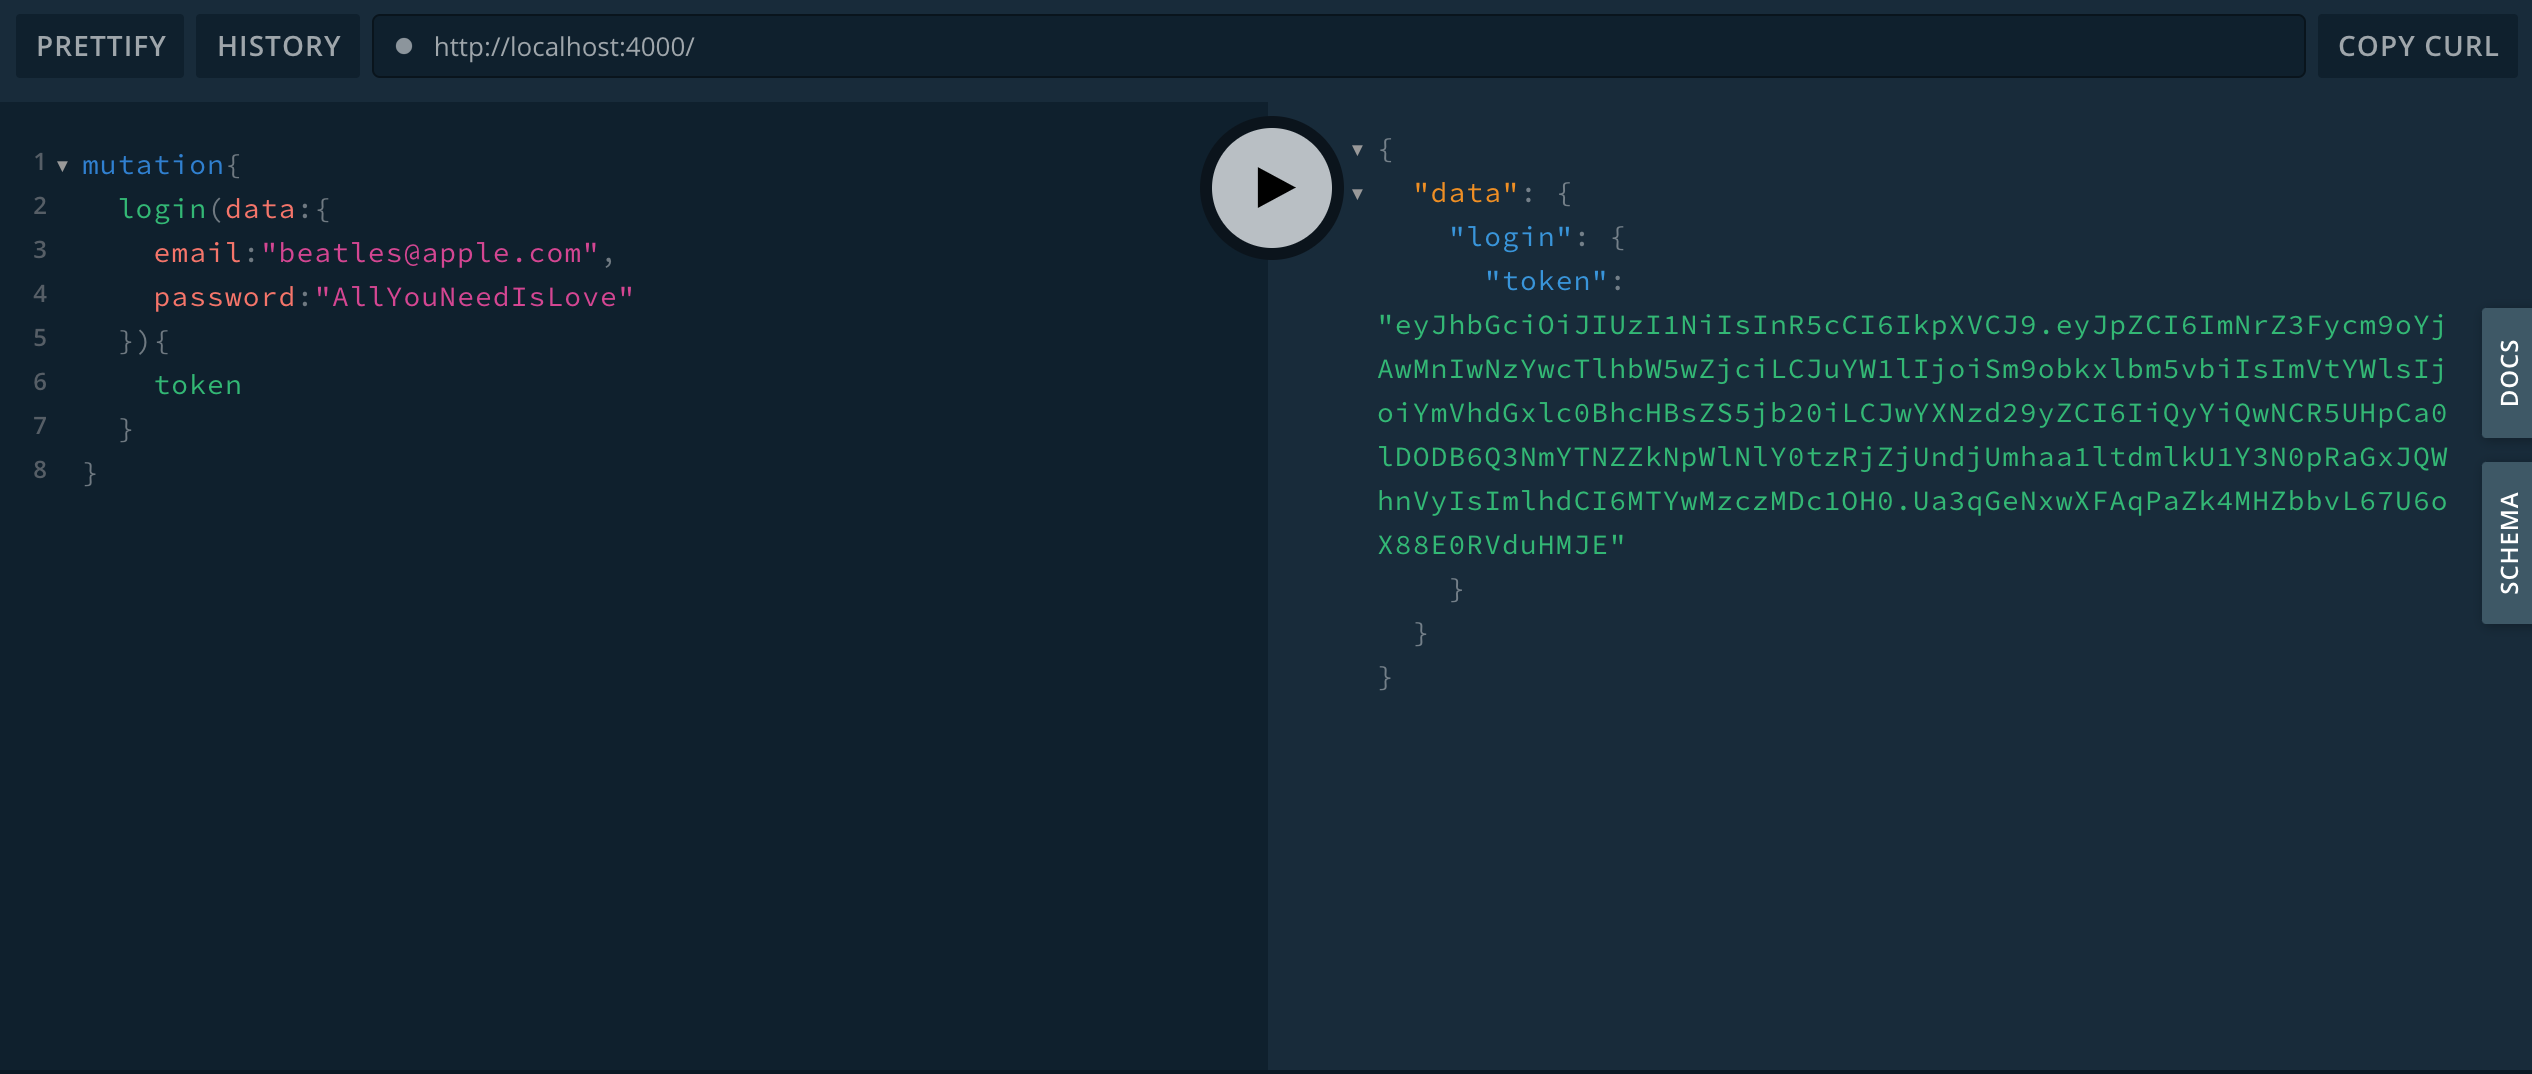
サインアップの時と同一のJWTトークンが返ってきました!
成功です!
おわりに
以上、GraphQLにおけるログイン認証をテストしてみました。
PrismaとDockerによって素早く環境を作ることができ、その後はほとんど意識することなく、コードを書けたのはGraphQLの強みであるように感じました。
それでは、また😊