前回の記事
iOS App Dev Tutorialsを読んでみた。その1 前回の記事を読んだ後、この記事をご覧ください。
今回の範囲
Using stacks to arrange views
第2回目は実際にXcodeを使って会議タイマーの画面を作成してみる。
内容の要約
1. プロジェクトを新規作成する
Xcodeを開き新しいテンプレートを作る。
2. 画面の内容をプログラムする。
1. 新しくテンプレートを作成すると『Hello,world』を映し出すコードが書かれている。まずはその名前とプレビューの構造をMeetingView用に書き換える。
MeetingView
struct MeetingView_Previews
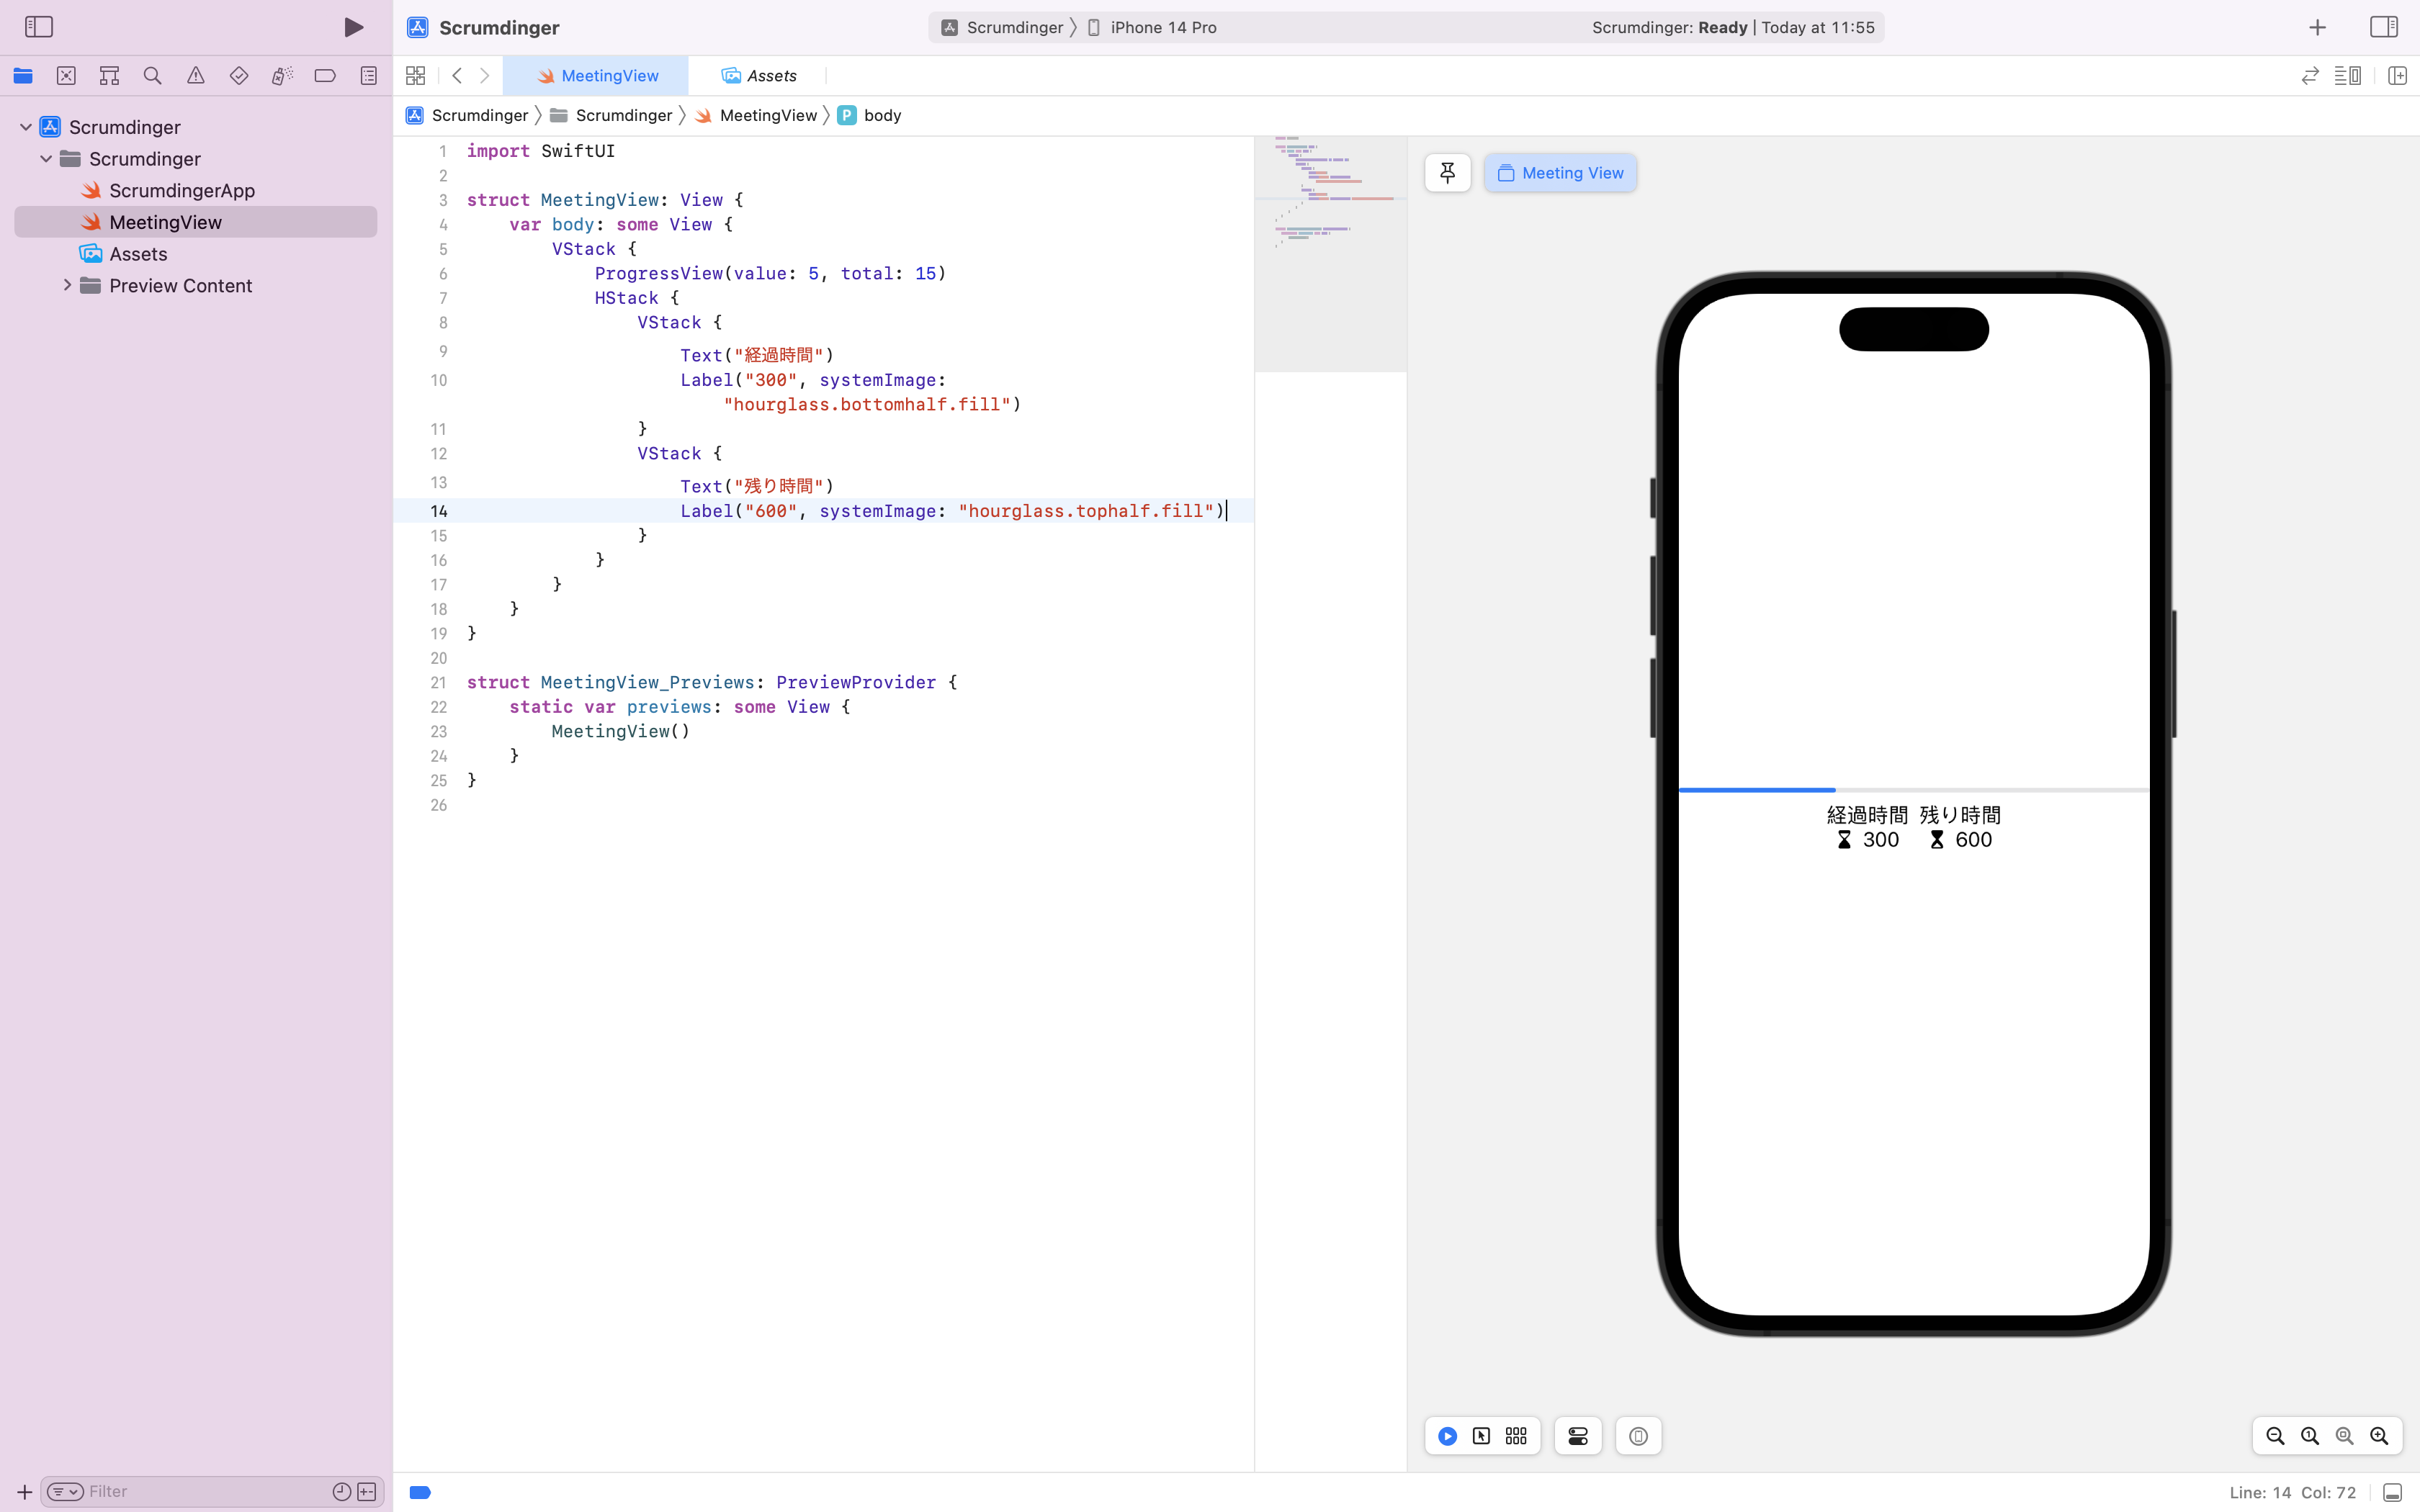
2.タイムバーを表示させ、その下に経過時間と残り時間というテキストと、砂時計を表示させる。
MeetingView
HStack {
    VStack(alignment: .leading) {
        Text("経過時間")
        Label("300", systemImage: "hourglass.bottomhalf.fill")
    }
    VStack(alignment: .trailing) {
        Text("残り時間")
        Label("600", systemImage: "hourglass.tophalf.fill")
    }
}
3. ビューの調整
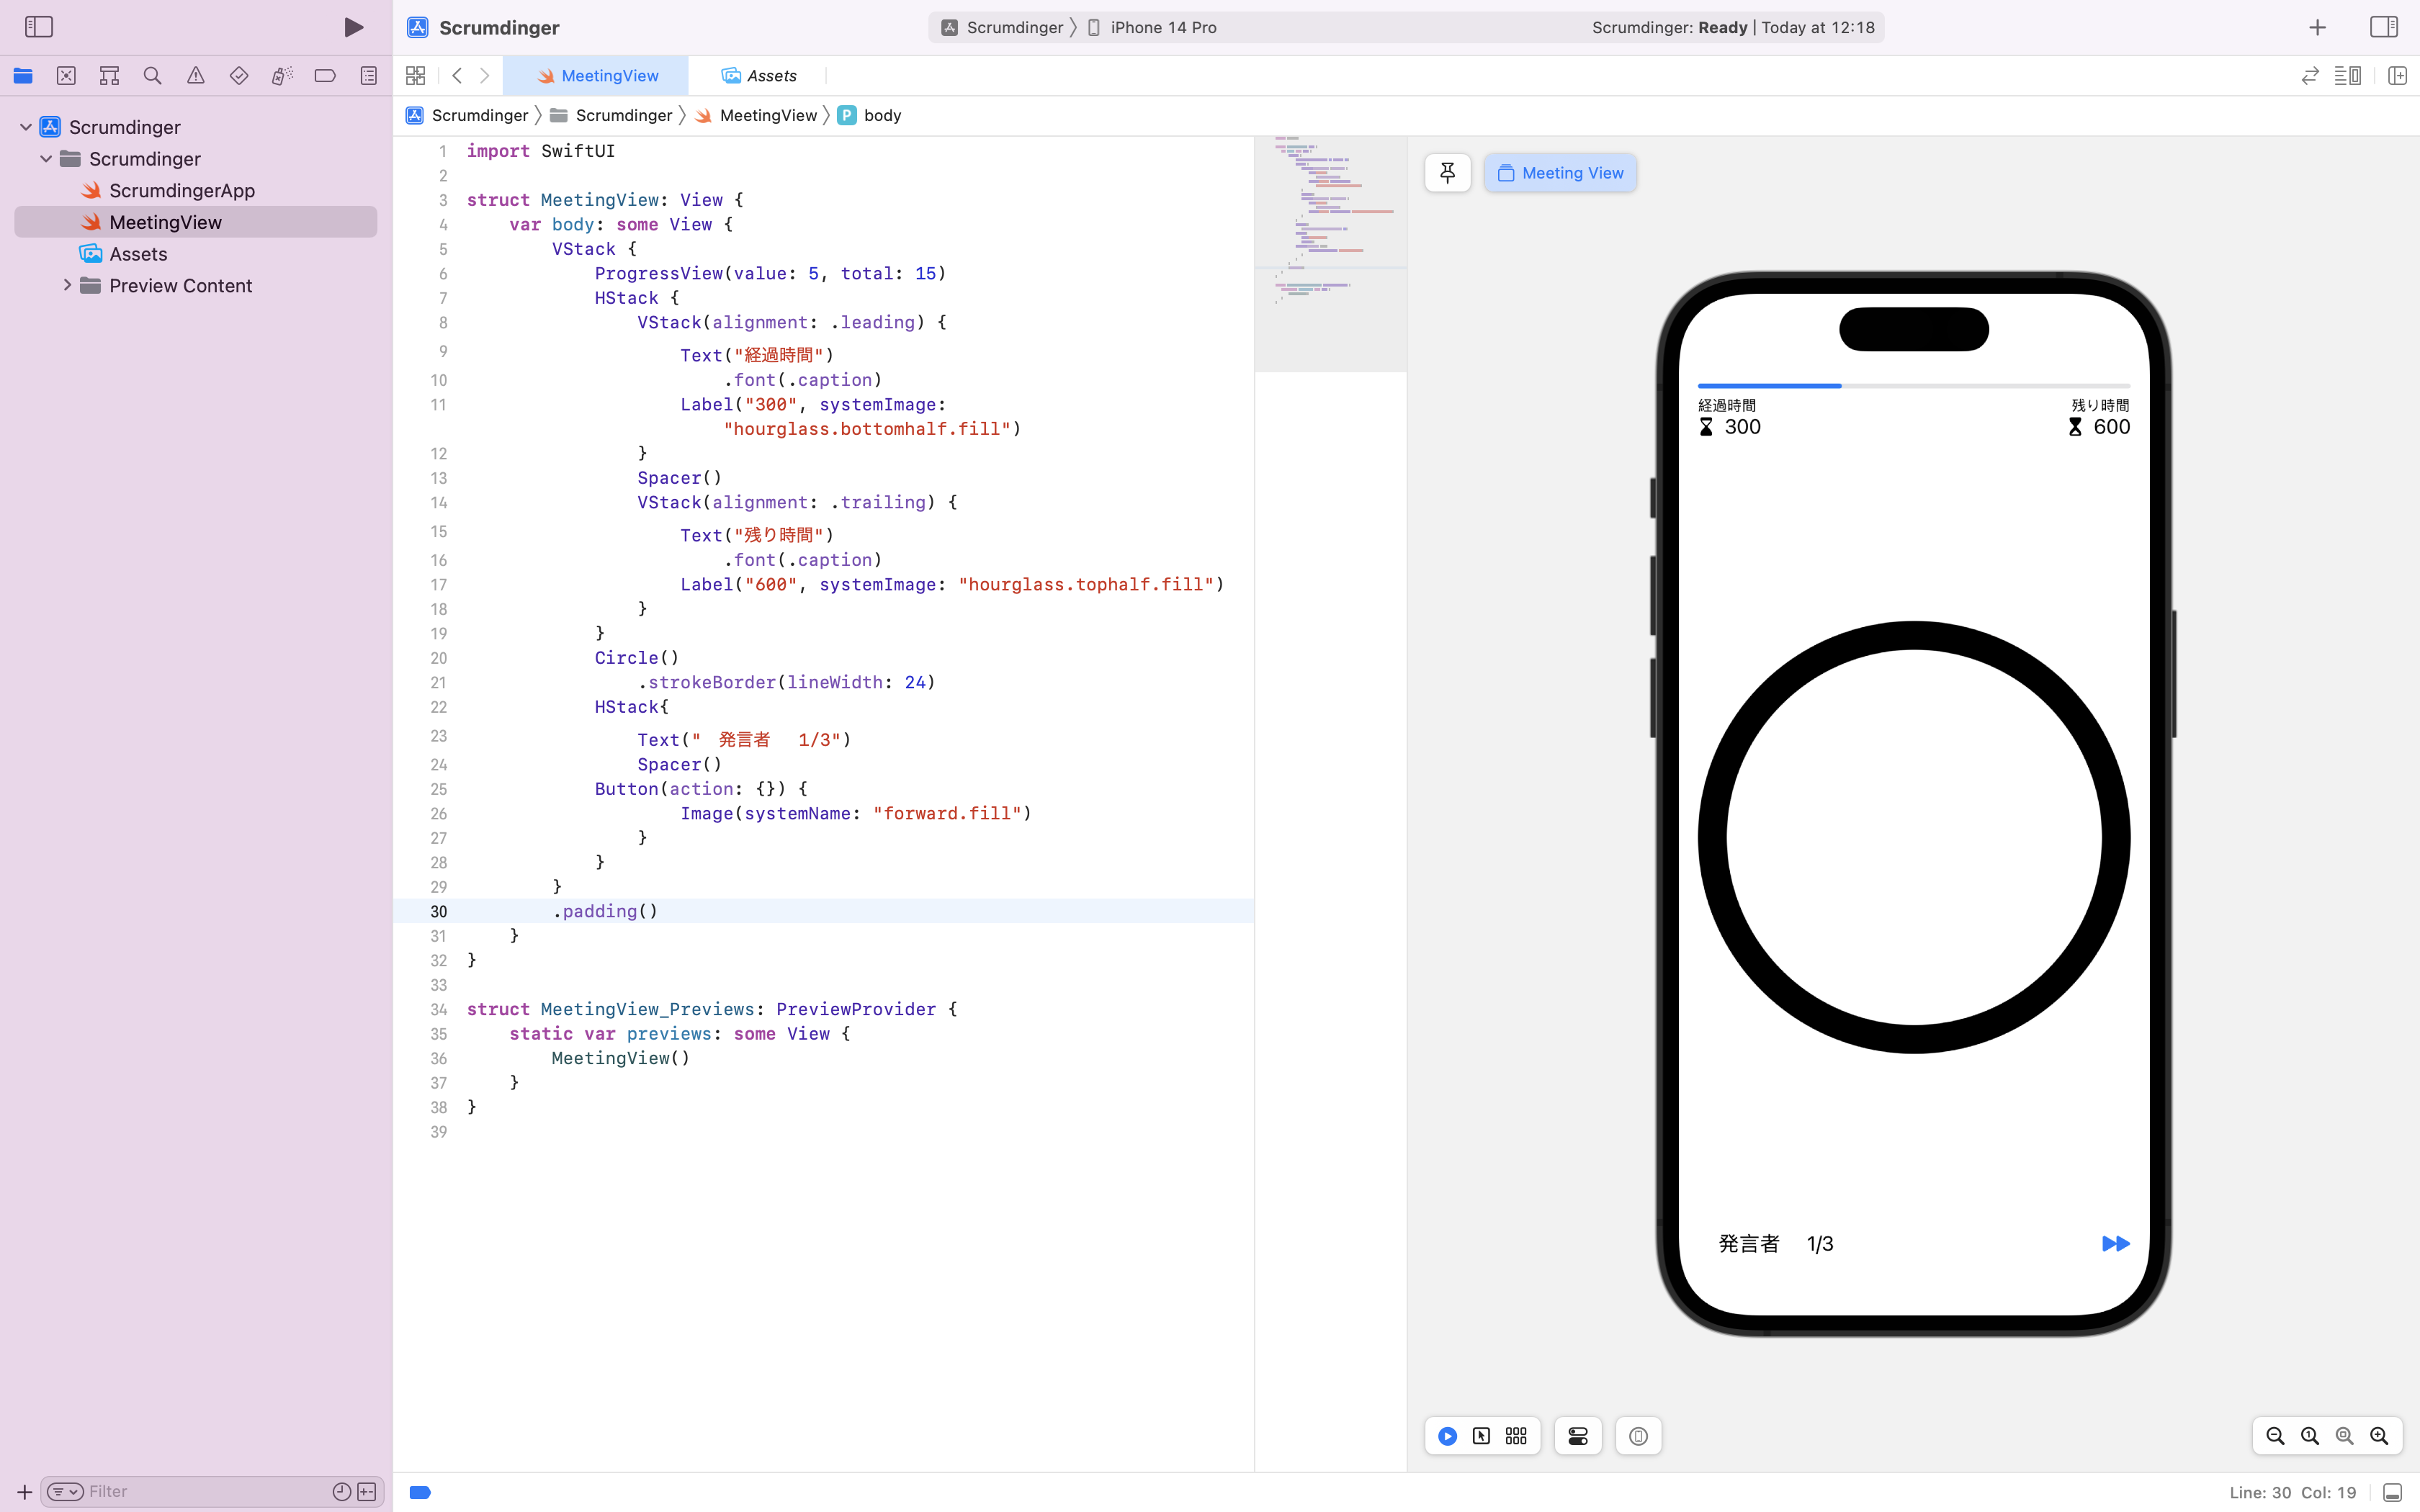
1.下の二つのコードを使ってテキストとテキストの間にスペースを空けてテキストのサイズを縮小する。
MeetingView
Spacer()
MeetingView
.font(.caption)
2.円形のタイマーと次の発言者に進むボタンを作る。
MeetingView
Circle()
    .strokeBorder(lineWidth: 24)
HStack {
    Text("Speaker 1 of 3")
    Spacer()
    Button(action: {}) {
        Image(systemName: "forward.fill")
    }
}
4. 終わり
第2回目のチュートリアルはここまでで終了です。次回は細かい設定などをやる予定です。

![スクリーンショット 2022-10-20 20.59.41.png]](https://qiita-user-contents.imgix.net/https%3A%2F%2Fqiita-image-store.s3.ap-northeast-1.amazonaws.com%2F0%2F2918800%2F34b37fdc-4f97-047e-c8be-1e8c0b82828f.png?ixlib=rb-4.0.0&auto=format&gif-q=60&q=75&s=e51701dcad41f322d9426b6d53268629)


