はじめに
こちらのページを参考にしながらSpring Boot 2を使ってメールを送信することにどうにか成功したのですが、途中送信ボタンを押した時にエラーが発生したり、クリックしすぎて大量にメールが送られたりと色々苦労したので、自分なりに改善したコードを共有したいと思います。
Maven Dependencies
今回はspring-boot-starter-mailを利用してメールを送信します。
Ajaxを利用するために、jQueryのwebjarも追加してます。
<dependencies>
  <dependency>
    <groupId>org.springframework.boot</groupId>
    <artifactId>spring-boot-starter-mail</artifactId>
  </dependency>
  <dependency>
    <groupId>org.springframework.boot</groupId>
    <artifactId>spring-boot-starter-thymeleaf</artifactId>
  </dependency>
  <dependency>
    <groupId>org.springframework.boot</groupId>
    <artifactId>spring-boot-starter-web</artifactId>
  </dependency>
  <dependency>
    <groupId>org.projectlombok</groupId>
    <artifactId>lombok</artifactId>
    <optional>true</optional>
  </dependency>
  <dependency>
    <groupId>org.springframework.boot</groupId>
    <artifactId>spring-boot-starter-test</artifactId>
    <scope>test</scope>
  </dependency>
  <dependency>
    <groupId>org.webjars</groupId>
    <artifactId>bootstrap</artifactId>
    <version>4.3.1</version>
  </dependency>
  <dependency>
    <groupId>org.webjars</groupId>
    <artifactId>jquery</artifactId>
    <version>3.3.1-2</version>
  </dependency>
</dependencies>
サンプル
application.properties
今回はGmailを使用します
spring.mail.host=smtp.gmail.com
spring.mail.port=587
spring.mail.username={your_gmail_account}
spring.mail.password={your_app_password}
spring.mail.properties.mail.smtp.auth=true
spring.mail.properties.mail.smtp.starttls.enable=true
View
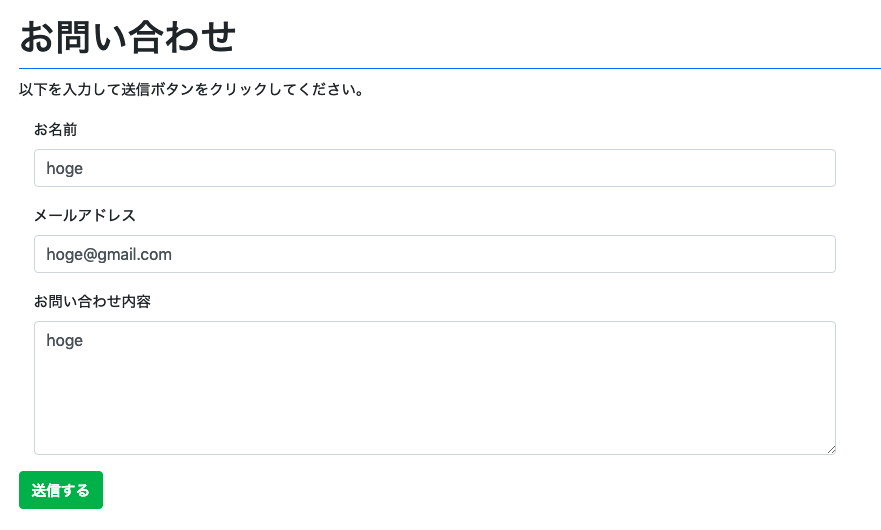
簡単なお問い合わせフォームです。ThymeleaftとBootstrapを使用しています。
<html xmlns:th="http://www.thymeleaf.org">
<head>
  <meta charset="utf-8">
  <link rel="stylesheet" media="all"
        th:href="@{/webjars/bootstrap/4.3.1/css/bootstrap.min.css}">
  <script th:src="@{/webjars/jquery/3.3.1-2/jquery.min.js}"></script>
  <script src="js/script.js"></script>
  <title>Send email with Spring Boot</title>
</head>
<body>
  <div class="container">
    <h1 class="pb-2 mt-4 mb-2 border-bottom border-primary">
      お問い合わせ
    </h1>
    <div>
      <p>以下を入力して送信ボタンをクリックしてください。</p>
      <form name="contactform" id="contactform" role="form">
        <div class="form-group">
          <label for="inputName" class="col-sm-3">お名前</label>
          <div class="col-sm-9">
            <input type="text" class="form-control" name="name"
                   placeholder="お名前" value="">
          </div>
        </div>
        <div class="form-group">
          <label for="inputEmail" class="col-sm-3">メールアドレス</label>
          <div class="col-sm-9">
            <input type="email" class="form-control" name="email"
                   placeholder="メールアドレス" value="">
          </div>
        </div>
        <div class="form-group">
          <label for="inputMessage" class="col-sm-3">お問い合わせ内容</label>
          <div class="col-sm-9">
            <textarea class="form-control" name="message" rows="5">
            </textarea>
          </div>
        </div>
        <div class="text-center">
          <button type="button" name="btnSubmit"
                  class="btn btn-success" id="btnSend">送信する</button>
        </div>
      </form>
    </div>
  </div>
</body>
</html>
JavaScript
送信ボタンが押された際に実行されるscriptです。
$(document).ready(function() {
	$('#btnSend').click(function() {
		$("#btnSend").prop("disabled", true);
		// フォームのデータをJSONに変換
		var rawData = $('#contactform').serializeArray();
		var data = {};
		jQuery.each(rawData, function(i, e) {
			data[e.name] = e.value;
		});
		// Ajaxを使ってメールを送信
		$.ajax({
			type: "POST",
			url: "./sendmail",
			dataType: "json",
			data: JSON.stringify(data),
			contentType: 'application/json',
			scriptCharset: 'utf-8',
			success: function(outdata, dataType) {
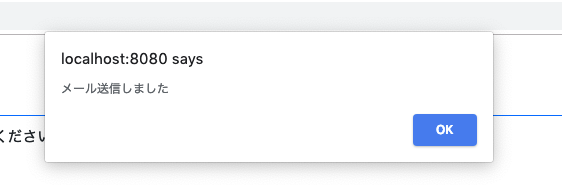
				if (outdata[0] == "OK") alert("メール送信しました");
				$("#btnSend").prop("disabled", false);
			},
			error: function(XMLHttpRequest, textStatus, errorThrown) {
				alert("Error : " + errorThrown);
				$("#btnSend").prop("disabled", false);
			}
		});
	});
});
Model
フォームデータを一時的に格納するためのモデルです。
package jp.co.e3sys.model;

import lombok.Getter;
import lombok.Setter;

@Getter
@Setter
public class ContactForm {
	private String name;
	private String email;
	private String message;
}
Controller
フォーム表示用
package jp.co.e3sys.controller;

import org.springframework.stereotype.Controller;
import org.springframework.ui.Model;
import org.springframework.web.bind.annotation.GetMapping;

@Controller
public class IndexController {
	@GetMapping("/")
	String index(Model model) {
		return "index";
	}
}
メール送信用
package jp.co.e3sys.controller;

import java.util.Arrays;
import java.util.List;

import org.springframework.beans.factory.annotation.Autowired;
import org.springframework.http.MediaType;
import org.springframework.mail.MailSender;
import org.springframework.mail.SimpleMailMessage;
import org.springframework.web.bind.annotation.RequestBody;
import org.springframework.web.bind.annotation.RequestMapping;
import org.springframework.web.bind.annotation.RequestMethod;
import org.springframework.web.bind.annotation.ResponseBody;
import org.springframework.web.bind.annotation.RestController;

import jp.co.e3sys.model.ContactForm;

@RestController
public class SendMailController {
	@Autowired
	private MailSender mailSender;

	@RequestMapping(value="/sendmail", method=RequestMethod.POST, consumes=MediaType.APPLICATION_JSON_VALUE)
	@ResponseBody
	public List<String> sendmail(@RequestBody ContactForm form) {
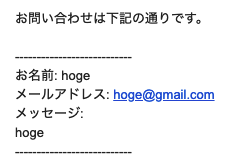
		String body = "お名前: " + form.getName() + "\n" +
				"メールアドレス: " + form.getEmail() + "\n" +
				"メッセージ: \n" + form.getMessage();
		SimpleMailMessage msg = new SimpleMailMessage();
		msg.setFrom(form.getEmail());
		msg.setTo("xxx@gmail.com"); // 適宜変更してください
		msg.setSubject("お問い合わせがありました");
		msg.setText("お問い合わせは下記の通りです。\n\n---------------------------\n" + body + "\n---------------------------");
		mailSender.send(msg);
		return Arrays.asList("OK");
	}
}
Application.javaを作成し、動作確認
main関数を作成し、テストしてみます。
package com.example.app;

import org.springframework.boot.SpringApplication;
import org.springframework.boot.autoconfigure.SpringBootApplication;
import org.springframework.context.annotation.ComponentScan;

@SpringBootApplication
@ComponentScan("com.example.controller") //コントローラのパッケージが別の場合
public class Application {

	public static void main(String[] args) {
		SpringApplication.run(Application.class, args);
	}
}
送信ボタンを一度押すと、複数回押せないようにボタンを一旦無効化します

次のステップ
今度は定期的なタスク(メール送信)実行をSpringで実現してみたいと思います。


