今回は静的サイトジェネレーターのHugoを使って、ブログを作る方法をなるべく丁寧に解説します。
Hugoとは?
今流行りの静的サイトジェネレーターの一つです。
中身はGO言語で作られています。
特徴はビルド速度がとても早く、ブログやポートレートサイトを作るためのテーマが揃っています。
そしてNetlifyやgithubPagesのサービスと組み合わせることによって、無料でホスティングすることもできます。
さらにnetlify CMSを使うと、WordPressのようにブラウザ上の管理画面で記事を投稿できます。
今回はシリーズでHugo + gitlab + Netlify + Netlify CMSを使い、
無料ホスティングすることを目指そうと思います。
まずはこの記事ではHugoのテーマのサンプルブログを立ち上げて、
最初の1記事を投稿するところを解説しようと思います。
作業環境はWSLでWindows上にLinux(Ubuntu)を立ち上げて、
この環境で作業をします。
立ち上げ方が分からない方はこの記事を参考に立ち上げてみてください。
え~、そんなWindowsでLinux動かす方法があるんだったら、もっと早く教えてよ。
ステップ1: 最新のHugoをインストールする
apt-getでインストールすることもできますが、古いVersionのHugoなので、
直接、最新のHugoをインストールします。
ここのページで最新のソフトをダウンロードします。
https://github.com/gohugoio/hugo/releases
今回は hugo_0.53_Linux-64bit.deb のURLをコピーして使います。
$ wget https://github.com/gohugoio/hugo/releases/download/v0.53/hugo_0.53_Linux-64bit.deb
$ sudo dpkg -i hugo_0.53_Linux-64bit.deb
$ hugo version
Hugo Static Site Generator v0.53-8FC339DC2529FF77E494A1C12CD1FF9FBCB880A4 linux/amd64 BuildDate: 2018-12-24T08:26:10Z
versionが表示されれはインストール成功です。
ステップ2: 新しいサイトを作成する
次のコマンドでベースとなるスケルトンフォルダを作ります。
$ hugo new site myblog
Congratulations! Your new Hugo site is created in /home/appuser/sample_hugo/myblog.

Just a few more steps and you're ready to go:

1. Download a theme into the same-named folder.
   Choose a theme from https://themes.gohugo.io/, or
   create your own with the "hugo new theme <THEMENAME>" command.
2. Perhaps you want to add some content. You can add single files
   with "hugo new <SECTIONNAME>/<FILENAME>.<FORMAT>".
3. Start the built-in live server via "hugo server".

Visit https://gohugo.io/ for quickstart guide and full documentation.
ステップ3: テーマを追加します
Hugoには色々なテーマが用意されています。
https://themes.gohugo.io/
今回は自分のブログでも適用している casper-two を適用します。
https://themes.gohugo.io/hugo-casper-two/
ポイントは git submodule で追加することです。
これでNetlifyと連携する時にいい感じになります。
$ cd myblog
$ git init
$ git submodule add https://github.com/eueung/hugo-casper-two.git themes/casper-two

Cloning into '/home/appuser/sample_hugo/myblog/themes/casper-two'...
remote: Enumerating objects: 522, done.
remote: Total 522 (delta 0), reused 0 (delta 0), pack-reused 522
Receiving objects: 100% (522/522), 3.96 MiB | 3.63 MiB/s, done.
Resolving deltas: 100% (233/233), done.
ステップ4: サンプルサイトをコピー
テーマのフォルダの中のサンプルサイトをコピーしてmyblog/以下に設置します。
これでcontent/と、static/と、config.tomlがコピーされます。
コマンドはmyblog/直下で実行してください。
$ cp -r themes/casper-two/exampleSite/* ./
ステップ5: 簡易サーバーを起動します
$ hugo server

                   | EN
+------------------+----+
  Pages            | 35
  Paginator pages  |  2
  Non-page files   |  0
  Static files     | 22
  Processed images |  0
  Aliases          | 11
  Sitemaps         |  1
  Cleaned          |  0

Total in 42 ms
Watching for changes in /home/appuser/sample_hugo/myblog/{content,data,layouts,static,themes}
Watching for config changes in /home/appuser/sample_hugo/myblog/config.toml
Environment: "development"
Serving pages from memory
Running in Fast Render Mode. For full rebuilds on change: hugo server --disableFastRender
Web Server is available at //localhost:1313/ (bind address 127.0.0.1)
Press Ctrl+C to stop
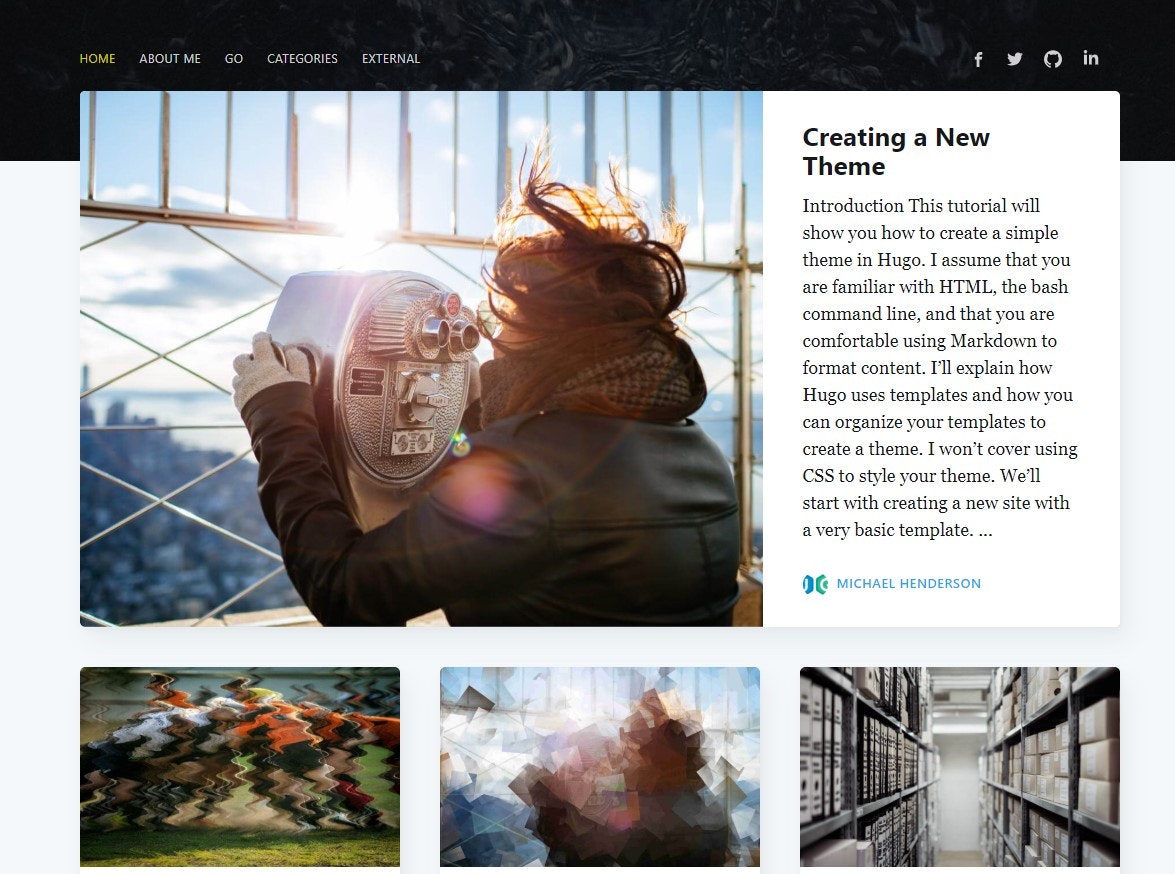
ブラウザで以下のURLにアクセスしてサンプルブログが表示されれば成功です。
http://localhost:1313/
ステップ6: 初めての自分の記事を投稿します
今回のサンプルサイトでは post 下にmarkdownファイルを作成します。
$ hugo new post/my-first-post.md
/home/appuser/sample_hugo/myblog/content/post/my-first-post.md created
vim で my-first-post.md の中身を編集します。
draft: trueを削除して、自分の適当な文章を入力します。
---
title: "My First Post"
date: 2019-01-06T13:36:49+09:00
draft: true  ここを削除します
---
Hello World !
はじめてのブログだよ。
hugo server コマンドで簡易サーバーを起動し、
投稿した記事が表示されているか確認しましょう。

自分の作成したページが表示されていれば成功です。
まとめ
さてどうでしょうか?
簡単にHugoを立ち上げることができたでしょうか?
これからブログを立ち上げようとする方や、
静的サイトジェネレータを使ってみたい方は
Hugoを使ってみてはいかがでしょうか?
次回は、ここで作ったHugoブログをgitlabにPushして、Netlifyから無料ホスティングする方法を解説しようと思います。
自分の技術ブログではフリーランス界隈の情報や最新のIT情報の発信していますので、よろしくお願いします。
それではみなさん、次の記事でお会いしましょうーー!