ROS2とWebの連携
ロボットの制御をWebブラウザで行いたい。
なぜなら、コントローラー側にアプリを入れる必要がないから。
というわけで、Webと連携させていきます。
Apache Web Serverの導入
まずは、Webサーバをラズパイに実装します。
リモートデスクトップまたはSSHにてラズパイにログインして以下のコマンドを実行します。
$ sudo apt update
$ sudo apt install -y apache2
イントラネットでのみの利用を想定しているのでファイアウォールの設定は省いています。
Apacheがインストールできたら、一度サイト表示されるか確認します。
PC側のブラウザにて、URLに http://[ホスト名].local として表示されるか確認してください。
表示されたら、自分のホームディレクトリ以下がサイトに表示されるように設定を変更します。
$ sudo nano /etc/apache2/sites-available/000-default.conf
上記コマンドで設定ファイルを開きます。
開いたら、 以下を修正追加します。
    ServerAdmin webmaster@localhost
    ServerName minitan.local
    DocumentRoot /home/shoichi/www/html
    #DocumentRoot /var/www/html
    <Directory /home/shoichi/www/html>
            Options FollowSymlinks Includes
            AllowOverride All
            AddType text/html .html
            Require all granted
    </Directory>
ServerAdminは上記のままでも特に問題はないです。
ServerNameはホスト名を入れてください。
もとからあるDocumentRootをコメントアウトして、自分のホームディレクトリ以下にWebサイト用のディレクトリを用意します。
設定を変更したら、Ctrl+Xで保存終了してください。
設定を保存しただけだと反映されないため、以下のコマンドで反映させます。
$ sudo a2ensite 000-default.conf
これでサイト設定が反映されましたので、Apacheを起動(再起動)させます。
手順はSSHの時やFTPサーバを入れたときと同じです。
$ sudo systemctl start apache2
また、再起動時に自動で実行するようにもしておきます。
$ sudo systemctl enable apache2
次に、ホームディレクトリにWebサイトのディレクトリ作成及びパーミッションの設定をします。
パーミッションを変更しないとサイトが表示されません
$ cd /home
$ chmod +x [ユーザー名]
$ cd ~
$ mkdir -p www/html
$ chmod -R +x www
パーミッションの変更ができたら、index.html ファイルを置いて表示されるか確認します。
$ cd ~/www/html
$ echo "Done!" >> index.html
ブラウザで、http://[ホスト名].local/index.html でDone!と表示されればOKです。
rosbridge_suiteの導入
ROSとWebを連携させるために、rosbridge_suiteを導入します。
$ sudo apt update
$ sudo apt install -y ros-humble-rosbridge-suite
これでインストールされます(便利)
実行は以下のコマンドでできます。
$ ros2 launch rosbridge_server rosbridge_websocket_launch.xml
そういえば、まだワークスペースを作ってませんでした。
$ cd ~
$ mkdir -p [ワークスペース名]/src
$ cd ~/[ワークスペース名]
$ colcon build
これでワークスペースの作成ができました。
連携させてみる
ROS側、Web側ともに下準備ができたので、連携させるためのプログラムを作っていきます。
ROS側にパッケージを作成する
以下のコマンドでパッケージを作成します。
$ cd ~/[ワークスペース名]/src
$ ros2 pkg create --build-type ament_python --node-name webtest_node webtest
webtestディレクトリが作成されていますので、ディレクトリに入ってプログラミングしていきます。
PC側のVisual Studio Codeで表示しながらプログラミングするのがおすすめです。
webtestディレクトリ内にさらにwebtestディレクトリがあって、その中に webtest_node.pyがあるので、そのファイルを以下のように編集します。
import rclpy
from rclpy.node import Node
from std_msgs.msg import String

class WebTestNode(Node):
    def __init__(self):
        super().__init__('webtest_node')
        self.pub = self.create_publisher(String, 'webtest', 10)
        self.timer = self.create_timer(1, self.timer_callback)
        self.cnt = 0
    def timer_callback(self):
        msg = String()
        self.cnt += 1
        msg.data = f'Web Test Count: {self.cnt}'
        self.pub.publish(msg)
        self.get_logger().info(f'publish: {msg.data}')

def main():
    try:
        print('Hi from webtest.')
        rclpy.init()
        node = WebTestNode()
        rclpy.spin(node)
    except KeyboardInterrupt:
        node.get_logger().info('Ctrl+C received - exiting...')
    finally:
        node.get_logger().info('ROS node shutdown')
        node.destroy_node()
        rclpy.shutdown()


if __name__ == '__main__':
    main()
編集が終わったら(PC側のVisual Studio Codeで編集している場合は保存&FTPアップロードをお忘れなく)、ビルドして実行してみます。
SSH接続したターミナルから
$ cd ~/[ワークスペース]
$ colcon build
で、ビルドした後
$ source install/setup.bash
$ ros2 run webtest webtest_node
で実行します。
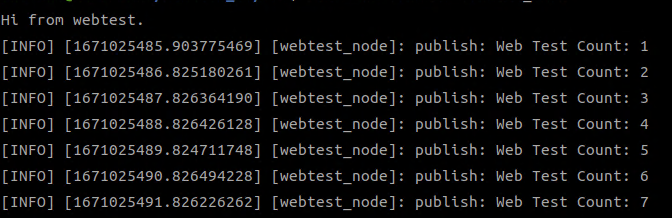
上記のようにカウントアップされていけばOKです。一旦Ctrl+Cで止めましょう。
次は、Web側の準備をします。
先程作成した www/html/index.htmlを編集します。
<!DOCTYPE html>
<html lang="ja">
<head>
    <meta charset="UTF-8">
    <title>WebTest</title>
    <script src="http://static.robotwebtools.org/EventEmitter2/current/eventemitter2.min.js"></script>
    <script src="http://static.robotwebtools.org/roslibjs/current/roslib.min.js"></script>
    <script src="https://cdnjs.cloudflare.com/ajax/libs/jquery/3.6.1/jquery.min.js"></script>
    <script src="webtest.js"></script>
</head>
<body>
    <div id="main-contents">

    </div>
</body>
</html>
次にJavascriptファイル webtest.js をwww/html以下に作成します。
$(function() {
    let ros = new ROSLIB.Ros({
        url : 'ws://ホスト名.local:9090'
    });

    ros.on('connection', function() {
        console.log('Connected to websocket server.');
    });
    ros.on('error', function(error) {
        console.log('Error connecting to websocket server: ', error);
    });
    ros.on('close', function() {
        console.log('Connection to websocket server closed.');
    });

    let webtest_listener = new ROSLIB.Topic({
        ros : ros,
        name : '/webtest',
        messageType : 'std_msgs/msg/String'
    });

    function ros_webtest_topic_subscribe() {
        webtest_listener.subscribe(function(message) {
            $('#main-contents').html('subscribe: ' + message.data);
        });
    }
    ros_webtest_topic_subscribe();
});
上記2つのファイルをラズパイ側にFTPアップロードしたら準備は完了です。
Javascriptの方、下記記述部分のホスト名を書き換えるのをお忘れなく
url : 'ws://ホスト名.local:9090'
sshまたはリモートデスクトップで、以下のコマンドを実行してROS側の処理を開始します。
$ cd ~/[ワークスペース]
$ ros2 run webtest webtest_node
別のターミナルで
$ ros2 launch rosbridge_server rosbridge_websocket_launch.xml
次に、PC側のブラウザで http://[ホスト名].local/index.html を表示してみましょう。
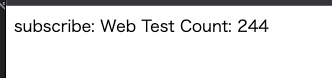
このような感じで、数字がカウントアップされていれば正しく受信できています。
これでWebとの連携が出来るようになりました。お疲れさまでした!
次は、ラズパイのカメラ映像をWebで表示する方法を書いていく予定です。