昨日のUnitテストが若干結合テストを含んでいたことは置いといて, 今日はIntegration Testを説明します。
結合テスト
公式ドキュメントにもあるように現時点ではiOSのみです。このテストは、XcodeのテストとJSとのコンビネーションで実現しています。
環境設定
(少し前に設定したので、忘れてる部分があるかもしれません。ご容赦ください)
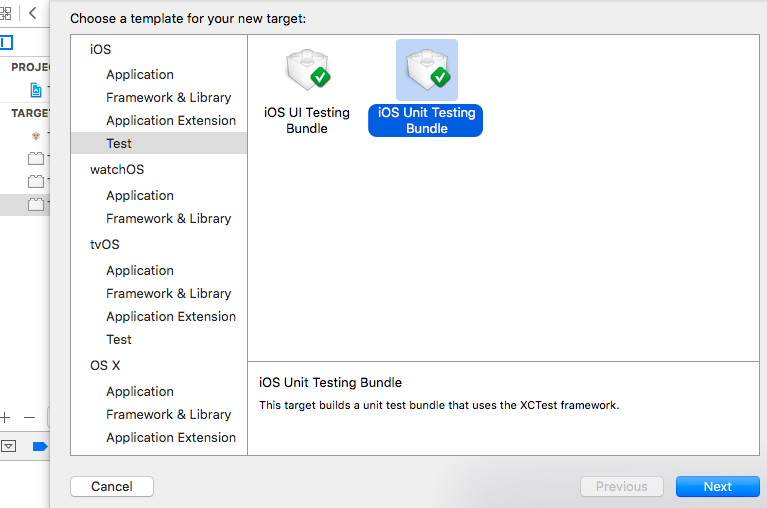
1. iOS Unit test bundleを追加
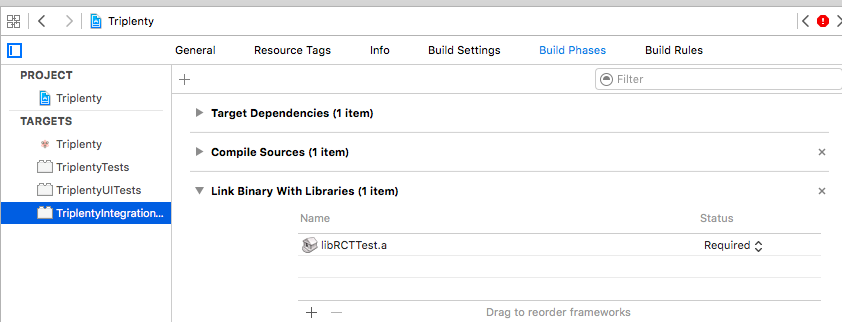
2. Linking library
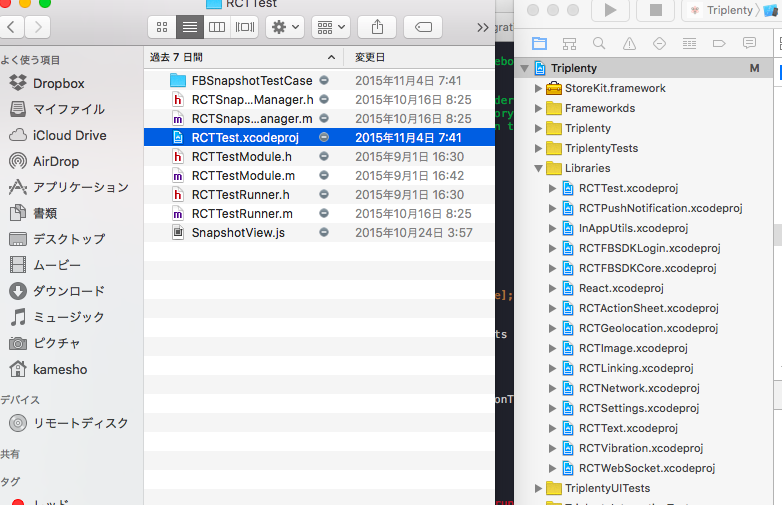
node_modules/react-native/Libraries/RCTTest/RCTTest.xcodeprojをリンクさせる。Xcodeの左のペインにドラックアンドドロップする。詳しくはこちら
3. テストファイル(*.m)を書き換える
# import <UIKit/UIKit.h>
# import <XCTest/XCTest.h>

# import <RCTTest/RCTTestRunner.h>

# import "RCTAssert.h"

# define RCT_TEST(name)                  \
- (void)test##name                      \
{                                       \
[_runner runTest:_cmd module:@#name]; \
}

@interface TriplentyIntegrationTests : XCTestCase

@end


@implementation TriplentyIntegrationTests
{
  RCTTestRunner *_runner;
}

- (void)setUp
{
# if __LP64__
  RCTAssert(NO, @"Tests should be run on 32-bit device simulators (e.g. iPhone 5)");
# endif

  NSOperatingSystemVersion version = [NSProcessInfo processInfo].operatingSystemVersion;
  RCTAssert((version.majorVersion == 8 && version.minorVersion >= 3) || version.majorVersion >= 9, @"Tests should be run on iOS 8.3+, found %zd.%zd.%zd", version.majorVersion, version.minorVersion, version.patchVersion);
  _runner = RCTInitRunnerForApp(@"iOS/TriplentyIntegrationTests/js/IntegrationTestsApp", nil);
}

# pragma mark Logic Tests


// This list should be kept in sync with IntegrationTestsApp.js
RCT_TEST(IntegrationTestHarnessTest)
RCT_TEST(TriplentyTest)
//RCT_TEST(AsyncStorageTest)
//RCT_TEST(AppEventsTest)
////RCT_TEST(ImageSnapshotTest) // Disabled: #8985988
//RCT_TEST(SimpleSnapshotTest)

// Disable due to flakiness: #8686784
//RCT_TEST(LayoutEventsTest)
//RCT_TEST(PromiseTest)

@end
4. JSファイルを作る
iOS/<target test name>/js/ディレクトリを作り、3)のRCT_TESTの引数のファイル名を作る。例にもある下記のIntegrationTestHarness.jsでテストがうまくいっているかXcodeのテストを起動して確認します。
'use strict';

var RCTTestModule = require('NativeModules').TestModule;
var React = require('react-native');
var {
  Text,
  View,
} = React;

var IntegrationTestHarnessTest = React.createClass({
  propTypes: {
    shouldThrow: React.PropTypes.bool,
    waitOneFrame: React.PropTypes.bool,
  },

  getInitialState() {
    return {
      done: false,
    };
  },

  componentDidMount() {
    if (this.props.waitOneFrame) {
      requestAnimationFrame(this.runTest);
    } else {
      this.runTest();
    }
  },

  runTest() {
    if (this.props.shouldThrow) {
      throw new Error('Throwing error because shouldThrow');
    }
    if (!RCTTestModule) {
      throw new Error('RCTTestModule is not registered.');
    } else if (!RCTTestModule.markTestCompleted) {
      throw new Error('RCTTestModule.markTestCompleted not defined.');
    }
    this.setState({done: true}, RCTTestModule.markTestCompleted);
  },

  render() {
    return (
      <View style={{backgroundColor: 'white', padding: 40}}>
        <Text>
          {this.constructor.displayName + ': '}
          {this.state.done ? 'Done' : 'Testing...'}
        </Text>
      </View>
    );
  }
});

IntegrationTestHarnessTest.displayName = 'IntegrationTestHarnessTest';

module.exports = IntegrationTestHarnessTest;
OKだったら、下記のようにコンポーネントを呼び込み下記のような感じで動かします。TestModule.markTestPassed(true)で成功、TestModule.markTestPassed(false)で失敗を呼べます。
'use strict';
import UserActions from 'Triplenty/app/actions/UserActions';
import UserStore from 'Triplenty/app/stores/UserStore';
import TabBarView from 'Triplenty/app/components/TabBarView';
import Triplenty from 'Triplenty/app/Triplenty';
import React from 'react-native';
var { TestModule } = React.addons;

var TriplentyTest = React.createClass({

  login(){
    let fbObj = { ... }
    UserActions.parseSignIn(fbObj);
  },

  componentDidMount() {
    this.unsubscribe = UserStore.listen(this.onUserUpdated);
    UserActions.parseLogOut();
    this.login();
  },

  onUserUpdated(){
    this.done(true);
  },

  done(success) {
    TestModule.markTestPassed(success);
  },

  render() {
    return (
      <Triplenty/>
    );
  }
});

TriplentyTest.displayName = 'TriplentyTest';

module.exports = TriplentyTest;
Summary
結合テストではシミュレータが起動してテストできます。上の例ではReduxを利用していませんが、Reduxの状態とActionをうまいこと利用すれば、内部状態のテストもできると思います。
Appendix
appiumを利用したIntegrationテストの記事を見つけました。参考までに。


