概要
- 2.2インチのディスプレイをRaspberry Pi 3からPythonで制御したので、そのメモです
使用ハードウェア
手順
ハードウェアの接続
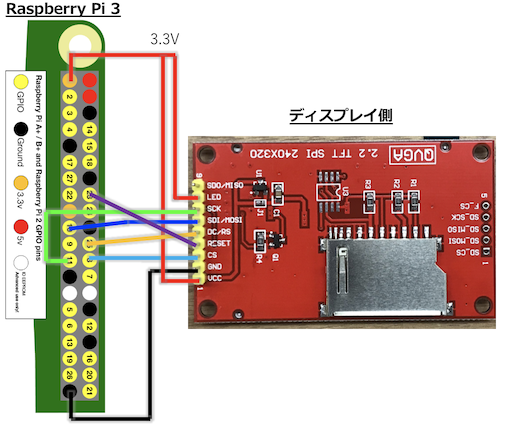
- 対応関係を以下の表にまとめました
| Raspberry Pi 3 Pin | LCD |
|---|---|
| - | SDO/MISO(未接続) |
| 3.3V | LED |
| GPIO11 | SCK |
| GPIO10/MOSI | SDI/MOSI |
| GPIO25 | DC/RS |
| GPIO23 | RESET |
| GPIO8/SPI_CE0_N | CS |
| GND | GND |
| 3.3V | VCC |
ソフトウェアの準備
- 任意のディレクトリに以下コマンドでソースコードをダウンロードします(本家のAdafruit社ではありませんが、こちらだと今回使用する2.2inchi TFTディスプレイを使えます。)
git clone https://github.com/Funkrusha/Adafruit_Python_ILI9340
- ディレクトリを移動します
cd Adafruit_Python_ILI9340
- 必要なツールをインストールします
sudo apt-get update
sudo apt-get install build-essential python-dev python-smbus python-pip python-imaging python-numpy
- 必要なPythonライブラリをインストールします
sudo pip install RPi.GPIO
sudo pip install Adafruit_BBIO
sudo python setup.py install
- サンプルディレクトリへ移動します
cd examples
- image.pyの30行目を書き換えます(デフォルトだと2.8インチディスプレイになっています)
image.py30行目
CURRENT_PITFT = PITFT_2_2 # 2.2インチディスプレイ用に設定を変更します
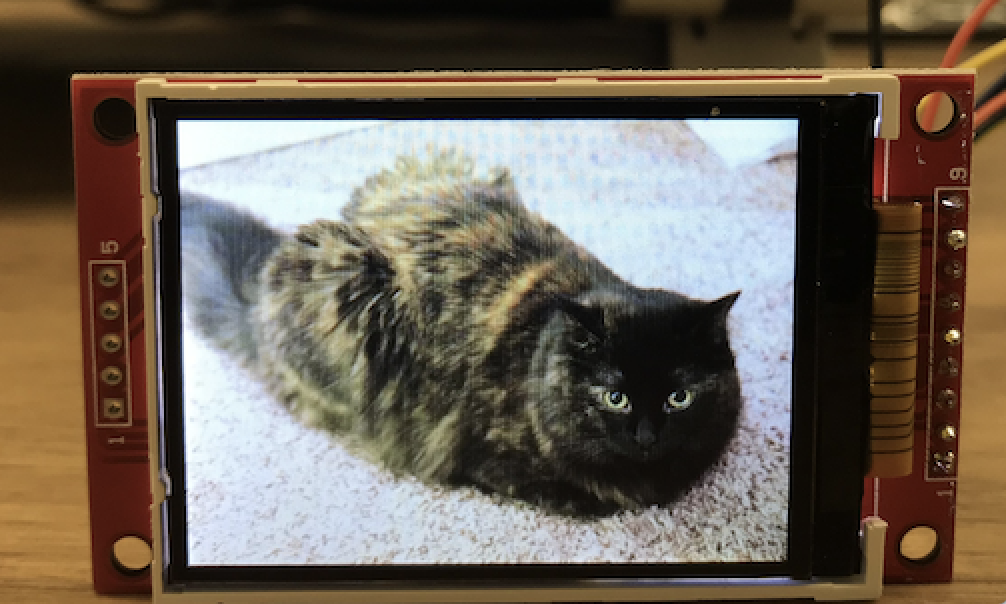
- image.pyを実行します
python image.py
- 実行後、猫の画が出たら成功です
以下のようなエラーが出た場合の対処法
エラーログ
Traceback (most recent call last):
  File "image.py", line 21, in <module>
    import Image
ImportError: No module named Image
- Adafruit_Python_ILI9340/Adafruit_ILI9341/ILI9341.pyの25,を以下のように変更します
Adafruit_ILI9341/ILI9341.pyの25,26行目
from PIL import Image  # PILからimportするようにします
from PIL import ImageDraw  # PILからimportするようにします
- 再度インストールします
sudo python setup.py install
- サンプルの実行ファイル(Adafruit_Python_ILI9340/examples/image.py)の21行目も以下のように書き換えます
image.py21行目
from PIL import Image # PILからimportするようにします