Q,Angular使ってるけど、ユーザー認証とかもっと簡単にできないの? A,Stormpathでできますよ!
何をするか
angularを使ってて、サーバー側はnodejs、expressを使っていて、アプリケーションを作りたいのだけれども、ユーザー管理とか、データのアクセス権限を簡単に設定したい。
Stormpathとは
ユーザー認証、管理をするサービス。
https://stormpath.com/product/
-アカウント管理
-パスワード管理
-グループ管理
-メールによる認証
-OAuth etc...
angularを用いた利用ガイド
http://docs.stormpath.com/angularjs/guide/index.html
環境
angularでの利用を考えているので、簡単のためangular-fullstackを利用してどんな感じかを残します。(レガシーなので本番には採用しない。)
https://stormpath.com/blog/angular-node-15-minutes/
Stormathではangular用のSDKも公開している模様。
https://github.com/stormpath/stormpath-sdk-angularjs
手順
テンプレートの作成
インストール等の説明は省きます。ググれば一杯ある。
mkdir stormpathSample
cd stormpathSample
yo anglar-fullstack stormpathSample
# Client

? What would you like to write scripts with? JavaScript
? What would you like to write markup with? HTML
? What would you like to write stylesheets with? CSS
? What Angular router would you like to use? uiRouter
? Would you like to include Bootstrap? Yes
? Would you like to include UI Bootstrap? No

# Server

? Would you like to use mongoDB with Mongoose for data modeling? No
grunt serve
Stormpathのアカウント作成
https://api.stormpath.com/register
でアカウント作成。
そしたらメールが来るので、アクティベートする。Tenantはそのままでいい。
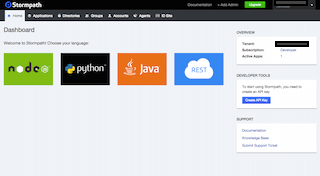
こんなダッシュボード画面がでる。

ここでcreate API keyを押してkeyを生成する。ダウンロードされるidとsecretを後ほど利用する。
ダッシュボードからApplicationsをみたらMy Applicationというのが自動生成されている。
このMy ApplicationのページにREST URLが表示されているのでこれを使う。
Serverの設定
Node側でのStormpathの設定をする。
'use strict';

// Use local.env.js for environment variables that grunt will set when the server starts locally.
// Use for your api keys, secrets, etc. This file should not be tracked by git.
//
// You will need to set these on the server you deploy to.

module.exports = {
  DOMAIN: 'http://localhost:9000',
  SESSION_SECRET: "stormpathsample-secret",
  // Control debug level for modules using visionmedia/debug
  DEBUG: '',

  //ここに先ほど入手したID等を入れる
  STORMPATH_API_KEY_ID: 'YOUR_KEY_ID',
  STORMPATH_API_KEY_SECRET: 'YOUR_KEY_SECRET',
  STORMPATH_APP_HREF: 'YOUR_APP_HREF'
};
expressをアップデートしておく。
npm i --save express@latest
stormpath-sdk-expressをインストールする。
npm i -save stormpath-sdk-express
stormpath-sdk-expressをrequireする。
expressアプリと紐づけて、yeomanで作られたapi/thingにアクセスするのに認証が必要となるようにする。
/**
 * Main application routes
 */

'use strict';

var errors = require('./components/errors');
//追加
var stormpathExpressSdk = require('stormpath-sdk-express');

module.exports = function(app) {
  //追加
  var spMiddleware = stormpathExpressSdk.createMiddleware();
  //追加
  spMiddleware.attachDefaults(app);

  // Insert routes below
  //変更
  app.use('/api/things', spMiddleware.authenticate, require('./api/thing'));
  //app.use('/api/things', require('./api/thing'));

  // All undefined asset or api routes should return a 404
  app.route('/:url(api|auth|components|app|bower_components|assets)/*')
   .get(errors[404]);

  // All other routes should redirect to the index.html
  app.route('/*')
    .get(function(req, res) {
      res.sendfile(app.get('appPath') + '/index.html');
    });
};
この状態だとclientからthingsは見れないようになっています。
Client側の設定
Stormpathのangular用SDKをインストールします。(npmがない?。。。)
apiリファレンスはここ。
http://docs.stormpath.com/angularjs/sdk/#/api
bower install --save stormpath-sdk-angularjs
grunt --force
angularへmoduleのインジェクションを行います。
'use strict';

angular.module('stormpathSampleApp', [
  'ngCookies',
  'ngResource',
  'ngSanitize',
  'ui.router',
  //追記
  'stormpath',
  //追記
  'stormpath.templates'
])
  .config(function ($stateProvider, $urlRouterProvider, $locationProvider) {
    $urlRouterProvider
      .otherwise('/');

    $locationProvider.html5Mode(true);
  });
ui-routerとのインテグレーションを行います。
'use strict';

angular.module('stormpathSampleApp', [
  'ngCookies',
  'ngResource',
  'ngSanitize',
  'ui.router',
  //追記
  'stormpath',
  //追記
  'stormpath.templates'
])
  .config(function ($stateProvider, $urlRouterProvider, $locationProvider) {
    $urlRouterProvider
      .otherwise('/');

    $locationProvider.html5Mode(true);
  })
  //追記
  .run(function($stormpath){
    $stormpath.uiRouter({
      loginState: 'login',
      defaultPostLoginState: 'main'
    });
  });
loginStateはユーザーのアクセス権限ないページをリクエストした場合リダイレクトされる先です。ログイン後にリクエストしたページに戻されます。
defaultPostLoginStateはユーザーがログインページを直接リクエストした場合、ログイン後に飛ばされるページです。
別の書き方もあるようですが、それは別記事で書こうと思います。
Client側のユーザー登録画面
設定はほとんど終わったので、ここからユーザー登録画面を作っていきます。
まずはナビバーから。
<div class="navbar navbar-default navbar-static-top" ng-controller="NavbarCtrl as navbar">
  <div class="container">
    <div class="navbar-header">
      <button class="navbar-toggle" type="button" ng-click="isCollapsed = !isCollapsed">
        <span class="sr-only">Toggle navigation</span>
        <span class="icon-bar"></span>
        <span class="icon-bar"></span>
        <span class="icon-bar"></span>
      </button>
      <a href="/" class="navbar-brand">stormpath-sample</a>
    </div>
    <div collapse="isCollapsed" class="navbar-collapse collapse" id="navbar-main">
      <ul class="nav navbar-nav">
        <li ng-repeat="item in menu" ng-class="{active: isActive(item.link)}">
          <a ng-href="{{item.link}}">{{item.title}}</a>
        </li>
        //追記
        <li if-user ng-class="{active: isActive('/profile')}">
          <a ng-href="/profile">Profile</a>
        </li>
        //追記
        <li if-not-user ng-class="{active: isActive('/register')}">
          <a ui-sref="register">Register</a>
        </li>
        //追記
        <li if-not-user ng-class="{active: isActive('/login')}">
          <a ui-sref="login">Login</a>
        </li>
        //追記
        <li if-user ng-class="{active: isActive('/logout')}">
          <a ui-sref="main" logout>Logout</a>
        </li>
      </ul>
    </div>
  </div>
</div>
if-user``if-not-userディレクティブを使うことでリンクを表示するか、しないかをコントロールできます。
詳細はここら辺で。http://docs.stormpath.com/angularjs/sdk/#/api/stormpath.ifUser:ifUser
ユーザー登録画面を作成していくので、
yo angular-fullstack:route register
としてルーティング先を作って、
<div ng-include="'components/navbar/navbar.html'"></div>

<div class="container">
    <div class="row">
        <div class="col-xs-12">
            <h3>Registration</h3>
            <hr>
        </div>
    </div>
    <div sp-registration-form post-login-state="main"></div>
</div>
sp-registration-form というディレクティブが用意されているのでそのままぶち込む。
post-login-stateはユーザー登録の終わった後に飛ばしたいページ先をオプションで設定出来る模様。
localhost:9000/registerをみるとこんな感じですね。
メールアドレスによる認証
メールによる認証を作っていきます。
ルーティングを/register/verifyにしておきます。
yo angular-fullstack:route emailVerification
? Where would you like to create this route? client/app/
? What will the url of your route be? /register/verify
   create client/app/emailVerification/emailVerification.js
   create client/app/emailVerification/emailVerification.controller.js
   create client/app/emailVerification/emailVerification.controller.spec.js
   create client/app/emailVerification/emailVerification.css
ユーザーが送られてきたメールのリンクをクリックした時に飛ばしたいURLの設定をします。
sptokenというURLパラメータui-routerに伝えておきます。
'use strict';

angular.module('stormpathSampleApp')
  .config(function ($stateProvider) {
    $stateProvider
      .state('emailVerification', {
      	//変更
        url: '/register/verify?sptoken',
        templateUrl: 'app/emailVerification/emailVerification.html',
        controller: 'EmailVerificationCtrl as emailVerification'
      });
  });
htmlのページも変更していきます。
<div ng-include="'components/navbar/navbar.html'"></div>

<div class="container">
  <div class="row">
    <div class="col-xs-12">
      <h3>Verify Your Account</h3>
      <hr>
    </div>
  </div>
  <div sp-email-verification></div>
</div>
sp-email-verificationディレクティブにていい感じに用意されています。
次に、stormpathに認証メールでの飛ばしたいリンクを伝えておきます。
ローカル開発環境のhttp://localhost:9000/register/verifyを加えます。
https://api.stormpath.com/login
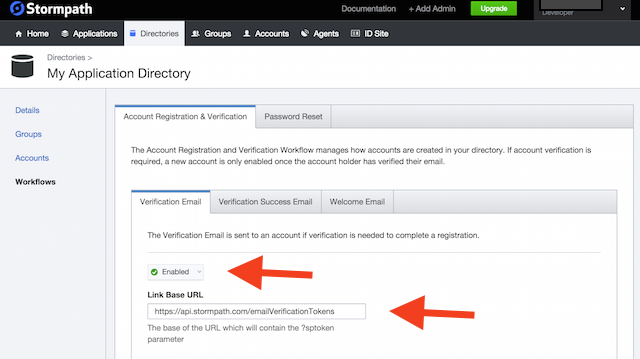
Directriesへ行ってworkflowに飛び、verificationをEnabledにし、Base link URLをhttp://localhost:9000/register/verifyに変更しましょう。
送信されるメールの内容もここから編集することができます。
save changesを押して保存します。
フォームをカスタマイズしたい場合はここを参考にすればいいと思います。
http://docs.stormpath.com/angularjs/guide/register.html#customizing-the-form
client側ログイン画面
登録画面を作れたので、ログイン画面を作成していきます。
先ほどと同様に
yo angular-fullstack:route login
<div ng-include="'components/navbar/navbar.html'"></div>

<div class="container">
  <div class="row">
    <div class="col-xs-12">
      <h3>Login</h3>
      <hr>
    </div>
  </div>
  <div sp-login-form></div>
</div>
これもsp-login-formというディレクティブが用意されていますので、これを使います。
詳細はここです。http://docs.stormpath.com/angularjs/sdk/#/api/stormpath.spLoginForm:sp-login-form
<ANY sp-login-form
     template-url="{string}">
   ...
</ANY>
templateURLを埋め込むこともできるようです。
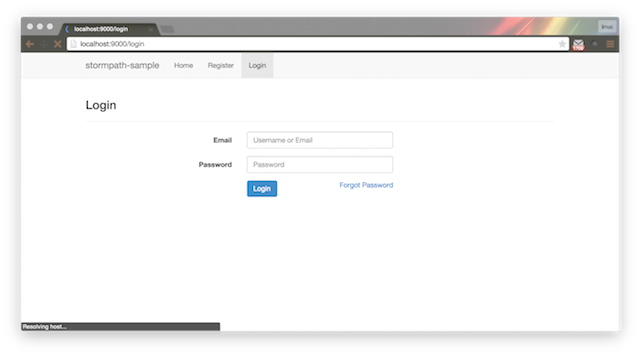
localhost:9000/loginをみると
すごく楽だ!
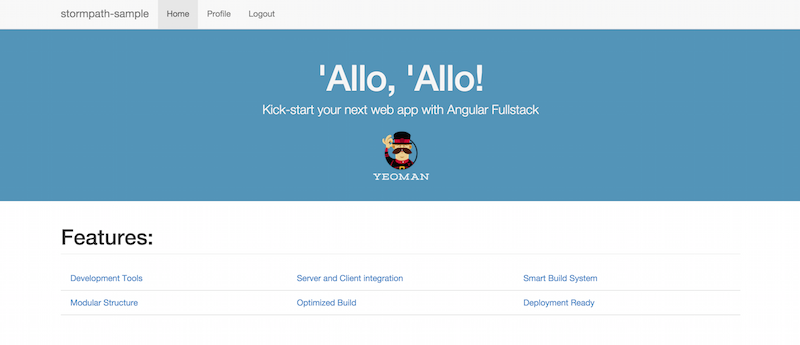
実際にユーザー登録をしてみて、送られてくるメールにあるURLに飛ぶと以下のような画面にいくと成功です。
/api/thingsからthingsをgetすることができました。
締め
このように簡単にユーザー認証フローを作ることができますし、アクセス認証も行えます。
ユーザー管理に時間を割かずにアプリケーションの開発ができるのですごく便利ですね。
angularユーザーの私からすると、テンプレートを用意してくれていると嬉しいです。
次は、ユーザーグループの管理方法について書きたいと思っています。


