はじめに
最近(結構前から)何かと有名なshadcn/ui は、React や Next.js で使える柔軟な UI コンポーネントセットで、主に Radix UI と Tailwind CSS を活用しています。
Radix UI をベースにしており、アクセシビリティに優れたコンポーネントを提供しています。
また、Tailwind CSS との統合により、スタイルのカスタマイズがものすごく簡単です。
なんか昔はshadcn-uiだったけどいつの間にかshadcn/uiになってました...時の流れは早いですね...
全体の概要
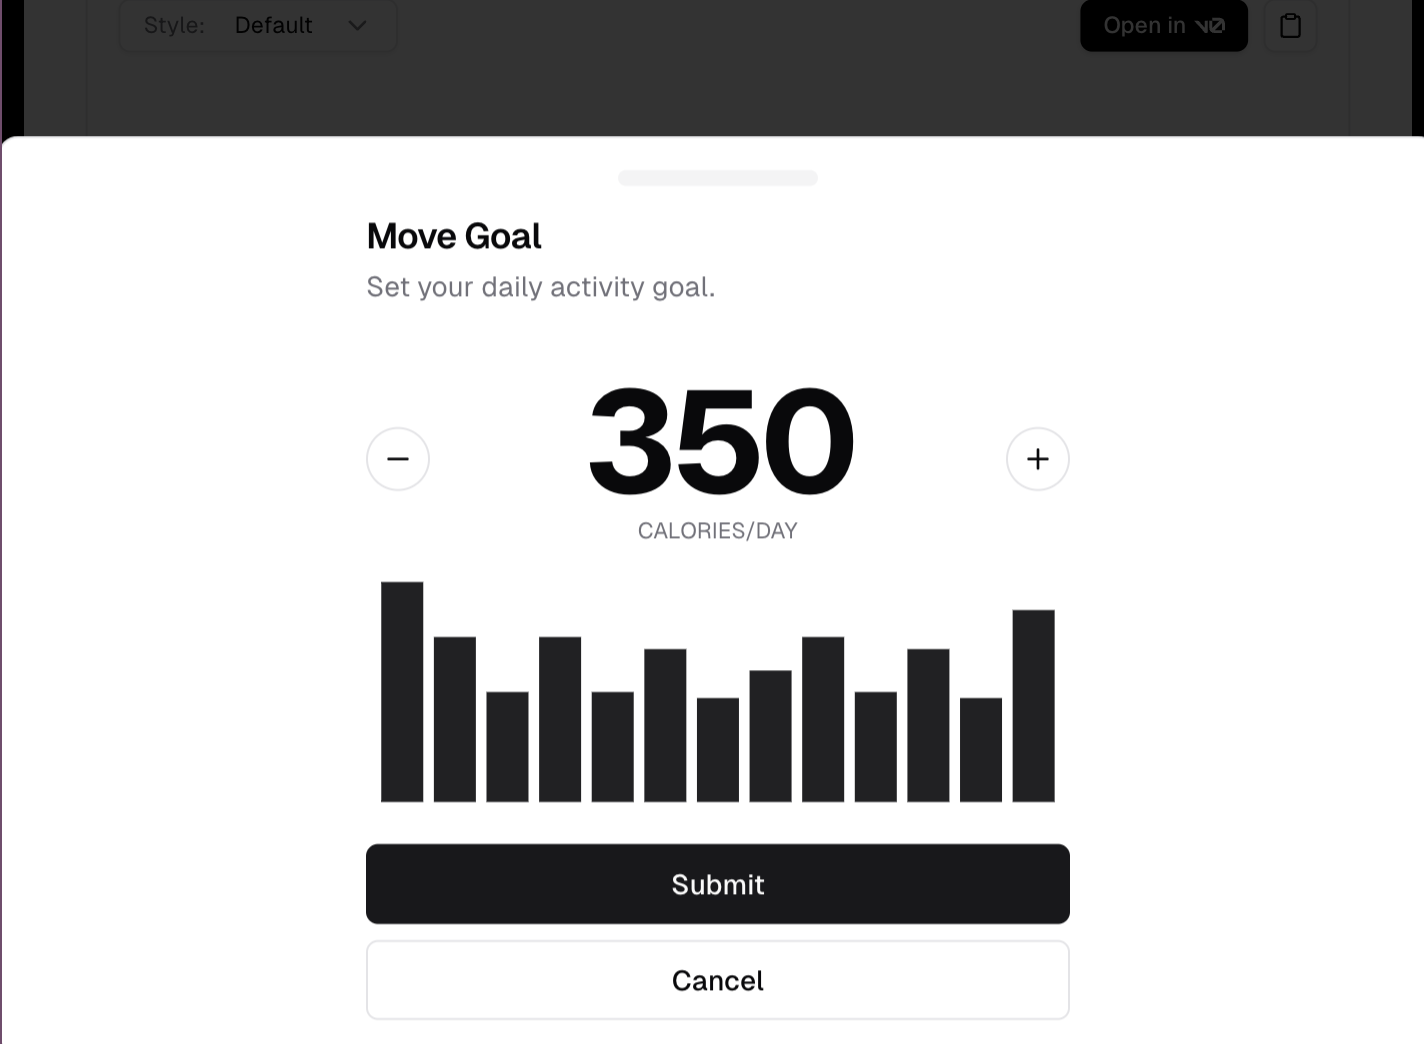
shadcn-uiでは簡単に以下のものが作れます
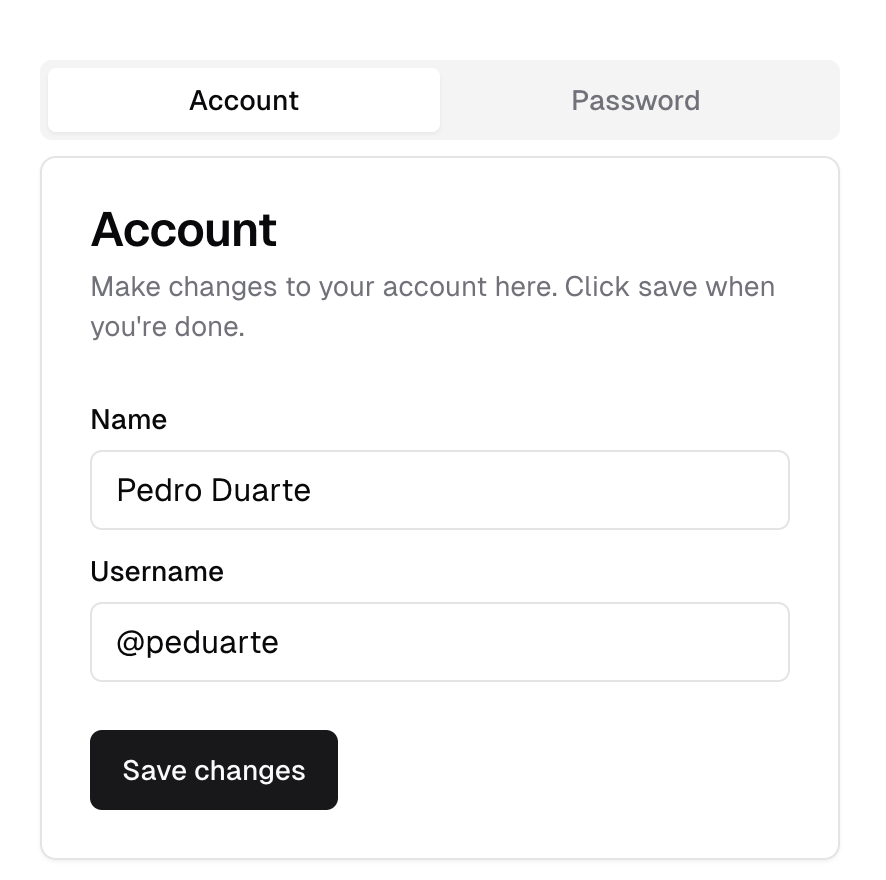
- 選択タブ
これらはいくつかの組み合わせでできています。
例えば、タブに関しては、後で解説するこのようなものの組み合わせになっています。
なので、今回はInputやLabelといった基礎的な部分をおさらいした上で、次回のパートで細かく書いていきたいと思います。
もちろん、知っていることばっかですし、チュートリアル見たらわかることなので、知っている方は飛ばしてください🙏🙏
何が優れているか
MaterialUIやChakuraUIなどがかなり有名で、それぞれの強みがありますが、なんといってもTailwindCSSとそのまま活用できる点で明確に差別化されていると言えます。
基本的な使い方
今回はNext.jsをベースに解説していきます。
とはいっても、Nextだけではなく、Viteなども選択可能です。(一応vueもあるみたい...)
以下のものを打つとインストールできます。
package.json下で行なってください。
npx shadcn@latest init
コンポーネントを入れるときは、以下のように選択してください。
すると選択肢が出てきます。
npx shadcn@latest add

#以下のものが出てくるので、選択する
? Which components would you like to add? › Space to select. A to toggle all. Enter to submit.
◯   accordion
◯   alert
◯   alert-dialog
◯   aspect-ratio
◯   avatar
◯   badge
◯   breadcrumb
◯   button
◯   calendar
.....
有名なものからご紹介
入力と選択(Button,Input,TextArea)
Button
独自のセレクタは
- variant→視覚的なスタイルを定義する
- disabaled→ボタンを押せないようにする
ローディングに関したは、UseStateで管理します。
lucide-reactはアイコンをインポートするときによく使います。
"use client"

import { useState } from "react"
import { Button } from "@/components/ui/button"
import { Loader2, Send, Trash2 } from 'lucide-react'

export default function CustomButtons() {
  const [loading, setLoading] = useState(false)

  const handleLoadingClick = () => {
    setLoading(true)
    setTimeout(() => setLoading(false), 2000)
  }

  return (
    <div className="flex flex-col items-center space-y-4 p-8">
      <Button variant="default" size="lg" className="w-48">
        デフォルトボタン
      </Button>

      <Button variant="destructive" size="sm" className="rounded-full">
        <Trash2 className="mr-2 h-4 w-4" />
        削除
      </Button>

      <Button
        variant="outline"
        className="bg-gradient-to-r from-pink-500 to-yellow-500 hover:from-pink-600 hover:to-yellow-600 text-white border-none"
      >
        グラデーションボタン
      </Button>

      <Button variant="ghost" className="text-lg font-semibold tracking-wide">
        ゴーストボタン
      </Button>

      <Button variant="link" className="underline-offset-4 hover:underline-offset-8 transition-all duration-300">
        リンクボタン
      </Button>

      <Button
        variant="secondary"
        className="relative overflow-hidden group"
        onClick={handleLoadingClick}
        disabled={loading}
      >
        {loading ? (
          <Loader2 className="h-4 w-4 animate-spin" />
        ) : (
          <>
            <span className="relative z-10">ホバーエフェクト</span>
            <span className="absolute inset-0 bg-primary transform scale-x-0 group-hover:scale-x-100 transition-transform origin-left duration-300" />
          </>
        )}
      </Button>

      <Button asChild>
        <a href="https://example.com" target="_blank" rel="noopener noreferrer" className="flex items-center">
          <Send className="mr-2 h-4 w-4" />
          送信
        </a>
      </Button>
    </div>
  )
}
Input/TextArea
まずはinputからです。
- type→default,password,date,fileなど基本的なinputと同じです
- placeholderも同様にあります。
Labelに関しては、Inputなどにidを指定しておけば、Labelにidを指定すれば連動され、タイトルのような役割を果たします。
(実際には、タグが追従され、アクセシビリティが向上されます。)
パスワードの開閉はuseStateを使って、textにするかpasswordにするかで判別します。
"use client"

import { useState } from "react"
import { Input } from "@/components/ui/input"
import { Label } from "@/components/ui/label"
import { Eye, EyeOff } from 'lucide-react'

export default function CustomInputs() {
  const [showPassword, setShowPassword] = useState(false)

  return (
    <div className="flex flex-col space-y-6 p-8 max-w-md mx-auto">
      {/* 基本的なInput */}
      <div className="space-y-2">
        <Label htmlFor="default-input">デフォルトInput</Label>
        <Input id="default-input" placeholder="ここに入力してください" />
      </div>

      {/* パスワードInput */}
      <div className="space-y-2">
        <Label htmlFor="password-input">パスワードInput</Label>
        <div className="relative">
          <Input
            id="password-input"
            type={showPassword ? "text" : "password"}
            placeholder="パスワード"
            className="pr-10"
          />
          <button
            type="button"
            onClick={() => setShowPassword(!showPassword)}
            className="absolute right-3 top-1/2 transform -translate-y-1/2"
          >
            {showPassword ? (
              <EyeOff className="text-gray-400 h-5 w-5" />
            ) : (
              <Eye className="text-gray-400 h-5 w-5" />
            )}
          </button>
        </div>
      </div>

      {/* カスタムスタイルInput */}
      <div className="space-y-2">
        <Label htmlFor="custom-input">カスタムスタイルInput</Label>
        <Input
          id="custom-input"
          placeholder="カスタム"
          className="border-2 border-purple-500 focus:border-purple-700 focus:ring-purple-700 rounded-lg shadow-sm"
        />
      </div>

      {/* ファイルInput */}
      <div className="space-y-2">
        <Label htmlFor="file-input">ファイルInput</Label>
        <Input
          id="file-input"
          type="file"
          className="file:mr-4 file:py-2 file:px-4 file:rounded-full file:border-0 file:text-sm file:font-semibold file:bg-violet-50 file:text-violet-700 hover:file:bg-violet-100"
        />
      </div>

      {/* 数値Input */}
      <div className="space-y-2">
        <Label htmlFor="number-input">数値Input</Label>
        <Input
          id="number-input"
          type="number"
          placeholder="数値を入力"
          min={0}
          max={100}
          step={1}
        />
      </div>

      {/* 日付Input */}
      <div className="space-y-2">
        <Label htmlFor="date-input">日付Input</Label>
        <Input
          id="date-input"
          type="date"
          className="text-gray-500"
        />
      </div>
    </div>
  )
}
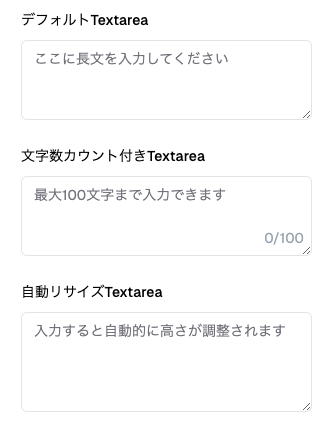
文字数が多い時は、textareaを使うと、長さの調整などができます。
- inputと違い、maxlengthなどの違いがあります。
- カウントしたい時はuseStateで管理します。
"use client"

import { useState } from "react"
import { Textarea } from "@/components/ui/textarea"
import { Label } from "@/components/ui/label"

export default function CustomTextareas() {
  const [characterCount, setCharacterCount] = useState(0)

  return (
    <div className="flex flex-col space-y-6 p-8 max-w-md mx-auto">
      {/* 基本的なTextarea */}
      <div className="space-y-2">
        <Label htmlFor="default-textarea">デフォルトTextarea</Label>
        <Textarea id="default-textarea" placeholder="ここに長文を入力してください" />
      </div>

      {/* 文字数カウント付きTextarea */}
      <div className="space-y-2">
        <Label htmlFor="count-textarea">文字数カウント付きTextarea</Label>
        <div className="relative">
          <Textarea
            id="count-textarea"
            placeholder="最大100文字まで入力できます"
            maxLength={100}
            onChange={(e) => setCharacterCount(e.target.value.length)}
            className="pr-16"
          />
          <span className="absolute bottom-2 right-2 text-sm text-gray-400">
            {characterCount}/100
          </span>
        </div>
      </div>

      {/* 自動リサイズTextarea */}
      <div className="space-y-2">
        <Label htmlFor="auto-resize-textarea">自動リサイズTextarea</Label>
        <Textarea
          id="auto-resize-textarea"
          placeholder="入力すると自動的に高さが調整されます"
          className="min-h-[100px] max-h-[300px] overflow-hidden"
          onChange={(e) => {
            e.target.style.height = 'auto'
            e.target.style.height = e.target.scrollHeight + 'px'
          }}
        />
      </div>
    </div>
  )
}
選択型状態管理(CheckBox,RadioBox,ToggleGroup)
基本的にどれも、準備した配列を回して、要素の状態を管理していきます。
状態管理+表示をしていきます。
checkbox
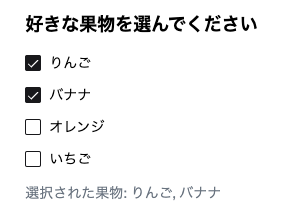
複数選択できます。
chakedの判定は、配列の中に入っているかどうかで決めるので、初期状態はnullです。
現在選択しているものを管理するには、useStateの配列を使い、onCheckedChangeが押されるたびに以下の動作が呼び出されます。
- checked がtrueなら、selectedFruitsに果物を追加します(配列のコピーを作るため...selectedFruitsを使用)。
- checked がfalseなら、選択を解除された果物を配列から取り除きます(filterメソッドを使用)。
これらの動作は独立しており、fruit配列を回していくのでつまり、全体を覆うものはありません。
"use client"

import { useState } from "react"
import { Checkbox } from "@/components/ui/checkbox"
import { Label } from "@/components/ui/label"

export default function CustomCheckboxGroup() {
 const [selectedFruits, setSelectedFruits] = useState<string[]>([])

 const fruits = ["りんご", "バナナ", "オレンジ", "いちご"]

 return (
   <div className="space-y-4">
     <h2 className="text-lg font-semibold">好きな果物を選んでください</h2>
     {fruits.map((fruit) => (
       <div key={fruit} className="flex items-center space-x-2">
         <Checkbox
           id={fruit}
           checked={selectedFruits.includes(fruit)}
           onCheckedChange={(checked) => {
             setSelectedFruits(
               checked
                 ? [...selectedFruits, fruit]
                 : selectedFruits.filter((f) => f !== fruit)
             )
           }}
         />
         <Label htmlFor={fruit}>{fruit}</Label>
       </div>
     ))}
     <p className="text-sm text-gray-500">
       選択された果物: {selectedFruits.join(", ") || "なし"}
     </p>
   </div>
 )
}
RadioGroup
単一の選択ができます。
逆にこちらは他の選択に従属しているので、全体をRadioGroupで囲っています。
中のものはRadioItemで囲っています。選択された物の状態はvalueで管理することができます。
"use client"

import { useState } from "react"
import { RadioGroup, RadioGroupItem } from "@/components/ui/radio-group"
import { Label } from "@/components/ui/label"

export default function CustomRadioGroup() {
 const [selectedPlan, setSelectedPlan] = useState("basic")

 const plans = [
   { value: "basic", label: "ベーシック", price: "¥1,000/月" },
   { value: "pro", label: "プロ", price: "¥2,000/月" },
   { value: "enterprise", label: "エンタープライズ", price: "¥5,000/月" },
 ]

 return (
   <div className="space-y-4">
     <h2 className="text-lg font-semibold">プランを選択してください</h2>
     <RadioGroup value={selectedPlan} onValueChange={setSelectedPlan}>
       {plans.map((plan) => (
         <div key={plan.value} className="flex items-center space-x-2">
           <RadioGroupItem value={plan.value} id={plan.value} />
           <Label htmlFor={plan.value} className="flex justify-between w-full">
             <span>{plan.label}</span>
             <span className="text-gray-500">{plan.price}</span>
           </Label>
         </div>
       ))}
     </RadioGroup>
     <p className="text-sm text-gray-500">
       選択されたプラン: {selectedPlan}
     </p>
   </div>
 )
}
Toggle Group
選択自体をボックスにします。複数選択です。
type="multiple"とすることで、複数選択の状態を、valueで管理できるようになります。
こちらも同様にGroupに対してItemで分けています。
"use client"

import { useState } from "react"
import { ToggleGroup, ToggleGroupItem } from "@/components/ui/toggle-group"
import { Bold, Italic, Underline } from 'lucide-react'

export default function CustomToggleGroup() {
 const [textFormatting, setTextFormatting] = useState<string[]>([])

 return (
   <div className="space-y-4">
     <h2 className="text-lg font-semibold">テキストフォーマット</h2>
     <ToggleGroup
       type="multiple"
       value={textFormatting}
       onValueChange={setTextFormatting}
       className="flex justify-center"
     >
       <ToggleGroupItem value="bold" aria-label="太字">
         <Bold className="h-4 w-4" />
       </ToggleGroupItem>
       <ToggleGroupItem value="italic" aria-label="斜体">
         <Italic className="h-4 w-4" />
       </ToggleGroupItem>
       <ToggleGroupItem value="underline" aria-label="下線">
         <Underline className="h-4 w-4" />
       </ToggleGroupItem>
     </ToggleGroup>
     <p className="text-sm text-gray-500">
       適用されたフォーマット: {textFormatting.join(", ") || "なし"}
     </p>
     <div className="p-4 border rounded">
       <p
         className={`
           ${textFormatting.includes("bold") ? "font-bold" : ""}
           ${textFormatting.includes("italic") ? "italic" : ""}
           ${textFormatting.includes("underline") ? "underline" : ""}
         `}
       >
         サンプルテキスト
       </p>
     </div>
   </div>
 )
}
スマホ型状態管理(slider,switch)
こちらはスマホでよく見る選択です。Sliderと呼ばれています。

- min={0},max={100},step={1}で大きさを変えます。
- value={[volume]}とonValueChangeで管理します。
"use client"

import { useState } from "react"
import { Slider } from "@/components/ui/slider"
import { Label } from "@/components/ui/label"

export default function CustomSlider() {
 const [volume, setVolume] = useState(50)

 return (
   <div className="space-y-4">
     <h2 className="text-lg font-semibold">音量調整</h2>
     <div className="space-y-2">
       <Label htmlFor="volume-slider">音量: {volume}%</Label>
       <Slider
         id="volume-slider"
         min={0}
         max={100}
         step={1}
         value={[volume]}
         onValueChange={(value) => setVolume(value[0])}
         className="w-[300px]"
       />
     </div>
     <div className="h-24 w-24 rounded-full bg-gradient-to-br from-blue-400 to-blue-700 flex items-center justify-center">
       <span className="text-white text-2xl font-bold">{volume}%</span>
     </div>
   </div>
 )
}
こちらはSwitchです。状態を!で反転するだけなので簡単です。
"use client"

import { useState } from "react"
import { Switch } from "@/components/ui/switch"
import { Label } from "@/components/ui/label"
import { Moon, Sun } from 'lucide-react'

export default function CustomSwitch() {
 const [isDarkMode, setIsDarkMode] = useState(false)
 const [isNotificationsEnabled, setIsNotificationsEnabled] = useState(true)

 return (
   <div className="space-y-6">
     <h2 className="text-lg font-semibold">設定</h2>

     {/* ダークモードスイッチ */}
     <div className="flex items-center justify-between">
       <div className="space-y-0.5">
         <Label htmlFor="dark-mode">ダークモード</Label>
         <p className="text-sm text-muted-foreground">
           画面の明るさを調整します
         </p>
       </div>
       <div className="flex items-center space-x-2">
         <Sun className="h-4 w-4" />
         <Switch
           id="dark-mode"
           checked={isDarkMode}
           onCheckedChange={setIsDarkMode}
         />
         <Moon className="h-4 w-4" />
       </div>
     </div>

     {/* 通知スイッチ */}
     <div className="flex items-center space-x-2">
       <Switch
         id="notifications"
         checked={isNotificationsEnabled}
         onCheckedChange={setIsNotificationsEnabled}
       />
       <Label htmlFor="notifications">通知を有効にする</Label>
     </div>

     {/* 設定状態の表示 */}
     <div className="p-4 border rounded">
       <p>現在の設定:</p>
       <ul className="list-disc list-inside">
         <li>ダークモード: {isDarkMode ? "オン" : "オフ"}</li>
         <li>通知: {isNotificationsEnabled ? "有効" : "無効"}</li>
       </ul>
     </div>
   </div>
 )
}
警告表示(Toast,alert)
何かの操作を完了した時に、表示させるカードのようなもので、数秒後にフェードアウトします。
toastはuseToastで管理し、出したい画面でToastコンポーネントをおきます。
"use client"

import { Button } from "@/components/ui/button"
import { useToast } from "@/components/ui/use-toast"
import { ToastAction } from "@/components/ui/toast"

export function ToastDemo() {
 const { toast } = useToast()

 const showDefaultToast = () => {
   toast({
     title: "デフォルトトースト",
     description: "これは基本的なトーストメッセージです。",
   })
 }

 const showSuccessToast = () => {
   toast({
     title: "成功!",
     description: "操作が正常に完了しました。",
     variant: "default",
     className: "bg-green-500",
   })
 }

 const showErrorToast = () => {
   toast({
     title: "エラー",
     description: "問題が発生しました。もう一度お試しください。",
     variant: "destructive",
   })
 }

 const showActionToast = () => {
   toast({
     title: "更新があります",
     description: "新しいバージョンが利用可能です。",
     action: <ToastAction altText="アップグレード">アップグレード</ToastAction>,
   })
 }

 return (
   <div className="flex flex-col items-center space-y-4">
     <Button onClick={showDefaultToast}>デフォルトトースト</Button>
     <Button onClick={showSuccessToast}>成功トースト</Button>
     <Button onClick={showErrorToast}>エラートースト</Button>
     <Button onClick={showActionToast}>アクション付きトースト</Button>
   </div>
 )
}
こちらを出したい画面(ホーム画面)とします。
import "./globals.css"
import type { Metadata } from "next"
import { Inter } from 'next/font/google'
import { Toaster } from "@/components/ui/toaster"

const inter = Inter({ subsets: ["latin"] })

export const metadata: Metadata = {
 title: "トーストデモ",
 description: "さまざまなトーストのバリエーションを表示するデモ",
}

export default function RootLayout({
 children,
}: {
 children: React.ReactNode
}) {
 return (
   <html lang="ja">
     <body className={inter.className}>
       {children}
       <Toaster />
     </body>
   </html>
 )
}
こちらは簡単な警告のカードが作れます。
import { AlertCircle } from "lucide-react"

import {
 Alert,
 AlertDescription,
 AlertTitle,
} from "@/components/ui/alert"

export function AlertDestructive() {
 return (
   <Alert variant="destructive">
     <AlertCircle className="h-4 w-4" />
     <AlertTitle>Error</AlertTitle>
     <AlertDescription>
       Your session has expired. Please log in again.
     </AlertDescription>
   </Alert>
 )
}
たまに見かけるもの(随時追加予定)
skelton
読み込み中の画面を出します。設定したものの灰色の状態が続きます。
calendar
fullcarendarよりかはできることは少ないですが、あれはエラーが多くて...
シンプルで便利かと思います。
次回はこれらを利用したよく使われるものをご紹介していきます!


