はじめに
こんにちは、shachitakuです。 弊社に入って8ヶ月のホヤホヤエンジニアです。マイコン歴は1週間くらいです。 最近M5Stack関連に詳しい同期([@shoyaokayama](https://qiita.com/shoyaokayama))に弟子入りしました。みなさんは動画みますか?
自分は普段ベッドに寝転がりながらYoutube、Amazon Prime、ニコニコ動画、Netflixなど色々見ています。以前まではAmazon Fire TV Stickを愛用していたのですが、動作がたまに遅かったり、HDMIを切り替えたりするのが面倒になって、最近はMacに統一しました。Macだと有線も使えるので好きなアニメがぬるぬる動いて、音質もモニタの内臓スピーカーより良いので耳が幸せになります。
しかしMacはMacでベッドに置くと場所を取って快適度が落ちます。
Bluetooth接続の片手デバイスっぽいマウスで操作できれば、より快適なNetflix & Chillができるかもしれない...!これは熱い。作るしかない。
想像しているビフォーアフター
Before

After

完成品
完成したBluetoothマウスの動作を撮ったので、まずこちらをご覧ください。 (緊張で手がめちゃくちゃ震えてますね)M5StickC x JoyStick HATのBluetoothマウスのデモ動画 pic.twitter.com/qIGdQDxmLB
— shachitokemuri (@reGinA_shachi) December 9, 2020
用意するもの
- Arduino IDEでのM5StickC開発環境 - 自分は[この記事](https://qiita.com/kurosuke1117/items/eb8b51e163e51c0f84dd)を参考にやりました。 - [M5StickC](https://www.switch-science.com/catalog/5517/) - PCにUSBポートがない場合は変換するためのハブなどが別途必要です - 安いやつだとM5StickCが認識されない場合があるので注意(経験談) - [JoyStick HAT](https://www.switch-science.com/catalog/6074/)↑M5StickCとJoyStick HATはスイッチサイエンスさんで買えます。
スイッチサイエンスさんの補足
- たまに在庫切れになってます
- 2-3日で来た気がします(都内住み)
-
GROVEで調べると色んな拡張モジュールをみれます
- M5StickCにはGROVEポートが1個があります
-
M5StickCの検索結果にも色々載ってます
- 見てるだけで楽しい
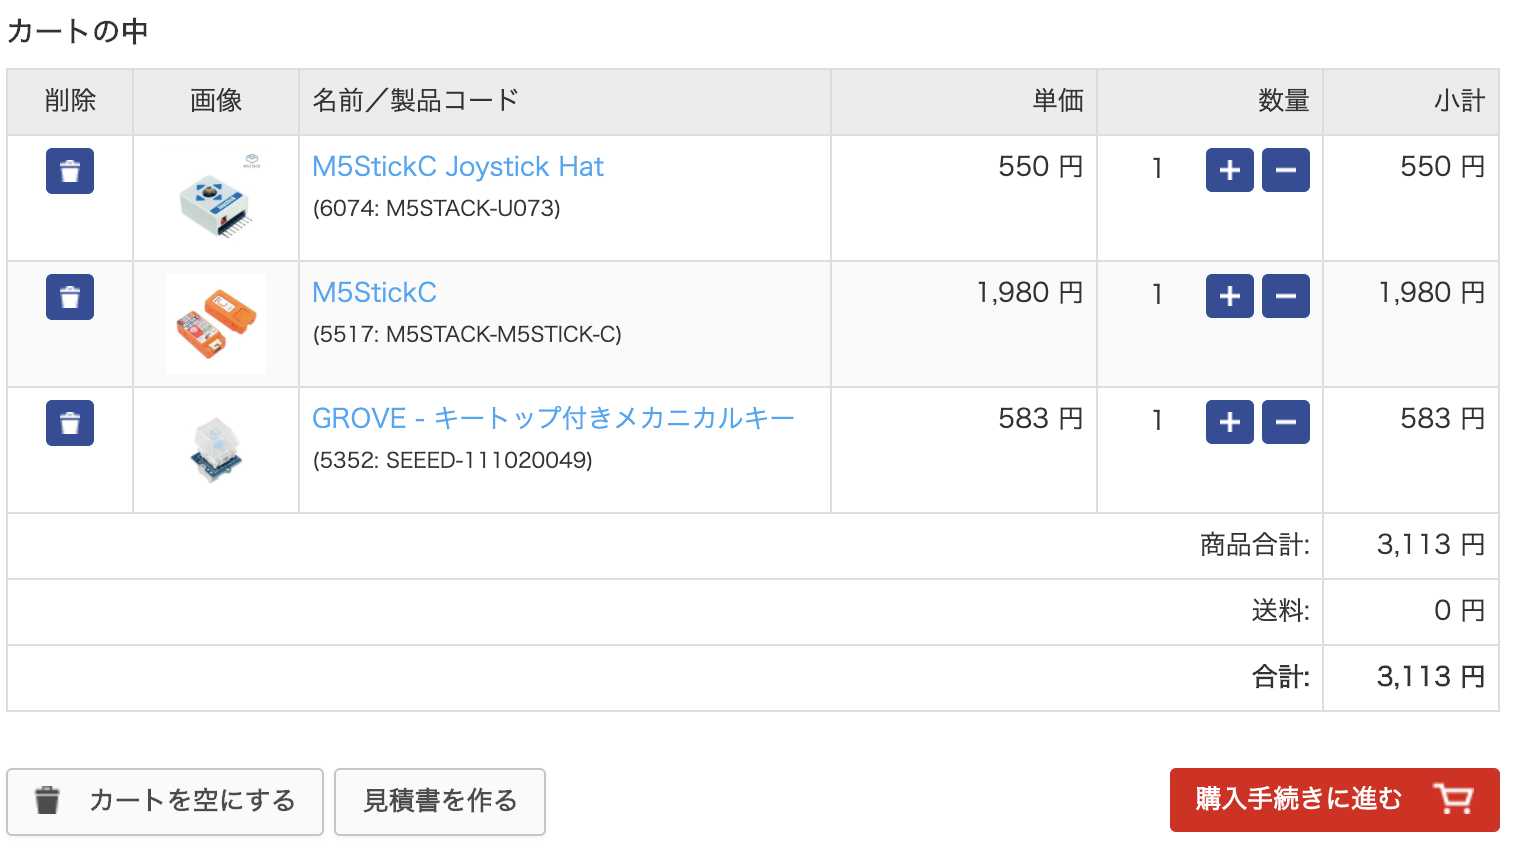
ちなみに当時自分が買った時のカートはこんな感じです。一定金額以上の購入で送料無料。
作り方(解説付き)
環境
Aruduino 1.8.13事前準備(ライブラリのインストール)
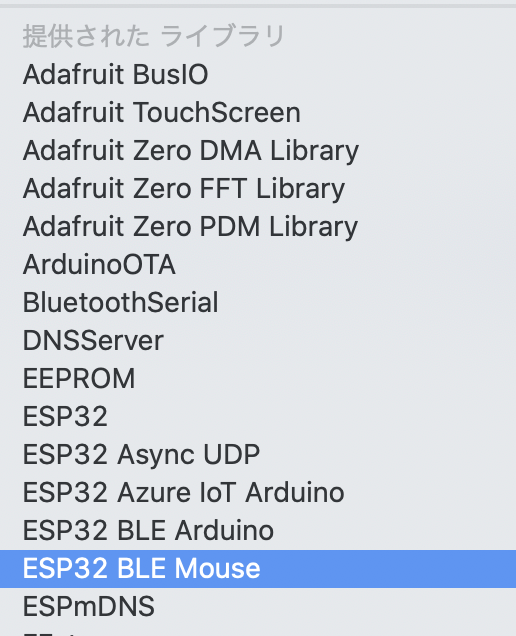
まず、開発するのに役立つライブラリを入れます。 ↓ESP32専用のライブラリで、ESP32をマウスとして扱えるようになります。 >[ESP32 BLE Mouse library](https://github.com/T-vK/ESP32-BLE-Mouse)入れ方はサイトに英語で書いてありますが、
In the Arduino IDE go to "Sketch" -> "Include Library" -> "Add .ZIP Library..." and select the file you just downloaded.
GitHubからZIPでダウンロードした後、Arduino IDEのスケッチから入れたらおkです

提供されたライブラリにESP32 BLE Mouseがあればインストール成功しているはずです。
ちなみにESP32とはM5StickCに内臓されているマイコンです。
低価格・低消費電力にもかかわらず、BluetoothとWi-Fiに繋げられることからIoT用のマイコンとして知られています。
ソース
完成品のソースコードをそのまま載せます。コメントアウトを各所書いているので、なんとなく雰囲気でフンフンわかるのではないでしょうか?補足はコードの後にあります。# include <M5StickC.h>
# include "Wire.h" // for wire reading
# define JOY_ADDR 0x38 // for JoyStick HAT setup
# include <BleMouse.h> // ESP32 BLE Mouse library (https://github.com/T-vK/ESP32-BLE-Mouse)
BleMouse bleMouse;
int8_t x_tilt, y_tilt, button; // to store data retrieved from JoyStick HAT
bool cursor_mode = true; // for switching between cursor and scroll mode
int s = 5; //cursor speed (initial value is 5)
uint32_t lastClick; // for double click detection
void setup() {
M5.begin(); // initialize the display
Serial.begin(115200); // bit rate for serial connection
M5.Axp.ScreenBreath(12); // screen brightness.7(Dark)~15(Bright)
M5.Lcd.fillScreen(BLACK); // clear the background
M5.Lcd.setTextColor(RED); // text color
M5.Lcd.setTextSize(2); // text size
Wire.begin(0, 26, 100000); // for HAT (0, 26), for Grove (32, 33)
bleMouse.begin(); // begin ESP32 BLE Mouse Library
// Initial lcd display
M5.Lcd.setCursor(0, 0);
M5.Lcd.print("Mode:\ncursor");
M5.Lcd.setCursor(0, 60);
M5.Lcd.printf("Cursor\nSpeed:\n%d", s);
}
void loop() {
// Update button status
M5.update();
// JoyStick HAT setup
Wire.beginTransmission(JOY_ADDR);
Wire.write(0x02);
Wire.endTransmission();
Wire.requestFrom(JOY_ADDR, 3);
// Read the values
if (Wire.available()) {
x_tilt = Wire.read(); // the values are 100 when tilted to the left, and -100 when tilted to the right.
y_tilt = Wire.read(); // same as x_tilt but y-direction.
button = Wire.read(); // equals 0 when pressed, and 1 if not.
}
// define movements
if(bleMouse.isConnected()) {
// switch between cursor mode and scroll mode
if(M5.Axp.GetBtnPress() == 1){
cursor_mode = !cursor_mode;
// update lcd message
M5.Lcd.fillRect(0, 0, 80, 60, BLACK);
M5.Lcd.setCursor(0, 0);
String mode = (cursor_mode == true) ? "cursor" : "scroll";
M5.Lcd.printf("Mode:\n%s", mode);
delay(10);
}
// change cursor speed
if(M5.Axp.GetBtnPress() == 2){
if(s < 10){
s += 1;
}else{
s = 1;
}
// update lcd message
M5.Lcd.fillRect(0, 60, 80, 100, BLACK);
M5.Lcd.setCursor(0, 60);
M5.Lcd.printf("Cursor\nSpeed:\n%d", s);
}
// Left Click (Button on the JoyStick HAT)
if(button == 0){
bleMouse.click(MOUSE_LEFT);
delay(100);
}
// Right Click
if(M5.BtnB.wasPressed()){
bleMouse.click(MOUSE_RIGHT);
delay(100);
}
// Forward Click (single click longer than 200ms)
if(M5.BtnA.wasReleasefor(200)){
bleMouse.click(MOUSE_FORWARD);
delay(100);
}
// Back Click (double click with interval less than 500ms)
if(M5.BtnA.wasPressed()){
if(M5.BtnA.lastChange() - lastClick < 500){
bleMouse.click(MOUSE_BACK);
delay(100);
}
lastClick = M5.BtnA.lastChange();
}
// cursor and scroll configurations
if(cursor_mode) {
// Right
if(x_tilt > 50) {
bleMouse.move(s, 0);
delay(10);
}
// Left
if(x_tilt < -50) {
bleMouse.move(-s, 0);
delay(10);
}
// Up
if(y_tilt > 50) {
bleMouse.move(0, -s);
delay(10);
}
// Down
if(y_tilt < -50) {
bleMouse.move(0, s);
delay(10);
}
} else { // scroll mode
// Right
if(x_tilt > 90) {
bleMouse.move(0,0,0,-1);
delay(100);
}
// Left
if(x_tilt < -90) {
bleMouse.move(0,0,0,1);
delay(100);
}
// Up
if(y_tilt > 90) {
bleMouse.move(0,0,-1);
delay(100);
}
// Down
if(y_tilt < -90) {
bleMouse.move(0,0,1);
delay(100);
}
}
}
}
ソースコードの補足情報
- setup()内に初期条件や設定系をまとめます(起動時に適応される)。 - loop()内には繰り返し行う処理を記述します。 - 構成としては、まずボタンやJoyStick HATの状態データを取り、その後、取ってきた値を参照にカーソル動かしたり、クリック判定したりしてます。 - カーソルの動きとスクロールの部分はインストールしたライブラリを使って再現しています。 - delay()の値や、bleMouse.move()の値によって、スピードを調整できます。 - クリック制御は下に載せた[M5StickC非公式日本語レファレンスにある画像](https://lang-ship.com/reference/unofficial/M5StickC/Class/Button/)を見るとわかりやすいと思います。 - クリック系につけてるdelay()の値は正直そこまで重要じゃない。 - ダブルクリックを再現するためにはlastChange()を使いました。 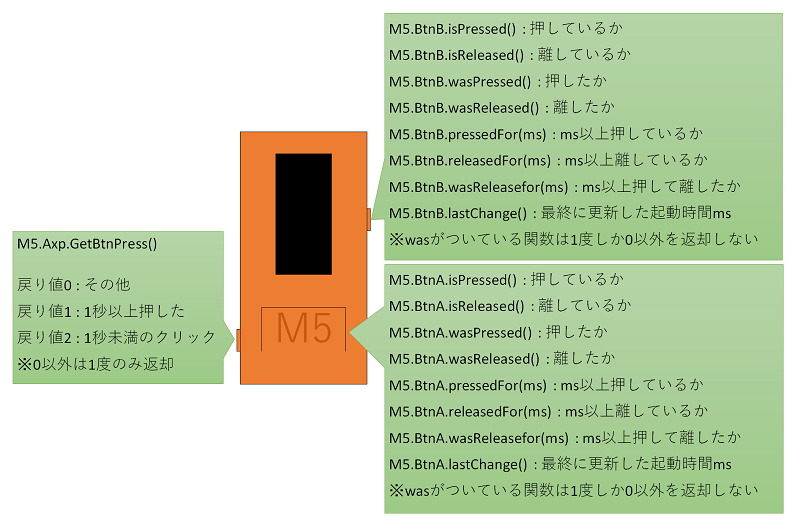感想
実際に寝っ転がりながらNetflixをみましたが、中々快適でした。 デモ動画のように感度を高くしすぎるとクリックが難しくなるので自分は6で落ち着きました。M5StickCのバッテリーは明るさ設定にもよりますが1時間ほどで充電切れになってしまうので、まだまだ改善できる部分はありそうです。