
概要
RainbowKit を利用して INTMAX Wallet で Dapps に接続する。
INTMAX Wallet とは
INTMAX Wallet は、Metamask や WalletConnect と同様の仮想通貨のウォレットアプリ。Google アカウントのみでウォレットを作成できるのが特徴。
ウォレットを作成する際の手間である、シークレットフレーズの管理が不要で、専用の拡張機能のインストールが不要のため、誰でも簡単に Web3 アプリケーションを利用できる。
RainbowKit とは
RainbowKit は dApps にウォレットを簡単に接続できる React ライブラリ。
RainbowKit を利用することで、Dapps の実装に必要な、ウォレットの接続を簡単に実装することができる。
実装
RainbowKit が React 専用のライブラリのため、Next.js を利用して実装する。
利用する各種バージョンは以下の通り
- next: 14.2.5
- react: 18
- rainbowkit: 2.1.4
- intmax-walletsdk: 0.0.4
最終的なコードは以下のリポジトリを参照。
1. Next.js のセットアップ
はじめに Next.js のプロジェクトを作成する。プロジェクト名はintamaxwallet-nextapp-sampleとして作成する。
npx create-next-app@latest
~~基本デフォルトでOK、省略~~
code intamaxwallet-nextapp-sample
2. rainbowkit と intmax-walletsdk のインストール
RainbowKit と INTMAX Wallet の利用に必要なライブラリをインストールする。
RainbowKit のインストール
npm install @rainbow-me/rainbowkit wagmi viem@2.x @tanstack/react-query
intmax-walletsdk のインストール
npm install intmax-walletsdk
3. ウォレットの設定
wagmi.tsx を作成し、intmax-walletsdk の定義と、定義した INTMAX Wallet を RainbowKit に登録するための設定を行う。
import { connectorsForWallets } from "@rainbow-me/rainbowkit";
import { intmaxwalletsdk } from "intmax-walletsdk/rainbowkit";
import { createConfig, http } from "wagmi";
import { polygon } from "viem/chains";

// Intmax Walletの設定
const intmaxWallet = intmaxwalletsdk({
  wallet: {
    url: "https://wallet.intmax.io/",
    name: "INTMAX Wallet",
    iconUrl: "https://wallet.intmax.io/favicon.ico",
  },
  metadata: {
    name: "IntmaxWallet Connect Sample App",
    description:
      "This is a sample of connecting to the polygon using intmax Wallet.",
  },
});

// 接続可能なウォレットの設定
const connectors = connectorsForWallets(
  [
    {
      // 推奨されるウォレットとしてintmaxWalletを指定する
      groupName: "Recommended Wallet",
      wallets: [intmaxWallet],
    },
  ],
  { projectId: "N/A", appName: "Sample Wallet" }
);

export const config = createConfig({
  chains: [polygon],// 動作確認用にPolygonを指定
  transports: {
    [polygon.id]: http(polygon.rpcUrls.default.http[0]),
  },
  connectors,
});
その後、providers.tsxに、上記の設定を読み込む処理を追加する。
"use client";

import * as React from "react";
import { QueryClient, QueryClientProvider } from "@tanstack/react-query";
import { WagmiProvider } from "wagmi";
import { RainbowKitProvider } from "@rainbow-me/rainbowkit";
import { config } from "./wagmi";

const queryClient = new QueryClient();

export function Providers({ children }: { children: React.ReactNode }) {
  return (
    <WagmiProvider config={config}>
      <QueryClientProvider client={queryClient}>
        <RainbowKitProvider>{children}</RainbowKitProvider>
      </QueryClientProvider>
    </WagmiProvider>
  );
}
4. ビューにウォレット接続ボタンを追加
作成したプロバイダーを全てのページで適応するためにlayout.tsxでProvidersを利用するように設定する
import "@/app/globals.css";
import "@rainbow-me/rainbowkit/styles.css";
import { Providers } from "@/utils/providers";

function RootLayout({ children }: { children: React.ReactNode }) {
  return (
    <html lang="ja">
      <body>
        <Providers>{children}</Providers>
      </body>
    </html>
  );
}

export default RootLayout;
最後にindex.tsxにウォレット接続ボタンを追加する。
import { ConnectButton } from "@rainbow-me/rainbowkit";

function Page() {
  return (
    <div
      style={{
        display: "flex",
        justifyContent: "flex-end",
        padding: 12,
      }}
    >
      <ConnectButton />
    </div>
  );
}

export default Page;
動作確認
以下のコマンドでアプリを起動する
npm run dev
ブラウザでhttp://localhost:3000にアクセスする。
ウォレット接続ボタンをクリック

INTMAX Wallet にログインし、接続を許可する
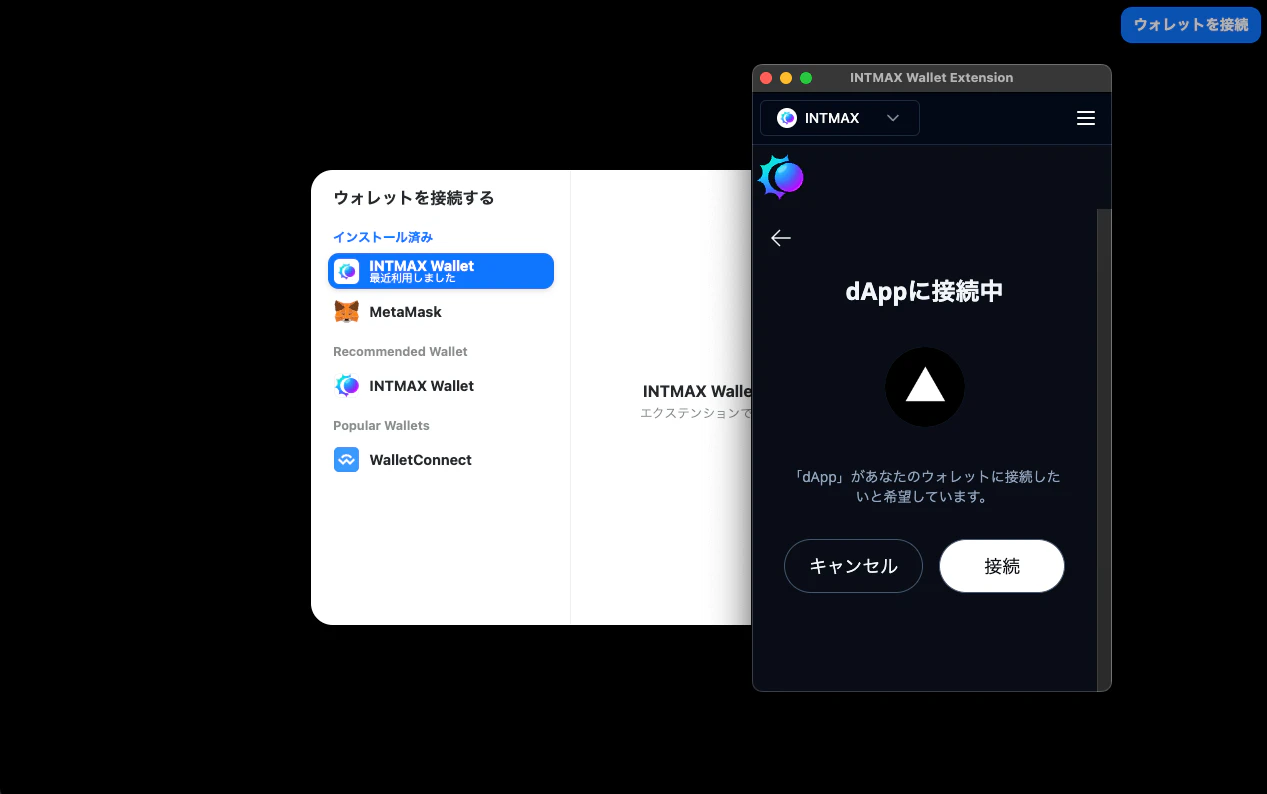
接続が完了している
