5
3

Delete article

Deleted articles cannot be recovered.

Draft of this article would be also deleted.

Are you sure you want to delete this article?

More than 5 years have passed since last update.

VisualStudio2019でUnityデバッガーのアタッチをツールバーに置く

Last updated at Posted at 2019-08-10

備忘録です。

通常VisualStudioでUnityをデバッグするには
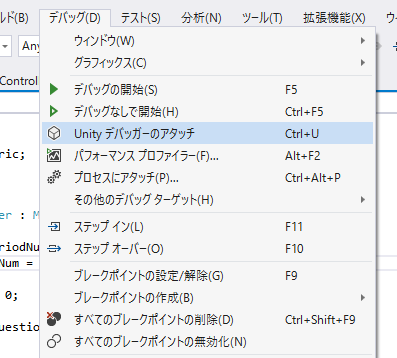
image.png
こんな感じでデバッグ→Unityデバッガーのアタッチを選択する必要がありますが、
デバッグを繰り返すときにはこれがとにかく面倒です。
探したところこの「Unityデバッガーのアタッチ」をツールバーに置く方法が見つかったので書き残しておきます。
(vs2017の頃には勝手にツールバーに置かれてた気がするのですが…)
これでUnityのデバッグが楽になりますね。

環境
  • Microsoft Visual Studio Community 2019 Version 16.2.1
  • Visual Studio Tools for Unity 4.2.0.1

恐らくvs2017とか他のバージョンでも同じようにできると思います。

手順

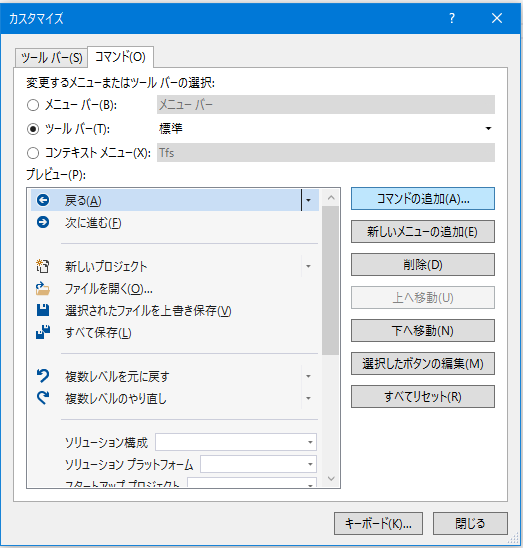
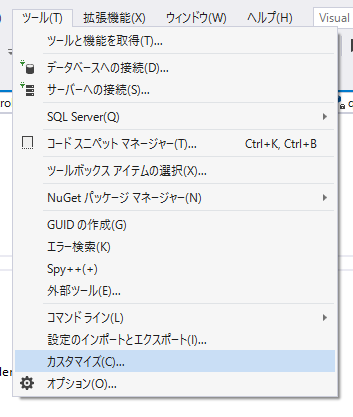
ツール→カスタマイズを選択
image.png

コマンドタブ、ツールバーを選択。プルダウンは標準を選択、
image.png

コマンドの追加をクリック。
カテゴリはデバッグ、コマンドは「cmdldUnityAttach」を選択してOKをクリック。
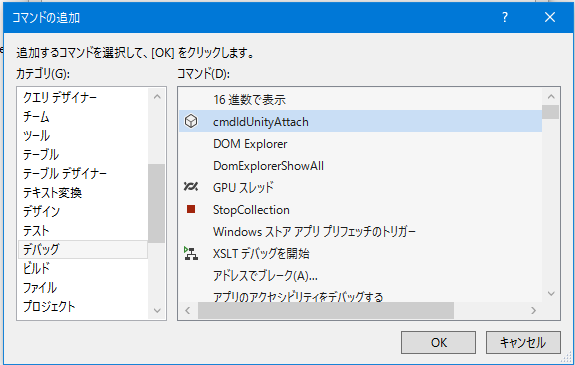
image.png

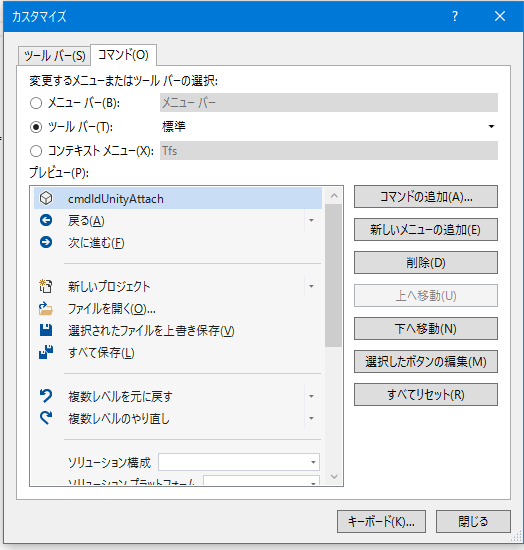
下へ移動などしてお好きな位置に移動し、閉じるをクリック
image.png

追加されました。
image.png

アイコンをクリックするとおなじみのUnityインスタンスの選択画面が表示されます。

この記事が誰かの役に立てたら幸いです。それでは。
5
3
0

Register as a new user and use Qiita more conveniently

  1. You get articles that match your needs
  2. You can efficiently read back useful information
  3. You can use dark theme
What you can do with signing up
5
3

Delete article

Deleted articles cannot be recovered.

Draft of this article would be also deleted.

Are you sure you want to delete this article?