SpringBootを使って、PayPay for Developersで、「ウェブペイメント」による支払いを実装してみました。
ソースはこちら
ウェブペイメントについては、公式によると、、
あなたのサービスからPayPay Webページ、またはPayPayアプリに遷移して行う決済を提供します。
ウェブペイメント-即時&出荷売上 は以下のような場合に採用することをお勧めしております
・モバイルアプリケーションから支払いが必要な場合
・ウェブサイトから支払いが必要な場合
・スマホ、ウェブブラウザ向けの両方をお持ちの場合、統一したインタフェースにより支払いを提供することが可能です。
だ、そうです。
つまりは、Web画面にPayPayの支払いサイト一旦遷移させて決済する仕組みのようです。
目次
- 開発環境
-
事前にやること
2.1 developerサイトでマーチャントアカウントを登録する
2.2 APIキー等を取得 - 完成イメージ
-
実装してみる
4.1 SDKの取り込み
4.2 APIキー類をproperty化
4.3 ApiClientをcomporent化
4.4 商品選択ページ
4.5 購入ページ
4.6 取引結果ページ
開発環境
| ツール | バージョン | 補足 |
|---|---|---|
| OS | macOS catalina | |
| 言語 | Kotlin | |
| FW | SpringBoot 2.6.4 | |
| PayPaySDK | paypayopa:1.0.6 | MavenRepository |
事前にやること。
developerサイトでマーチャントアカウントを登録する
いわゆる店舗としてのアカウントを登録します。
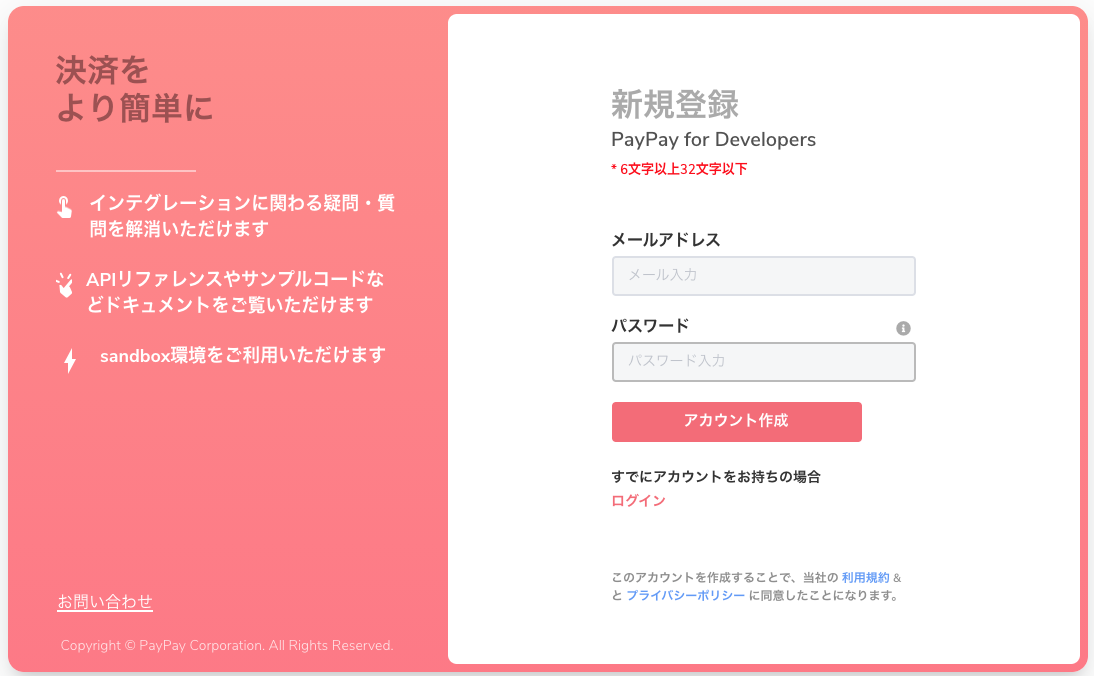
SignUpより、アカウント登録を実施。
希望のメールアドレス、パスワードを入力すると、ワンタイムパスワードが送られてきます。
送られてきたワンタイムパスワードを入力すると、アカウント発行完了となります。
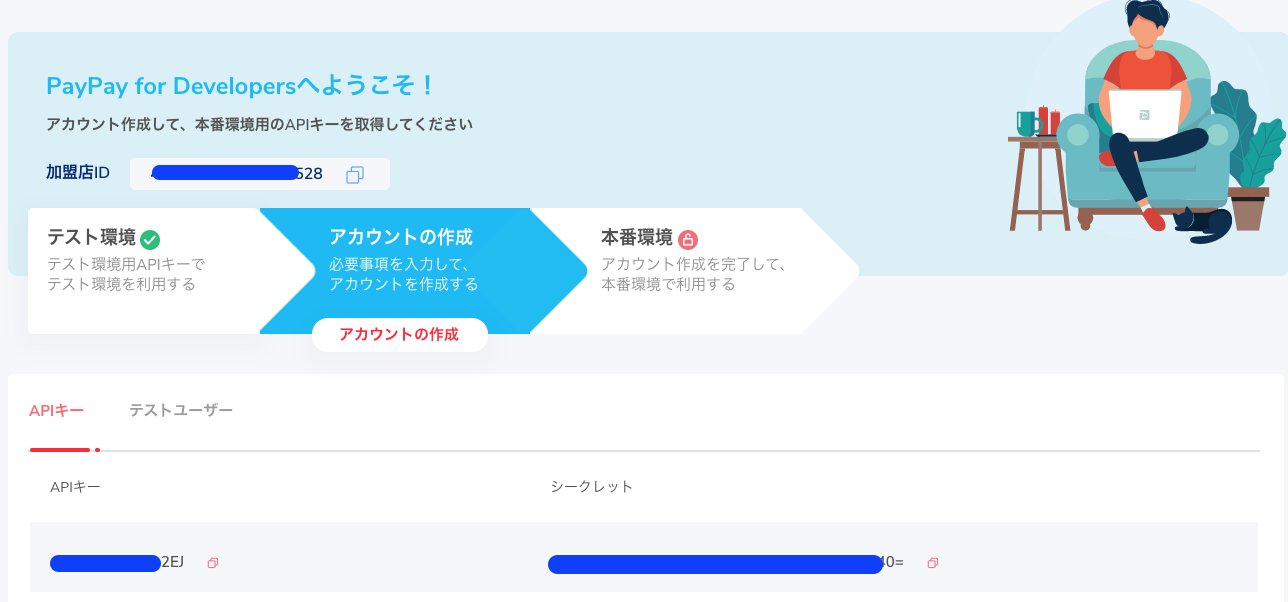
APIキー等を取得
以下の項目を控えておく
完成イメージ
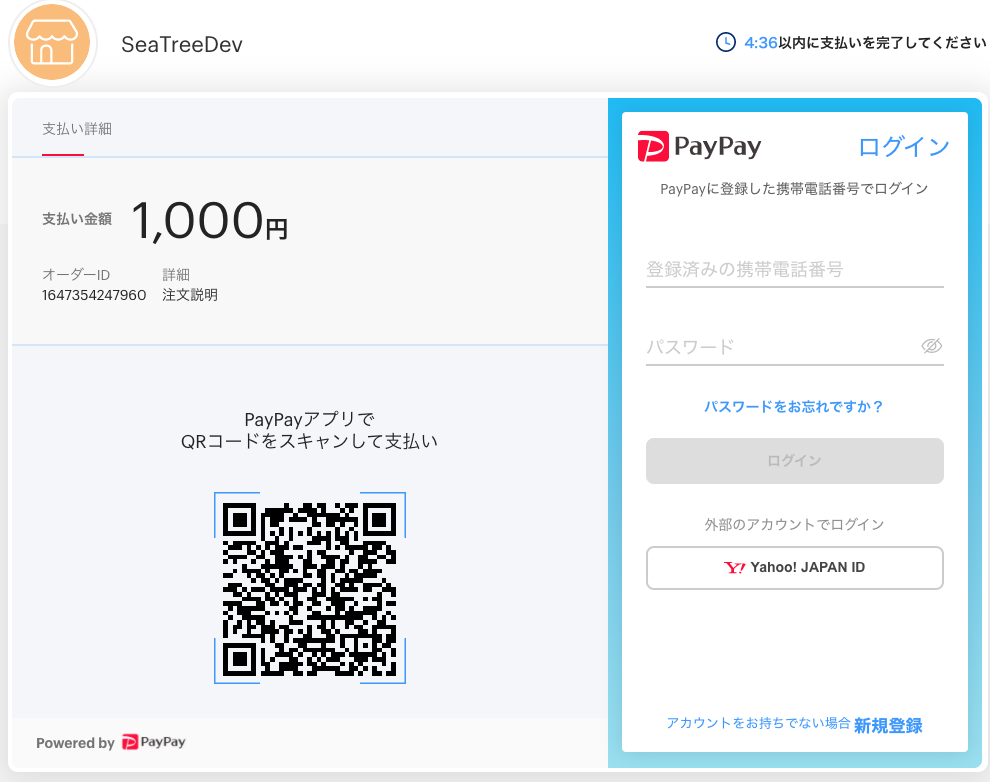
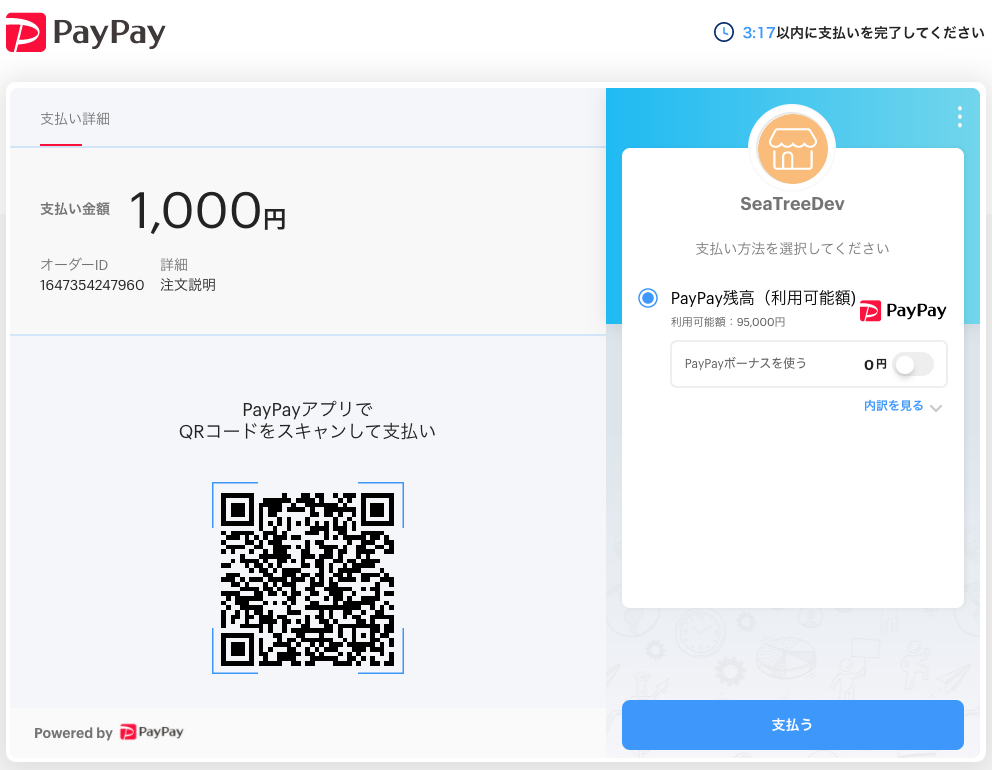
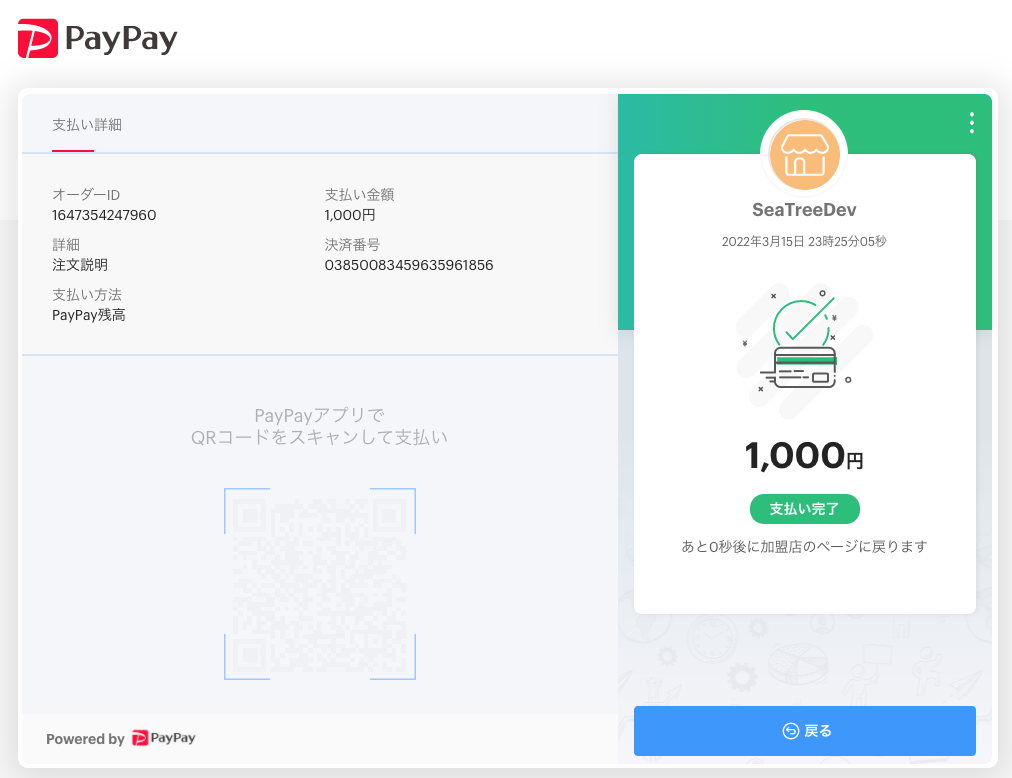
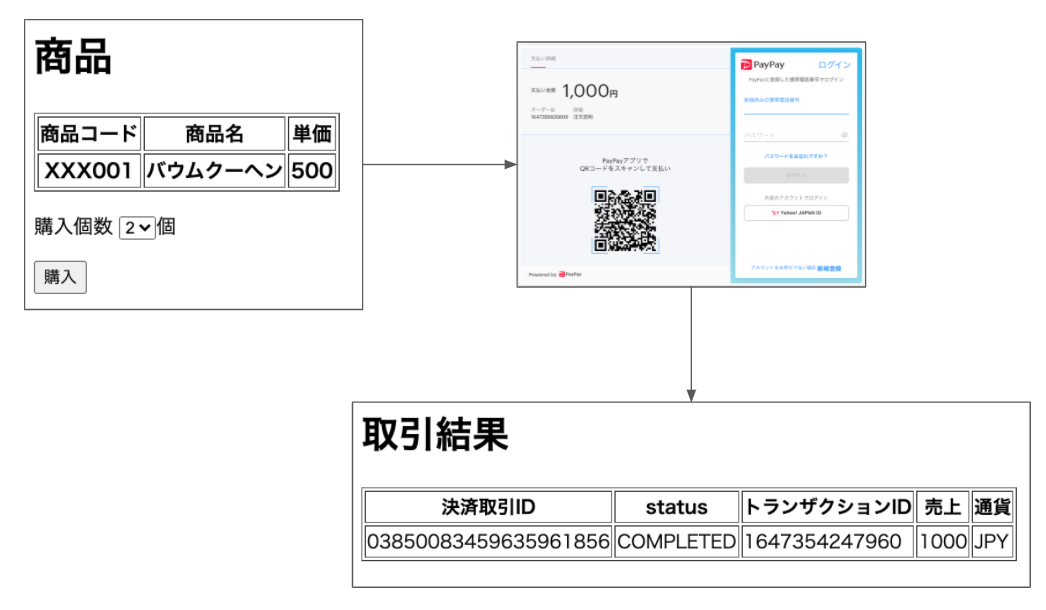
以下のような画面遷移でPayPayの支払いを実装してみます。
実装してみる
developerの登録も完了したので、いざ実装に取り掛かる。
まずは、以下を参考にSpringBoot環境を用意。
SpringBoot + kotlin + Thymeleafの構築
SDKの取り込み
gradleの依存関係に以下を追加。
paypayopaのみ追加するつもりだったが、SDK内で使用されているvalidationのバージョンの関係でコンパイルエラーに。。。
なので、validation類も追加。
dependencies {
	〜割愛〜
    implementation("org.hibernate.validator:hibernate-validator-annotation-processor:7.0.4.Final")
    implementation("org.glassfish:jakarta.el:4.0.2")
    implementation("org.glassfish:javax.el:3.0.1-b11")
    implementation("jakarta.validation:jakarta.validation-api:3.0.0")
    implementation("jp.ne.paypay:paypayopa:1.0.6")
}
APIキー類をproperty化
以下のpropertyについて、上記で取得した値に変更する
paypay:
  production-mode: false # true:本番モード, false: テストモード
  api-key: [YOUR_API_KEY]                 # 発行されたAPIキー
  api-secret-key: [YOUR_SECRET_KEY]       # 発行されたシークレット
  assume-merchant: [YOUR_ASSUME_MERCHANT] # 発行された店舗ID
@ConstructorBinding
@ConfigurationProperties(prefix = "paypay")
data class PaypayApiProperties(
    val productionMode: Boolean,
    val apiKey: String,
    val apiSecretKey: String,
    val assumeMerchant: String
)
@SpringBootApplication
@ConfigurationPropertiesScan // 追加
class DemoApplication

fun main(args: Array<String>) {
    runApplication<DemoApplication>(*args)
}
ApiClientをcomporent化
@Configuration
class PaypayApiClientConfiguration(
    private val paypayApiProperties: PaypayApiProperties
) {

    @Bean
    fun apiClient(): ApiClient {
        val apiClient = jp.ne.paypay.Configuration().defaultApiClient
        apiClient.setProductionMode(paypayApiProperties.productionMode)
        apiClient.setApiKey(paypayApiProperties.apiKey)
        apiClient.setApiSecretKey(paypayApiProperties.apiSecretKey)
        apiClient.setAssumeMerchant(paypayApiProperties.assumeMerchant)
        return apiClient
    }
}
商品選択ページ
    @GetMapping("/")
    fun index(): ModelAndView {
        return ModelAndView("selectProduct")
    }
<!DOCTYPE html>

<html xmlns:th="http://www.thymeleaf.org">

<head>
    <title>商品</title>
    <meta http-equiv="Content-Type" content="text/html; charset=UTF-8"/>
</head>

<body>
<h1>商品</h1>
<table border="1">
    <thead>
    <tr>
        <th>商品コード</th>
        <th>商品名</th>
        <th>単価</th>
    </tr>
    </thead>
    <tbody>
    <tr>
        <th>XXX001</th>
        <th>バウムクーヘン</th>
        <th>500</th>
    </tr>
    </tbody>
</table>
<form method="post" th:action="@{/order}">
    <p>購入個数
    <select name="quantity">
        <option value="2">2</option>
    </select>個
    </p>
    <input type="submit" value="購入">
</form>
</body>
</html>
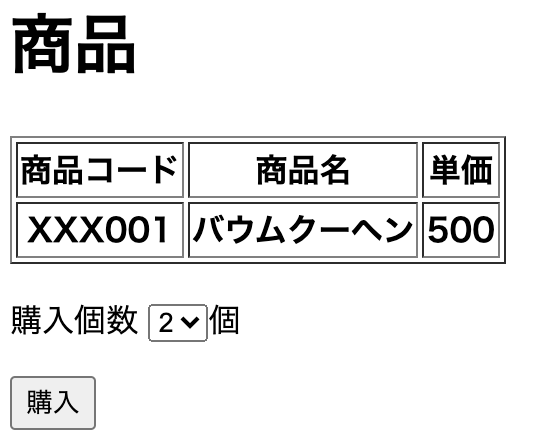
http://localhost:8080にアクセスで、商品選択ページを表示。
購入ページ
PayPayAPIのCreate a Codeを実行して、支払い用のQRコードを発行させます。
@Controller
class SampleController(
    private val paypayApiAdaptor: PaypayApiAdaptor
) {
    @PostMapping("/order")
    fun order(
        @RequestParam("quantity") quantity: Int
    ): ModelAndView {
        val merchantPaymentId = Instant.now().toEpochMilli().toString()

        val orderItems = listOf(
            MerchantOrderItem()
                .name("バウムクーヘン")
                .category("ケーキ")
                .productId("XXX001")
                .quantity(quantity)
                .unitPrice(MoneyAmount().amount(500).currency(MoneyAmount.CurrencyEnum.JPY))
        )

        val response = paypayApiAdaptor.createQrCode(
            merchantPaymentId = merchantPaymentId,
            amount = orderItems.sumOf { it.unitPrice.amount * it.quantity },
            orderItems = orderItems,
            orderDescription = "注文説明",
            isAuthorization = null,
            redirectUrl = "http://localhost:8080/paymentDetails/%s".format(merchantPaymentId),
            redirectType = QRCode.RedirectTypeEnum.WEB_LINK,
            userAgent = null
        )
        println(response)

        return ModelAndView("redirect:" + response.data.url)
    }
}
@Component
class PaypayApiAdaptor(
    private val apiClient: ApiClient
) {

    fun createQrCode(
        merchantPaymentId: String,
        amount: Int,
        orderItems: List<MerchantOrderItem>,
        orderDescription: String?,
        isAuthorization: Boolean?,
        redirectUrl: String?,
        redirectType: QRCode.RedirectTypeEnum?,
        userAgent: String?
    ): QRCodeDetails {
        val qrCode = QRCode()
        qrCode.amount = MoneyAmount().amount(amount).currency(MoneyAmount.CurrencyEnum.JPY)
        qrCode.merchantPaymentId = merchantPaymentId
        qrCode.codeType = "ORDER_QR"
        qrCode.orderItems = orderItems
        orderDescription?.let { qrCode.orderDescription = it }
        isAuthorization?.let { qrCode.isAuthorization(isAuthorization) }
        redirectUrl?.let { qrCode.redirectUrl = redirectUrl }
        redirectType?.let { qrCode.redirectType = redirectType }
        userAgent?.let { qrCode.userAgent = userAgent }

        return PaymentApi(apiClient).createQRCode(qrCode)
    }
}
PaymentApi(apiClient).createQRCode(qrCode)で、取引用のQRコードをPayPay側に作成します。
responseに含まれる、data.urlへアクセスするとPayPayの支払い画面へ遷移するので、Controllerの返却をdata.urlにredirectさせます。
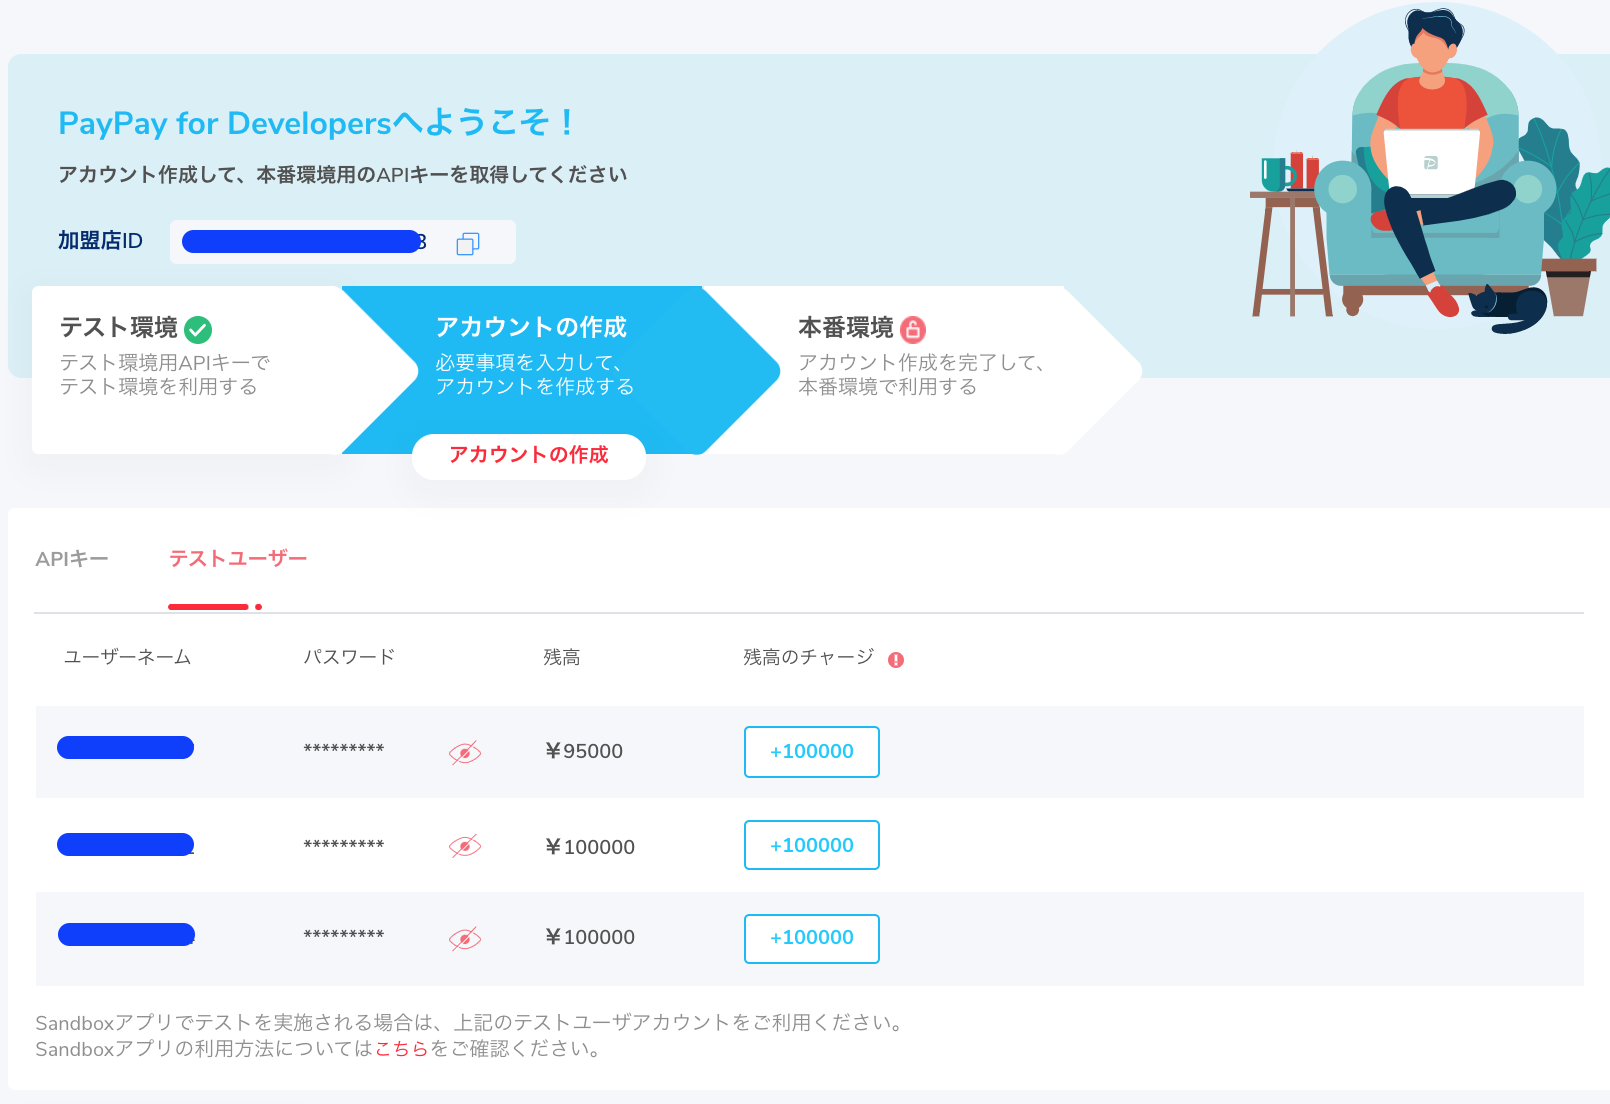
テストアカウントでログインして支払いしてみます。
テストアカウントはdeveloperサイトのダッシュボードの「テストユーザ」タブに記載されています。
数秒後に、PayPayAPIのCreate a CodeでリクエストしたredirectUrlにリダイレクトします。
今回は後述の取引結果ページへ遷移させます。
取引結果ページ
取引結果では、PayPayAPIのGet payment detailsを利用して、取引状態を取得します。
@Controller
class SampleController(
    private val paypayApiAdaptor: PaypayApiAdaptor
) {
    @GetMapping("/paymentDetails/{merchantPaymentId}")
    fun getPaymentDetails(
        @PathVariable("merchantPaymentId") merchantPaymentId: String
    ): ModelAndView {
        val response = paypayApiAdaptor.getPaymentDetails(merchantPaymentId = merchantPaymentId)
        print(response)
        return ModelAndView("paymentDetails").addObject("result", response.data)
    }
}
@Component
class PaypayApiAdaptor(
    private val apiClient: ApiClient
) {
    fun getPaymentDetails(
        merchantPaymentId: String
    ): PaymentDetails {
        return PaymentApi(apiClient).getCodesPaymentDetails(merchantPaymentId)
    }
}
<!DOCTYPE html>

<html xmlns:th="http://www.thymeleaf.org">

<head>
    <title>取引結果</title>
    <meta http-equiv="Content-Type" content="text/html; charset=UTF-8"/>
</head>

<body>
<h1>取引結果</h1>
<table border="1">
    <thead>
    <tr>
        <th>決済取引ID</th>
        <th>status</th>
        <th>トランザクションID</th>
        <th>売上</th>
        <th>通貨</th>
    </tr>
    </thead>
    <tbody>
    <tr>
        <td th:text="${result.paymentId}"></td>
        <td th:text="${result.status}"></td>
        <td th:text="${result.merchantPaymentId}"></td>
        <td th:text="${result.amount.amount}"></td>
        <td th:text="${result.amount.currency}"></td>
    </tr>
    </tbody>
</table>
</body>
</html>
実際の画面。

statusが「COMPLETE」であれば、「取引完了」です。
今回実装した内容です。
