この記事は「[IDOM Engineer Advent Calendar 2017](https://qiita.com/advent-
calendar/2017/idom-engineer)」の14日目の記事です。
13日目の記事は@kawamurayutoさんのLINE Notify と IFTTT を活用して、家族の情報共有をスマートにする方法は家族とのコミュニケーションにLINEを活用した話でした。
情報に過不足あれば指摘していただけると嬉しいです。
2017年12月15日(金)に「スター・ウォーズ/フォースの覚醒」の続編スターウォーズの最新作「スターウォーズ 最後のジェダイ」が始まりますね。楽しみで仕方がありません。早く観に行きましょう!
1. SWAPIとは
SWAPIとは、スターウォーズに関するデータ(惑星、宇宙船、乗り物、人、映画、種)をAPIで呼ぶことができるサイトのことです。
エピソード7までの情報があるようです。
また、利用は無料です。
利用規約はざっと目を通しておきましょう。
 SWAPI
https://swapi.co/
このサイトを利用して、スターウォーズについての情報を見ていきましょう。
SWAPIを利用します。
SWAPIのサイトにアクセスするとTOPページにAPIのURLが例として表示されています。

ターミナルを開いて以下を実行してみます。
curl, wget, httpieこの辺が利用できるならすぐに始めることができます。
$ http https://swapi.co/api/people/1/
HTTP/1.1 200 OK
Allow: GET, HEAD, OPTIONS
CF-RAY: 3ca0d0d62f726bbc-SJC
Connection: keep-alive
Content-Encoding: gzip
Content-Type: application/json
Date: Fri, 08 Dec 2017 15:39:09 GMT
Etag: W/"145c70f4eca80b4752674d42e5bf1bcf"
Server: cloudflare-nginx
Set-Cookie: __cfduid=da772b93637d029303bc47fe7c327d3e51512747549; expires=Sat, 08-Dec-18 15:39:09 GMT; path=/; domain=.swapi.co; HttpOnly; Secure
Transfer-Encoding: chunked
Vary: Accept, Cookie
Via: 1.1 vegur
X-Frame-Options: SAMEORIGIN

{
    "birth_year": "19BBY",
    "created": "2014-12-09T13:50:51.644000Z",
    "edited": "2014-12-20T21:17:56.891000Z",
    "eye_color": "blue",
    "films": [
        "https://swapi.co/api/films/2/",
        "https://swapi.co/api/films/6/",
        "https://swapi.co/api/films/3/",
        "https://swapi.co/api/films/1/",
        "https://swapi.co/api/films/7/"
    ],
    "gender": "male",
    "hair_color": "blond",
    "height": "172",
    "homeworld": "https://swapi.co/api/planets/1/",
    "mass": "77",
    "name": "Luke Skywalker",
    "skin_color": "fair",
    "species": [
        "https://swapi.co/api/species/1/"
    ],
    "starships": [
        "https://swapi.co/api/starships/12/",
        "https://swapi.co/api/starships/22/"
    ],
    "url": "https://swapi.co/api/people/1/",
    "vehicles": [
        "https://swapi.co/api/vehicles/14/",
        "https://swapi.co/api/vehicles/30/"
    ]
}
ルーク・スカイウォーカーの情報をゲットできました。
超簡単ですね。また、登場人物を検索することもできます。
検索する時はクエリーパラメータでsearchを追加して登場人物の名前を入れます。(名前の一部でも可)
$ http https://swapi.co/api/people/\?search=r2-d2
HTTP/1.1 200 OK
Allow: GET, HEAD, OPTIONS
CF-RAY: 3ca0d9858c226e32-SJC
Connection: keep-alive
Content-Encoding: gzip
Content-Type: application/json
Date: Fri, 08 Dec 2017 15:45:05 GMT
Etag: W/"45b596de39a39381fbc3a6b78bbb776d"
Server: cloudflare-nginx
Set-Cookie: __cfduid=d5811f199f675b0bb75d821963bf6c35f1512747904; expires=Sat, 08-Dec-18 15:45:04 GMT; path=/; domain=.swapi.co; HttpOnly; Secure
Transfer-Encoding: chunked
Vary: Accept, Cookie
Via: 1.1 vegur
X-Frame-Options: SAMEORIGIN

{
    "count": 1,
    "next": null,
    "previous": null,
    "results": [
        {
            "birth_year": "33BBY",
            "created": "2014-12-10T15:11:50.376000Z",
            "edited": "2014-12-20T21:17:50.311000Z",
            "eye_color": "red",
            "films": [
                "https://swapi.co/api/films/2/",
                "https://swapi.co/api/films/5/",
                "https://swapi.co/api/films/4/",
                "https://swapi.co/api/films/6/",
                "https://swapi.co/api/films/3/",
                "https://swapi.co/api/films/1/",
                "https://swapi.co/api/films/7/"
            ],
            "gender": "n/a",
            "hair_color": "n/a",
            "height": "96",
            "homeworld": "https://swapi.co/api/planets/8/",
            "mass": "32",
            "name": "R2-D2",
            "skin_color": "white, blue",
            "species": [
                "https://swapi.co/api/species/2/"
            ],
            "starships": [],
            "url": "https://swapi.co/api/people/3/",
            "vehicles": []
        }
    ]
}
R2-D2を検索して情報を取得することができましたね。
登場人物で取得できる情報一覧
| Attributes | 説明 |
|---|---|
| name | 人物の名前。 |
| birth_year | BBY(Yavinの戦いの前)またはABY(Yavinの戦闘の後)の宇宙標準を使用している人の誕生年。 |
| eye_color | 人物の目の色。知られていない場合は「unknown」、目がない場合は「n/a」 |
| gender | 人物の性別。男性なら「Male」、女性なら「Female」、不明なら「unknown」で性別がない場合は「n/a」 |
| hair_color | 人物の髪の色。知られていない場合は「unknown」で髪がない場合は「n/a」 |
| height | 人物の身長。単位はセンチメートル |
| mass | 人物の体重。単位はキロメートル |
| skin_color | 人物の肌の色。 |
| homeworld | 人物の生まれ故郷の星、または住んでいる惑星のURL |
| films | 人物が出演しているスターウォーズシリーズのURL |
| species | 人物の種別(人間とか、魚人とか) |
| starships | 人物が乗った宇宙船のURL一覧 |
| vehicles | 人物が乗った車両のURL一覧 |
| url | 人物データベースのURL |
| created | レコードが作成された年月日 |
| edited | レコードが編集された年月日 |
Yavinの戦いの前またはYavinの戦闘の後。 Yavinの戦いはスターウォーズのエピソードIV:新しい希望の終わりに起こる戦いのこと。
2. フロントエンド開発
swapiについて簡単に利用できることがわかったところで次はswapiを利用して簡単なWEBページを作成してみます。この記事では簡単なHTMLページを構築し、SWAPIで取得した情報を表示するサイトを作ってみます。
環境構築
普段はRubyエンジニアなのでフロントエンド開発知識はそれほどないのですが勉強の一環として、ここではフロント環境をなるべく今風に構築したいと思います。
利用するツール
- パッケージ管理にnpm
- モジュールバンドラにwebpack
※ npmコマンドが利用できることが前提です。
※ ターミナルにfishを利用しているので多少コマンドは読み替えて下さい。
開発環境の構築についてはざっと流します。
# プロジェクト作成
$ mkdir swapi-sandbox; and cd swapi-sandbox;
# package.json作成
$ npm init -y
# webpackをインストール
$ npm install -D webpack
# webpackコンフィグファイル作成
$ touch webpack.config.js
# src/app.jsを作成
$ mkdir src; and touch src/app.js
+ {
+   "name": "swapi-sandbox",
+   "version": "1.0.0",
+   "description": "",
+   "main": "index.js",
+   "scripts": {
+     "test": "echo \"Error: no test specified\" && exit 1"
+   },
+   "keywords": [],
+   "author": "",
+   "license": "ISC",
+   "devDependencies": {
+     "webpack": "^3.10.0"
+   }
+ }
+ const path = require('path');

+ module.exports = [{
+    entry: './src/app.js',
+    output: {
+        filename: 'bundle.js',
+        path: path.resolve(__dirname, 'public')
+    }
+}];
+ console.log('hello webpack')
$ node_modules/.bin/webpack webpack.config.js
Hash: 35c06b955c100972e49b
Version: webpack 3.10.0
Child
    Hash: 35c06b955c100972e49b
    Time: 98ms
        Asset     Size  Chunks             Chunk Names
    bundle.js  14.8 kB       0  [emitted]  main
       [0] multi ./src/app.js ./webpack.config.js 40 bytes {0} [built]
       [1] ./src/app.js 29 bytes {0} [built]
       [2] ./webpack.config.js 169 bytes {0} [built]
        + 2 hidden modules
設定が正しければpublic/bundle.jsが生成されます。
bundle.jsが利用できるjsか確認します。
$ touch public/index.html
+ <!DOCTYPE html>
+ <html>
+   <head>
+     <meta charset="utf-8">
+     <title>swapi-sandbox</title>
+   </head>
+   <body>
+
+   <script src="bundle.js" charset="utf-8"></script>
+   </body>
+ </html>
ブラウザで確認してConsoleにhello webpackが表示されていることを確認します。

これでwebpackの最低限の環境構築が整いました。
次にjsでswapiを呼び出す。
swapiを利用するためにここでは、axiosを利用します。
# axiosをインストール
$ npm install -S axios
{
  "name": "swapi-sandbox",
  "version": "1.0.0",
  "description": "",
  "main": "index.js",
  "scripts": {
    "test": "echo \"Error: no test specified\" && exit 1"
  },
  "keywords": [],
  "author": "",
  "license": "ISC",
  "devDependencies": {
    "webpack": "^3.10.0"
  },
+  "dependencies": {
+    "axios": "^0.17.1"
+  }
}
swapiから情報を取得するjsを作ります。
- console.log('hello webpack')
+ const axios = require('axios')
+ let SWAPI_PEOPLE = 'https://swapi.co/api/people/'
+
+ function getSwapiPeople(id) {
+   axios.get(SWAPI_PEOPLE + id).then(function(response){
+     console.log(response.data)
+   })
+ }
+ getSwapiPeople(1)
app.jsをバンドルするためにwebpackコマンドを実行しpublic/index.htmlを再度見ます。
$ node_modules/.bin/webpack webpack.config.js
SWAPIから取得することができましたね。

ここまでできたら後はガリガリプロジェクトを書くだけですが、その前にプロジェクトが大きくなることを考慮してプロジェクトディレクトリ構成を変更します。
プロジェクトを再構築する。
webpackのエンドポイントであるapp.jsにロジックを書くのはなるべくさけたほうがいいですね。なのでモジュール単位でjsを実装するための準備をします。
まず、src/modulesディレクトリを作成します。
これから作成するモジュールはここに格納していきます。
 .
 ├── package.json
 ├── public
 │   ├── bundle.js
 │   └── index.html
 ├── src
 │   ├── app.js
+│   └── modules
+│       └── lukeskywalker.js
 ├── touch
 └── webpack.config.js
とりあえず、modulesの配下にlukeskywalker.jsを作成し、
public/index.htmlを以下のように書き換えます。
swapiからlukeskywalkerの情報を取得するのでlukeskywalker.js を作成します。
+ const axios       = require('axios')
+ let SWAPI_PEOPLE  = 'https://swapi.co/api/people/'
+ let name          = document.querySelector('.name-by-swapi')
+ let birth_year    = document.querySelector('.birth_year-by-swapi')
+ let eye_color     = document.querySelector('.eye_color-by-swapi')

+ function getSwapiPeople(id) {
+   return axios.get(SWAPI_PEOPLE + id).then(function(response){
+     name.innerText = response.data.name
+     birth_year.innerText = response.data.birth_year
+     eye_color.innerText = response.data.eye_color
+   })
+ }

+ export default function getLukeSkywalkerInfo() {
+   getSwapiPeople(1)
+ }
app.jsから実装に関するコードを削除し利用する関数をインポートするように変更します。
- const axios       = require('axios')
- let SWAPI_PEOPLE  = 'https://swapi.co/api/people/'
- let name          = document.querySelector('.name-by-swapi')
- let birth_year    = document.querySelector('.birth_year-by-swapi')
- let eye_color     = document.querySelector('.eye_color-by-swapi')

- function getSwapiPeople(id) {
-   return axios.get(SWAPI_PEOPLE + id).then(function(response){
-     name.innerText = response.data.name
-     birth_year.innerText = response.data.birth_year
-     eye_color.innerText = response.data.eye_color
-   })
- }

- export default function getLukeSkywalkerInfo() {
-   getSwapiPeople(1)
- }
+ import getLukeSkywalkerInfo from './modules/lukeskywalker';

+ getLukeSkywalkerInfo()
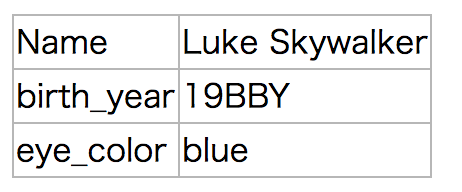
情報を取得したら表示する簡単な例です。
<!DOCTYPE html>
<html>
  <head>
    <meta charset="utf-8">
    <title>swapi-sandbox</title>
+	<style media="screen">
+	  table { border-collapse: collapse; }
+	  td {	border: 1px solid #b7b7b7; }
+	</style>

  </head>
  <body>
+    <table>
+      <tr>
+        <td>Name</td>
+        <td class="name-by-swapi"></td>
+      </tr>
+      <tr>
+        <td>birth_year</td>
+        <td class="birth_year-by-swapi"></td>
+      </tr>
+      <tr>
+        <td>eye_color</td>
+        <td class="eye_color-by-swapi"></td>
+      </tr>
+    </table>
    <script src="bundle.js" charset="utf-8"></script>
  </body>
</html>
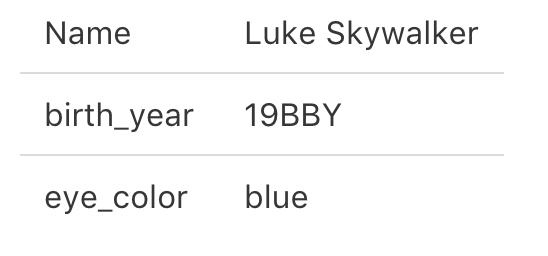
もうすこしキレイに見せる
swapiから取得できた情報をキレイに見せるために今回、CSSフレームワークにはbulmaを利用します。
$ npm install -D style-loader css-loader sass-loader node-loader
$ npm install -S bulma
{
  "name": "swapi-sandbox",
  "version": "1.0.0",
  "description": "",
  "main": "index.js",
  "scripts": {
    "test": "echo \"Error: no test specified\" && exit 1"
  },
  "keywords": [],
  "author": "",
  "license": "ISC",
  "devDependencies": {
+    "css-loader": "^0.28.7",
+    "node-sass": "^4.7.2",
+    "sass-loader": "^6.0.6",
+    "style-loader": "^0.19.0",
    "webpack": "^3.10.0"
  },
  "dependencies": {
    "axios": "^0.17.1",
+    "bulma": "^0.6.1"
  }
}
webpackでcssが利用できるようにします。
const path = require('path');

module.exports = [{
  entry: ['./src/app.js'],
  output: {
    filename: 'bundle.js',
    path: path.resolve(__dirname, 'public')
+  },
+  module: {
+    rules: [{
+        // css関連が利用できるようにする。
+        test: /\.(css|sass|scss)$/,
+        use: [
+            'style-loader',
+            'css-loader',
+            'sass-loader'
+        ]
+      }
+    ]
+  }
}];
bulmaを利用するためのstyle.scssをsrcディレクトリ配下に作成します。
$ touch style.scss
  .
  ├── package.json
  ├── public
  │   ├── bundle.js
  │   └── index.html
  ├── src
  │   ├── app.js
+ │   ├── style.scss
  │   └── modules
  │       └── lukeskywalker.js
  ├── touch
  └── webpack.config.js
@import "../node_modules/bulma/bulma.sass";
+ import './style.scss';
import getLukeSkywalkerInfo from './modules/lukeskywalker'

getLukeSkywalkerInfo()
<!DOCTYPE html>
<html>
  <head>
    <meta charset="utf-8">
    <title>swapi-sandbox</title>
-   <style media="screen">
-     table { border-collapse: collapse; }
-     td {  border: 1px solid #b7b7b7; }
-   </style>
  </head>
  <body>
+    <div class="container">
+      <div>
+        <table class="table">
          <tr>
            <td>Name</td>
            <td class="name-by-swapi"></td>
          </tr>
          <tr>
            <td>birth_year</td>
            <td class="birth_year-by-swapi"></td>
          </tr>
          <tr>
            <td>eye_color</td>
            <td class="eye_color-by-swapi"></td>
          </tr>
        </table>
+      </div>
+    </div>
    <script src="bundle.js" charset="utf-8"></script>
  </body>
</html>
3. SWAPIに登録されている登場人物を全て取得する
3-1. 開発の準備
これまでずっと、bundle.jsを生成するときには以下でしたが、コマンドを短縮しましょう。
$ node_modules/.bin/webpack webpack.config.js
webpackをビルドするコマンドをnpm scriptsに追加しておきます。
これで、npm run webpackでビルドできるようになります。
{
  "scripts": {
    "test": "echo \"Error: no test specified\" && exit 1",
+    "webpack": "webpack"
  },
}
bundle.jsを生成するためのコマンド
$ npm run webpack
3-2. プロジェクトを改修して登場人物を全員取得できるように改修します。
ここからはソースコードを貼っていきます。
ディレクトリ構造はこんな感じです。
.
├── package.json
├── public
│   ├── bundle.js
│   └── index.html
├── src
│   ├── app.js
│   ├── modules
│   │   ├── add-swapi-people-attributes.js
│   │   └── swapi-people.js
│   └── style.scss
└── webpack.config.js
index.htmlは突起して書く所はありませんが、div.id="sw-people"に登場人物の一覧を表示します。
<!DOCTYPE html>
<html lang="jp">
  <head>
    <meta charset="utf-8">
    <title>swapi-sandbox</title>
  </head>
  <body>
    <section class="hero is-black is-bold">
      <div class="hero-body">
        <div class="container">
          <h1 class="title">
            swapi-sandbox
          </h1>
          <h2 class="subtitle">
            url: https://swapi.co/
          </h2>
        </div>
      </div>
    </section>
    <div id="sw-people" class="container tile is-vertical is-11">
    </div>
    <footer class="footer">
      <div class="content has-text-centered">
        <a href="https://bulma.io">
          <img src="https://bulma.io/images/made-with-bulma.png" alt="Made with Bulma" width="128" height="24">
        </a>
      </div>
    </footer>
    <script src="bundle.js" charset="utf-8"></script>
  </body>
</html>
エントリーポイントであるapp.jsには、htmlを生成するメソッドgetSwPeopleInfoを利用できるに宣言しています。
import './style.scss';
import { getSwPeopleInfo } from './modules/swapi-people'

document.addEventListener('DOMContentLoaded', function() {
  getSwPeopleInfo()
}, false)
swapiの登場人物を取得するためのajax処理をまとめています。
また、swapiに登録されている登場人物は全部で88人いるようですが17番だけn/aなので取得対象外にしています。
import { addDivElement } from './add-swapi-people-attributes'

const axios         = require('axios')
const SWAPI_PEOPLE  = 'https://swapi.co/api/people/'
const PEOPLE_COUNT  = 88

function getSwapiPeople(id) {
  axios.get(SWAPI_PEOPLE + id).then(function(response){
    addDivElement(id, response.data)
  }).catch(function (e) {
    console.log(e);
  })
}

export function getSwPeopleInfo() {
  for (var i = 1; i <= PEOPLE_COUNT; i++) {
    if (i == 17) { // /people/17はn/a
      continue
    }
    getSwapiPeople(i)
  }
}
index.htmlに追加する登場人物の主要情報を生成するためのjsです。
属性ごとにメソッドを切っているのは、可読性を上げるためです。
export function addDivElement(id, data) {
  let colors = ['is-primary', 'is-link', 'is-info', 'is-success', 'is-warning', 'is-danger']
  let article = document.createElement('article')

  article.classList.add('tile', 'is-child', 'notification');
  article.classList.add(colors[Math.floor(Math.random() * colors.length)])

  addChildName(id, data.name, article)
  addChildUrl(data.url, article)

  var attributes = document.createElement('div')
  addChildbirthYear(data.birth_year, attributes)
  addChildEyeColor(data.eye_color, attributes)
  addChildHairColor(data.hair_color, attributes)
  addChildSkinColor(data.skin_color, attributes)
  addChildGender(data.gender, attributes)
  addChildHeight(data.height, attributes)
  addChildMass(data.mass, attributes)
  addChildHomeworld(data.homeworld, attributes)

  article.appendChild(attributes)

  var div = document.createElement('div')
  div.classList.add('tile', 'is-parent', 'is-vertical');
  div.appendChild(article)

  let element = document.querySelector('#sw-people')
  element.appendChild(div)
}

function createAndAddChild(value, classList, parentNode) {
  var c_elt = document.createElement('p')
  classList.map(function(v, index, array){
    c_elt.classList.add(v)
  })
  c_elt.innerText = value
  parentNode.appendChild(c_elt)
}

function addChildName(id, name, parentNode) {
  createAndAddChild(id + ": " +name, ['title', 'name'], parentNode)
}

function addChildUrl(url, parentNode) {
  createAndAddChild("URL: " + url, ['subtitle', 'url'], parentNode)
}

function addChildbirthYear(birth_year, parentNode) {
  createAndAddChild("BIRTHDAY: " + birth_year, ['birth_year'], parentNode)
}

function addChildEyeColor(eye_color, parentNode) {
  createAndAddChild("EYE_COLOR: " + eye_color, ['eye_color'], parentNode)
}

function addChildHairColor(hair_color,parentNode) {
  createAndAddChild("HAIR_COLOR: " + hair_color, ['hair_color'], parentNode)
}

function addChildSkinColor(skin_color,parentNode) {
  createAndAddChild("SKIN_COLOR: " + skin_color, ['skin_color'], parentNode)
}

function addChildGender(gender,parentNode) {
  createAndAddChild("GENDER: " + gender, ['gender'], parentNode)
}

function addChildHeight(height,parentNode) {
  createAndAddChild("HEIGHT: " + height, ['height'], parentNode)
}

function addChildMass(mass,parentNode) {
  createAndAddChild("MASS: " + mass, ['mass'], parentNode)
}

function addChildHomeworld(homeworld,parentNode) {
  createAndAddChild("HOMEWOLRD: " + homeworld, ['homeworld'], parentNode)
}
bulmaの情報をインポートしつつ、独自のカスタマイズを書いています。
そこまでカスタマイズしてませんが。。
@import "../node_modules/bulma/bulma.sass";

.url {
  font-size: 14px;
}

.attributes {
  font-size: 1rem;
  font-weight: 400;
  line-height: 1.25;
}
package.jsonはこんな感じになりました。
{
  "name": "swapi-sandbox",
  "version": "1.0.0",
  "description": "",
  "main": "index.js",
  "scripts": {
    "test": "echo \"Error: no test specified\" && exit 1",
    "webpack": "webpack"
  },
  "keywords": [],
  "author": "",
  "license": "ISC",
  "devDependencies": {
    "css-loader": "^0.28.7",
    "node-sass": "^4.7.2",
    "sass-loader": "^6.0.6",
    "style-loader": "^0.19.0",
    "webpack": "^3.10.0"
  },
  "dependencies": {
    "axios": "^0.17.1",
    "bulma": "^0.6.1"
  }
}
webpack.config.jsはこんな感じになりました。
const path = require('path');

module.exports = [{
  entry: ['./src/app.js'],
  output: {
    filename: 'bundle.js',
    path: path.resolve(__dirname, 'public')
  },
  module: {
    rules: [{
        // css関連が利用できるようにする。
        test: /\.(css|sass|scss)$/,
        use: [
            'style-loader',
            'css-loader',
            'sass-loader'
        ]
      }
    ]
  }
}];
ここまでですね。
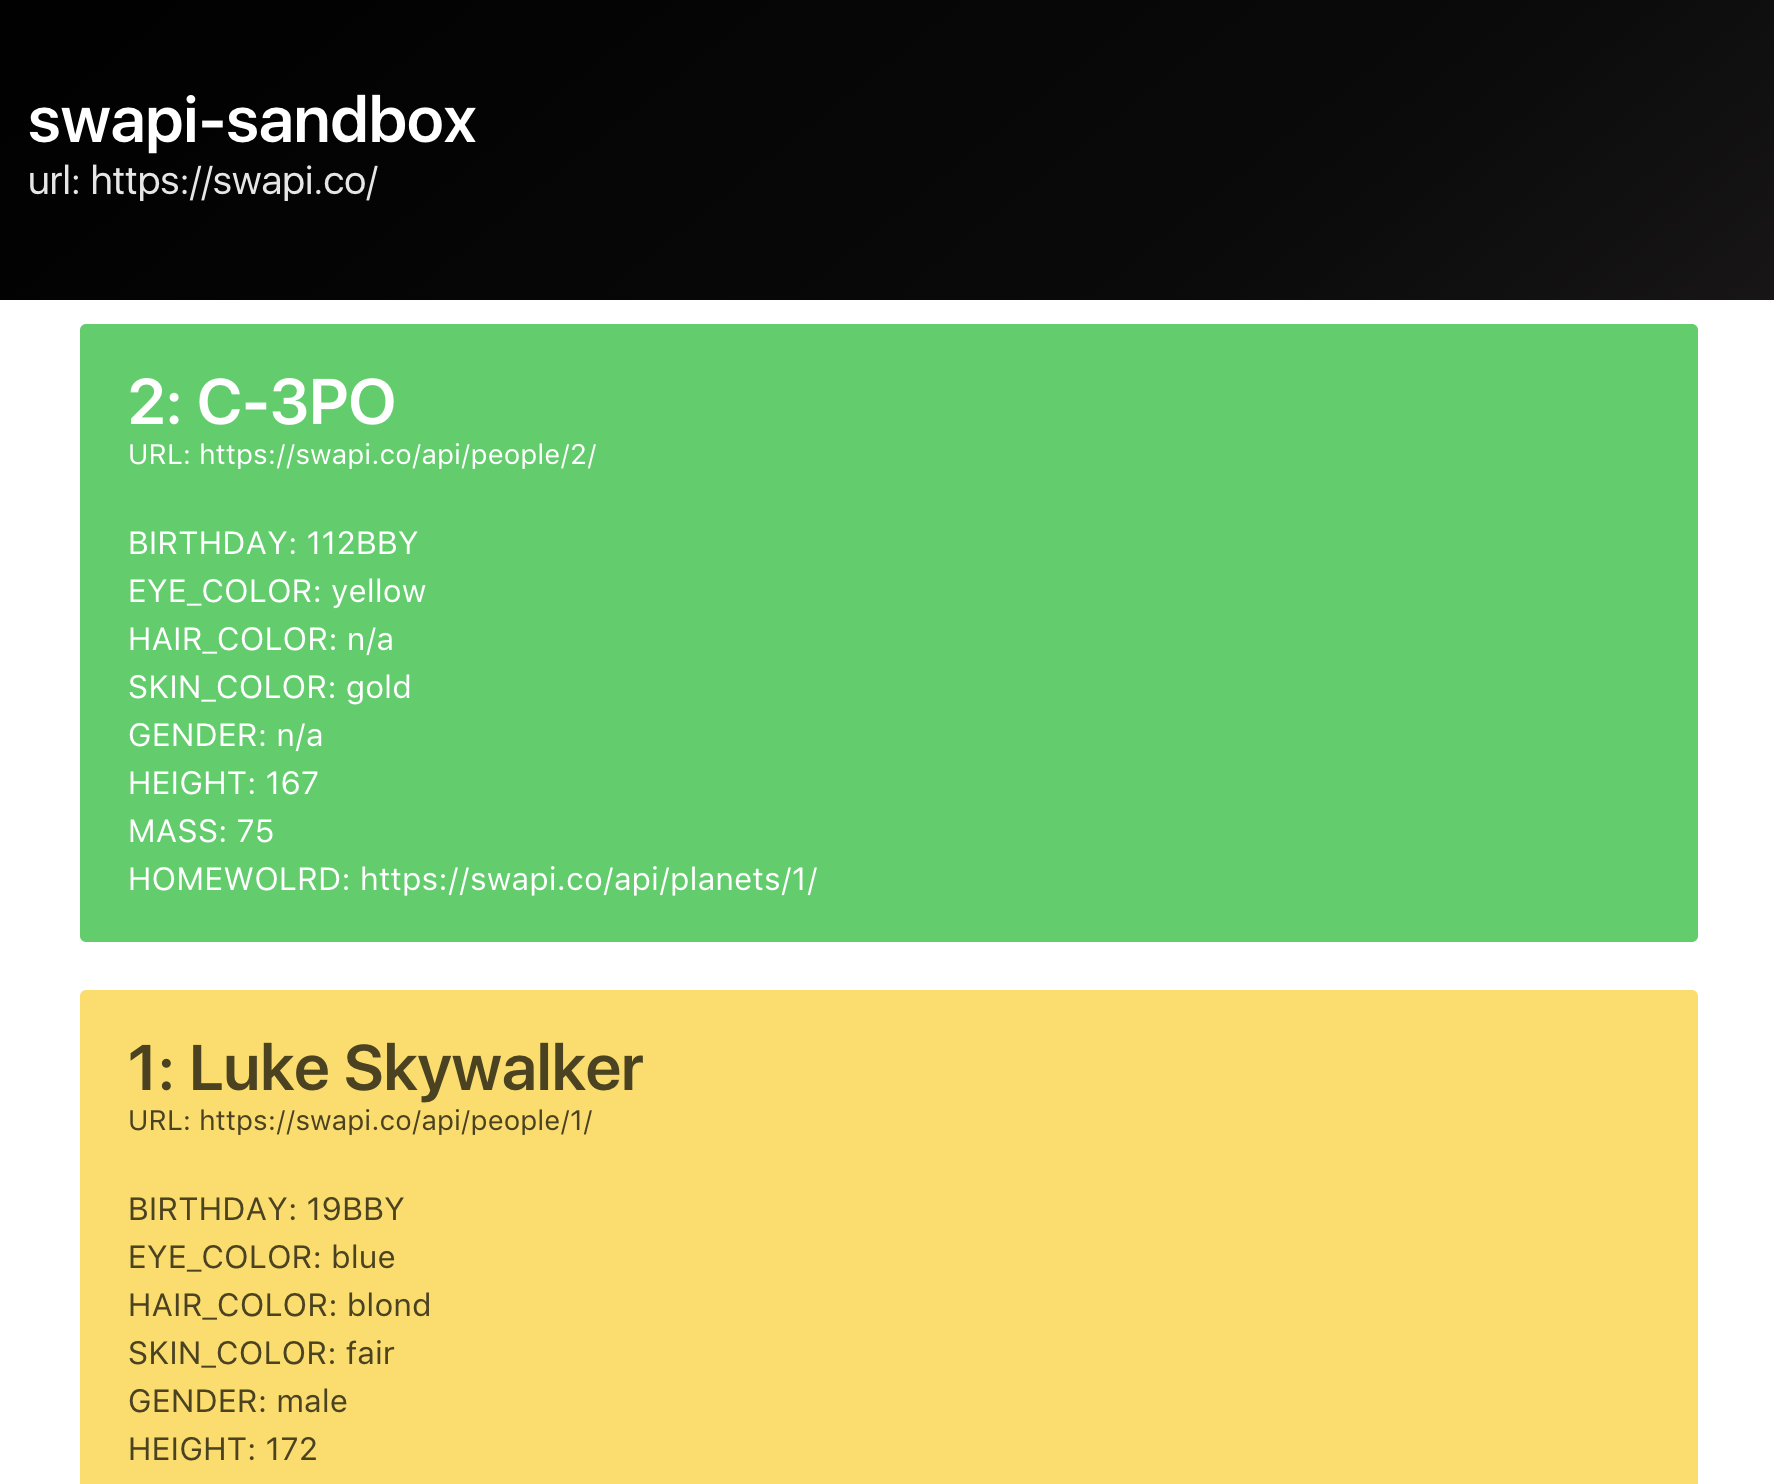
3-3. 画面イメージ
こんな感じの画面ができあがりました。下にスクロールすると87人の登場人物のプロフィールを見ることができます。非デザイナーとしては上々です。
4. あとがき
本当は12月15日に投稿したかった内容なのですが、15日が取られていたので前日の投稿です![]()
作成時に登場人物の画像を貼ろうか検討したのですが、肖像権的なことを考えて断念しました。
プライベートならありかもしれませんね。
また、以下のことが未対応なので時間ができたら対応を検討したいと思います。
- 登場人物をajaxで取得しているので取得順番が順不同で、今回は、登場人物の表示順番はランダム
- jsのミニマム対応
- 人物の画像取り込み&base64対応
また、SWのオープニングもかっこいいですよね。
SWPAIでは各エピソードのプロローグも取得できます。
画像だけですが、エピソード1からエピソード7のプロローグを一気に流すを作成してみました。
背景や音楽も合わせて作成したので結構本格的なのができました。
swapiには各言語を利用したコードサンプルありますので、初学者の勉強にはすごくいいと思います。
では、May the Force be with you. 映画館へ!


