こちらの記事でIBM Cloud上の仮想GPUサーバーをDockerコンテナで使用する方法を紹介しました。今回はこの環境をGoogle Colaboratoryのローカルランタイムとして使用する方法を紹介します。Google Colaboratoryが提供するホスト型ランタイムは12時間の制限がありますが、ローカルランタイムを使用すると無制限に使用することが可能です。
1. NVIDIA Container Toolkit環境の構築
こちらに従ってNVIDIA Container Toolkitの環境を構築します。
2. Jupyter Notebookの起動
以下のコマンドでDockerコンテナ上でJupyter Notebookを起動します。
$ docker run -it --gpus all -p 8888:8888 tensorflow/tensorflow:latest-gpu-jupyter \
jupyter notebook --ip 0.0.0.0 --no-browser --allow-root --NotebookApp.allow_origin='https://colab.research.google.com'
以下のようにJupter Notebookの接続先が表示されます。
http://10313cb03051:8888/?token=xxxxxxxxxxxxxxxxxxxxxxxxxxxxxxxxxxxxxxxx
3. ポートフォワーディングの構成
ローカルのPCでポートフォワーディングの構成をします。
ssh schiyoda@169.62.141.xxx -L 8888:localhost:8888 -N
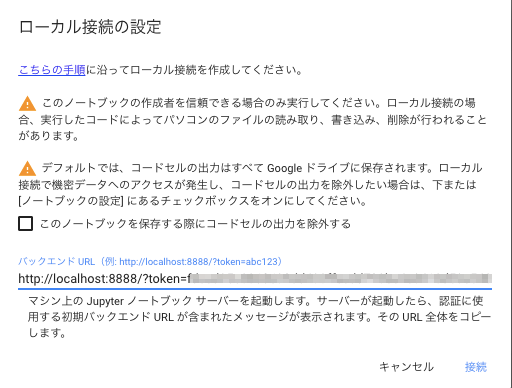
4. Google Colaboratoryから接続
Google Colaboratoryで「ローカルランタイムに接続」を選択し、バックエンドURLを指定します。
接続ができると、nvidia-smi コマンドでGPUの構成が見えるようになります。

参考
以下のように起動のオプションでDockerやJupyter Notebookの起動時の設定が可能です。
docker run -it --gpus all -p 8080:8080 -v ~/workspace:/tf tensorflow/tensorflow:latest-gpu-jupyter \
jupyter notebook --ip 0.0.0.0 --port 8080 --no-browser --allow-root --NotebookApp.allow_origin='https://colab.research.google.com'
-p : Dockerのポートフォワードの設定
-v : ホストのディレクトリをコンテナ上にマウント
--port: Jupter Notebookの起動ポート