概要
VisualStudio2019を使って初めてC#のCUIアプリを作ったときのメモ
対象読者: 他言語の経験はあるけどC#触ったことない人
この記事で学べること↓
- クラスや非同期処理その他の文法
- コマンドライン引数の解析
- CSVファイルの読み込み
- MySQLとの接続&SQL実行
- ※ORMではないです
準備
インストール
- VisualStudio2019をインストール
- MySQLをインストール
プロジェクト初期化
VisualStudioを開いて新しいプロジェクトの作成 > コンソールアプリ(.NET Core)
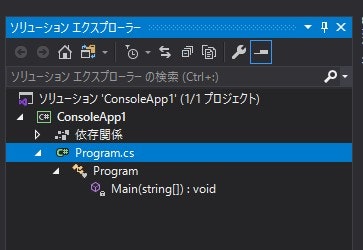
こんな感じのプロジェクトができる
設計
ざっくりと↓のようなアプリを作ってみたい
- CUIで動く
- CSVファイルからユーザーデータを読み込める
- MySQLにユーザーデータの作成と削除ができる
実装
コマンドライン引数解析機能
ライブラリをインストール
ツール > NuGetパッケージマネージャー > パッケージマネージャーコンソールをクリック
コンソールが開かれるので↓のコマンドを実行
PM> Install-Package System.CommandLine -Version 2.0.0-beta1.21308.1
コマンドライン引数解析クラス作成
/Services/Command.csクラスを作成して編集
using System;
using System.Threading.Tasks;
using System.CommandLine;
using System.CommandLine.Invocation;

namespace ConsoleApp1.Services {
    public class Command {
        private RootCommand _command;
        public Command(Func<string, string, Task<int>> handler) {
            this._command = this.InitCommand(handler);
        }

        // 非同期処理
        public async Task<int> Execute(string[] args) {
            // InvokeAsync()の処理が完了するまで待機
            return await this._command.InvokeAsync(args);
        }

        private RootCommand InitCommand(Func<string, string, Task<int>> handler) {
            var rootCommand = new RootCommand();
            rootCommand.Description = "C# Console App.";
            // コマンドライン引数の定義
            rootCommand.AddArgument(new Argument<string>("mode", "App mode e.g. create"));
            rootCommand.AddArgument(new Argument<string>("filePath", "CSV file path e.g. C:\\tmp\\test.csv"));
            // コマンドライン引数をもとに実行する処理の定義
            rootCommand.Handler = CommandHandler.Create<int, string, string>(async (int _, string mode, string filePath) => {
                await handler(mode, filePath);
            });

            return rootCommand;
        }
    }
}
補足
-
クラスのコンストラクタ
- クラス名のメソッド
例) public Command() { }がコンストラクタになる
- クラス名のメソッド
-
非同期処理
- 非同期処理の戻り値は(例えばstringの場合)
Task<string>という型にする - 非同期処理のメソッドには
async修飾子をつける - 非同期処理が完了するまで待機させたい箇所では
awaitをつける
- 非同期処理の戻り値は(例えばstringの場合)
CSVファイル読み込み機能
ライブラリをインストール
PM> Install-Package CsvHelper
ユーザーデータクラス作成
/Models/UserCSV.csを作成して編集
using CsvHelper.Configuration.Attributes;

namespace ConsoleApp1.Models {
    public class UserCSV {
        [Name("名前")]
        public string Name { get; set; }

        [Name("年齢")]
        public int Age { get; set; }
    }
}
CSV読み込みクラス作成
/Services/CSV.csを作成して編集
using System.Collections.ObjectModel;
using System.Threading.Tasks;
using CsvHelper;
using ConsoleApp1.Models;

namespace ConsoleApp1.Services {
    public class CSV {
        private CsvReader _reader;

        public CSV(CsvReader reader) {
            this._reader = reader;
        }

        public async Task<ObservableCollection<UserCSV>> ReadUserCSV() {
            // UserCSVデータを入れるコレクションを生成
            var userCsvs = new ObservableCollection<UserCSV>();

            await Task.Run(() => {
                // usingステートメント
                using (this._reader) {
                    this._reader.Read();
                    this._reader.ReadHeader();
                    var records = this._reader.GetRecords<UserCSV>();

                    foreach (var record in records) {
                        userCsvs.Add(new UserCSV() {
                            Name = record.Name,
                            Age = record.Age
                        });
                    }
                };
            });

            return userCsvs;
        }
    }
}
補足
-
usingステートメント
- アンマネージドリソース(ファイルなど)の使用権取得→破棄の処理を自動でやってくれる
- 今回の場合CSVファイルの使用権取得から破棄までをusingステートメントで制御させている
MySQL操作機能
本当はORM使いたかったけどどれがいいのかよくわからなかったので愚直にSQL文叩いていく
(そのうちC#の良さげなORM調査してみる)
ライブラリをインストール
PM> Install-Package MySql.Data
MySQL操作クラス
/Services/MySQL.csを作成して編集
using MySql.Data.MySqlClient;
using ConsoleApp1.Models;

namespace ConsoleApp1.Services {
    // struct
    public struct MySQLConfigs {
        public string server;
        public string database;
        public string user;
        public string password;
        public string characterCode;
    }

    public class MySQL {
        private MySQLConfigs _configs;
        private MySqlConnection _connection;

        public MySQL(MySQLConfigs configs) {
            this._configs = configs;
            this._connection = new MySqlConnection(this.BulildConnectionString());
        }

        public void CreateTable(string tableName) {
            this._connection.Open();
            var command = new MySqlCommand();
            command.Connection = this._connection;
            command.CommandText = $"CREATE TABLE IF NOT EXISTS {this._configs.database}.{tableName} (id INT NOT NULL PRIMARY KEY AUTO_INCREMENT, name VARCHAR(32), age INT)";
            command.ExecuteNonQuery();
            this._connection.Close();
        }

        public void CreateUser(string tableName, UserCSV user) {
            this._connection.Open();
            var command = new MySqlCommand();
            command.Connection = this._connection;
            command.CommandText = $"INSERT INTO {tableName} (name, age) VALUES (\"{user.Name}\", {user.Age})";
            command.ExecuteNonQuery();
            this._connection.Close();
        }

        public void DeleteUser(string tableName, UserCSV user) {
            this._connection.Open();
            var command = new MySqlCommand();
            command.Connection = this._connection;
            command.CommandText = $"DELETE FROM {tableName} WHERE name = \"{user.Name}\" AND age = {user.Age}";
            command.ExecuteNonQuery();
            this._connection.Close();
        }

        private string BulildConnectionString() {
            string connectionString = $"Server={this._configs.server};Database={this._configs.database};Uid={this._configs.user};Pwd={this._configs.password};Charset={this._configs.characterCode}";
            return connectionString;
        }
    }
}
やっていることは大体↓みたいな感じ
- MySQLのコンフィグ作成
- DBとコネクション貼る
- コネクションをOpenにする
- SQL実行する
- コネクションをCloseする
補足
-
struct(構造体)
- いくつかの変数をひとまとめにして扱うためのもの
- 今回はMySQLのコンフィグをstructで定義している
Main関数
Program.csを編集
using System;
using System.IO;
using System.Text;
using System.Globalization;
using System.Threading.Tasks;
using CsvHelper;
using ConsoleApp1.Services;

namespace ConsoleApp1 {
    class Program {
        static async Task Main(string[] args) {
            var command = new Command(Handler);
            await command.Execute(args);
        }

        private static async Task<int> Handler(string mode, string filePath) {
            if (mode != "create" && mode != "delete") {
                Console.WriteLine($"Appliction mode \"{mode}\" is invalid.");
                return 1;
            }

            var cultureInfo = new CultureInfo("ja-JP");
            var streamReader = new StreamReader(filePath, Encoding.GetEncoding("utf-8"));
            var csvReader = new CsvReader(streamReader, cultureInfo);
            var csv = new CSV(csvReader);
            var userRecords = await csv.ReadUserCSV();
            Console.WriteLine($"{userRecords.Count} users found");

            var configs = new MySQLConfigs() {
                database = "csharp_test",
                server = "localhost",
                user = "root",
                password = "password",
                characterCode = "utf8"
            };
            var mysql = new MySQL(configs);
            mysql.CreateTable("users");

            foreach (var user in userRecords) {
                if (mode == "create") {
                    Console.WriteLine($"Create user \"{user.Name}\"");
                    mysql.CreateUser("users", user);
                } else if (mode == "delete") {
                    Console.WriteLine($"Delete user \"{user.Name}\"");
                    mysql.DeleteUser("users", user);
                }
            }

            return 0;
        }
    }
}
動作確認
コマンドライン引数の設定
アプリ実行時の引数をVisualStudio上で設定できる
ソリューションエクスプローラー > ConsoleApp1右クリック > プロパティ > デバッグクリック
アプリケーション引数に引数を入力(複数入力する場合は半角スペースを挿入)
今回は↓を入力
create ${CSVファイルのパス}
ビルド
ビルド > ソリューションのビルドをクリックして実行
実行前の準備
- MySQLで
csharp_testという名前のデータベースを作る - ↓のようなCSVファイルを作る
"名前","年齢"
"太郎",20
"次郎",19
実行
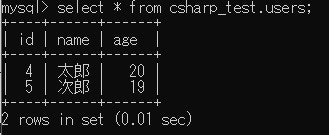
テーブルにユーザーが追加されていればOK
参考記事
大変参考になりました!👍
https://qiita.com/Shiho_anyplus/items/0f5bfbf73d9512802d0a
https://qiita.com/TsuyoshiUshio@github/items/02902f4f46f0aa37e4b1
https://qiita.com/4_mio_11/items/145c658078a7fe5f36a7
https://qiita.com/tnishiki/items/bfe0978592e023099588
https://qiita.com/hdk-t/items/403b3c479eb4197a92b1