はじめに
本記事は以下を読んでいることを前提に作成しました。
Github の masterブランチへ commit が行われたら CircleCI に Heroku へのデプロイを実行させる
本記事はCircleCIを用いてHerokuとのCI/CDパイプラインを構成する方法について自分用も兼ねて解説していきます。
基本的に公式ドキュメントを参考にしたので、こちらも合わせて読んでみるのをおすすめします。
開発環境
Ruby 2.6.5
Rails 6.0.0
Bundler 2.1.4
MySQL 5.6.50
HerokuへのCI/CDパイプラインを構築
Herokuのアプリをセットアップしてあることが前提になりますので、まだの方はこちらを参考にして、Herokuに手動でプロイしてから、行いましょう。
1)環境変数の追加
CircleCIで自動でプロイするためにHerokuアプリケーション名と、Heroku APIキーを環境変数として追加します。(CircleCIでの環境変数の設定はこちら)
以下、アプリケーション名をHEROKU_APP_NAME、Heroku APIキーをHEROKU_API_KEYという変数名で扱います。
HEROKU_APP_NAMEはherokuにデプロイしているアプリ名を代入します。
HEROKU_API_KEYはターミナルにて以下コマンドを実行したときの値を代入します。
アプリ名 % heroku auth:token
xxxxxxxx-xxxx-xxxx-xxxx-xxxxxxxxxxxxxxxx
出力されたものを全てコピーし、Circleci上に環境変数として設定します。
2)git pushでmasterブランチを自動デプロイ
以下がそのコードである。
deploy:
    docker:
      - image: buildpack-deps:trusty
    executor: heroku/default
    steps:
      - checkout # push/mergeされたコードのチェック
      - run:
          name: Heroku への master のデプロイ
          command: |
            git push https://heroku:$HEROKU_API_KEY@git.heroku.com/$HEROKU_APP_NAME.git master
このコードを書くことでコードをチェックし自動デプロイを実行してくれる。
3)workflowの設定
workflows:
  version: 2.1
  build-deploy:
    jobs:

      - build
      - deploy:
          requires:
            - build
          filters:
            branches:
              only: master
公式ドキュメントではカスタマイズも可能だが初心者の僕はその領域には達していないため、まずはパイプラインを組むことを目標に用意されているワークフローを使用しました。
完成コード
version: 2.1
orbs:
  ruby: circleci/ruby@0.1.2
  heroku: circleci/heroku@1.2.3
jobs:
  build:
    docker:
      - image: circleci/ruby:2.6.5-stretch-node
    executor: ruby/default
    steps:
      - checkout
      - run: gem install bundler -v 2.1.4
      - run:
          name: Which bundler?
          command: bundle -v
      - ruby/bundle-install

  deploy:
    docker:
      - image: buildpack-deps:trusty
    executor: heroku/default
    steps:
      - checkout
      - run:
          name: Heroku への master のデプロイ
          command: |
            git push https://heroku:$HEROKU_API_KEY@git.heroku.com/$HEROKU_APP_NAME.git master

workflows:
  version: 2.1
  build-deploy:
    jobs:

      - build
      - deploy:
          requires:
            - build
          filters:
            branches:
              only: master
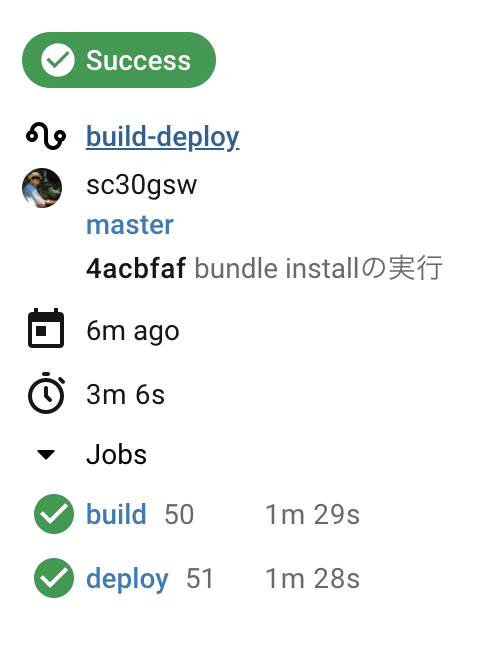
これでHerokuとのCI/CDパイプラインを結ぶことができた。
しっかりとbuildの下にdeployが表示されている。
この書き方は、あくまで初級編のため、RSpecによるテストの実行までは記述していないが、そういう記述もできることを頭に入れておいてほしいと思います。
