概要
FreeIPA Ansible Module を用いて FreeIPA 環境を構築する。KVM のプロビジョニングには Terraform を用いる。手順は次の通り:
ネットワーク構成は下図の通り:
サンプルコード:
前提条件
- Ansible (core v2.14.30)
- Terraform (v1.3.9)
- KVM packages
qemu-kvmlibvirt
crdtools- LDAP client
-
openldap-clients(Fedora 系) -
ldap-utils(Debian 系)
-
手順
手順は次の公式ドキュメンテーションに従う。
Rocky Linux 9.4 image の用意
Libvirt の default pool に Rocky Linux 9.4 iamge を libvirt の default pool にダウンロードしておく:
sudo curl -L -o /var/lib/libvirt/images/Rocky-9-GenericCloud.latest.x86_64.qcow2 https://download.rockylinux.org/pub/rocky/9.4/images/x86_64/Rocky-9-GenericCloud.latest.x86_64.qcow2
Terraform コードの作成
次の3つの terraform ファイルを作成する:
-
main.tf: メインロジック -
variables.tf: 引数の定義 -
tfvars.tf: 引数に値を入力
terraform {
  required_providers {
    libvirt = {
      source  = "dmacvicar/libvirt"
      version = "0.7.1"
    }
  }
}

provider "libvirt" {
  uri = var.libvirt_uri
}

locals {
  cidr_splitted      = split("/", var.cidr)
  cidr_subnet        = local.cidr_splitted[0]
  cidr_prefix        = local.cidr_splitted[1]
  nameservers_string = "[\"${join("\", \"", var.nameservers)}\"]"

  # Auto-calculate mac address from IP
  ips_parts = [for vm in var.vms : split(".", vm.ip)]
  mac_addrs = [
    for ip_parts in local.ips_parts : format(
      "52:54:00:%02X:%02X:%02X",
      tonumber(ip_parts[1]),
      tonumber(ip_parts[2]),
      tonumber(ip_parts[3])
    )
  ]
}

resource "libvirt_cloudinit_disk" "commoninit" {
  count = length(var.vms)
  name  = "commoninit_${var.vms[count.index].name}.iso"
  user_data = templatefile(var.vms[count.index].cloudinit_file, {
    hostname = var.vms[count.index].name
  })
  pool = var.pool
}

resource "libvirt_domain" "vm" {
  count  = length(var.vms)
  name   = var.vms[count.index].name
  vcpu   = var.vms[count.index].vcpu
  memory = var.vms[count.index].memory

  disk {
    volume_id = libvirt_volume.system[count.index].id
    scsi      = "true"
  }

  cloudinit = libvirt_cloudinit_disk.commoninit[count.index].id
  autostart = true

  network_interface {
    network_name = var.network_name
    addresses    = [var.vms[count.index].ip]
    mac          = local.mac_addrs[count.index]
  }

  cpu {
    mode = "host-passthrough"
  }

  graphics {
    type        = "vnc"
    listen_type = "address"
  }

  # Makes the tty0 available via `virsh console`
  console {
    type        = "pty"
    target_port = "0"
    target_type = "serial"
  }
}

resource "libvirt_volume" "system" {
  count          = length(var.vms)
  name           = "${var.vms[count.index].name}_system.qcow2"
  pool           = var.pool
  format         = "qcow2"
  base_volume_id = var.vm_base_image_uri
  size           = var.vms[count.index].disk
}
variable "libvirt_uri" {
  type    = string
  default = "qemu:///system"
}

variable "vm_base_image_uri" {
  type = string
}

variable "network_name" {
  type    = string
  default = "default"
}

variable "cidr" {
  type    = string
  default = "192.168.122.0/24"
}

variable "gateway" {
  type    = string
  default = "192.168.122.1"
}

variable "nameservers" {
  type    = list(string)
  default = ["192.168.122.1"]
}


variable "pool" {
  type    = string
  default = "default"
}

variable "vms" {
  type = list(
    object({
      name           = string
      vcpu           = number
      memory         = number
      disk           = number
      ip             = string
      cloudinit_file = string
    })
  )
}
次のファイル terraform.tfvars で 3台の VM の情報を設定しておく:
libvirt_uri = "qemu:///system"

pool              = "default"
vm_base_image_uri = "/var/lib/libvirt/images/Rocky-9-GenericCloud.latest.x86_64.qcow2"
network_name      = "default"

vms = [
  {
    name           = "freeipa1"
    vcpu           = 4
    memory         = 16000                    # in MiB
    disk           = 100 * 1024 * 1024 * 1024 # 100 GB
    ip             = "192.168.122.11"
    cloudinit_file = "cloud_init.cfg"
  },
  {
    name           = "freeipa2"
    vcpu           = 4
    memory         = 16000                    # in MiB
    disk           = 100 * 1024 * 1024 * 1024 # 100 GB
    ip             = "192.168.122.12"
    cloudinit_file = "cloud_init.cfg"
  },
  {
    name           = "freeipa3"
    vcpu           = 4
    memory         = 16000                    # in MiB
    disk           = 100 * 1024 * 1024 * 1024 # 100 GB
    ip             = "192.168.122.13"
    cloudinit_file = "cloud_init.cfg"
  },
]
Rocky Linux の初期設定用の cloud_init.cfg も用意する:
#cloud-config
fqdn: ${hostname}
users:
  - name: root
    ssh-authorized-keys:
      - "<SSH_KEY>"
VM の provisioning
次のコマンドを実行し、Terraform による VM の provisioning を行う。
terraform init
terraform apply -auto-approve
サーバの hostname の設定
サーバの hostname を FQDN 形式に設定する:
[root@freeipa1 ~]# hostnamectl set-hostname ipaserver.example.com
[root@freeipa2 ~]# hostnamectl set-hostname ipareplica1.example.com
[root@freeipa3 ~]# hostnamectl set-hostname ipareplica2.example.com
サーバ上の /etc/hosts の編集
各サーバ同士は FQDN だけでなく shortname でも互いに到達できる必要がある1。次のようにそれぞれのホストの /etc/hosts に次のエントリーを追加しておく:
192.168.122.11 ipaserver.example.com ipaserver
192.168.122.12 ipareplica1.example.com ipareplica1
192.168.122.13 ipareplica2.example.com ipareplica2
Ansible による FreeIPA のインストール
Ansible Galaxy から Collection freeipa.ansible_freeipa を取得する。
ansible-galaxy collection install freeipa.ansible_freeipa
Collection がインストールされたことを確認する:
$ ansible-galaxy collection list | grep freeipa
freeipa.ansible_freeipa 1.13.1
次のような inventory ファイル hosts.ini を作成する:
[all:vars]
ansible_user=root

[ipaserver]
ipaserver.example.com ansible_host=192.168.122.11

[ipareplicas]
ipareplica1.example.com ansible_host=192.168.122.12
ipareplica2.example.com ansible_host=192.168.122.13

[ipacluster:children]
ipaserver
ipareplicas

[ipacluster:vars]
ipaadmin_password=ADMPassword1
ipadm_password=DMPassword1
ipaserver_domain=example.com
ipaserver_realm=EXAMPLE.COM
ipareplica_domain=example.com
ipareplica_realm=EXAMPLE.COM
Collection 内の Playbook install-cluster.yml を実行し、サーバに FreeIPA をインストールする:
ansible-playbook -i hosts.ini $HOME/.ansible/collections/ansible_collections/freeipa/ansible_freeipa/playbooks/install-cluster.yml
インストールの完了を待つ。次のような出力が出てくればよい。
...
PLAY RECAP ***************************************************************************************************************************************************************************************************************************************************************
ipareplica1.example.com    : ok=61   changed=42   unreachable=0    failed=0    skipped=34   rescued=0    ignored=0
ipareplica2.example.com    : ok=61   changed=42   unreachable=0    failed=0    skipped=34   rescued=0    ignored=0
ipaserver.example.com      : ok=41   changed=23   unreachable=0    failed=0    skipped=42   rescued=0    ignored=0
動作確認
各サーバ同士が FQDN でアクセスできるよう、DNS を設定しておくか、クライアント側の /etc/hosts にも次のようなエントリーを記述しておく:
192.168.122.11 ipaserver.example.com ipaserver
192.168.122.12 ipareplica1.example.com ipareplica1
192.168.122.13 ipareplica2.example.com ipareplica2
LDAP の疎通確認
FreeIPA の LDAP サーバにアクセスできることを確認する:
$ ldapsearch -H ldap://ipaserver.example.com -x -b "dc=example,dc=com"
...
# search result
search: 2
result: 0 Success

# numResponses: 116
# numEntries: 115
LDAPS の疎通確認
事前にサーバ・レプリカのいずれかの CA 証明書 /etc/ipa/ca.crt をダウンロードする:
scp root@ipaserver:/etc/ipa/ca.crt .
FreeIPA の LDAPS サーバにアクセスできることを確認する:
$ ldapsearch -H ldaps://ipaserver.example.com -x -b "dc=example,dc=com" -o "TLS_CACERT=./ca.crt"
...
# search result
search: 2
result: 0 Success

# numResponses: 116
# numEntries: 115
Web コンソールへのアクセス
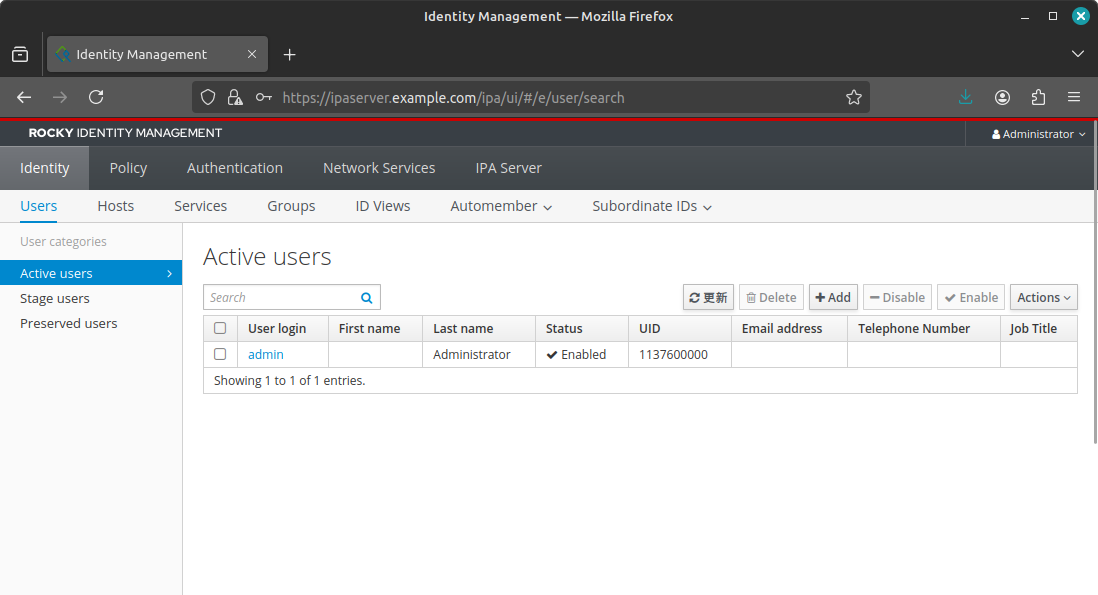
ブラウザから Webコンソール (例:https://ipaserver.example.com) にアクセスできることを確認する。
ログインする場合は、ユーザ名をadmin、パスワードは hosts.ini の ipaadmin_password で指定したもの (例:ADMPassword1)を使用する。
ログインできることを確認する:


