はじめに
dockerの学習の一環として、下記を実施しました。
1.CentOS7.8にdockerインストール
2.nginxインストール&起動
3.htmlファイル作成&表示
今回は、こちらの流れについて解説していきたいと思います。
環境
・HyperVisor
VMware Workstation 15 Player
・仮想マシン
CPU:2
メモリ:10088MB
HDD:300GB
ネットワークアダプタ:ブリッジ
※NICは1つになります。
・OS
CentOS7.5(1804)
※「yum update」により「CentOS7.8(2003)」にアップデート
[root@tspdocker yum.repos.d]# cat /etc/redhat-release
CentOS Linux release 7.8.2003 (Core)
[root@tspdocker yum.repos.d]#
※仮想マシン設定のエビデンス(ネットワークアダプタ設定)
構成図
今回の構成はこちらになります。
事前設定
下記について事前に設定済みになります。
- ホスト名:tspdocker
- IPアドレス:192.168.0.40
- DNS:8.8.8.8,8.8.4.4
※Google Public DNSを使用しています。 - firewalld:停止/自動起動停止
- selinux:無効
- NTP:設定済み(ntp.nict.jp)
- yum update:済み
手順
docker準備
旧バージョンのdockerアンインストール
yum remove docker docker-client docker-client-latest docker-common docker-latest docker-latest-logrotate docker-logrotate docker-engine
公式リポジトリのインストール
yum install -y yum-utils device-mapper-persistent-data lvm2
yum-config-manager --add-repo https://download.docker.com/linux/centos/docker-ce.repo
DOCKER CE のインストール
最新版のDocker CEをインストールします。
yum install -y docker-ce docker-ce-cli containerd.io
Docker の起動/自動起動
Docker起動
systemctl start docker
Docker自動起動設定
systemctl enable docker
バージョンの確認
docker --version
実行例
[root@tspdocker yum.repos.d]# docker --version
Docker version 19.03.9, build 9d988398e7
[root@tspdocker yum.repos.d]#
docker上にnginxの準備
nginxのイメージ取得
docker pull nginx
実行例
[root@tspdocker yum.repos.d]# docker pull nginx
Using default tag: latest
latest: Pulling from library/nginx
afb6ec6fdc1c: Pull complete
b90c53a0b692: Pull complete
11fa52a0fdc0: Pull complete
Digest: sha256:30dfa439718a17baafefadf16c5e7c9d0a1cde97b4fd84f63b69e13513be7097
Status: Downloaded newer image for nginx:latest
docker.io/library/nginx:latest
[root@tspdocker yum.repos.d]#
イメージ確認
docker images
実行例
[root@tspdocker yum.repos.d]# docker images
REPOSITORY          TAG                 IMAGE ID            CREATED             SIZE
nginx               latest              9beeba249f3e        8 days ago          127MB
[root@tspdocker yum.repos.d]#
nginx起動
docker run -d -p 8080:80 nginx
実行例
[root@tspdocker yum.repos.d]# docker run -d -p 8080:80 nginx
b631bfb26b8eb469437f55731abadc6d1e308149bf89062d0282ae11db722faa
[root@tspdocker yum.repos.d]#
nginx起動確認
docker ps -a
実行例
[root@tspdocker yum.repos.d]# docker ps -a
CONTAINER ID        IMAGE               COMMAND                  CREATED             STATUS              PORTS                  NAMES
b631bfb26b8e        nginx               "nginx -g 'daemon of…"   10 seconds ago      Up 9 seconds        0.0.0.0:8080->80/tcp   vibrant_engelbart
[root@tspdocker yum.repos.d]#
WEB画面確認
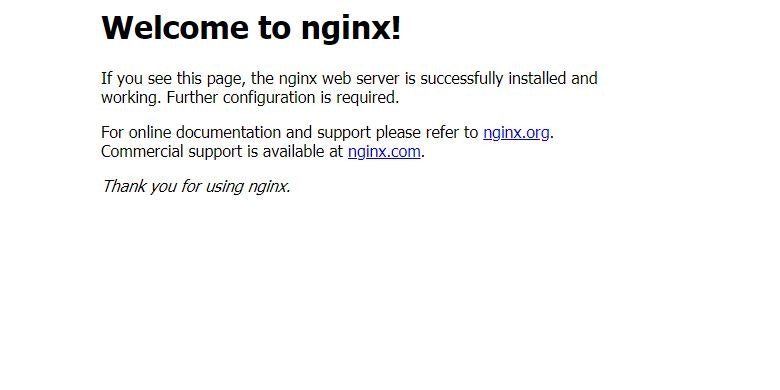
「http://<サーバのIPアドレス>:8080」へブラウザからアクセス
例)http://192.168.0.40:8080/
アクセスするとこちらの画面が表示される。
実際にhtmlファイルを作成後に表示する
コンテナへログイン
コンテナ名を調べる
docker ps -a
実行例
[root@tspdocker yum.repos.d]# docker ps -a
CONTAINER ID        IMAGE               COMMAND                  CREATED             STATUS              PORTS                  NAMES
b631bfb26b8e        nginx               "nginx -g 'daemon of…"   3 hours ago         Up 3 hours          0.0.0.0:8080->80/tcp   vibrant_engelbart
[root@tspdocker yum.repos.d]#
→実行例の場合は、「vibrant_engelbart」がコンテナ名。
コンテナへログイン
docker exec -it vibrant_engelbart /bin/bash
→「vibrant_engelbart」はコンテナ名
実行例
[root@tspdocker yum.repos.d]# docker exec -it vibrant_engelbart /bin/bash
root@b631bfb26b8e:/#
OSバージョン確認
cat /etc/os-release
実行例
root@b631bfb26b8e:/# cat /etc/os-release
PRETTY_NAME="Debian GNU/Linux 10 (buster)"
NAME="Debian GNU/Linux"
VERSION_ID="10"
VERSION="10 (buster)"
VERSION_CODENAME=buster
ID=debian
HOME_URL="https://www.debian.org/"
SUPPORT_URL="https://www.debian.org/support"
BUG_REPORT_URL="https://bugs.debian.org/"
root@b631bfb26b8e:/#
→OSが**「Ubuntu」**であることを確認
vim/sudoインストール
※ファイル編集に使用するパッケージになります。
インストール可能なパッケージ一覧の更新
apt-get update
実行例
root@b631bfb26b8e:/# apt-get update
Get:1 http://deb.debian.org/debian buster InRelease [121 kB]
Get:2 http://security.debian.org/debian-security buster/updates InRelease [65.4 kB]
Get:3 http://deb.debian.org/debian buster-updates InRelease [49.3 kB]
Get:4 http://security.debian.org/debian-security buster/updates/main amd64 Packages [201 kB]
Get:5 http://deb.debian.org/debian buster/main amd64 Packages [7905 kB]
Get:6 http://deb.debian.org/debian buster-updates/main amd64 Packages [7380 B]
Fetched 8350 kB in 3s (3209 kB/s)
Reading package lists... Done
root@b631bfb26b8e:/#
vimのインストール
apt-get install vim
apt-get install sudo
htmlファイルの文字化け対策
export LANG=C.UTF-8
export LANGUAGE=en_US:
env | grep LANG
※こちらは一時的な設定になります。(ログアウトするとリセットされます。)
実行例
root@b631bfb26b8e:/usr/share/nginx/html# export LANG=C.UTF-8
root@b631bfb26b8e:/usr/share/nginx/html# export LANGUAGE=en_US:
root@b631bfb26b8e:/usr/share/nginx/html#
root@b631bfb26b8e:/usr/share/nginx/html# env | grep LANG
LANGUAGE=en_US:
LANG=C.UTF-8
html作成
htmlのデフォルトのルートディレクトリは**「/usr/share/nginx/html」**になります。
test用htmlファイル作成
vim /usr/share/nginx/html/test.html
記載内容
<!DOCTYPE html>
<meta http-equiv="content-type" charset="utf-8">
<html>
  <head>
    <title>主な要素</title>
  </head>
  <body>
       <h1>タイトル</h1>
       <h2>副題</h2>

       <p>
        これはパラグラフです。文節を記述するためのタグです。
        一部分だけをマーキングする場合は<span>スパン</span>を使用します。
       </p>

       <h3>
         箇条書きの例
       </h3>
         <ul>
           <li>HTMLの基本</li>
           <li>スタイルの基本</li>
           <li>スクリプトの基本</li>
         </ul

         <button>OKボタン</button>
         <button>NGボタン</button>
  </body>
</html>
作成したhtmlファイル表示
「http://<サーバのIPアドレス>:8080/test.html」へブラウザからアクセス
例)http://192.168.0.40:8080/test.html
こちらの画面が表示される。
参考記事
Install Docker on CentOS 7
docker上のnginxのドキュメントルート
[Docker] Docker でNginx を起動して Web ページを表示する


