Background
現在OpenCVでマイナーな画像処理を取り上げて簡単な説明するwebページ( https://featurepoints.jp/opencv_doc/ )を作成中です。
公式OpenCV ドキュメントページから探すのですが、今回はcontribモジュールにあるalphamatを紹介します。
このalphamatは、髪の毛やよれた服などの微細な輪郭領域まで計算してくれるモジュールです。
Dataset
ぱくたそ:新しいアプリを宣伝するキラキラ広報のフリー素材
の画像を使っています。

Create Map Image
今回の処理ではマップ画像が入ります。
オブジェクトの輪郭に対して灰色のエリアを指定するのですが、ツールとして pytorch+yolov3を使ってマリオを物体検出してみたのアノテーションで使ったlabelmeを使っています。
json形式のアノテーションファイルができるので、そこから領域を読み取ってfillPolyで塗りつぶしていきます。
import cv2
import json
import numpy as np

def main():

    with open("woman.json") as fin:
        raw = json.load(fin)

        #背景色は黒
        dst = np.zeros((
            raw["imageHeight"], raw["imageWidth"], 3))
        dst += 0

        #人物は白で塗りつぶし
        for shapes in raw["shapes"]:
            if shapes["label"] == "person":
                person_contours = np.array(shapes["points"], dtype='int32')
        cv2.fillPoly(dst, [person_contours], color=(255, 255, 255))

        #微細な輪郭エリアば灰色で塗りつぶし
        for shapes in raw["shapes"]:
            if shapes["label"] != "person":
                gray_contours = np.array(shapes["points"], dtype='int32')
                cv2.fillPoly(dst, [gray_contours], color=(127, 127, 127))

        cv2.imwrite('trimap.png', dst)

if __name__ == '__main__':
    main()
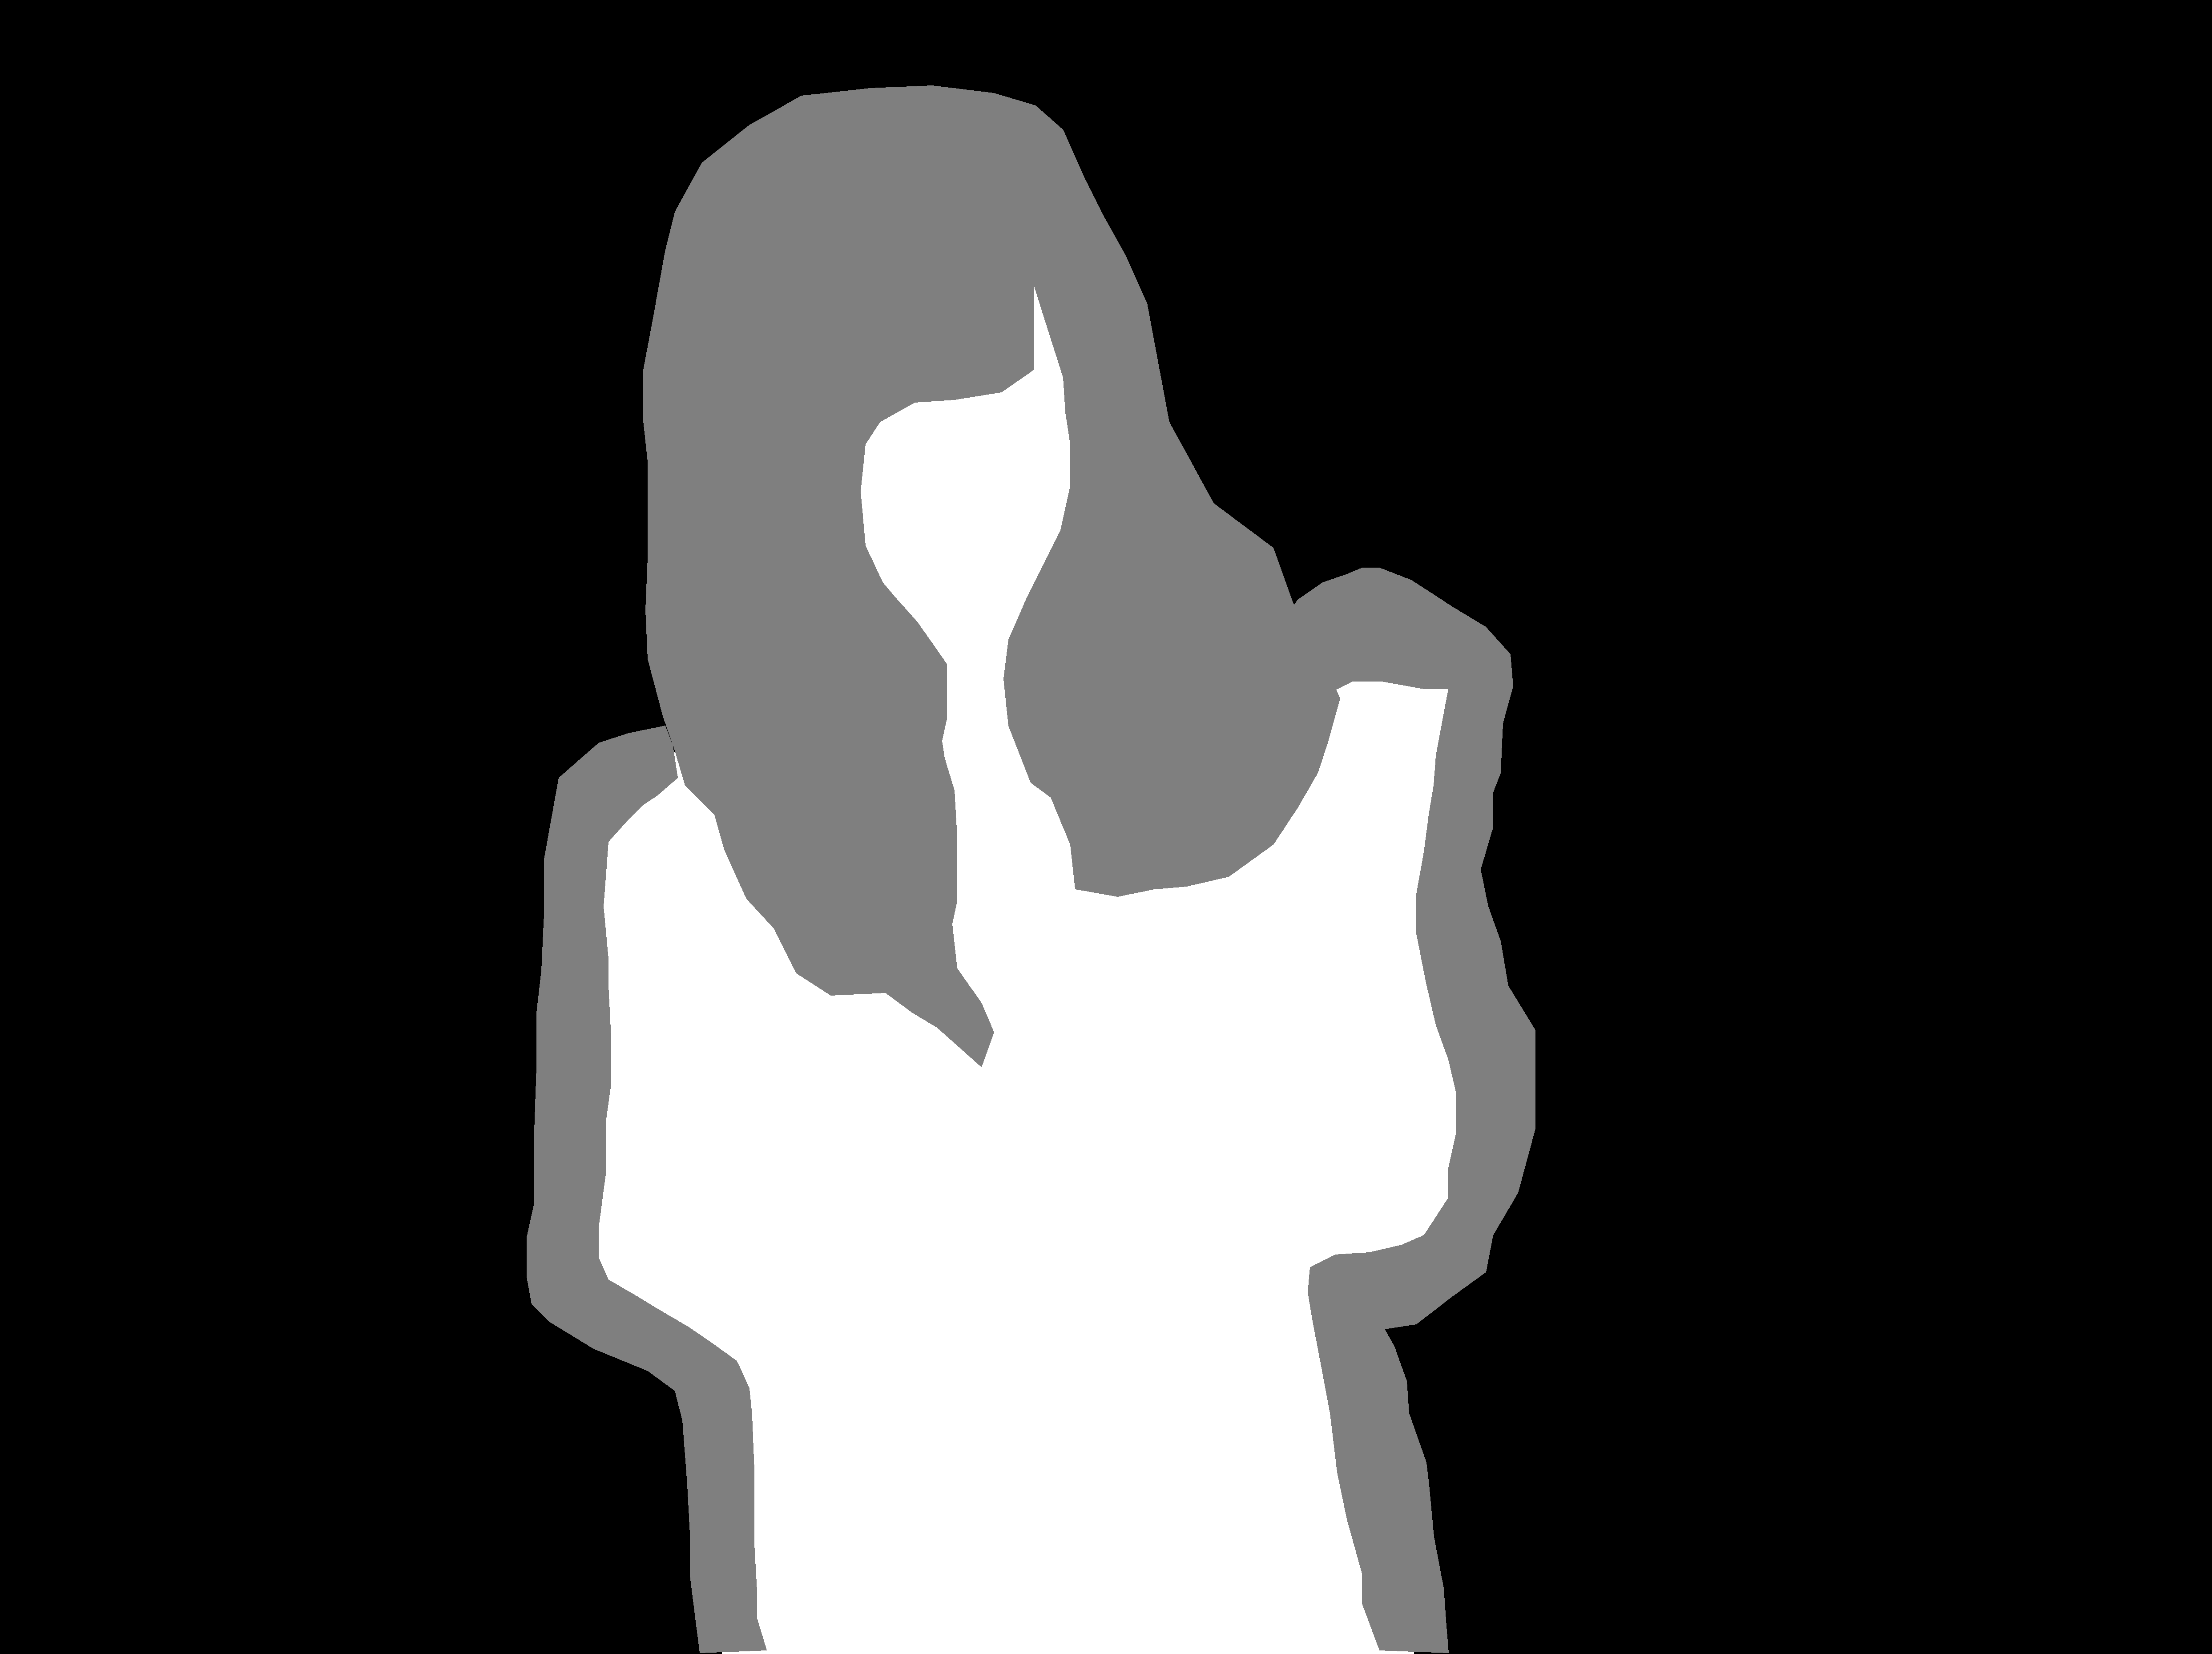
これでマップ画像は完成。
Process
多分C++のみです。Pythonは多分なさそう。もしあったらサーセン。
# include <iostream>
# include <opencv2/core.hpp>
# include <opencv2/core/utility.hpp>
# include <opencv2/imgproc.hpp>
# include <opencv2/videoio.hpp>
# include <opencv2/highgui.hpp>
# include <opencv2/alphamat.hpp>

int main(int argc, const char* argv[])
{
    cv::String keys = "{src||}""{map||}";
    cv::CommandLineParser parser(argc, argv, keys);
    cv::String src_path = parser.get<cv::String>("src");
    cv::String map_path = parser.get<cv::String>("map");

    std::string name = "Effect";
    cv::Mat srcMat = cv::imread(src_path, cv::IMREAD_COLOR);
    cv::Mat mapMat = cv::imread(map_path, cv::IMREAD_GRAYSCALE);

    cv::Mat dst;

    cv::alphamat::infoFlow(srcMat, mapMat, dst);

    cv::namedWindow(name, cv::WINDOW_AUTOSIZE);

    while(true){

        cv::imshow(name, dst);
        int key = cv::waitKey(0);
        if (key == 27){
            break;
        } else if(key == 's'){
            cv::imwrite("output.png", dst);
        }
    }

    cv::destroyAllWindows();
    return 0;
}
make
./main -src=[元画像のパス] -map=[マップ画像のパス]
Consequence
処理結果はこんな感じになりました。
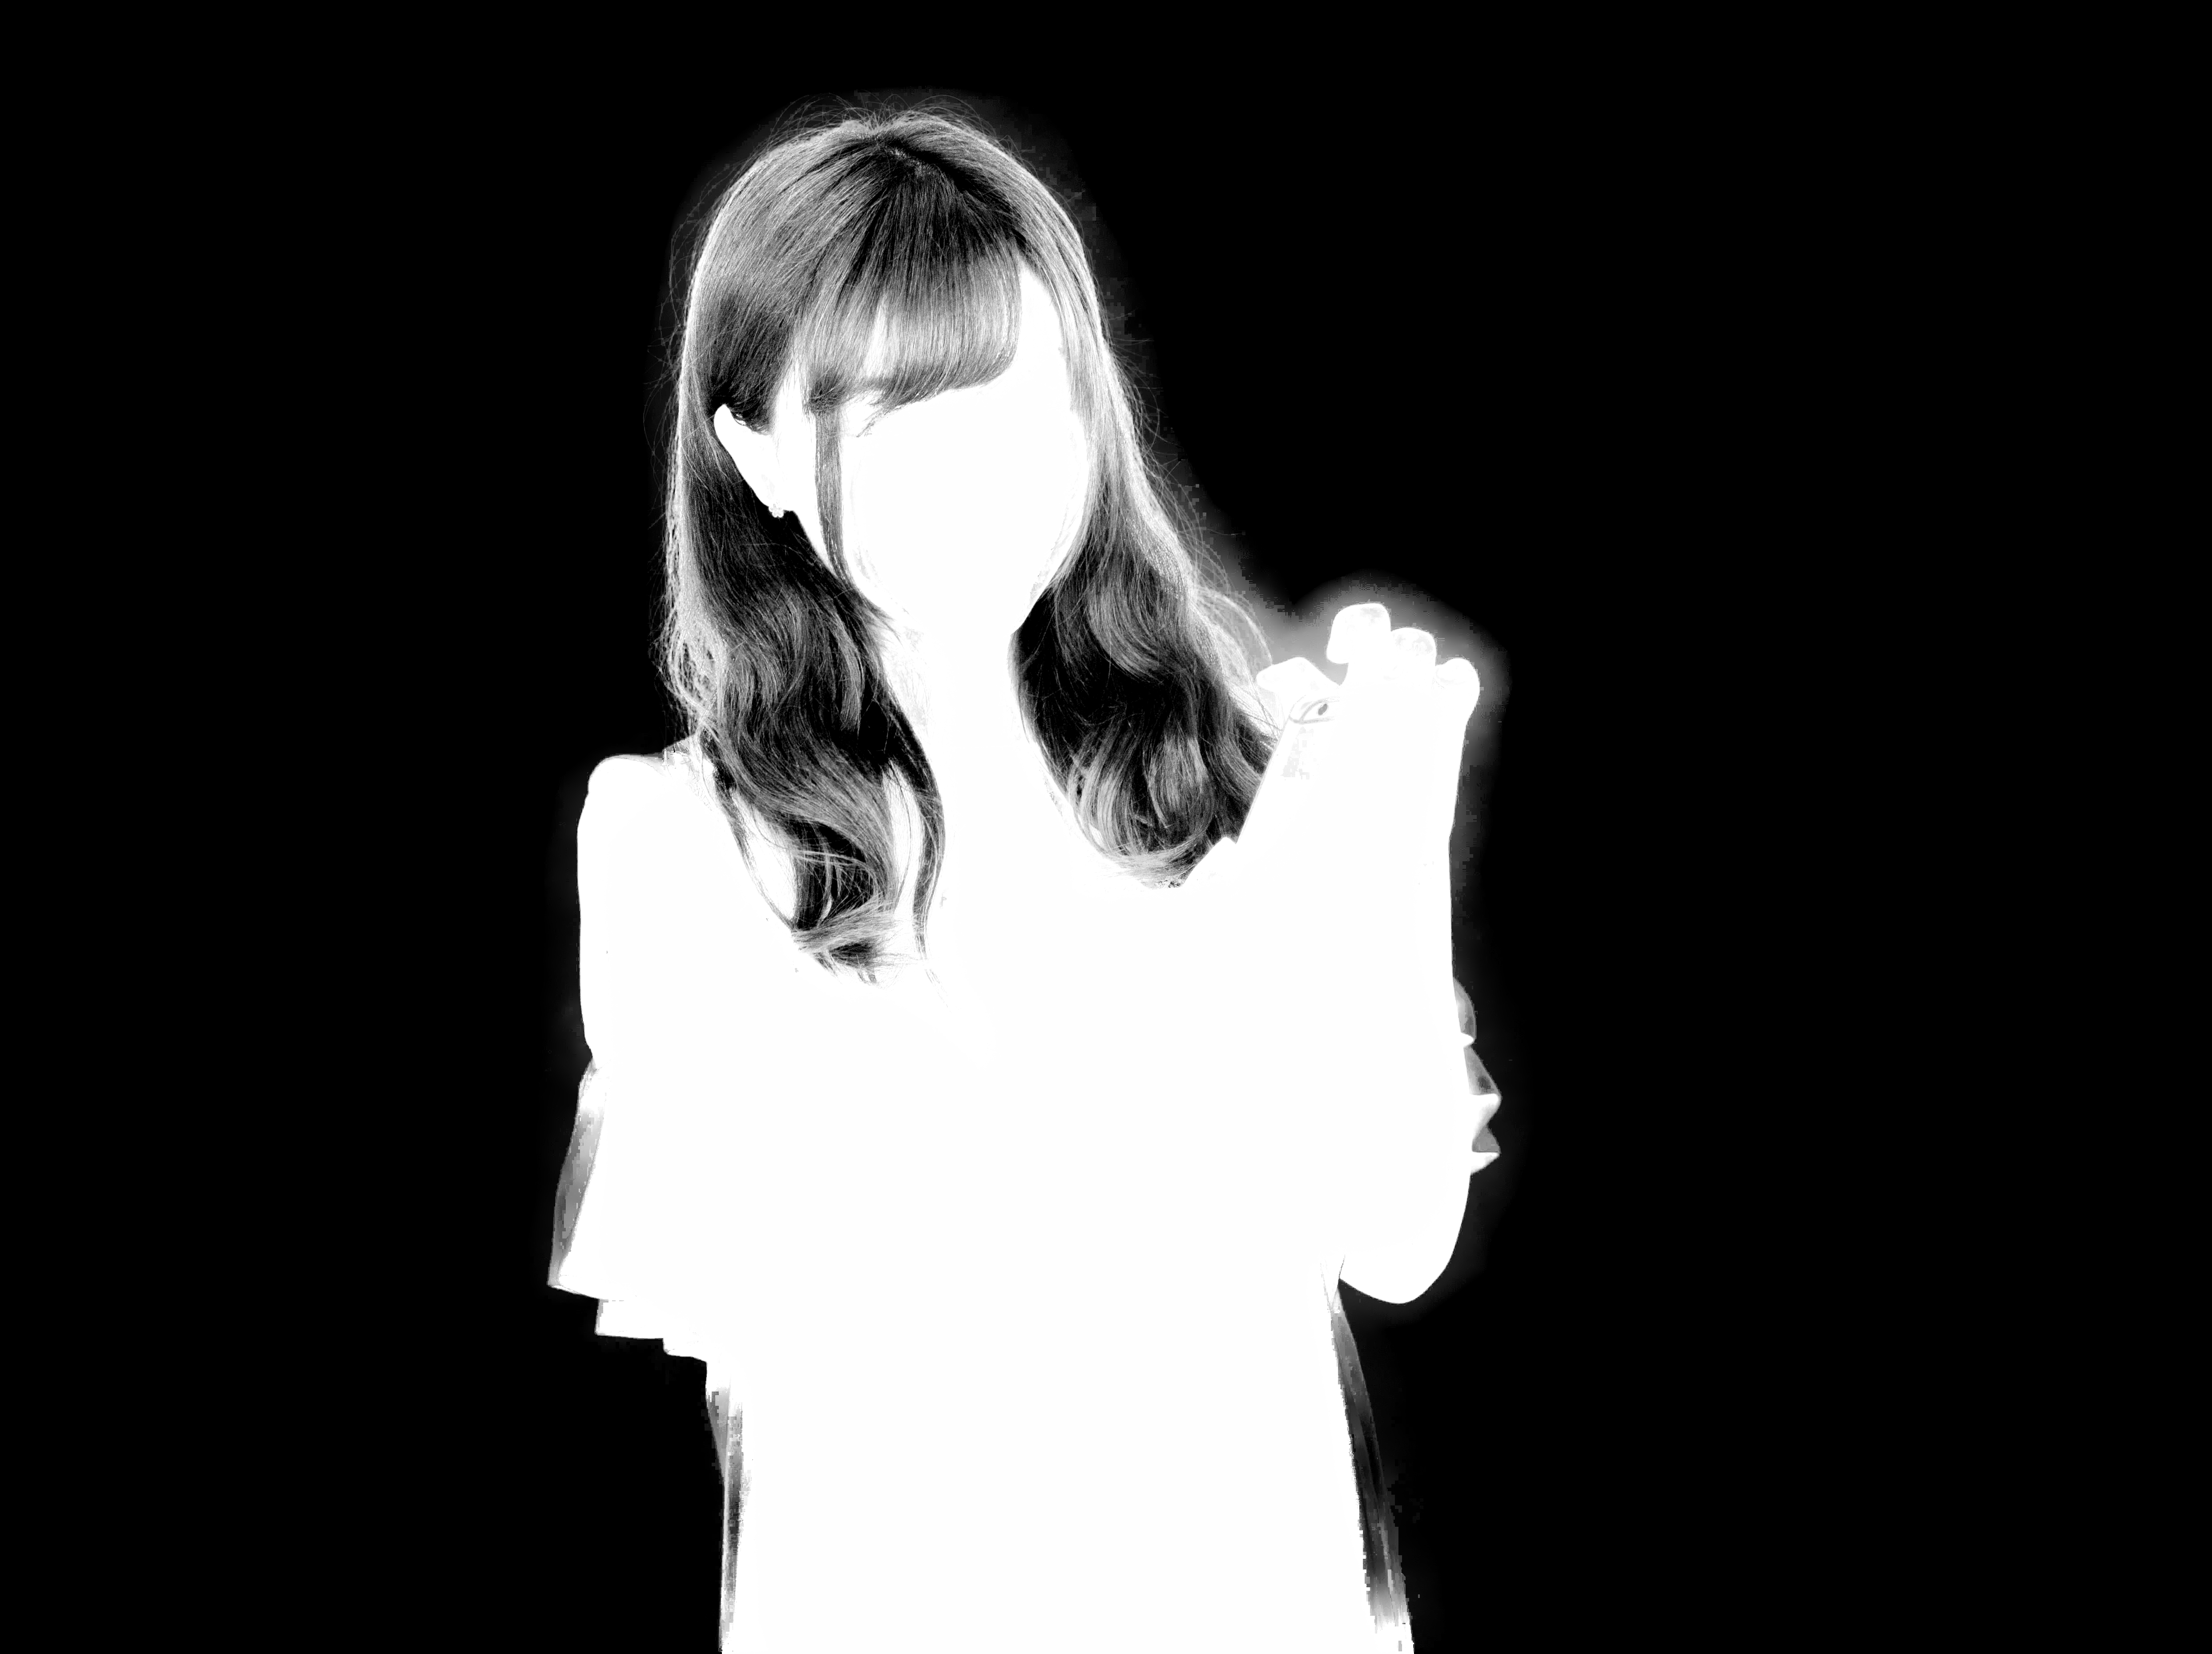
ガチで灰色の部分が髪の毛の微細な領域まで計算してくれてます。
但し、計算時間はMacBookPro メモリ16GBで実行すると2,3分はかかりました。
この出力だけでもオモロい。
PostScript
ここから背景画像と合成させたいのですが、どうやったら良さそうでしょうか。![]()
やはり、輪郭部分だけを塗りつぶして白いとこだけトリミングすればいいのかな。
よくわからん。