日本Androidの会秋葉原支部ロボット部 Advent Calendar 2019 2日目です。
というわけで我が家にも raspberry pi 4 が到着しました。

今回はraspberry pi 4 と 3 を組み合わせお家kubernetes環境を構築したいと思います。
raspberry pi 4 が Masrer 1台, Worker 2台に3を使用します。
下準備
家にあった以下のものを使用しました。
- 電源 ← Ankerの6ポート充電器
- LAN SW ← 以前ハードオフで買ったBuffaloのジャンク
- LANケーブル 3本
物が揃ったら、公式サイトから最新のraspbian-buster-liteをダウンロードして展開、Win32DiskImagerでイメージを3台分焼きます。
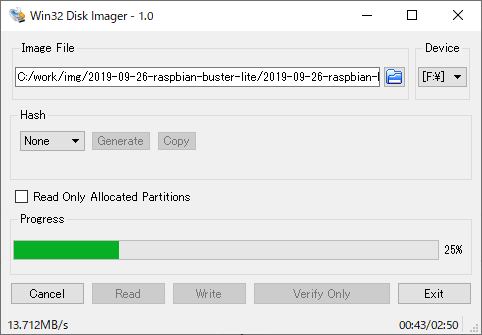
イメージを焼いたらmicroSDカードを挿して起動します。
raspberry pi 4 には USB-TypeC の実装に不具合があると聞いていましたが、家にあったType-C用のケーブルで起動出来ました。
起動したら、sudo raspi-config で hostnameの編集 と ssh接続を許可しておきます。
/etc/dhcpcd.conf を編集して eth0 に固定IPをセットしておきます。
# Example static IP configuration:
interface eth0
static ip_address=192.168.0.93/24
# static ip6_address=fd51:42f8:caae:d92e::ff/64
static routers=192.168.0.1
static domain_name_servers=8.8.8.8
CRIインストール
ここからはドキュメントに従って構築していきます。
まず各ラズパイに docker を入れます。
raspbian-busterではまだdockerがレポジトリに提供されていないようなので、下記blogの手順に従い直接パッケージをダウンロードしてきてインストールします。
$ wget https://download.docker.com/linux/debian/dists/buster/pool/stable/armhf/containerd.io_1.2.6-3_armhf.deb
$ wget https://download.docker.com/linux/debian/dists/buster/pool/stable/armhf/docker-ce-cli_18.09.7~3-0~debian-buster_armhf.deb
$ wget https://download.docker.com/linux/debian/dists/buster/pool/stable/armhf/docker-ce_18.09.7~3-0~debian-buster_armhf.deb

$ sudo dpkg -i containerd.io_1.2.6-3_armhf.deb
$ sudo dpkg -i docker-ce-cli_18.09.7~3-0~debian-buster_armhf.deb
$ sudo dpkg -i docker-ce_18.09.7~3-0~debian-buster_armhf.deb
$ sudo usermod pi -aG docker
kubeadmのインストール
$ sudo apt-get update && sudo apt-get install -y apt-transport-https curl
$ curl -s https://packages.cloud.google.com/apt/doc/apt-key.gpg | sudo apt-key add -
$ sudo tee /etc/apt/sources.list.d/kubernetes.list <<EOF
deb https://apt.kubernetes.io/ kubernetes-xenial main
EOF
$ sudo apt-get install -y kubelet kubeadm kubectl
$ sudo systemctl start kubelet
$ sudo systemctl enable kubelet
kubeadmを使用したシングルマスタークラスターの作成
マスターを初期化します。
rootで実行しました。
root@raspi-master:~# kubeadm init --pod-network-cidr=10.244.0.0/16
[init] Using Kubernetes version: v1.16.3
[preflight] Running pre-flight checks
        [WARNING IsDockerSystemdCheck]: detected "cgroupfs" as the Docker cgroup driver. The recommended driver is "systemd". Please follow the guide at https://kubernetes.io/docs/setup/cri/
[preflight] Pulling images required for setting up a Kubernetes cluster
[preflight] This might take a minute or two, depending on the speed of your internet connection
[preflight] You can also perform this action in beforehand using 'kubeadm config images pull'
[kubelet-start] Writing kubelet environment file with flags to file "/var/lib/kubelet/kubeadm-flags.env"
[kubelet-start] Writing kubelet configuration to file "/var/lib/kubelet/config.yaml"
[kubelet-start] Activating the kubelet service
[certs] Using certificateDir folder "/etc/kubernetes/pki"
[certs] Generating "ca" certificate and key
[certs] Generating "apiserver" certificate and key
[certs] apiserver serving cert is signed for DNS names [raspi-master kubernetes kubernetes.default kubernetes.default.svc kubernetes.default.svc.cluster.local] and IPs [10.96.0.1 192.168.0.93]
[certs] Generating "apiserver-kubelet-client" certificate and key
[certs] Generating "front-proxy-ca" certificate and key
[certs] Generating "front-proxy-client" certificate and key
[certs] Generating "etcd/ca" certificate and key
[certs] Generating "etcd/server" certificate and key
[certs] etcd/server serving cert is signed for DNS names [raspi-master localhost] and IPs [192.168.0.93 127.0.0.1 ::1]
[certs] Generating "etcd/peer" certificate and key
[certs] etcd/peer serving cert is signed for DNS names [raspi-master localhost] and IPs [192.168.0.93 127.0.0.1 ::1]
[certs] Generating "etcd/healthcheck-client" certificate and key
[certs] Generating "apiserver-etcd-client" certificate and key
[certs] Generating "sa" key and public key
[kubeconfig] Using kubeconfig folder "/etc/kubernetes"
[kubeconfig] Writing "admin.conf" kubeconfig file
[kubeconfig] Writing "kubelet.conf" kubeconfig file
[kubeconfig] Writing "controller-manager.conf" kubeconfig file
[kubeconfig] Writing "scheduler.conf" kubeconfig file
[control-plane] Using manifest folder "/etc/kubernetes/manifests"
[control-plane] Creating static Pod manifest for "kube-apiserver"
[control-plane] Creating static Pod manifest for "kube-controller-manager"
[control-plane] Creating static Pod manifest for "kube-scheduler"
[etcd] Creating static Pod manifest for local etcd in "/etc/kubernetes/manifests"
[wait-control-plane] Waiting for the kubelet to boot up the control plane as static Pods from directory "/etc/kubernetes/manifests". This can take up to 4m0s
[kubelet-check] Initial timeout of 40s passed.
[apiclient] All control plane components are healthy after 141.559156 seconds
[upload-config] Storing the configuration used in ConfigMap "kubeadm-config" in the "kube-system" Namespace
[kubelet] Creating a ConfigMap "kubelet-config-1.16" in namespace kube-system with the configuration for the kubelets in the cluster
[upload-certs] Skipping phase. Please see --upload-certs
[mark-control-plane] Marking the node raspi-master as control-plane by adding the label "node-role.kubernetes.io/master=''"
[mark-control-plane] Marking the node raspi-master as control-plane by adding the taints [node-role.kubernetes.io/master:NoSchedule]
[bootstrap-token] Using token: bowfjr.d1qkhhp3r2sq52yi
[bootstrap-token] Configuring bootstrap tokens, cluster-info ConfigMap, RBAC Roles
[bootstrap-token] configured RBAC rules to allow Node Bootstrap tokens to post CSRs in order for nodes to get long term certificate credentials
[bootstrap-token] configured RBAC rules to allow the csrapprover controller automatically approve CSRs from a Node Bootstrap Token
[bootstrap-token] configured RBAC rules to allow certificate rotation for all node client certificates in the cluster
[bootstrap-token] Creating the "cluster-info" ConfigMap in the "kube-public" namespace
[addons] Applied essential addon: CoreDNS
[addons] Applied essential addon: kube-proxy

Your Kubernetes control-plane has initialized successfully!

To start using your cluster, you need to run the following as a regular user:

  mkdir -p $HOME/.kube
  sudo cp -i /etc/kubernetes/admin.conf $HOME/.kube/config
  sudo chown $(id -u):$(id -g) $HOME/.kube/config

You should now deploy a pod network to the cluster.
Run "kubectl apply -f [podnetwork].yaml" with one of the options listed at:
  https://kubernetes.io/docs/concepts/cluster-administration/addons/

Then you can join any number of worker nodes by running the following on each as root:

kubeadm join 192.168.0.93:6443 --token bowfjr.d1qkhhp3r2sq52yi \
    --discovery-token-ca-cert-hash sha256:2e16bc7758ac748789d01ef4ef616434db858b1636887d64cfe520e977f4b33b
root@raspi-master:~#
configをセットします。
root@raspi-master:~# mkdir -p $HOME/.kube
root@raspi-master:~# cp -i /etc/kubernetes/admin.conf $HOME/.kube/config
root@raspi-master:~# chown $(id -u):$(id -g) $HOME/.kube/config
root@raspi-master:~# kubectl get nodes
NAME           STATUS     ROLES    AGE    VERSION
raspi-master   NotReady   master   4m3s   v1.16.3
root@raspi-master:~#
Podネットワークアドオンのインストール
flannelを入れました。
root@raspi-master:~# kubectl apply -f https://raw.githubusercontent.com/coreos/flannel/master/Documentation/kube-flannel.yml
各コンポーネントがインストールされました。
root@raspi-master:~# kubectl get pod --all-namespaces
NAMESPACE     NAME                                   READY   STATUS    RESTARTS   AGE
kube-system   coredns-5644d7b6d9-jd2r7               1/1     Running   0          14m
kube-system   coredns-5644d7b6d9-twbnt               1/1     Running   0          14m
kube-system   etcd-raspi-master                      1/1     Running   1          15m
kube-system   kube-apiserver-raspi-master            1/1     Running   1          15m
kube-system   kube-controller-manager-raspi-master   1/1     Running   3          15m
kube-system   kube-flannel-ds-arm-jfzq9              1/1     Running   1          9m16s
kube-system   kube-proxy-bm22g                       1/1     Running   0          14m
kube-system   kube-scheduler-raspi-master            1/1     Running   3          15m
root@raspi-master:~# kubectl get nodes
NAME           STATUS   ROLES    AGE   VERSION
raspi-master   Ready    master   16m   v1.16.3
root@raspi-master:~#
ノードの追加
Workerのラズパイでkubeadb joinを実行してClusterにノードを追加します。
pi@raspi-worker1:~ $ sudo kubeadm join 192.168.0.93:6443 --token bowfjr.d1qkhhp3r2sq52yi \
>     --discovery-token-ca-cert-hash sha256:2e16bc7758ac748789d01ef4ef616434db858b1636887d64cfe520e977f4b33b
[preflight] Running pre-flight checks
        [WARNING IsDockerSystemdCheck]: detected "cgroupfs" as the Docker cgroup driver. The recommended driver is "systemd". Please follow the guide at https://kubernetes.io/docs/setup/cri/
[preflight] Reading configuration from the cluster...
[preflight] FYI: You can look at this config file with 'kubectl -n kube-system get cm kubeadm-config -oyaml'
[kubelet-start] Downloading configuration for the kubelet from the "kubelet-config-1.16" ConfigMap in the kube-system namespace
[kubelet-start] Writing kubelet configuration to file "/var/lib/kubelet/config.yaml"
[kubelet-start] Writing kubelet environment file with flags to file "/var/lib/kubelet/kubeadm-flags.env"
[kubelet-start] Activating the kubelet service
[kubelet-start] Waiting for the kubelet to perform the TLS Bootstrap...

This node has joined the cluster:
* Certificate signing request was sent to apiserver and a response was received.
* The Kubelet was informed of the new secure connection details.

Run 'kubectl get nodes' on the control-plane to see this node join the cluster.

pi@raspi-worker1:~ $
ラベルをセットしておいてしばらくすると、
root@raspi-master:~# kubectl label node raspi-worker1 node-role.kubernetes.io/worker=
node/raspi-worker1 labeled
root@raspi-master:~# kubectl label node raspi-worker2 node-role.kubernetes.io/worker=
node/raspi-worker2 labeled
root@raspi-master:~#
Worker Node が認識されてStatusがReadyになりました。
root@raspi-master:~# kubectl get nodes
NAME            STATUS   ROLES    AGE     VERSION
raspi-master    Ready    master   23m     v1.16.3
raspi-worker1   Ready    worker   6m16s   v1.16.3
raspi-worker2   Ready    worker   4m43s   v1.16.3
root@raspi-master:~#
これでお家Kubernetesが捗ります! ![]()