Google Colaboratory で学習したモデル をhtmlアプリから利用する
tensorflow.js にモデルを変換して angularアプリに組み込みます
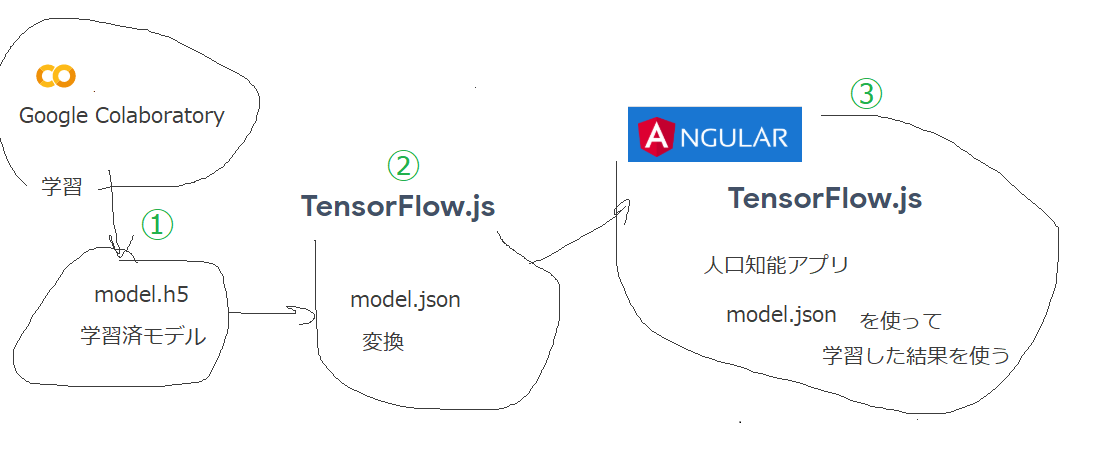
手順は、大きく分けて3つ
- Google Colaboratory で、学習させる
- 学習済モデルの(model.h5)ファイルをTensorFlow.js Layers formatに変換する
- TensorFlow.js を使った Angular アプリを開発します。
解説
1.Google Colaboratory で、学習させる
JupyterNotebookに解説を記載していますので、↓こちらを参照してください
Google Colaboratory 学習してモデル(model.h5)を保存するJupyterNotebook 。
2.学習済モデルの(model.h5)ファイルをTensorFlow.js Layers formatに変換する
JupyterNotebookに解説を記載していますので、↓こちらを参照してください
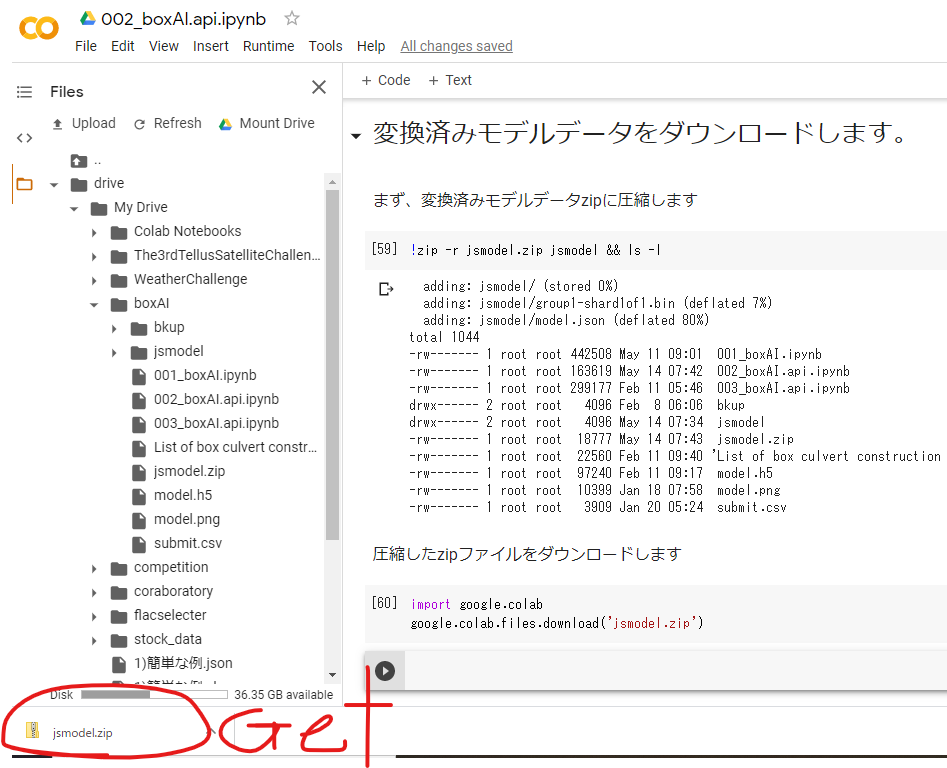
Google Colaboratory 学習済モデル(model.h5)をコンバートするJupyterNotebook
最後は、jsmodel.zip というファイルがダウンロードできます。
3.TensorFlow.js を使ったアプリを開発します。
作ったアプリはここで動作を確認できます
https://sasaco.github.io/BoxAI
本記事では、Tensorflow.jsポイントだけ説明します。
本アプリは Angular7 を使っています。
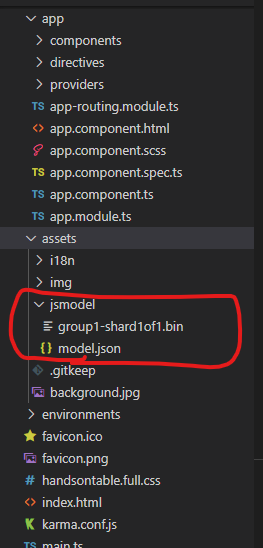
変換したモデル(model.json) を asset フォルダに置きます。
アクセス(読み書き)できるフォルダは asset フォルダなので 変換したモデル(model.json) を asset フォルダに置きます。
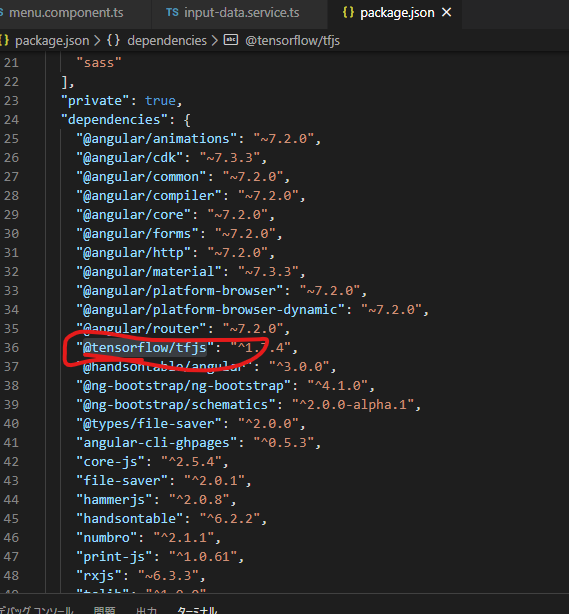
@tensorflow/tfjsモジュールをプロジェクトに追加します
ターミナルで下記のコマンドを実行
npm install @tensorflow/tfjs --save
これで、package.json に 追加されます
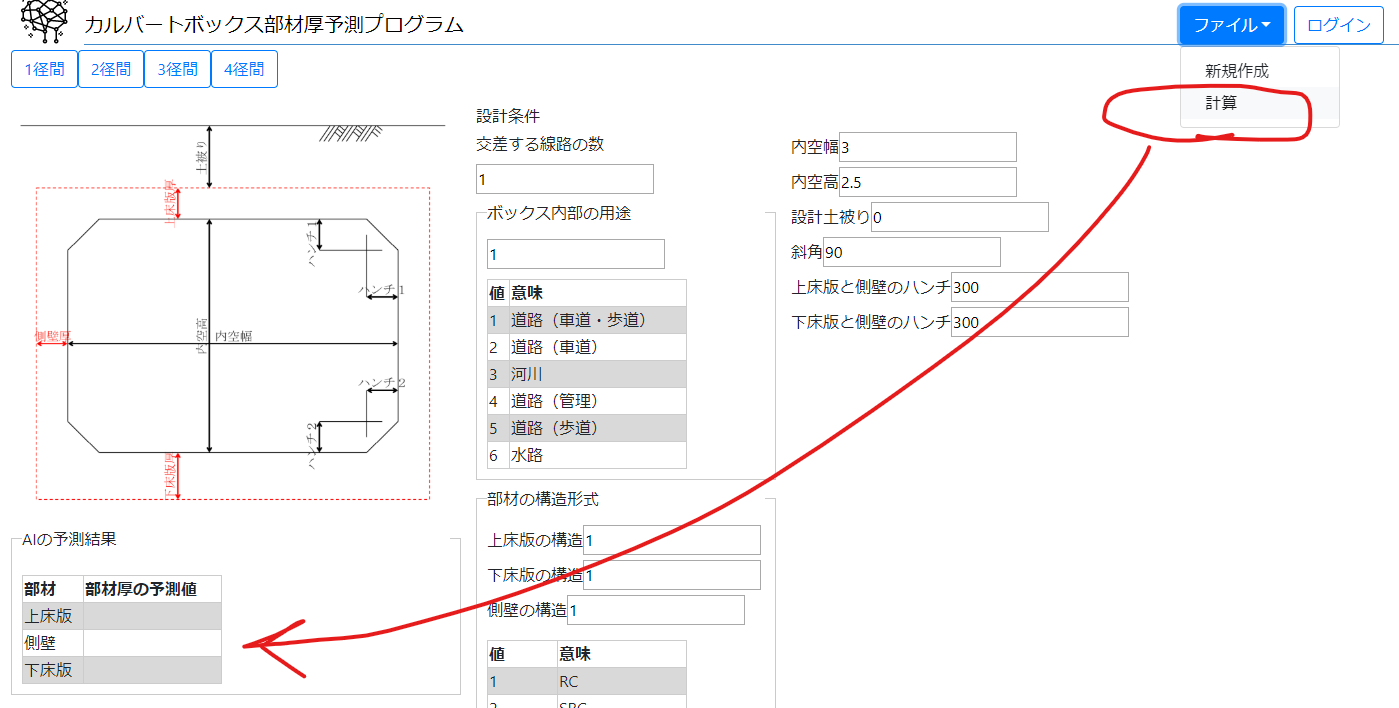
ファイルメニューの[計算]をクリックすると AI が予測を開始します。
この処理を src\app\components\menu\menu.component.ts に書いています
@tensorflow/tfjs をインポートする
import * as tf from '@tensorflow/tfjs';
モデルを読み込む
const MODEL_PATH = 'assets/jsmodel/model.json';
const model = await tf.loadLayersModel(MODEL_PATH);
インプットされているデータを取得する
const data = this.input.getInputArray();
正規化処理
    let data_normal = [];
    const maxValue = [10, 6, 4, 2, 2, 2, 2, 14.117, 18, 11.25, 11.95, 7.57, 7.57, 6.9, 7.57
                        , 6.606, 93.47583, 700, 700, 1200, 1200];
    const minValue = [1, 1, 1, 1, 1, 1, 0, 0, 0, 0, 0, 0, 0, 0, 0
                        , 0, 30.00833, 0, 0, 0, 0];

    for (let i = 0; i < data.length; i++){
      data_normal.push((data[i] - minValue[i]) / (maxValue[i] - minValue[i]));
     }
インプットされているデータをテンソルに変換する
const inputs = tf.tensor(data_normal).reshape([1, data_normal.length]);
AI に推論させる
    const output = model.predict(inputs) as any;
    let predictions_normal = Array.from(output.dataSync());
答え(predictions) は正規化を元に戻す
    const predictions = [];
    const maxValue1 = [2000, 1900, 1900, 1100, 600];
    const minValue1 = [ 130,  130,  130,    0,   0];

    for (let i = 0; i < predictions_normal.length; i++){
      const a: number = this.input.toNumber(predictions_normal[i]);
      predictions.push((maxValue1[i] - minValue1[i]) * a + minValue1[i]);
    }
推論させたデータを表示する
this.input.loadResultData(predictions);
ソースコードはここにあります
https://github.com/sasaco/BoxAI
