redux-form (1) - Simple Form Example
redux-form (2) - Synchronous Validation Example
redux-form (3) - Field-Level Validation Example
redux-form (4) - Submit Validation Example
redux-form (5) - Initialize From State
redux-form (6) - ユーザ登録
ReactでForm componentを作るときに、とても便利な**redux-form**の説明です。
【注意】(2019/07/13)
いろいろ試した結果、redux-formとreact-router v4の組み合わせがうまく動作しないという結論に達しました。reduxForm()とconnect()という2つのHOCで2重にラップした時に、propsが、最終的なコンポーネントにうまく伝わっていかない感じです。ラップする順番を変えてもだめでした。しかしreduxForm()の代わりに、antdのForm.create()でラップすればうまくいきました。何か私の見落としがあるのかもしれませんが、当面はForm.create()でいろいろ試していきたいと思います。
1. redux-form概説
redux-form はReact form componentをRedux storeにconnectするためのものです。使い方は簡単で、提供されたreducerを使います。actionを明示的に指定する必要もありません。具体的には、次の3つのキー要素が使われます。
- formReducer : Redux actionによって伝えられた Form の更新を、Redux stateに反映させるreducer。
- reduxForm() : HOC。 form component (decorated form componentまたはwrapped componentと呼ばれる)をwrapして、ユーザ入力をRedux actionにbindします。
- <Field /> : wrapped form componentで使われるcomponentで、input componentをRedux-form に組み込んでくれます。
「redux-formが生成するprop一覧」
「reduxFormがwrapped componentに渡せるprop一覧」
reduxFormがpropをwrapped componentに渡す方法は次の2つです:
- reduxForm(config:Object)のconfigで指定する。
- 親のcomponentのpropとして指定する。
1-1.redux-formの4ステップ
redux-formを使うためには、基本的に以下の4ステップを踏むことになります。
- (1) form reducerの初期化
- (2) reduxForm で Form component を decorate
- (3) <Field/> を使ってForm content を定義
- (4) onSubmit関数を定義してForm componentに渡す
この4ステップは実際に、以下に示す「4.Simple Form Example」のソースコードで確認できます。
2. handleSubmitについて
handleSubmitはsubmit時にキックされるハンドラです。
handleSubmit は decorated form component (wrapped component) のpropとしてredux-formが生成するものです。
onSubmitハンドラとしてのhandleSubmitについて
- まずvalidationを行います。(syncとasyncの両方で)
- 成功すればonSubmit関数を呼びます。引数としてvalues(formのコンテンツ)が与えられます。
- onSubmitがpropとして指定されていない場合は、handleSubmit()の引数として与える必要があります。 例:<form onSubmit={handleSubmit(submit)}>
- onSubmitがpromiseの場合、resolved または rejectedが決定するまでは、submitting propがtrueとなる。
handleSubmitはwrapped componentの中で以下のように取り出せます。
const SimpleForm = props => {
  const { handleSubmit, pristine, reset, submitting } = props
handleSubmitはwrapped componentの中で以下のように使用されます。
<form onSubmit={handleSubmit}>
<button onClick={handleSubmit}>
3. Field について
Field componentは、個別のinputをどのようにRedux storeにconnectすべきかを示すものです。以下の3点が重要です。
- (1) name propが必要とされます。例 'firstName'
- (2) component propが必要とされます。次の3パターンがあります。1. stateful class component / 2. stateless function component / 3. (3) DOM input string (input, select, or textarea)
- その他の全てのpropは、component propの指定で生成された要素に渡されます。(★)
3番目に関連して、<Field />がcomponent propのcomponentに渡すpropは次の3種類です。
- input object
- meta object
- custom props (★で述べたprops)
input object
**input object は、<input /> componentとReduxを結びつけるためのものです。**input object は <input /> componentの中で分解されて使われます。
使用例として、以下の記事のコードを見てみましょう。
redux-form (2) - Synchronous Validation Example
// *** component prop : 2. A stateless function
const renderField = ({
  input, // ★ input object は \<Field /> により component propのcomponentに渡される
  label,
  type,
  meta: { touched, error, warning }
}) => (
  <div>
    <label>{label}</label>
    <div>
      // ★ input objectはここで分解される
      <input {...input} placeholder={label} type={type} />
      {touched &&
        ((error && <span>{error}</span>) ||
          (warning && <span>{warning}</span>))}
    </div>
  </div>
)


const SyncValidationForm = props => {
  const { handleSubmit, pristine, reset, submitting } = props
  return (
    <form onSubmit={handleSubmit}>
      <Field
        name="username"
        type="text"
        // ★ 2. renderField = stateless function component
        component={renderField}
        label="Username"
      />
      <Field name="email" type="email" component={renderField} label="Email" />
      <Field name="age" type="number" component={renderField} label="Age" />
      <div>
        <button type="submit" disabled={submitting}>
          Submit
        </button>
        <button type="button" disabled={pristine || submitting} onClick={reset}>
          Clear Values
        </button>
      </div>
    </form>
  )
}
input objectは次のような属性を持っています。
- input.checked
- input.name
- input.onBlur(eventOrValue)
- input.onChange(eventOrValue)
- input.onDragStart(event)
- input.onDrop(event)
- input.onFocus(event)
- input.value
input.valueの値はboolean(checkboxes) や 文字列(他の全てのinput types)です。Redux stateに値が無い場合は 空文字('')となります。null や undefinedではなく、空文字で初期化されるということは、このinput componentがcontrolledであることを保証してくれます。他のtype(Date や Number) が必要な場合はinitialValuesで明示的に指定する必要があります。
4.Simple Form Example
exampleのSimple Form Exampleを見てみましょう。
Simple Form Example - Getting Started With redux-form
index.jsはオリジナルのものから、不要なものを削除してあります。
import React from 'react'
import ReactDOM from 'react-dom'
import { Provider } from 'react-redux'
import { createStore, combineReducers } from 'redux'
// *** redux-form の reducer
import { reducer as reduxFormReducer } from 'redux-form'

const dest = document.getElementById('content')
const reducer = combineReducers({
  form: reduxFormReducer // mounted under "form"
})
const store = createStore(reducer)

const showResults = values =>
  new Promise(resolve => {
    setTimeout(() => {
      // simulate server latency
      window.alert(`You submitted:\n\n${JSON.stringify(values, null, 2)}`)
      resolve()
    }, 500)
  })

let render = () => {
  const SimpleForm = require('./SimpleForm').default
  ReactDOM.render(
    <Provider store={store}>
      <h2>Form</h2>
      <SimpleForm onSubmit={showResults} />
    </Provider>,
    dest
  )
}

render()
<Field />で指定したinputに入力すると自動的にRedux stateと同期を取ってくれます。actionが裏で動いていますが、明示的な指定はありません。formをsubmitすれば、呼び出し元のonSubmit propで指定したhandlerがキックされます。
import React from 'react'
import { Field, reduxForm } from 'redux-form'

const SimpleForm = props => {
  const { handleSubmit, pristine, reset, submitting } = props
  return (
    <form onSubmit={handleSubmit}>
      <div>
        <label>First Name</label>
        <div>
          <Field
            name="firstName"
            component="input"
            type="text"
            placeholder="First Name"
          />
        </div>
      </div>
      <div>
        <label>Last Name</label>
        <div>
          <Field
            name="lastName"
            component="input"
            type="text"
            placeholder="Last Name"
          />
        </div>
      </div>
      <div>
        <label>Email</label>
        <div>
          <Field
            name="email"
            component="input"
            type="email"
            placeholder="Email"
          />
        </div>
      </div>
      <div>
        <label>Sex</label>
        <div>
          <label>
            <Field
              name="sex"
              component="input"
              type="radio"
              value="male"
            />{' '}
            Male
          </label>
          <label>
            <Field
              name="sex"
              component="input"
              type="radio"
              value="female"
            />{' '}
            Female
          </label>
        </div>
      </div>
      <div>
        <label>Favorite Color</label>
        <div>
          <Field name="favoriteColor" component="select">
            <option />
            <option value="ff0000">Red</option>
            <option value="00ff00">Green</option>
            <option value="0000ff">Blue</option>
          </Field>
        </div>
      </div>
      <div>
        <label htmlFor="employed">Employed</label>
        <div>
          <Field
            name="employed"
            id="employed"
            component="input"
            type="checkbox"
          />
        </div>
      </div>
      <div>
        <label>Notes</label>
        <div>
          <Field name="notes" component="textarea" />
        </div>
      </div>
      <div>
        /*** 現在の form value が initialValuesに等しいか、または     ***
         *** submit (Promise)がまだresolveしていなければ、ボタンは無効 ***/
        <button type="submit" disabled={pristine || submitting}>
          Submit
        </button>
        <button type="button" disabled={pristine || submitting} onClick={reset}>
          Clear Values
        </button>
      </div>
    </form>
  )
}

export default reduxForm({
  form: 'simple' // a unique identifier for this form
})(SimpleForm)
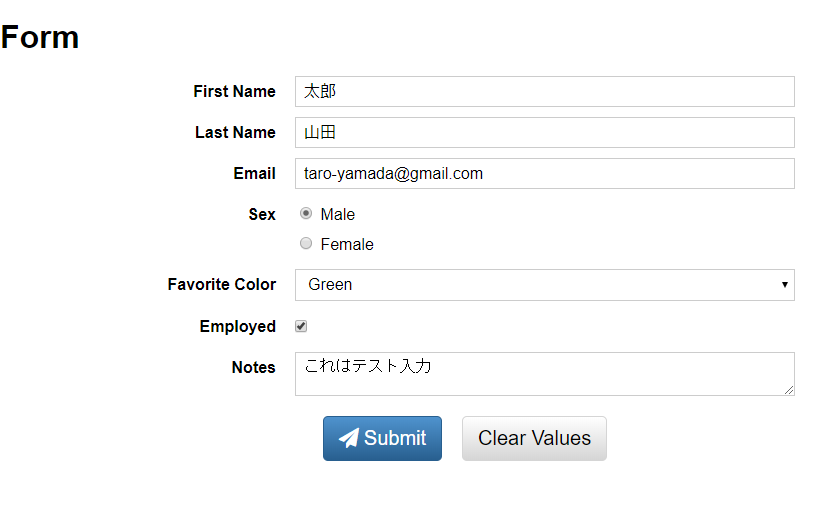
4-1.入力途中のスナップショット
4-2.Submit直後のスナップショット

今回は以上です