はじめに
Dockerを使ってJupyterLabの環境を構築して、ipywidgetsを動かします。
-
JupyterLabとは(ジュピター・ラボ)
- JupyterNotebook(ジュピター・ノートブック)の後継機として開発されたブラウザ上で動作する対話型実行環境です。
-
ipywidgetsとは
- jupyter環境上でインタラクティブなGUI(スライダー、ドロップダウンメニュー等)を作り、操作できるライブラリーです。
Dockerで環境構築
Docker-Composeを使って次のように環境構築を進めます。
必要なファイル、ディレクトリ
| 説明 | |
|---|---|
| Dockerfile | Docker上で動作させるコンテナの構成情報を記述するためのファイル |
| docker-compose.yml | jupyterLab環境に必要な設定などを記述するためのファイル |
| workディレクトリ | ipynbファイルなどの保存するワークディレクトリ |
ディレクトリ構成
以下のような構成でファイル、ディレクトリを作成します。
.
├── Dockerfile
├── docker-compose.yml
└── work
dockerfile
Dockerfileは以下のように書きます。
# python-nodejsをベースイメージにする
FROM nikolaik/python-nodejs:python3.8-nodejs17

# ライブラリーをインストール
RUN python -m pip install --upgrade pip && pip install \
    numpy \
    matplotlib \
    jupyter \
    jupyterlab \
    ipywidgets

# extensionsをインストール
RUN jupyter nbextension enable --py widgetsnbextension \
 && jupyter labextension install @jupyter-widgets/jupyterlab-manager

# ワークディレクトリを指定
WORKDIR /workspace

# コンテナ起動時に実行するコマンドを指定
CMD jupyter-lab --no-browser \
  --port=8888 --ip=0.0.0.0 --allow-root
インストールするライブラリーは、必要に応じてバージョン指定しましょう。
例えばnumpyのバージョン指定をする場合はnumpy==1.19.2のように書けばOKです。
最後にnumpyとmatplotlibも使ったサンプルを作成するので、一緒にインストールしておきます。
ipywidgetsを使うために##
- node.jsが必要なので、ベースイメージに
python-nodejsを指定。 -
extensionsのインストールが必要。
docker-compose.yml
docker-compose.ymlは以下のように書きます。
version: '3'
services:
    python-nodejs:
        build: .
        volumes:
            - ./workspace:/workspace
        ports:
            - "8888:8888"
起動方法
初回の起動
Dockerイメージビルド
$ docker-compose build
結構な時間がかかるので、焦らずに待ちましょう。。
Dockerコンテナの起動
$ docker-compose up
以下のようなログが出てきたら、「?token=」の後に記載されたトークン部分の英数字をコピーします。
Currently running servers:
http://0.0.0.0:8888/?token=e5703610... :: /workspace
http://localhost:8888 にアクセスします。
パスワード入力を求められるので、password欄にログからコピーしたトークンをペーストします。
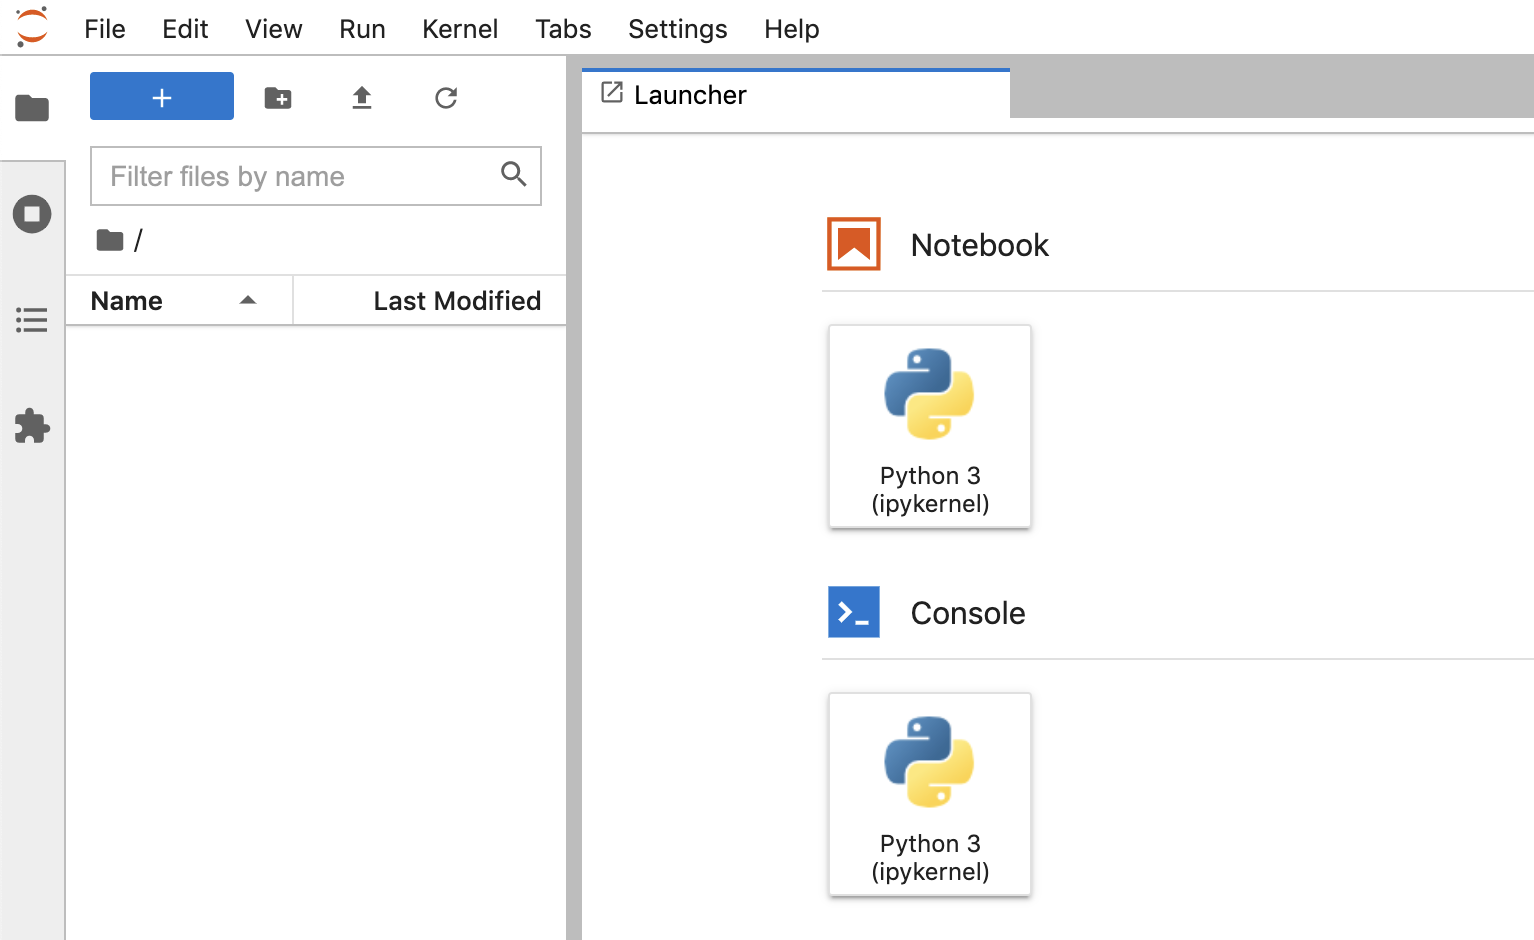
以下のような画面表示を確認できればOKです。
 |
|---|
次回以降の起動
コンテナIDを確認して起動
# コンテナIDを確認
$ docker ps -a

# コンテナ起動
$ docker container start [コンテナID]
http://localhost:8888 にアクセスします。
トークンの確認方法
# コンテナの中に入る
$ docker exec -i -t [コンテナID] bash

# トークンの確認 (下記のどちらかで)
$ jupyter server list
$ jupyter notebook list
password欄にログからコピーしたトークンをペーストします。
ipywidgetsでUIを作る
ユーザーガイドに沿って以下のUI部品を作っていきます。
-
interact関数でスライダーとドロップダウンメニュー -
interact_manual関数でボタン
スライダー
from ipywidgets import interact
import ipywidgets as widgets

# 呼び出される関数
def f(x):
    return x

# interact(関数名, 初期値)
interact(f, x=10)
関数 f の引数 x をUIで変更して実行。
スライダーを動かすと関数が呼び出され、その戻り値が出力されます。
ドロップダウンメニュー
from ipywidgets import interact
import ipywidgets as widgets

# ドロップダウンメニュー(文字列のリストを渡す)
def k(x='oranges'):
    return x

interact(k, x=['apples','oranges'])
ボタン
from ipywidgets import interact_manual
import ipywidgets as widgets
from ipywidgets import FloatSlider

def slow_function(i):
    print(int(i),list(x for x in range(int(i)) if
                str(x)==str(x)[::-1] and
                str(x**2)==str(x**2)[::-1]))
    return

# ボタンを押して関数を実行する
interact_manual(slow_function,i=FloatSlider(min=1e5, max=1e7, step=1e5))
サンプル:matplotlibと組み合わせる
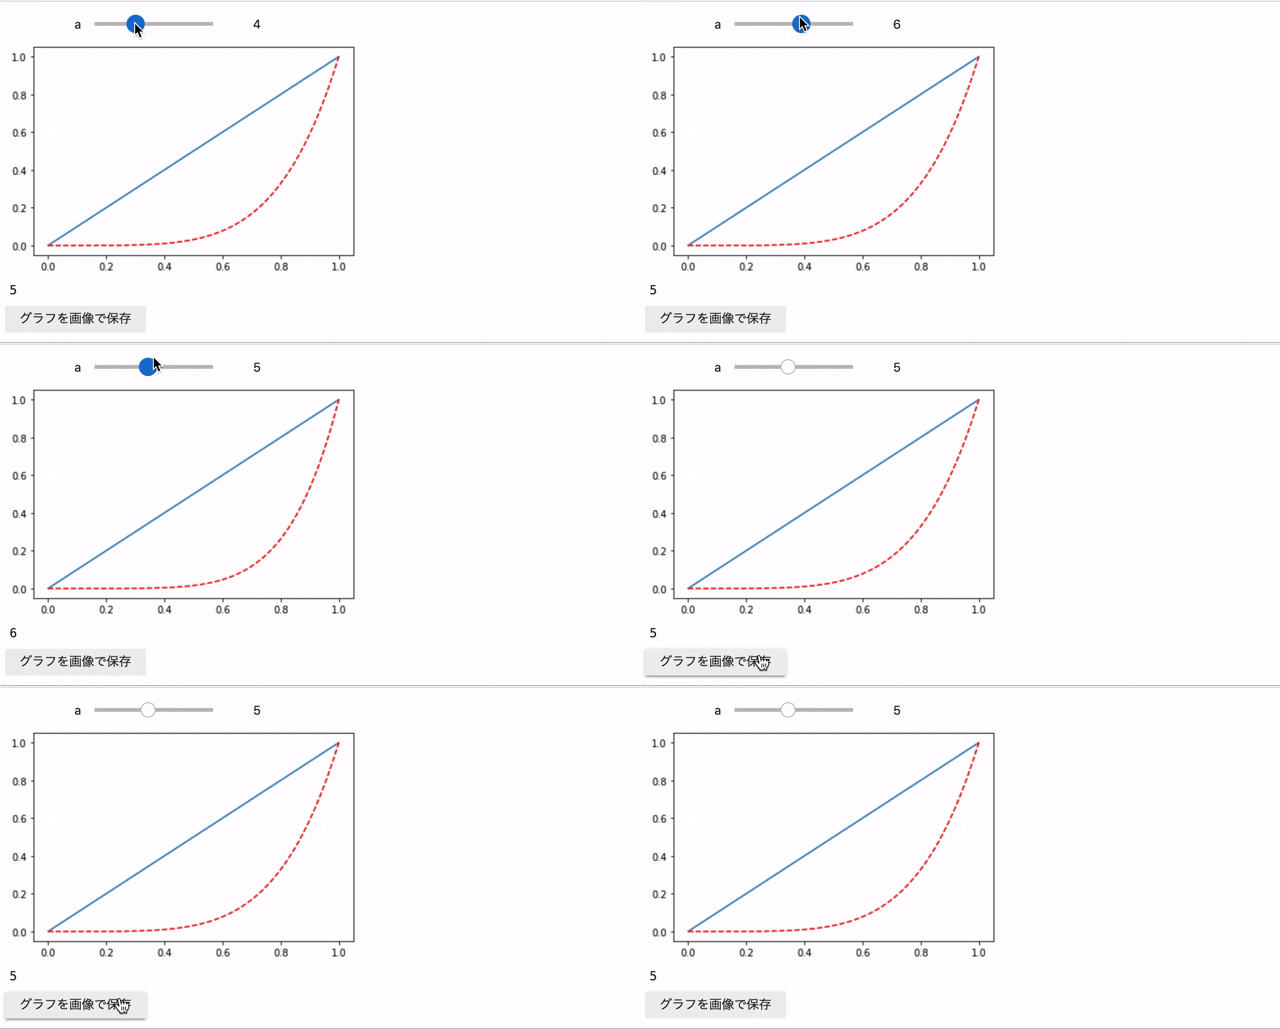
インタラクティブにグラフの値を変更し、ボタン押してグラフを画像化してファイル出力します。
%matplotlib inline
import numpy as np
import matplotlib.pyplot as plt
from ipywidgets import interact, interact_manual

# グラフを描画する
def draw_graph(a):
    global fig
    fig = plt.figure()

    x_1 = np.linspace(0, 1, 100)
    y_1 = x_1
    x_2 = np.linspace(0, 1, 100)
    y_2 = x_2 ** a

    plt.plot(x_1, y_1)
    plt.plot(x_2, y_2, color='r', linestyle='dashed')
    plt.show()

    return a

# スライダーを動かしたときの処理
interact(draw_graph, a=widgets.IntSlider(min=1, max=10, step=1, value=5))

# グラフを画像で保存
def save_image():
    fig.savefig('sample_image.png')

# ボタンを押したときの処理
btn_save = interact_manual.options(manual_name='画像で保存する')
btn_save(save_image)


