はじめに
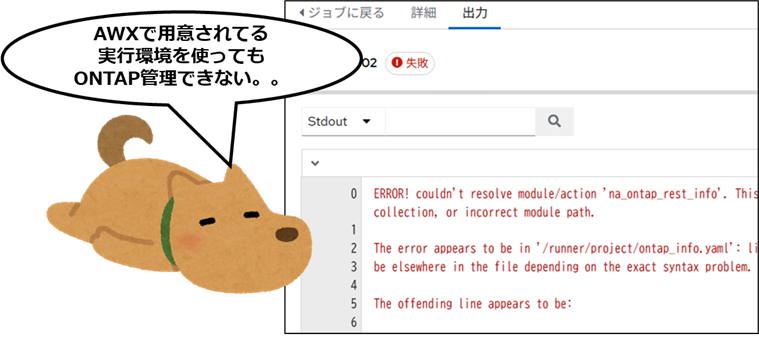
前回の記事ではAWXのInstallについて記載しましたが、AWXを使用したStorage(ONTAP)の管理にあたって、事前にONTAP管理用の実行環境(Execution Environment)の作成が必要になります。
本記事では、Ansible Builderを使用したONTAP管理用の実行環境の作成について記載します。
実行環境は、Ansible Playbookを実行するためのコンテナ化された環境で、必要なライブラリやツールをコンテナイメージに含めることで、依存関係の管理が簡単になり、環境の衝突を回避する事ができます。
何をしたい?できる?
- Ansible BuilderのInstall
- Ansible BuilderでONTAP用の実行環境作成
記事における環境情報
本記事では、以下の環境で実施した内容となります。
分かり易くするために、構成図は単純化しています。
AlmaLinux: 10.0
Docker : 28.3
Ansible Builder: 3.1.0

Ansible Builder
Ansible Builderは、Ansibleの実行環境(Execution Environment)を構築するためのツールで、このツールを使う事で、Ansibleの実行環境を簡単に構築・管理できます。
これにより、依存関係の管理が楽になり、再現性のある環境での自動化が可能になります。

設定手順
1. DockerのInstall
Ansible Builderでは実行環境をコンテナイメージとして作成する為、DockerのManualを参考にしてDockerのInstallを実施します。

1-1. Dockerリポジトリの登録
> sudo dnf config-manager --add-repo https://download.docker.com/linux/centos/docker-ce.repo

[sudo] user100 のパスワード:
repo の追加: https://download.docker.com/linux/centos/docker-ce.repo


# リポジトリが追加された事の確認
> sudo dnf repolist |grep docker
docker-ce-stable                    Docker CE Stable - x86_64
1-2. DockerエンジンのInstall
>  sudo dnf -y install docker-ce docker-ce-cli containerd.io

Docker CE Stable - x86_64                                                                                            22 kB/s |  10 kB     00:00
依存関係が解決しました。
====================================================================================================================================================
 パッケージ                                  アーキテクチャー         バージョン                           リポジトリー                       サイズ
====================================================================================================================================================
インストール:
 containerd.io                               x86_64                   1.7.27-3.1.el10                      docker-ce-stable                    44 M
 docker-ce                                   x86_64                   3:28.3.0-1.el10                      docker-ce-stable                    21 M
 docker-ce-cli                               x86_64                   1:28.3.0-1.el10                      docker-ce-stable                   8.6 M
依存関係のインストール:
(中略)

完了しました!
1-3. Dockerサービスの起動及び有効化
# Serviceの開始
> systemctl start docker

==== AUTHENTICATING FOR org.freedesktop.systemd1.manage-units ====
'docker.service'を開始するには認証が必要です。
Authenticating as: user100
Password:
==== AUTHENTICATION COMPLETE ====


# Serviceの有効化
> systemctl enable docker

==== AUTHENTICATING FOR org.freedesktop.systemd1.manage-unit-files ====
Authentication is required to manage system service or unit files.
Authenticating as: user100
Password:
==== AUTHENTICATION COMPLETE ====
==== AUTHENTICATING FOR org.freedesktop.systemd1.reload-daemon ====
Authentication is required to reload the systemd state.
Authenticating as: user100
Password:
==== AUTHENTICATION COMPLETE ====
2. Ansible BuilderのInstall
Ansible Builderのドキュメントを参考にInstallを進めます。

2-1. pipのInstall
pipを使ってAnsible BuilderをInstallするので、事前にpipをInstallします。
# pipのInstall
> sudo dnf install pip

[sudo] user100 のパスワード:
メタデータの期限切れの最終確認: 0:15:26 前の 2025年06月28日 01時38分13秒 に実施しました。
依存関係が解決しました。
====================================================================================================================================================
 パッケージ                          アーキテクチャー               バージョン                              リポジトリー                      サイズ
====================================================================================================================================================
インストール:
 python3-pip                         noarch                         23.3.2-7.el10                           appstream                         3.2 M
(中略)
完了しました!
2-2. Ansible BuilderのInstall
pipを使用してAnsible BuilderのInstallを実施します。
> sudo python3 -m pip install ansible-builder

[sudo] user100 のパスワード:
Collecting ansible-builder
  Downloading ansible_builder-3.1.0-py3-none-any.whl.metadata (2.8 kB)
Requirement already satisfied: PyYAML in /usr/lib64/python3.12/site-packages (from ansible-builder) (6.0.1)
Collecting bindep (from ansible-builder)
(中略)
3. 実行環境の作成
3-1. ONTAP管理向けの実行環境の仕様を定義
実行環境のBuildにあたって、collection、Python、System Packageなど、実行環境へ含めるコンテンツを指定する定義ファイルの作成が必要になります。
定義ファイルのサンプルはExecution environment definitionを参照ください。

現状のVersionは3となってますが、過去のVersion 1の作成例については、以下のリンクが参考になります。
ansible-builderでNetApp Ansibleモジュール用の実行環境を準備してみる
AWX 設定作業 を Ansibleで 実施して自動化をシンプルに開始してみる
> cat execution-environment.yml
---
version: 3

images:
  base_image:
    name: quay.io/centos/centos:stream9-minimal

options:
  package_manager_path: /usr/bin/microdnf

dependencies:
  python_interpreter:
    package_system: python3.11
    python_path: /usr/bin/python3.11
  ansible_core:
    package_pip: ansible-core~=2.15
  ansible_runner:
    package_pip: ansible-runner~=2.3
  galaxy: requirements.yml
  python: requirements.txt

additional_build_steps:
  append_base:
    - RUN alternatives --install /usr/bin/python3 python3 /usr/bin/python3.11 0
> cat requirements.yml
---
collections:
  - name: netapp.ontap
  - name: netapp.elementsw
> cat requirements.txt
netapp-lib
solidfire-sdk-python
3-2. ONTAP管理向けの実行環境のBuild
作成した定義ファイルのあるディレクトリ上で、実行環境のBuildを実施します。
DOCKER_IDは各自で利用しているIDに置き換えて下さい。

# DockerHubへのログイン
> DOCKER_ID=netappPSXXXXX
> sudo docker login -u $DOCKER_ID
[sudo] user100 のパスワード:

i Info → A Personal Access Token (PAT) can be used instead.
          To create a PAT, visit https://app.docker.com/settings


Password:

WARNING! Your credentials are stored unencrypted in '/root/.docker/config.json'.
Configure a credential helper to remove this warning. See
https://docs.docker.com/go/credential-store/

Login Succeeded


# 実行環境のBuild
> sudo /usr/local/bin/ansible-builder build --tag $DOCKER_ID/ansible-ee:stream9-custom-v2 --container-runtime docker
[sudo] user100 のパスワード:
Running command:
  docker build -f context/Dockerfile -t netappPSXXXXX/ansible-ee:stream9-custom-v2 context
Complete! The build context can be found at: /home/user100/context

#
> ls -l context/
合計 4
-rw-r--r--. 1 root root 2939  6月 30 17:06 Dockerfile
drwxr-xr-x. 3 root root   69  6月 30 17:06 _build
3-3. DuckerHubへのPush
Docker HubにイメージをpushしてAWXからEE登録時、pullできるようにします。

> $ sudo docker push $DOCKER_ID/ansible-ee:stream9-custom-v2
[sudo] user100 のパスワード:
The push refers to repository [docker.io/netappPSXXXXX/ansible-ee]
923114727d66: Pushed
7c80d3af4eaf: Pushed
5f70bf18a086: Pushed
(中略)
stream9-custom-v2: digest: sha256:xxxxxb0c17925b3fe5xxxxxxx size: 3662
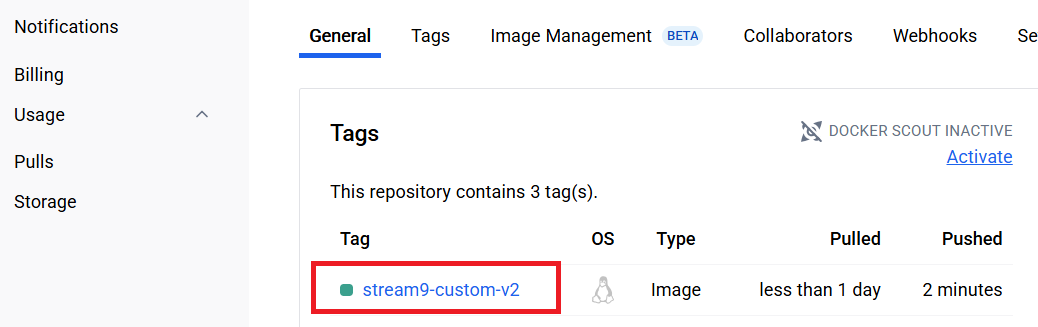
実行環境のイメージがDockerHubのRepositoriesにある事を確認します。
参考及びリンク
ansible-builderでNetApp Ansibleモジュール用の実行環境を準備してみる
AWX 設定作業 を Ansibleで 実施して自動化をシンプルに開始してみる
GUI版のAnsible(AWX)使ってStorage(ONTAP)を管理する1【AlmaLinuxへAWX Install編】