はじめに
普段Vue.jsを使って開発をしているのですが、ある日、開発をしていたらコンポーネントを動的にマウントしたいという希望が出てきました。
この記事では、Vueのコンポーネントを動的にマウント、それに伴い動的にマウントしたコンポーネントを削除したり、propsを設定したりする方法について説明します。
どんな時に使うか
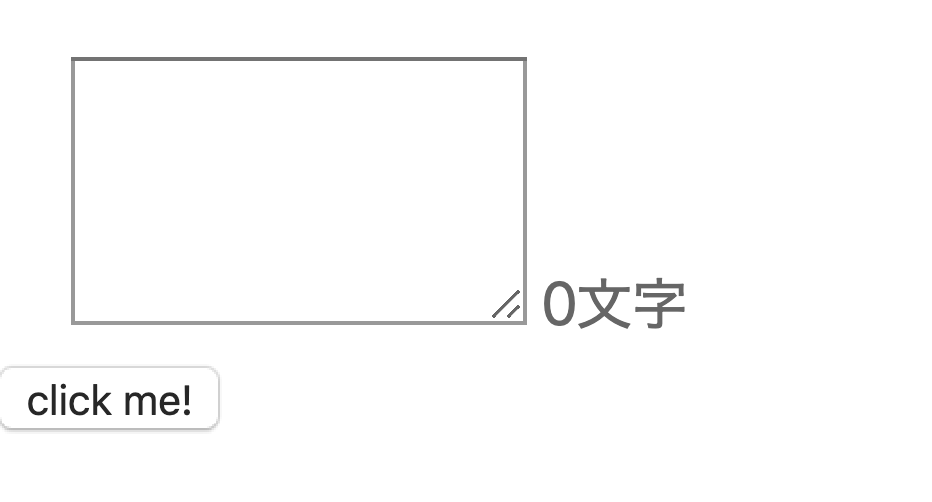
例えば、ボタンを押したらテキストエリアが出現するコードについて考えてみます。
これぐらいであればjQueryでできるかもしれませんが、テキストボックスにcssで装飾などをつけている場合には、コンポーネントにして、それをappendしたいと思います。Vueを使えばイベントの定義なども非常に簡単になるので一石二鳥です。
v-ifやv-showなどでもできますが、コンポーネントを最初どこに追加するかわからない場合などには動的にマウントする必要が出てくるでしょう。
ただ単にコンポーネントを表示するだけであれば以下のようになります。テキストエリアの横には文字数のカウントをつけています。

vueファイルはこんな感じ。
<template>
  <div>
    <count-text></count-text>
    <button>click me!</button>
  </div>
</template>

<script>
import TextBox from './TextBox.vue';

export default {
  components: {
    'count-text': TextBox
  }
}
</script>
<template>
  <div class="uk-margin-top uk-margin-left">
    <textarea rows=5 v-model="text" @keydown="countTextLength" @keyup="countTextLength"></textarea>
    <span>{{ length }}文字</span>
  </div>
</template>

<script>
export default {
  data: function () {
    return {
      length: 0,
      text: ''
    }
  },
  methods: {
    countTextLength: function () {
      this.length = this.text.length;
    }
  }
}
</script>
コンポーネントを動的にマウントする
ポイントは、appendTextメソッドの中です。
コンポーネントのインスタンスを作成して、jQueryでappendしています。
<template>
  <div>
    <div class="text-place"></div>
    <button @click="appendText">click me!</button>
  </div>
</template>

<script>
import Vue from 'vue/dist/vue.esm.js';
import TextBox from './TextBox.vue';

export default {
  methods: {
    appendText: function () {
      var ComponentClass = Vue.extend(TextBox);
      var instance = new ComponentClass();
      instance.$mount();
      $('.text-place').append(instance.$el);
    }
  }
}
</script>
画面は以下のような感じになります。
propsを設定する
動的にマウントするコンポーネントにpropsを設定したい時にはどうすれば良いのでしょうか。
テキストにtitleを設定してみます。
<template>
  <div class="uk-margin-top uk-margin-left">
    <span>{{ title }}</span>
    <textarea rows=5 v-model="text" @keydown="countTextLength" @keyup="countTextLength"></textarea>
    <span>{{ length }}文字</span>
  </div>
</template>

<script>
export default {
  props: {
    title: String //追加
  },
  data: function () {
    return {
      length: 0,
      text: ''
    }
  },
  methods: {
    countTextLength: function () {
      this.length = this.text.length;
    }
  }
}
</script>
propsを設定するには、以下のようにします。
<template>
  <div>
    <div class="text-place"></div>
    <button @click="appendText">click me!</button>
  </div>
</template>

<script>
import Vue from 'vue/dist/vue.esm.js';
import TextBox from './TextBox.vue';

export default {
  methods: {
    appendText: function () {
      var ComponentClass = Vue.extend(TextBox)
      var instance = new ComponentClass({
        // 追加
        propsData: {
          title: 'タイトル'
        }
      });
      instance.$mount();
      $('.text-place').append(instance.$el);
    }
  }
}
</script>

イベントを設定する
emitなどで親にイベントを通知したい時などは以下のようにします。
<template>
  <div class="uk-margin-top uk-margin-left">
    <span>{{ title }}</span>
    <textarea rows=5 v-model="text" @keydown="countTextLength" @keyup="countTextLength" @change="changeText"></textarea>
    <span>{{ length }}文字</span>
  </div>
</template>

<script>
export default {
  props: {
    title: String
  },
  data: function () {
    return {
      length: 0,
      text: ''
    }
  },
  methods: {
    countTextLength: function () {
      this.length = this.text.length;
    },
    changeText: function () {
      this.$emit('changed'); //追加
    }
  }
}
</script>
親のコンポーネントは以下の通り
<template>
  <div>
    <div class="text-place"></div>
    <button @click="appendText">click me!</button>
  </div>
</template>

<script>
import Vue from 'vue/dist/vue.esm.js';
import TextBox from './TextBox.vue';

export default {
  methods: {
    appendText: function () {
      var ComponentClass = Vue.extend(TextBox)
      var instance = new ComponentClass({
        propsData: {
          title: 'タイトル'
        }
      });
      // emitで受け取るイベントを定義 functionの部分はmethodsで定義もできます。
      instance.$on('change', function () {
        console.log('textchanged');
      });
      instance.$mount();
      $('.text-place').append(instance.$el);
    }
  }
}
</script>
instance.$on('イベント名', 処理)という感じで定義できます。
コンポーネントを削除するには
自分自身を削除するには$destroyを使います。
<template>
  <div class="uk-margin-top uk-margin-left">
    <span>{{ title }}</span>
    <textarea rows=5 v-model="text" @keydown="countTextLength" @keyup="countTextLength" @change="changeText"></textarea>
    <span>{{ length }}文字</span>
    <button @click="deleteSelf">destroy!</button>
  </div>
</template>

<script>
export default {
  props: {
    title: String
  },
  data: function () {
    return {
      length: 0,
      text: ''
    }
  },
  methods: {
    countTextLength: function () {
      this.length = this.text.length;
    },
    changeText: function () {
      this.$emit('changed');
    },
    deleteSelf: function () {
      this.$destroy();
      this.$el.parentNode.removeChild(this.$el);
    }
  }
}
</script>
      this.$destroy();
      this.$el.parentNode.removeChild(this.$el);
でコンポーネントを削除します。
thisの部分をinstanceに変更すると、親からも削除できます。
      instance.$destroy();
      instance.$el.parentNode.removeChild(instance.$el);
終わりに
Vue.jsは非常に便利だと感じました。
この場を借りて、この方法を教えてくれた参考記事の偉大な先人たちへ深い感謝を送りたいと思います。
非常に助かりました。
参考記事
https://css-tricks.com/creating-vue-js-component-instances-programmatically/
https://stackoverflow.com/questions/40445125/how-can-component-delete-itself-in-vue-2-0
