はじめに
リソースをそこまで必要としない分析で、ローカルのJupyter NotebookからBigQueryデータを使いたい場合がよくある。そこで、ローカルのJupyter NotebookでBigQueryのクエリを書いて、そのままDataFrameに格納するための方法を紹介する。
・macOS Mojave
・Python3.7.3
Python3の仮想環境を作る
適当なディレクトリ(ここでは/Users/{username}/BigQueryLocal)を作成して、virtualenvでEVN3という仮想環境を作り、ENV3を有効にする。
$ mkdir BigQueryLocal
$ cd BigQueryLocal
$ virtualenv -p python3.7 ENV3
$ source ENV3/bin/activate
gcloudの認証
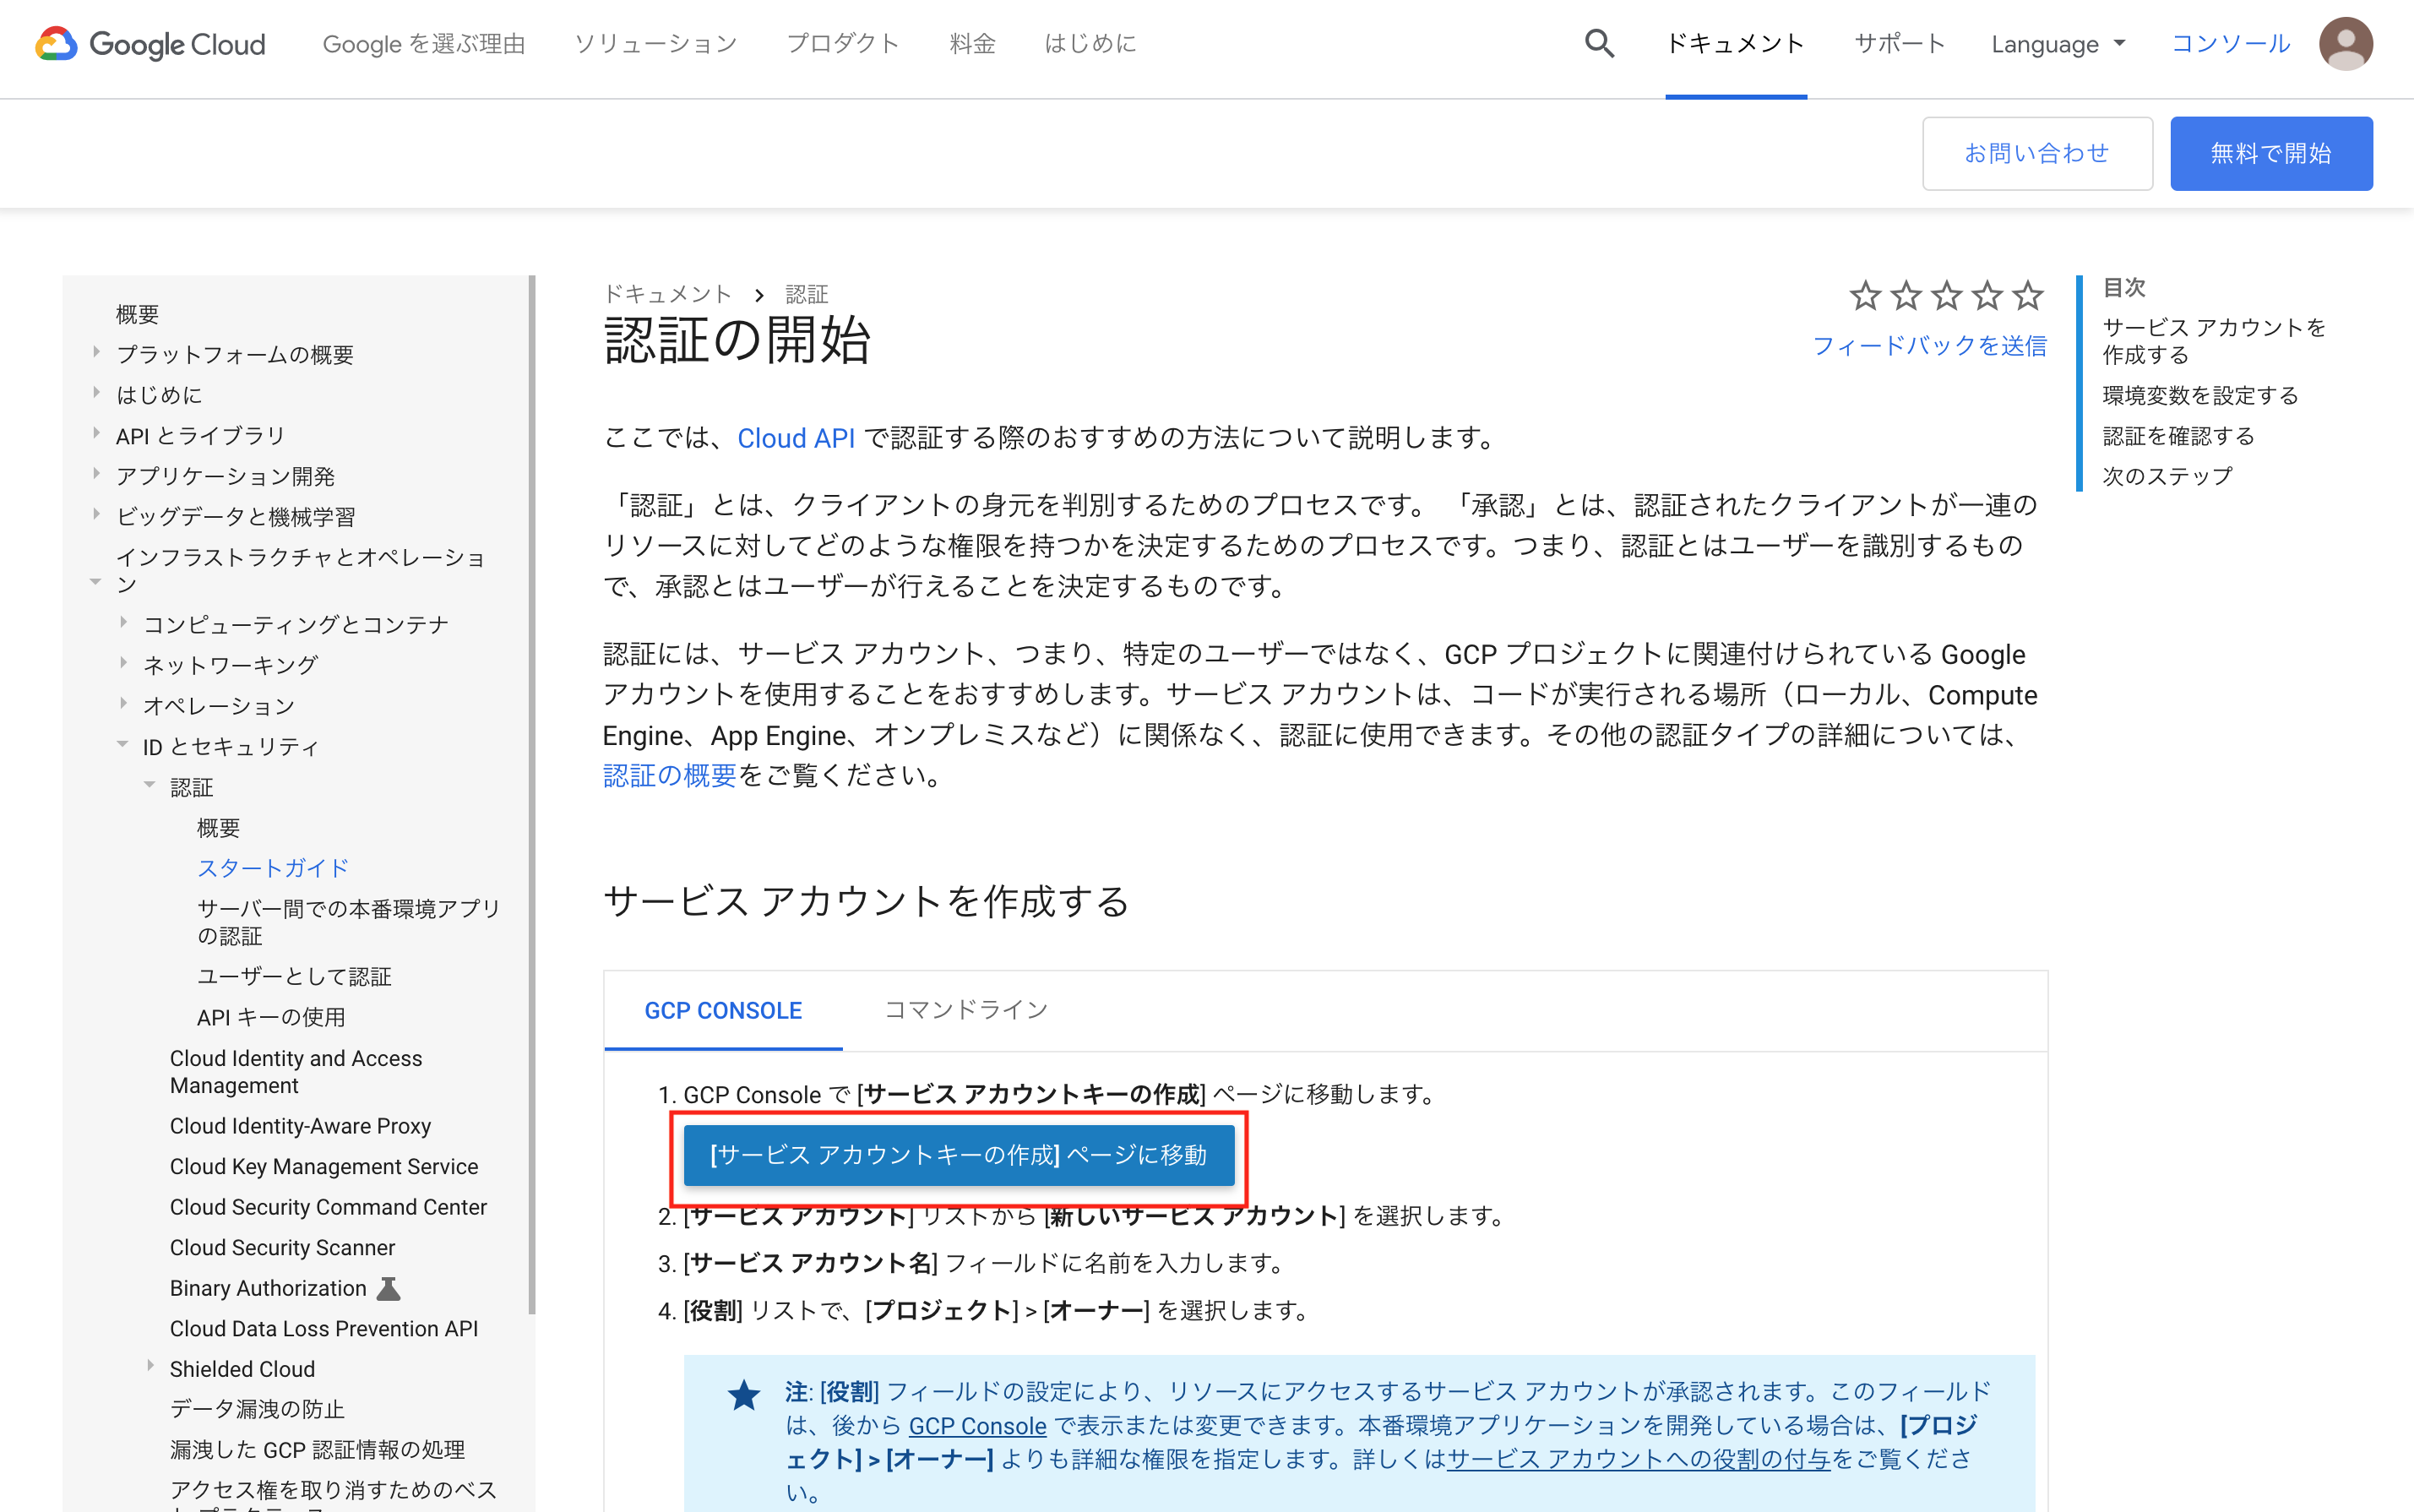
まず、以下のURLをクリックする。
https://cloud.google.com/docs/authentication/getting-started?hl=ja
上記のURLをクリックすると、以下の画面が現れるので、[サービス アカウントキーの作成] ページに移動をクリックする。

サービス アカウントキーの作成に移動して、サービスアカウントをApp Engine default service account、キーのタイプをJSONにして、作成を押すと、JSONファイルがダウンロードされる。

ダウンロードしたJSONのアカウントキー{xxxxxxxxxx}.jsonを/Users/{username}/BigQueryLocalの直下に配置して、以下を実行する。
$ export GOOGLE_APPLICATION_CREDENTIALS="/Users/{username}/BigQueryLocal/{xxxxxxxxxx}.json"
Projectディレクトリを作成する
必ずしも必要ではないが、その後の見通しをよくするために、TestProjectというディレクトリを作成して、移動する。
$ mkdir TestProject
$ cd TestProject
必要パッケージをインストールする
最低限必要な以下のパッケージをpipでインストールする。
$ pip install google-cloud-bigquery
$ pip install jupyter
$ pip install pandas
Jupyter Notebookを起動する
以下のコマンドでjupyter notebookを起動する。
$ jupyter notebook
起動したら、適当なnotebookを作成して、以下のモジュールのインポートとクライアント認証を行う。
[1]
from google.cloud import bigquery
client = bigquery.Client()
ここでは、デフォルトで用意されているbigquery-public-data.samples.natalityのデータを使う。
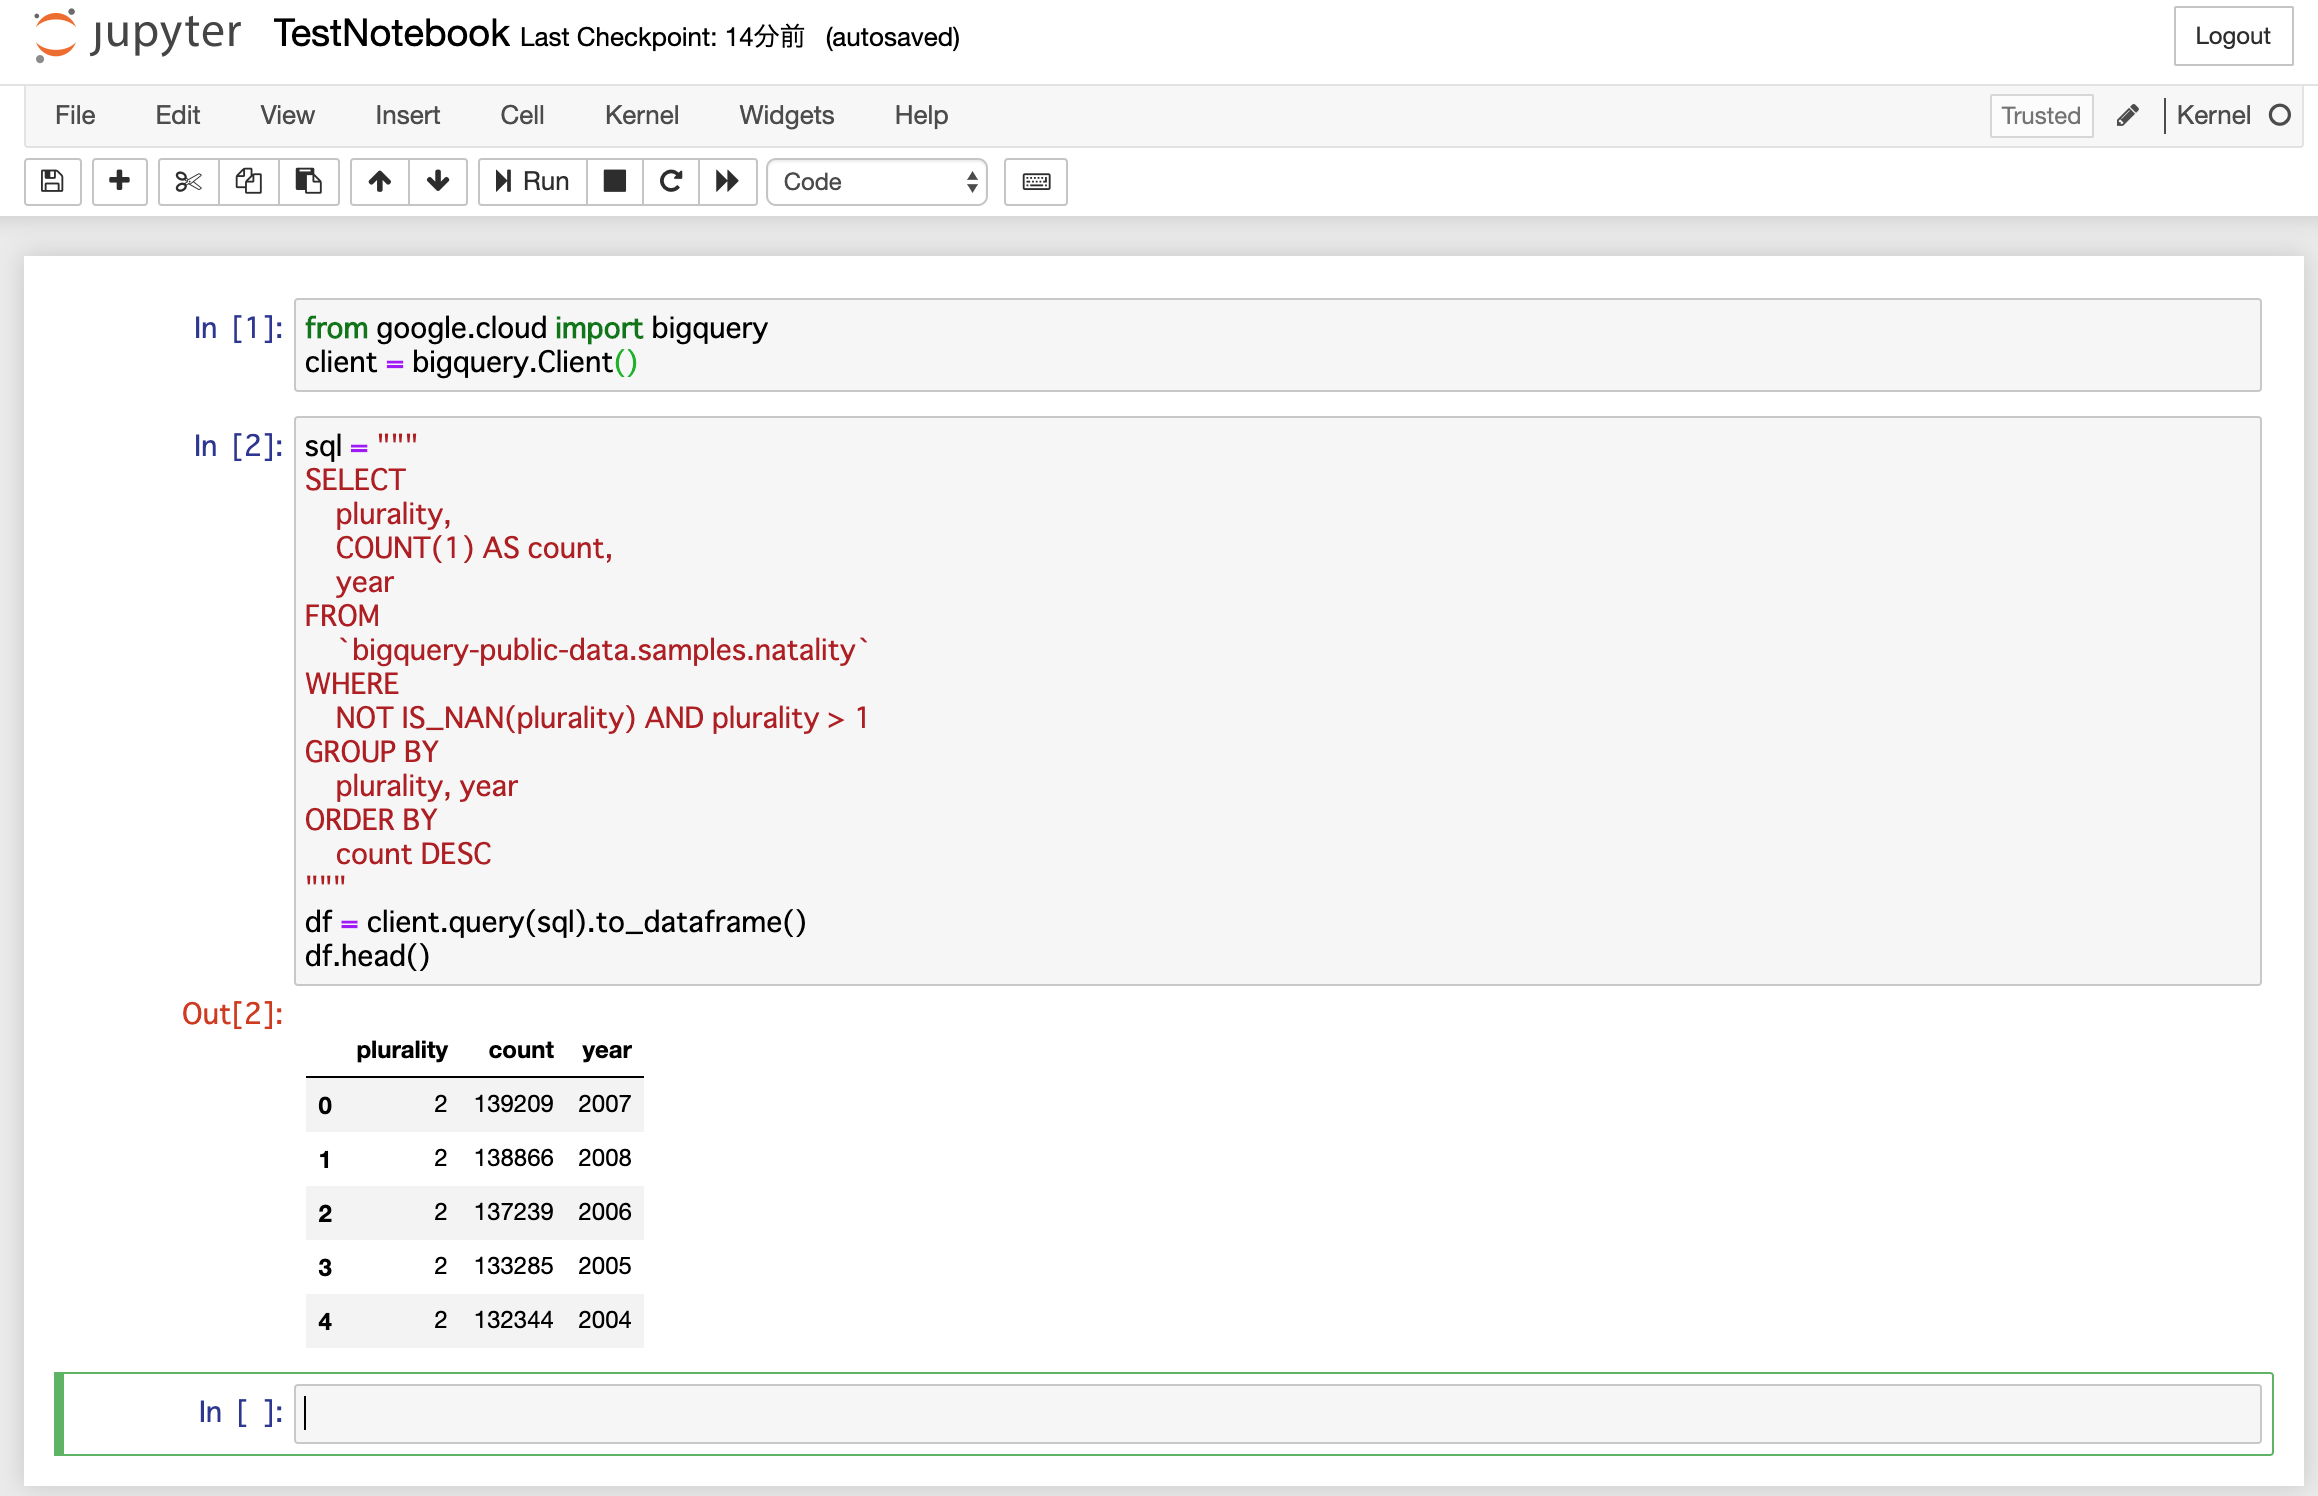
以下を実行すると、BigQueryデータをDataFrameで扱えるようになる。
[2]
sql = """
SELECT
    plurality,
    COUNT(1) AS count,
    year
FROM
    `bigquery-public-data.samples.natality`
WHERE
    NOT IS_NAN(plurality) AND plurality > 1
GROUP BY
    plurality, year
ORDER BY
    count DESC
"""
df = client.query(sql).to_dataframe()
df.head()
実際には以下のような出力になり、DataFrameとして、出力されていることが確認できる。

次回以降は以下だけを実行すればいよい。
$ cd BigQueryLocal
$ source ENV3/bin/activate
$ export GOOGLE_APPLICATION_CREDENTIALS="/Users/{username}/BigQueryLocal/{xxxxxxxxxx}.json"
$ cd TestProject
$ jupyter notebook
参考
virtualenvによる環境構築は、以下を参照。
https://cloud.google.com/python/setup?hl=ja
Jupyter NotebookでのBigQueryの使用方法は以下を参照。
https://cloud.google.com/bigquery/docs/visualize-jupyter?hl=ja