背景
私の研究室では研究室のサーバにsshで接続して機械学習モデルの学習などを行っています.
普段はvenvで仮想環境を作ってpython3 train.pyみたいにPythonのプログラムを実行しているのですが,急に研究室のサーバ上でJupyterNotebookを使う必要性が出てきました.
しかし,VScodeでそのままJupyterNotebookを開いただけではvenvで作った仮想環境を有効にすることができませんでした.
何がしたいか
ssh接続した先にある.ipynbファイルをVScodeで開き,あらかじめ作ったvenvの仮想環境上でpythonプログラムを実行したい.
解決策
例ではvenvで作った仮想環境をカーネルに指定していますが,anacondaなどのパッケージ管理ツールで作った仮想環境でも指定可能です.
まずはVScodeで使いたいサーバにssh接続します.
VScodeでssh接続する方法はこちらにあります.
VScodeでssh接続ができたらcommand+shift+pでコマンドパレットを開きます.(windowsならctrl+shift+p)
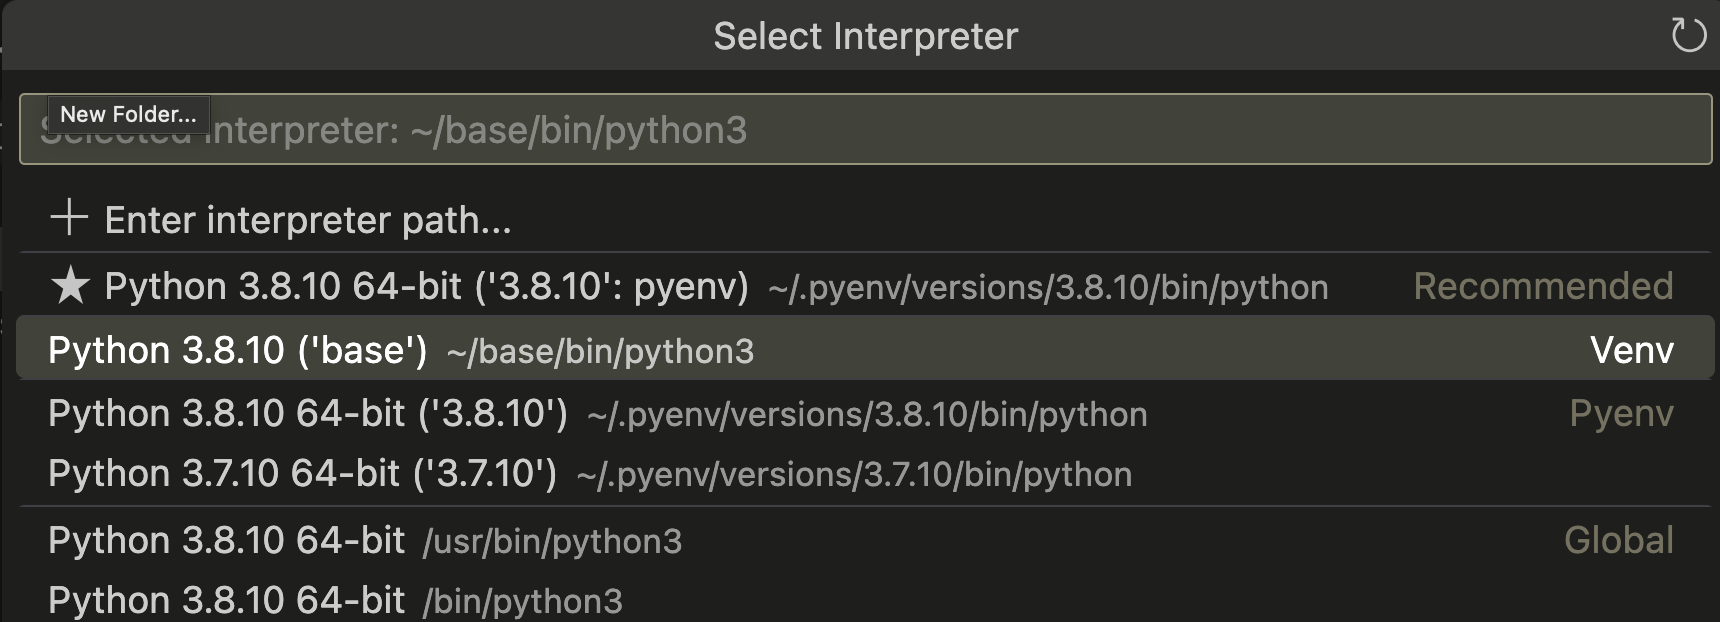
そこで「python」と打つと 「Python: Select Interpreter 」というものが検索に引っかかるのでこれを選択.

すると自動で検知されたカーネルがいくつか出現します.

使いたい仮想環境がここにあれば一度escを押してコマンドパレットから離れます.
使いたい仮想環境が無ければ「 + Enter interpreter path... 」を選択してpathで仮想環境を指定します.この時指定するpathは(絶対パス)/(仮想環境の名前)/bin/python3です.
サジェストが出るので自分で打たなくてもぽちぽちしていれば追加できます.
無事追加できると先程のカーネル一覧にpython (バージョン)('仮想環境の名前')という項目が追加されているはずです.
これでVScodeが仮想環境のカーネルを認識できる状態になりました.
次はこれをJupyterNotebook側で選択してあげます.
「jupyter」と打つと「 Jupyter: Select Interpreter to Start Jupyter Server 」というものが検索に引っかかるのでこれを選択.

洗濯が完了すると以下のように自分で作った仮想環境の名前が右上に表示されます.
私の場合はbaseという名前の仮想環境を使っているのでこのようになります.

これで無事pythonのコードが実行できれば完了です.
お疲れ様でした.