この記事は Retty Inc. Advent Calendar 2017 6日目です。
昨日は @YutaSakata さんによる Android のコンパイル済み Layout Xml を Web 経由で差し込めるようにした話 でした。
今日はRettyでも採用されているVue.jsのお話です。
Vue.js使ってますか?
皆さんご存知Vue.jsはGitHub上の全公開レポジトリで6番目のスター数を誇り、今年のQiitaのアドベントカレンダーが4つも出るなど、人気のJavaScriptフレームワークです。
Vue.jsの良さの1つである、DOM要素に対するイベントハンドリングの手軽さを利用して、ブラウザのコンソールに絵を書いて遊んでみました。
Vue.jsのイベントハンドリング
Vue.jsではDOM要素に対して、JavaScript側からではなくHTML Template側にイベントリスナーの割り当てを記述します。
<div id="app">
    <button v-on:click="doSomething">ClickMe!</button>
    <!-- または -->
    <button @click="doSomething">ClickMe!</button>
</div>
これだけでマウントしたVueインスタンスの doSomething メソッドを、ボタンclick時に呼び出すことができます。
また .stop や .prevent などのイベント修飾子が提供されているため
<div id="app">
    <!-- popupウィンドウ表示時の背景レイヤー (クリックすると閉じる) -->
    <div class="popup-background" @click="dismissPopup">
        <!-- popupウィンドウの中身 (クリックしても閉じない) -->
        <section class="popup-container" @click.stop>
            <p>もふもふ</p>
        </section>
    </div>
</div>
このように親要素からのイベントの伝搬を簡単に止めたりすることができます。
また、上記はイベント修飾子 self を用いて以下のように書き換えられます。
<div id="app">
    <!-- popupウィンドウ表示時の背景レイヤー (クリックすると閉じる) -->
    <div class="popup-background" @click.self="dismissPopup">
        <!-- popupウィンドウの中身 (クリックしても閉じない) -->
        <section class="popup-container">
            <p>もふもふ</p>
        </section>
    </div>
</div>
他にもキーボードイベントに対しては、.ctrl .alt .shift .meta のシステム修飾子が用意されていたり、イベントの発火をHTMLテンプレートにシンプルに記述できます。
公式ドキュメントは、HTMLにリスナーを記述することによって
- HTML テンプレートを眺めることで、JS コード内のハンドラ関数を探すことを容易にします
- JS 内のイベントリスナーを手作業でアタッチする必要がないので、ViewModel を DOM 依存のない純粋なロジックにできます。これはテスタビリティも向上します。
- ViewModel が消去されるときに、すべてのイベントリスナーは自動で削除されます。手動でそれらの消去をおこなうことを気にする必要はありません。
としています。
コンソールに絵を描く
ここからが本題です。
HTMLに白いdivを一つ置き、その内部をマウスでドラッグすることでその内容をコンソールに描き出すものを作ります。
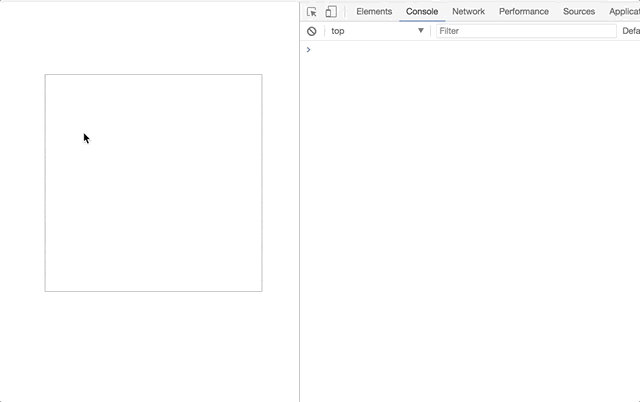
↑こんな感じです。可愛いですね。
全体のコードはこちら。
マウスイベントによってドラッグまたはクリックされた領域を記憶し、コンソールを毎回消してから再描画しています。
<!DOCTYPE html>
<html>
<head>
    <title>test</title>
    <style type="text/css">
        .paintArea {
            margin: 100px 100px;
            width: 300px;
            height: 300px;
            border: 1px solid #AAA;
        }
    </style>
</head>
<body>

    <section id="app">
        <div class="paintArea"
            @mousedown="onMousedown"
            @mouseup="onMouseup"
            @mousemove="onMousemove"
            @click="onClick"
        ></div>
    </section>

    <script type="text/javascript" src="https://cdn.jsdelivr.net/npm/vue"></script>
    <script type="text/javascript">

        class Point {
            constructor(x = 0, y = 0) {
                this.x = x
                this.y = y
            }

            static createFromMouseEvent({offsetX, offsetY}) {
                return new Point(Math.round(offsetX/10), Math.round(offsetY/10))
            }

            isSameAs({x, y}) {
                return this.x === x && this.y === y
            }
        }

        new Vue({
            el: "#app",
            data() {
                return {
                    pointStack: [],
                    isPainting: false,
                }
            },
            computed: {
                prePoint() {
                    return this.pointStack.length ? this.pointStack[this.pointStack.length - 1] : null
                },
            },
            methods: {
                ///////////////////////////////
                // monuse event handlers
                ///////////////////////////////
                onClick(event) {
                    const point = Point.createFromMouseEvent(event)
                    this.drawToConsole(point)
                },
                onMousedown(event) {
                    this.isPainting = true
                },
                onMouseup(event) {
                    this.isPainting = false
                },
                onMousemove(event) {
                    if (!this.isPainting) {
                        return
                    }

                    const point = Point.createFromMouseEvent(event)
                    this.drawToConsole(point)
                },
                ///////////////////////////////
                // canvas console
                ///////////////////////////////
                drawToConsole(point) {
                    if (this.prePoint !== null && this.prePoint.isSameAs(point)) {
                        return
                    }

                    console.clear()

                    this.pointStack.push(point)

                    const canvasIndices = [...Array(30).keys()]

                    const consoleCanvasString = canvasIndices.reduce((carry, indexY) =>
                        canvasIndices.reduce((line, indexX) => {
                            const targetPoint = new Point(indexX, indexY)
                            const isPaintedPoint = this.pointStack.some(p => p.isSameAs(targetPoint))
                            const paint = isPaintedPoint ? '● ' : '  '
                            return `${line}${paint}`
                        }, carry) + '\n'
                    , '')

                    console.log(consoleCanvasString)
                }
            },
        })
    </script>

</body>
</html>
以下、ポイントの解説です。
イベントリスナーの設定
このようにマウス操作に関するイベントに対して、シンプルに呼び出すメソッドを記述できます。
<section id="app">
    <div class="paintArea"
        @mousedown="onMousedown"
        @mouseup="onMouseup"
        @mousemove="onMousemove"
        @click="onClick"
    ></div>
</section>
Spread Operator
スプレッド演算子 は、複数の引数 (関数呼び出しのため) または複数の要素 (配列リテラルのため)、あるいは複数の値 (分割代入のため) が置かれるところで式が展開されます。
スプレッド演算子
これを利用して0~29の配列を作っています。
// いわゆるrange関数。 0~29の配列を生成
const canvasIndices = [...Array(30).keys()]
Array(30) によって中身が空で長さが30の配列を作成し、 Array.prototype.keys() により、valueが0~29のArray Iteratorオブジェクトを作っています。
それをSpread Operatorにて展開しています。
高階関数
Vue.jsは関係ありませんが、最近のJavaScriptでfor文を見かけなくなりました。
Rettyでは副作用を防ぎ、可読性も良いことから高階関数の利用を推奨しています。
ESLintのルールとして多く採用されている Airbnb JavaScript Style Guide でもイテレーターの使用は禁止されています。
drawToConsoleの中で2重ループを回して30x30の描画用の文字列の生成を行う際コードを抜き出すと
// 0~29の外側のループ = 縦方向
const consoleCanvasString = canvasIndices.reduce((carry, indexY) =>
    canvasIndices.reduce((line, indexX) => { // 0~29の内側のループ = 横方向
        const targetPoint = new Point(indexX, indexY)
        const isPaintedPoint = this.pointStack.some(p => p.isSameAs(targetPoint))
        // 空白か●かを決定し、文字列としてつなげていく
        const paint = isPaintedPoint ? '● ' : '  '
        return `${line}${paint}`
    }, carry) + '\n' // 横1行が生成されたら改行
, '')
このようにreduceで書くことでforの二重ループを書かずに、配列を元に文字列を生成しています。
また、ループの内側では
const isPaintedPoint = this.pointStack.some(p => p.isSameAs(targetPoint))
some を用いてループ内部の座標が既に ● として描画済みであるかどうかを判定しています。
RubyやPython、Kotlinなどでは anyと呼ばれてるやつですね。
まとめ
console.logはいいぞ。
明日は @koji-t による「物体検出とボケ検出で一眼レフ風の料理写真候補抽出」です。
お楽しみに。
以上ですー。