はじめに
deviseで作ったuserテーブルに名前やプロフィールを入れておきたかったのでやってみました。
自分でログイン機能を作ると簡単にできるのですが、deviseをいじるのって最初は勇気がいると思うのでそんな方々の手助けになればと書いてみます。
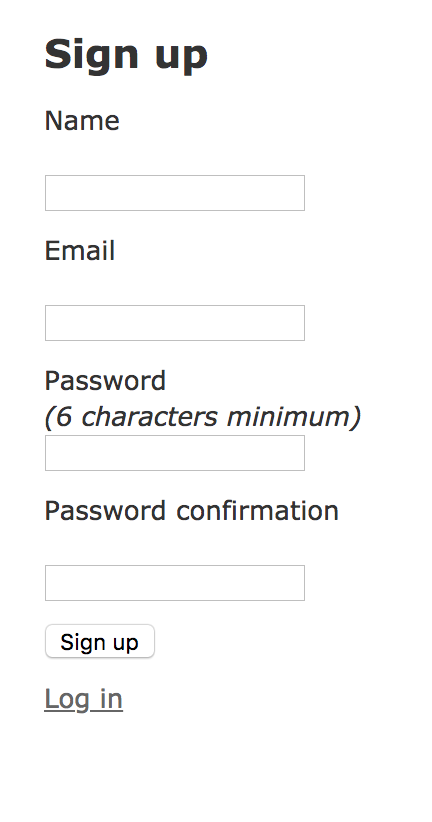
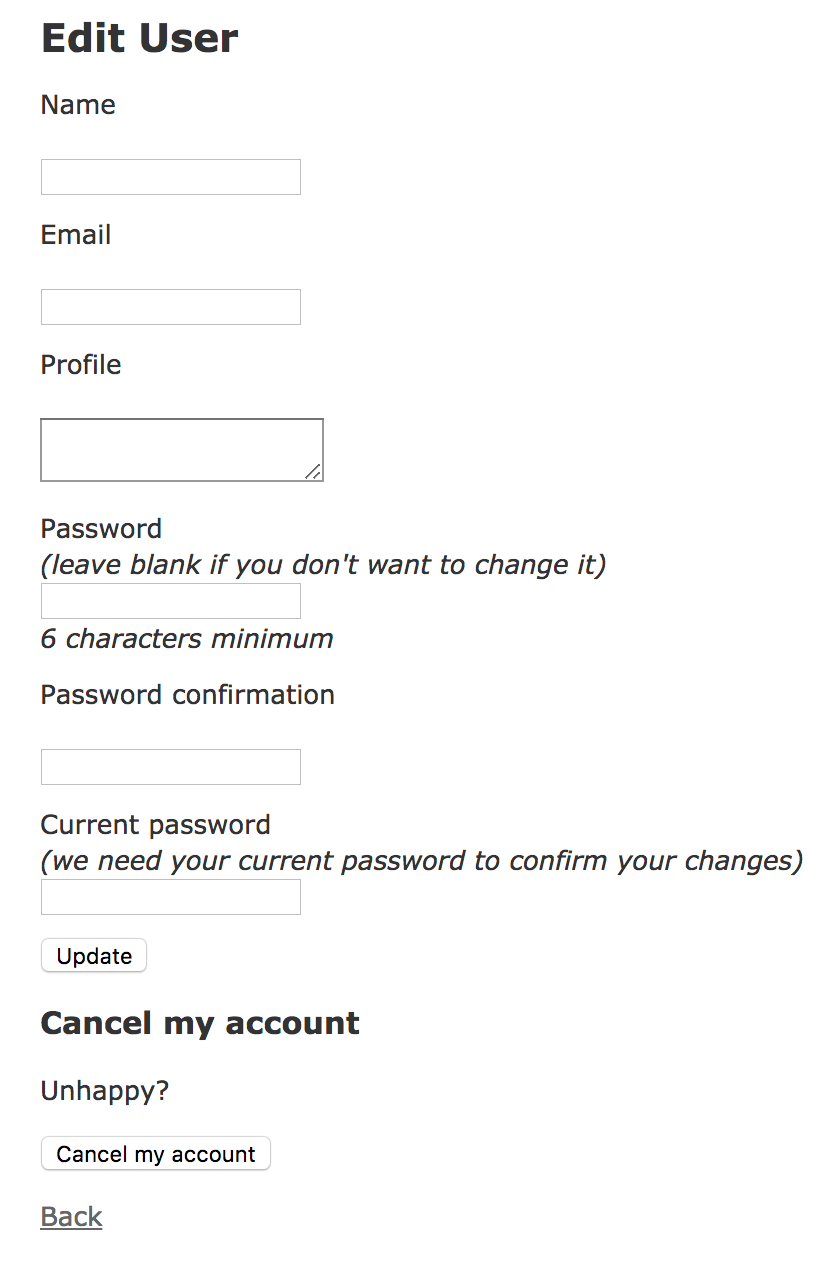
ここではサインアップの時に名前の入力をできるようにして、アカウントの編集の時に名前とプロフィールを入力できるようにしてみます。
バージョン
Ruby 2.3.1
Rails 5.1.6
devise 4.5.0
各種インストール
まず、見本という事でここでは適当にブログアプリを作ります。
$ rails new devise_app
$ rails g scaffold blog title:string content:text
$ rails db:create
$ rails db:migrate
次にdeviseをインストールします。
gem 'devise'
ちなみにこのようにバージョンを指定しない書き方だと自動的に最新版がインストールされます。
$ bundle install
この後に
$ rails g devise:install
これでdeviseのインストール完了です。
deviseの各種ファイルを用意
modelの生成
$ rails g devise user
これでモデルとマイグレーションファイルができます。
viewの生成
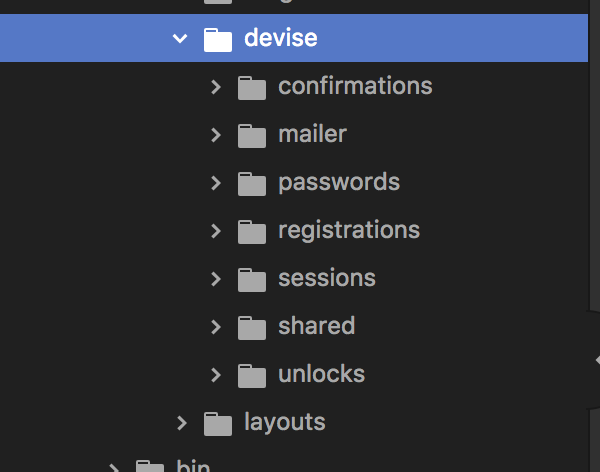
$ rails g devise:views
するとこのようにdeviseで使われるviewファイルが作成されます。

ちなみにこの中で今回使うのはregistrationsのみです。
controllerの生成
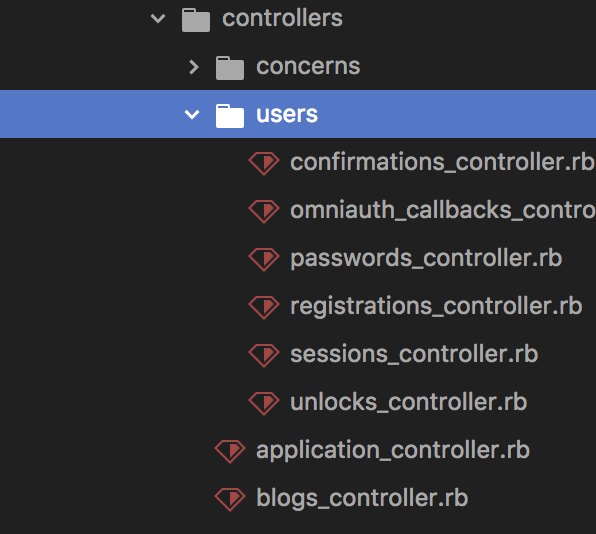
$ rails g devise:controllers users
controllerもいくつかできますが今回devise関連の記述を行うのはregistrations_controller.rbとapprication_controller.rbです。

各種ファイルの編集
マイグレーションファイル
今回はプロフィール画面にユーザーの名前とプロフィールを表示させたいのでnameとprofileのカラムを追記します。
# frozen_string_literal: true

class DeviseCreateUsers < ActiveRecord::Migration[5.1]
  def change
    create_table :users do |t|
      t.string :name, null: false #追記
      t.text :profile #追記

      ## Database authenticatable
      t.string :email,              null: false, default: ""
      t.string :encrypted_password, null: false, default: ""
「rails db:migrate」を忘れずに。
モデル
class User < ApplicationRecord
  # Include default devise modules. Others available are:
  # :confirmable, :lockable, :timeoutable, :trackable and :omniauthable
  devise :database_authenticatable, :registerable,
         :recoverable, :rememberable, :validatable

  validates :name, presence: true #追記
  validates :profile, length: { maximum: 200 } #追記
end
nameとprofileにバリデーションをかけておきます。
コントローラ
class ApplicationController < ActionController::Base
  protect_from_forgery with: :exception

  # ログイン済ユーザーのみにアクセスを許可する
  before_action :authenticate_user!

  # deviseコントローラーにストロングパラメータを追加する
  before_action :configure_permitted_parameters, if: :devise_controller?

  protected
  def configure_permitted_parameters
    # サインアップ時にnameのストロングパラメータを追加
    devise_parameter_sanitizer.permit(:sign_up, keys: [:name])
    # アカウント編集の時にnameとprofileのストロングパラメータを追加
    devise_parameter_sanitizer.permit(:account_update, keys: [:name, :profile])
  end

end
これでuserモデルに追記したパラメータを渡せるようになります。
ちなみにapplication_controller.rbに「:authenticate_user!」を設定しているのでどのページでもログインしていないとログインページに飛ばされるようになります。
ビュー
<h2>Sign up</h2>

<%= form_for(resource, as: resource_name, url: registration_path(resource_name)) do |f| %>
  <%= devise_error_messages! %>

  <!--サインアップ時に名前を入力できるようにフォームを追加-->
  <div class="field">
    <%= f.label :name %><br />
    <%= f.text_field :name, autofocus: true %>
  </div>

  <div class="field">
    <%= f.label :email %><br />
    <%= f.email_field :email, autofocus: true, autocomplete: "email" %>
  </div>
<h2>Edit <%= resource_name.to_s.humanize %></h2>

<%= form_for(resource, as: resource_name, url: registration_path(resource_name), html: { method: :put }) do |f| %>
  <%= devise_error_messages! %>

  <!--アカウント編集時に名前を入力できるようにフォームを追加-->
  <div class="field">
    <%= f.label :name %><br />
    <%= f.text_field :name, autofocus: true %>
  </div>

  <div class="field">
    <%= f.label :email %><br />
    <%= f.email_field :email, autofocus: true, autocomplete: "email" %>
  </div>

  <!--アカウント編集時にプロフィールを入力できるようにフォームを追加-->
  <div class="field">
    <%= f.label :profile %><br />
    <%= f.text_area :profile, autofocus: true %>
  </div>
それぞれのビューに入力フォームを追記していきます。
これでサインアップ時に名前、アカウント編集で名前とプロフィールを入力できるようになりました。


ユーザーのプロフィール画面を作成
ルーティング
resources :users, only: [:show]

# ログイン、アカウント編集後、任意のページに推移させるための記述
devise_for :users, controllers: {
        registrations: 'users/registrations'
}
usersのshowへのルーティングを作成
その下の「devise_for」に関してはregistrations_controller.rbで記述する内容を有効にするためです。
コントローラ
protected
  # アカウント編集後、プロフィール画面に移動する
  def after_update_path_for(resource)
    user_path(id: current_user.id)
  end
  # ログイン後、blogs/indexに移動する
  def after_sign_in_path_for(resource)
    blogs_path
  end
deviseの設定はここで終わりです。
あとはプロフィール画面を作成していきます。
$ rails g controller Users show
deviseのusersとは別にusers_controller.rbとusers/show.html.erbを生成します。
class UsersController < ApplicationController
  def show
    @user = User.find(params[:id]) #追記
  end
end
ビュー
<h1>Users#show</h1>
<p>名前 : <%= @user.name %></p>
<p>メールアドレス : <%= @user.email %></p>
<p>プロフィール : <%= @user.profile %></p>
とりあえず表示させるだけ

終わりに
deviseを初めて使った時に便利だなと思った反面、使わないファイルが多く生成されるのでごちゃごちゃしてカスタマイズしづらい印象でした。
実際自分でいじるときは結構な勇気が要りました笑
この記事がdeviseをカスタマイズする方にとって、はじめの一歩の手助けになれば幸いです。
また、意見やご指摘、質問なども大歓迎です!