そもそもReduxとは?
Reactとは別のJavaScriptアプリケーションのための状態管理ライブラリです。React以外のライブラリとも組み合わせて使用が可能です。
アプリケーションの状態を一元管理することで、データの共有やコンポーネント間の通信が容易になります。
このReduxの利用を簡単かつ効果的に設計されているのがRedux Toolkitであり、公式からもRedux Toolkitの利用が推奨されています。
Storeの作成
まずはStoreの作成から行います。
import { configureStore } from "@reduxjs/toolkit";

export const store = configureStore({
  reducer: {}
})
reducerの中身は後から修正します。
Sliceの作成
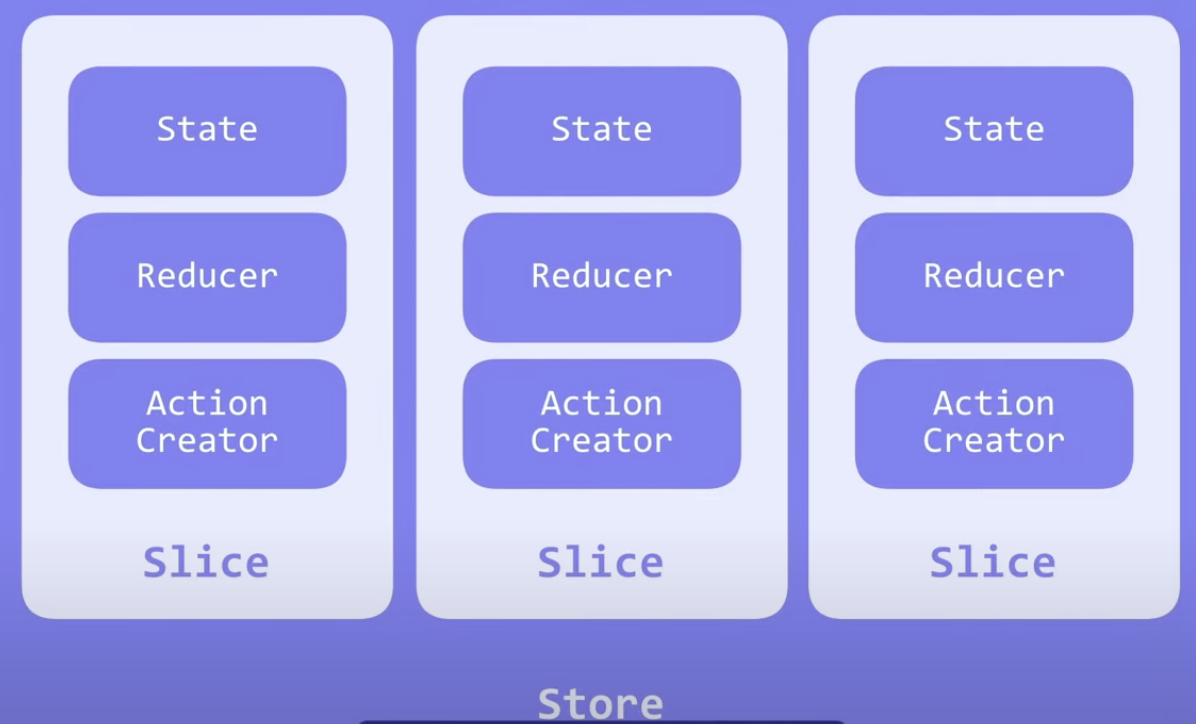
次はActionCreatorとStateとReducerを3つ同時に作成していきます。3つ同時に作成するのは生のReduxだけだとできないですが、Redux Toolkitを使用することで可能になります。これをSliceと呼びます。
Stateとは初期化された値や更新された値が入っている今の状態です。
ReducerとはStateを更新するための裏側の仕組みのことです。
ActionCreatorとはStateを更新する具体的な処理のことです。
import { createSlice } from "@reduxjs/toolkit";

export const counterSlice = createSlice({
  name: "counter",
  initialState: {
    count: 0,
  },
  reducers: {
    increment: (state) => {
      state.count += 1;
    },
    decrement: (state) => {
      state.count -= 1;
    },
    incrementByAmount: (state, action) => {
      state.count += action.payload;
    },
  },
  //自動で同じ名前のAction Creatorが作成される。
});

export const { increment, decrement, incrementByAmount } = counterSlice.actions; //actionCreatorのこと

export default counterSlice.reducer;
reducersを定義することによって自動で同じ名前のactionCreatorが作成されます。なので自分でactionCreatorを作成する必要はありません。
そして、どのコンポーネントからもactionCreatorを使えるようにexportしています。
Storeをどのコンポーネントからも使えるようにする
import { Provider } from "react-redux";
import { store } from "./redux/store";

const root = ReactDOM.createRoot(document.getElementById("root"));
root.render(
  <React.StrictMode>
    <Provider store={store}>
      <App />
    </Provider>
  </React.StrictMode>
);
AppをProviderで囲んであげることでアプリケーション全体からStoreを利用することができるようになります。
そして先ほどSotreを作成した際に空にしていたreducerを修正します
import { configureStore } from "@reduxjs/toolkit";
import counterReducer from "./counterSlice";

export const store = configureStore({
  reducer: {
    counter: counterReducer,
  },
});
今後増やす場合はreducerのオブジェクトを増やす形で追加していけばOKです!
データの取得と更新をする
次は実際にstoreで管理されているデータの取得と更新をしようと思います。
以下のようにします。
import { useDispatch, useSelector } from "react-redux";
import { decrement, increment, incrementByAmount } from "./redux/counterSlice";

function App() {
  //useSelectorはアクセス, useDipatchで更新
  const count = useSelector((state) => state.counter.count);
  const dispatch = useDispatch();
  const [incrementAmount, setIncrementAmount] = useState("2");
  const incre = () => dispatch(increment())
  const decre = () => dispatch(decrement())
  const increBy = () => dispatch(incrementByAmount(Number(incrementAmount)))

  return (
    <div className="App">
      <h1>Count: {count}</h1>
      <input
        value={incrementAmount}
        onChange={(e) => setIncrementAmount(e.target.value)}
      />
      <button onClick={incre}>+</button>
      <button onClick={decre}>ー</button>
      <button onClick={increBy}>追加</button>
    </div>
  );
}
useSelectorを使用してuseSelector((state) => state.counter.count)のようにすることでデータを取得する事ができます。
ここのstate.counterのcounterはreducerで定義したオブジェクトのcounterプロパティのことです。
export const store = configureStore({
  reducer: {
    counter: counterReducer, // ここのこと
  },
});
そしてstate.counter.countのcountはinitialStateで定義したプロパティのことです。
export const counterSlice = createSlice({
  name: "counter",
  initialState: {
    count: 0,  // ここのこと
  },
  ...省略
データの更新については、dispatchの中にimportしたactionCreatorを渡してあげることによって更新をする事ができます。
immutabilityの保持について
上記説明の中ではあえて触れなかったですが、Redux Toolkitではimmutabilityについて考える必要がなく実装することができます。
というのも、以下の実装部分についてですが、
increment: (state) => {
  state.count += 1
}
immutabilityを保持するという観点で実装するならば、このようになります。
increment: (state) => {
  const newState = { ...state }
  newState.count += 1
  return newState
}
通常ならこのようにスプレッド演算子などを使ってコピーを作成して、コピーしたオブジェクトのプロパティを変更してそれを返してあげるという処理になります。
もちろんこのように書いてもうまく動きます。
Redux Toolkitでは内部でよしなにやってくれていて、オブジェクトを直接書き換えるような記述をしてもimmutabilityを保持してくれています。
なのでRedux Toolkitを使うとimmutabilityを保持を意識する必要がないですし、コードの記述量も少なくする事ができます。
参考

