JX通信社Advent Calendar 2019 16日目の記事です。
はじめに
今月開催された AWS re:invent 2019 で iOS/Android向けの新しいAmplify Framework が発表されました。
今回は、前回作成したAppSync APIに新しいiOS Amplify Frameworkを使って接続します。さらに、11月にAmplify CLIに追加された amplify pullコマンドを使ってAmplifyプロジェクトを複数プラットフォーム間で共有する方法も紹介します。
1. インストール
公式のチュートリアルに合わせて、作成したXcodeプロジェクトに CocoaPods を使用してフレームワークを追加します。
今回はamplify pullを使ってAmplifyプロジェクトを設定するため amplify-tools はインストールしません。
この amplify-tools はPodfileの script_phases を設定することで、pod install時に、PodターゲットのBuild PhasesにAmplifyプロジェクトを管理するためのスクリプトを登録しています。
platform :ios, '13.0'

target 'AdvCal19' do
  use_frameworks!

  # pod 'amplify-tools'

  pod 'Amplify'
  pod 'AWSPluginsCore'
  pod 'AmplifyPlugins/AWSAPIPlugin'
end
% pod install --repo-update
2. Amplifyプロジェクト設定
amplify pullコマンドを使って前回作成したAmplifyプロジェクトの設定を取り込みます。
% amplify pull

For more information on AWS Profiles, see:
https://docs.aws.amazon.com/cli/latest/userguide/cli-multiple-profiles.html

? Do you want to use an AWS profile? Yes
? Please choose the profile you want to use <amplify configureで作成したプロファイル>
? Which app are you working on? <作成済みのapp名をリストから選択>
Backend environment <指定したappのenvironment> found. Initializing...
? Choose your default editor: None
? Choose the type of app that you're building ios

? Do you plan on modifying this backend? Yes

Successfully pulled backend environment dev from the cloud.
Run 'amplify pull' to sync upstream changes.
amplify pullが成功すると、amplify/ディレクトリとawsconfiguration.json, amplifyconfiguration.jsonが追加されます。
GitHub等に公開する場合は、前回同様amplify/以下にあるteam-provider-info.jsonを.gitignoreに追加します。
// awsconfiguration.json
{
  "UserAgent": "aws-amplify/cli",
  "Version": "0.1.0",
  "IdentityManager": {
    "Default": {}
  },
  "AppSync": {
    "Default": {
      "ApiUrl": "https://<識別子>.appsync-api.<リージョン>.amazonaws.com/graphql",
      "Region": "<リージョン>",
      "AuthMode": "API_KEY",
      "ApiKey": "<APIキー>",
      "ClientDatabasePrefix": "<プレフィックス>"
    }
  }
}
// amplifyconfiguration.json
{
  "api": {
    "plugins": {
      "awsAPIPlugin": {
        "advcal19": {
          "endpointType": "GraphQL",
          "endpoint": "https://<識別子>.appsync-api.<リージョン>.amazonaws.com/graphql",
          "region": "<リージョン>",
          "authorizationType": "API_KEY",
          "apiKey": "<APIキー>"
        }
      }
    }
  }
}
このawsconfiguration.jsonとamplifyconfiguration.jsonをフレームワークが初期化時に読みにいくのでプロジェクトに追加します。
3. モデルの生成
次のコマンドでamplify/にあるschema.graphqlからモデルクラスを生成します。
# schema.graphql
type Message @model {
  id: ID!
  message: String
  createdAt: String
}
% amplify codegen model
生成した.swiftファイルをプロジェクトに追加します。
AmplifyModelsがビルドエラーになる場合は次のように書き換えます。
import Amplify
import Foundation

// DataStoreModelRegistrationの場合ビルドエラーになる
final public class AmplifyModels: AmplifyModelRegistration {
    public let version: String = <文字列>

    public func registerModels(registry: ModelRegistry.Type) {
        registry.register(modelType: <生成されたモデル>.self)
    }
}
4. アプリ起動時のフレームワーク初期化
フレームワークの初期化処理を追加します。
import Amplify
import AmplifyPlugins

// ...
@UIApplicationMain
class AppDelegate: UIResponder, UIApplicationDelegate {

  func application(_ application: UIApplication, didFinishLaunchingWithOptions launchOptions: [UIApplication.LaunchOptionsKey: Any]?) -> Bool {
        let apiPlugin = AWSAPIPlugin(modelRegistration: AmplifyModels())
        do {
            try Amplify.add(plugin: apiPlugin)
            try Amplify.configure()
        } catch {
            // ...
        }
        return true
    }
}
5. Mutationの実装
amplify codegen modelで生成したモデルをAmplify.API.mutate(of:type:)に渡します。
// schema.graphqlから生成されたモデル定義
public struct Message: Model {
    public let id: String
    public var message: String?
    public var createdAt: String?

    public init(id: String = UUID().uuidString,
                message: String? = nil,
                createdAt: String? = nil) {
        self.id = id
        self.message = message
        self.createdAt = createdAt
    }
}
let mesage = Message(message: "hello")
Amplify.API.mutate(of: note, type: .create) { (event) in
    switch event {
    case .completed(let result):
        switch result {
        case .success(let note):
            // ...
        case .failure(let error):
            // ...
        }
    case .failed(let error):
        // ...
    default:
        // ...
    }
}
6. Subscriptionの実装
.data(let result)で結果を取得します。
_ = Amplify.API.subscribe(from: Message.self, type: .onCreate) { (event) in
    switch event {
    case .inProcess(let subscriptionEvent):
        switch subscriptionEvent {
        case .connection(let subscriptionConnectionState):
            // ...
        case .data(let result):
            switch result {
            case .success(let message):
                // ...
            case .failure(let error):
                // ...
            }
        }
    case .completed:
        // ...
    case .failed(let error):
        // ...
    default:
        // ...
    }
}
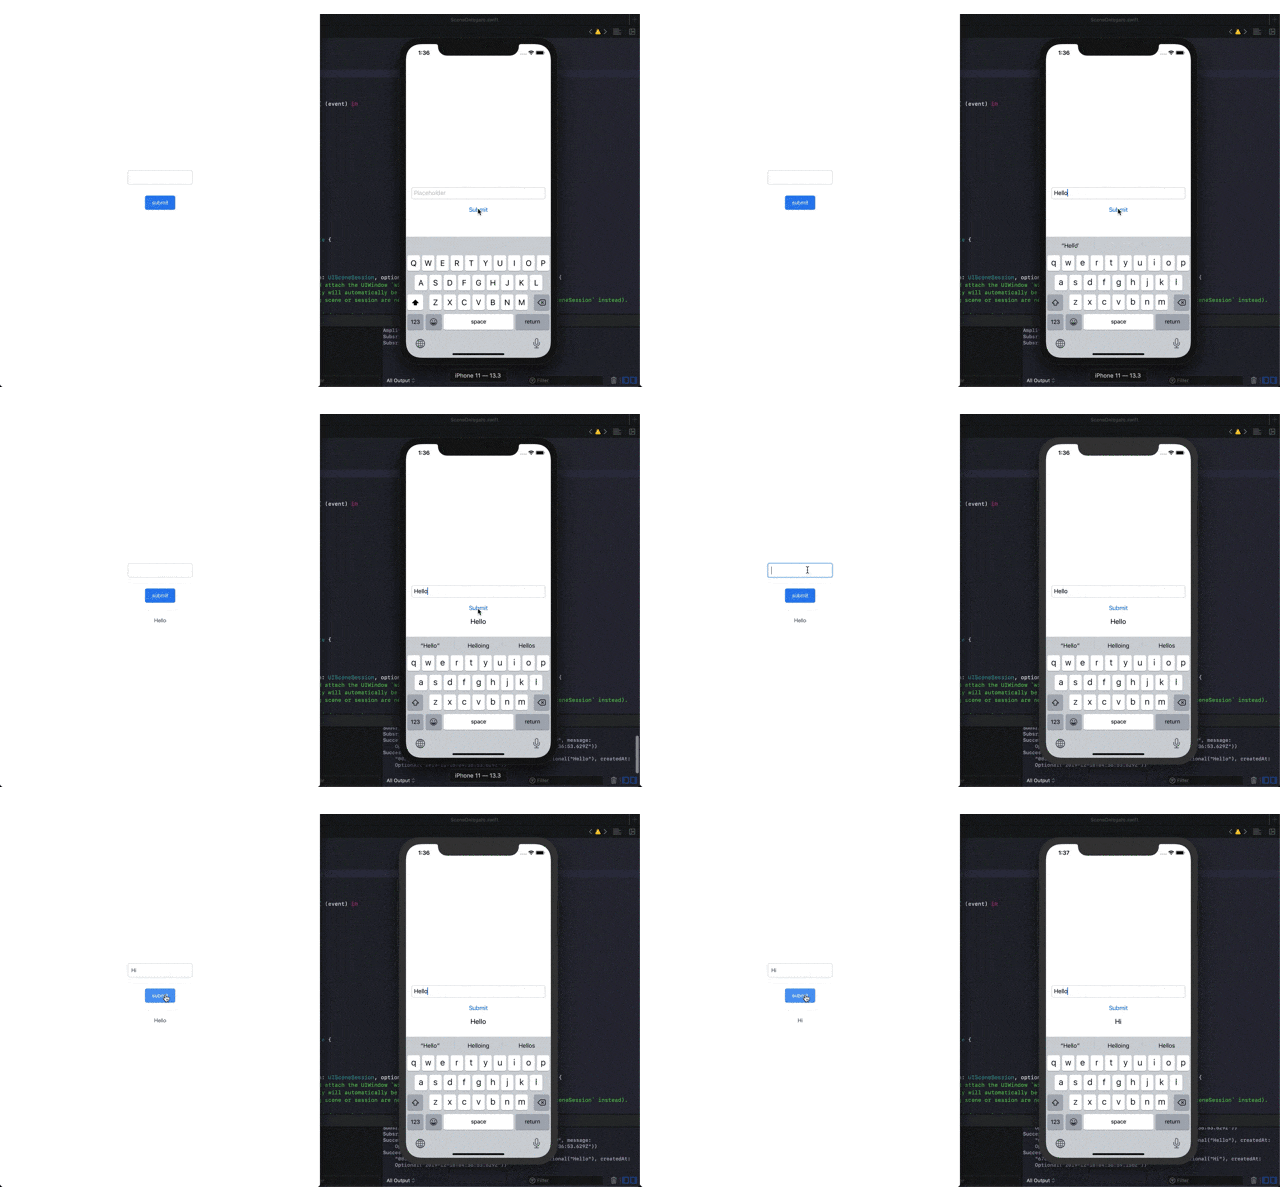
7. デモ
おわりに
2回に渡ってAmplifyとAppSync APIを使ったWebとiOS間の双方向通信を実装しました。
AppSyncのGraphQL APIはセットアップが簡単で、これからも個人的に使い続けたいところです。
Amplify Frameworkはまだpreview段階なこともあり、ハマりどころもありますがこれからに期待したいと思います。
17日目は @healthyboy5 さんです。
おまけ
このamplify-toolsはPodfileのscript_phasesを設定することで、
pod install時に、PodターゲットのBuild PhasesにAmplifyプロジェクトを管理するためのスクリプトを登録しています。
script_phasesで登録されるスクリプトには問題があります。
which nodeで見つからないとNode is not installed.とビルドエラーになるのですが、ローカルのNode環境を nodenv 等で構築している場合にこの部分がネックになります。
set -e
export PATH=$PATH:`npm bin -g`

cd ..
if ! which node > /dev/null; then
  echo "warning: Node is not installed. Vist https://nodejs.org/en/download/ to install it"
elif ! test -f ./amplifyxc.config; then
  npx amplify-app --platform ios
fi

# ...
amplify-toolsはamplifyxc.configの設定値を読み込んでinitやpushをビルド時に実行してくれますが、pullにまだ対応していないこともあり、今回の記事ではamplify-toolsを使わないという選択をしました。
このscript_phasesのスクリプトに強引に処理を差し込むこともできなくはないので、おまけとしてその方法を紹介します。
post_installフックを使って対象のBuild Phasesを割り出します。
# Podfile
target 'YOUR_APP' do
  # ...
end

post_install do |installer|
  pod_target = installer.pods_project.targets.find{ |target| target.name == "amplify-tools" }
  unless pod_target
    raise ::Pod::Informative, "Failed to find amplify-tools"
  end

  build_phase = pod_target.shell_script_build_phases.find{ |bp| bp.name.include? "Amplify" }
  unless build_phase
    raise ::Pod::Informative, "Failed to find Amplify"
  end
  build_phase.shell_script = "eval \"$(nodenv init -)\"\n" << build_phase.shell_script
end
もう一度pod installを実行すると以下のように処理が差し込まれた状態でスクリプトが登録されます。
eval "$(nodenv init -)"
set -e
export PATH=$PATH:`npm bin -g`
# ...
bp.name.include? "Amplify"の部分はamplify-toolsのpodspecに設定されたscript_phaseのnameプロパティを指定しています。
