# はじめに
Raspberry PiのGPIO端子を使用して、スイッチ入力を行う際の、プルダウン抵抗について。
Raspberry PiのGPIO端子は、3.3V、最大16mAで作動します。
また、Raspberry Piは複数のGPIOを使用できますが、同時に流せる電流は50mAまでです。
物理プルダウン抵抗
Raspberry PiのGPIO端子は最大16mAまでしか流せないので、抵抗を使って電流を落とす必要があります。オームの法則から、抵抗値を求めます。
R = \frac{V}{I}\\
R = \frac{3.3}{0.016}\\
R = 206.25
最低206.25Ω以上の抵抗をプルダウン抵抗として使用します。余裕を持たせて、GPIO端子にかかる電流が3mA程度になるように1kΩ程度の抵抗を使います。
GPIO端子26本すべて使用する場合、78mAと許容量を超えるので、抵抗値を上げる必要があります。
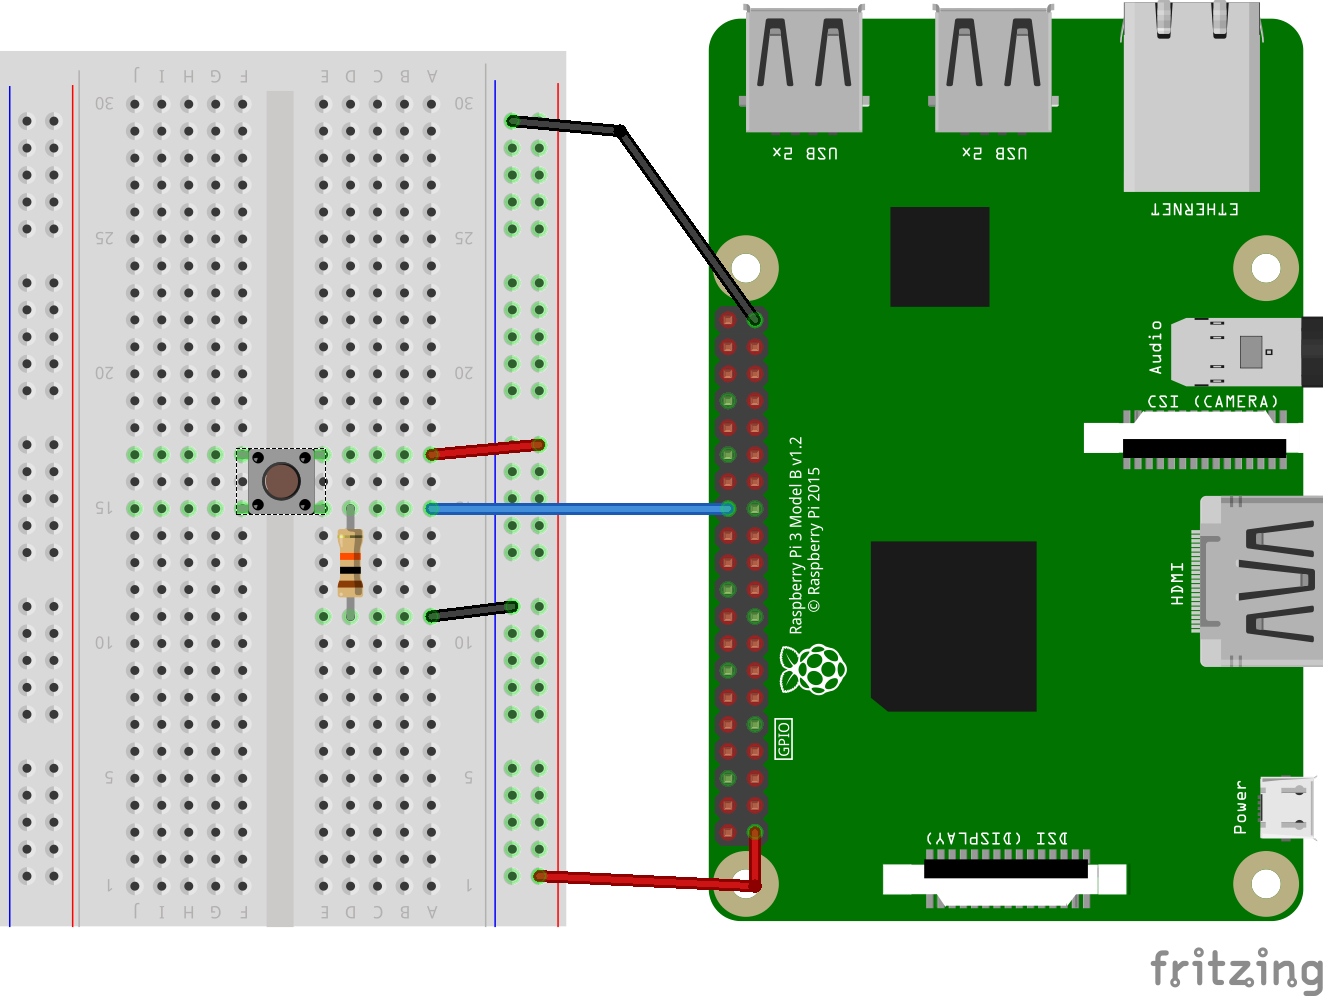
回路例
GPIO入力端子として26番のGPIO7端子を使用しています。回路のハイインピーダンス(解放)状態を防ぐため、グランド端子に接続します。
プログラム例
スイッチが押されると、コンソールにSW Onと出力。
import RPi.GPIO as GPIO

GPIO_Nbr = 7

GPIO.setmode(GPIO.BCM)
GPIO.setup(GPIO_Nbr, GPIO.IN)

while True:
	if GPIO.input(GPIO_Nbr):
		print("SW On")

GPIO.cleanup()
内部プルダウン抵抗
GPIOを操作するPythonライブラリのRPI.GPIOを使用してプルダウン抵抗を有効化させます。
RPI.GPIO.setup(端子番号, GPIO.IN, pull_up_down=GPIO.PUD_DOWN)
回路例
プログラム例
import RPi.GPIO as GPIO

GPIO_Nbr = 7

GPIO.setmode(GPIO.BCM)
GPIO.setup(GPIO_Nbr, GPIO.IN, pull_up_down=GPIO.PUD_DOWN)

while True:
	if GPIO.input(GPIO_Nbr):
		print("SW On")

GPIO.cleanup()

